
The 2012 Honda Civic Maintenance Manual is a comprehensive guide designed to help owners and mechanics perform routine maintenance and repairs․ It includes detailed instructions‚ essential for DIY enthusiasts and professionals alike‚ covering everything from oil changes to complex electrical system troubleshooting․ This manual ensures optimal vehicle performance‚ safety‚ and longevity by providing step-by-step procedures and diagnostic tips․ Whether you’re a seasoned mechanic or a first-time car owner‚ this resource is indispensable for keeping your Honda Civic in pristine condition․
Overview of the Manual’s Purpose and Scope
The 2012 Honda Civic Maintenance Manual serves as a detailed guide for ensuring optimal vehicle performance through regular maintenance and repairs․ It covers essential tasks like oil changes‚ tire rotations‚ and fluid checks‚ while also addressing advanced diagnostics and troubleshooting․ Designed for both DIY enthusiasts and professional mechanics‚ the manual provides clear instructions and specifications to keep your Honda Civic running smoothly and safely․
Importance of Regular Maintenance for the 2012 Honda Civic
Regular maintenance is crucial for preventing damage‚ extending the vehicle’s lifespan‚ and ensuring optimal performance․ It improves fuel efficiency‚ reduces emissions‚ and enhances safety by addressing potential issues early․ Proper upkeep also prevents costly repairs‚ maintains reliability‚ and preserves the value of your Honda Civic‚ ensuring it runs smoothly for years to come․

Maintenance Schedule for the 2012 Honda Civic
The maintenance schedule outlines regular service intervals for optimal performance․ It includes oil changes‚ tire rotations‚ and fluid checks‚ ensuring your Civic runs efficiently and maintains its value․
Recommended Maintenance Intervals
Regular maintenance is crucial for the 2012 Honda Civic․ Oil changes are recommended every 5‚000 to 7‚500 miles‚ while tire rotations should occur every 6‚000 to 8‚000 miles․ Air filters should be inspected and replaced every 15‚000 to 30‚000 miles․ Spark plugs and timing belts are typically serviced at 30‚000 to 105‚000 miles․ Refer to the manual for a detailed schedule tailored to your driving conditions․
Service Items Based on Mileage or Time
Service items for the 2012 Honda Civic are scheduled based on mileage or time․ Brake fluid replacement is recommended every 30‚000 miles․ Coolant inspection and replacement are due every 90‚000 to 105‚000 miles․ Belt inspections‚ including the timing belt‚ should occur at 105‚000 miles or as specified․ Always consult the manual for precise intervals tailored to your vehicle’s needs and driving conditions․

Oil Change and Fluid Check Guidelines
The 2012 Honda Civic requires regular oil changes using 0W-20 synthetic oil for optimal engine performance․ Fluid checks‚ including coolant‚ brake‚ and transmission fluids‚ should be performed during every service visit․ Always refer to the manual for recommended intervals and procedures to ensure proper maintenance and extend the vehicle’s lifespan;
Step-by-Step Oil Change Procedure
Gather materials: socket wrench‚ drain pan‚ new oil filter‚ and 0W-20 synthetic oil․ Warm the engine‚ locate the oil drain plug underneath‚ and unscrew it․ Drain the oil into a pan‚ then replace the plug․ Remove the old oil filter and install a new one․ Refill with the recommended oil level‚ and dispose of used materials responsibly․ Refer to the manual for precise specifications․
How to Check and Top Off Essential Fluids
Locate the engine oil‚ coolant‚ brake‚ and transmission fluid reservoirs under the hood․ Check each fluid level against the minimum mark on the dipstick or reservoir․ Top off as needed with the recommended type for your 2012 Honda Civic․ Refer to the owner’s manual for specific guidelines and capacities to ensure proper fluid levels and vehicle performance․
Tire Maintenance and Care
Proper tire maintenance is crucial for safety‚ fuel efficiency‚ and handling․ Regularly check tire pressure‚ ensure even tread wear‚ and inspect for damage or punctures․ Always maintain the recommended tire pressure and rotate tires as specified in the manual to extend their lifespan and ensure optimal vehicle performance․
Proper Tire Pressure and Rotation Practices
Check tire pressure monthly and before long trips‚ using the recommended levels found on the tire information placard․ Rotate tires every 6‚000 to 8‚000 miles to ensure even tread wear․ Follow the rear-to-front rotation pattern for optimal performance and safety․ Proper pressure and rotation extend tire life and improve vehicle handling and fuel efficiency․
Inspecting Tires for Wear and Damage
Inspect tires regularly for uneven wear‚ cracks‚ or bulges․ Check tread depth using the penny test; replace tires if depth is below 2/32″․ Look for punctures or damage on sidewalls and tread․ Address uneven wear by rotating tires or aligning wheels․ Regular inspections ensure safety‚ improve handling‚ and prevent costly repairs․ Inspect tires during every oil change for optimal maintenance․

Brake System Maintenance
Regular brake system maintenance ensures safety and optimal performance․ Inspect brake pads and rotors for wear‚ check fluid levels‚ and bleed the system if necessary; Addressing issues promptly prevents damage and maintains reliable stopping power․ Always follow Honda’s guidelines for effective maintenance․
Inspecting Brake Pads and Rotors
Inspect brake pads for wear by removing the wheels and visually checking thickness․ Ensure pads have at least 1/8 inch of material․ Examine rotors for scoring‚ warping‚ or excessive rust․ Measure rotor thickness using a micrometer to ensure it meets specifications․ Replace pads or rotors if worn or damaged to maintain safe braking performance and prevent further damage to the system․
Brake Fluid Replacement and Bleeding
Replace brake fluid every 30‚000 to 50‚000 miles or as specified․ Use Honda Heavy Duty Brake Fluid DOT 3․ Bleed the system to remove air bubbles‚ ensuring proper braking․ Use a brake bleeding kit and follow the sequence: right rear‚ left rear‚ right front‚ left front․ Always flush with fresh fluid and avoid contamination to maintain system integrity and safety;
Battery and Electrical System Care
Check battery terminals for corrosion‚ ensure connections are secure‚ and monitor charging system performance․ Test battery voltage regularly to maintain reliability and prevent electrical system issues․
Checking and Maintaining Battery Health
Inspect battery terminals for corrosion and clean them with a wire brush if necessary․ Check the battery’s voltage using a multimeter to ensure it’s within the recommended range․ Test the charging system by starting the engine and measuring voltage․ Replace the battery if it shows signs of wear or fails performance tests․ Always refer to the manual for specific guidelines․
Diagnosing Common Electrical Issues
Start by identifying symptoms like dimming lights or faulty accessories․ Use a multimeter to test battery voltage and circuit continuity․ Check fuses in the interior and under-hood fuse boxes for blown fuses or corrosion․ Inspect wiring and connectors for damage or wear․ Test the charging system with the engine running to ensure proper alternator function․ Refer to the manual for detailed diagnostic procedures and troubleshooting charts․

Air Filter and Cabin Filter Replacement
Regular replacement of the engine air filter and cabin air filter ensures optimal performance‚ fuel efficiency‚ and interior air quality․ Follow the manual’s detailed steps for a proper replacement process․
Replacing the Engine Air Filter
Locate the engine air filter housing‚ typically near the engine․ Open the hood and release the clips or screws securing the housing․ Remove the old filter‚ taking note of its orientation․ Insert the new filter‚ ensuring it fits snugly and the gasket seals properly․ Replace the housing and secure it tightly․ This improves engine performance and fuel efficiency․
Replacing the Cabin Air Filter
Open the glovebox and release the stops by pushing the sides inward․ Pull the glovebox down to access the filter․ Remove the old cabin air filter and discard it․ Insert the new filter‚ ensuring it fits securely․ Replace the glovebox and reattach it using the clips․ This improves air quality and reduces odors inside the vehicle․
Belt and Hose Inspection
Inspect serpentine and timing belts for cracks or wear․ Check coolant and brake hoses for leaks or damage․ Regular checks ensure performance and longevity․
Checking the Condition of Serpentine and Timing Belts
Inspect the serpentine belt for cracks‚ wear‚ or frays․ Check the timing belt for similar damage and proper tension․ Replace belts showing signs of deterioration or at recommended intervals to prevent engine breakdowns and ensure smooth operation․ Regular checks help maintain reliability and performance‚ avoiding costly repairs․
Inspecting Coolant and Brake Hoses
Inspect coolant hoses for cracks‚ leaks‚ or soft spots․ Check connections for signs of leakage․ Brake hoses should be examined for cracks‚ frays‚ or wear․ Ensure flexibility without excessive softness․ Address any damage promptly to maintain proper coolant circulation and reliable braking performance․ Regular inspections prevent potential failures and ensure overall vehicle safety and efficiency․
Spark Plug Replacement
Spark plug replacement is crucial for maintaining the 2012 Honda Civic’s engine performance․ The manual recommends replacing spark plugs every 100‚000 miles․ It provides a step-by-step guide for DIYers and mechanics‚ outlining tools needed and torque specifications․ Proper installation ensures optimal fuel efficiency and reduces emissions․
When and How to Replace Spark Plugs
Spark plugs in the 2012 Honda Civic should be replaced every 100‚000 miles․ The process involves gathering tools‚ locating the spark plugs‚ removing them‚ and installing new ones․ Ensure the new plugs are properly gapped and tightened to specifications for optimal engine performance and fuel efficiency․ Always refer to the manual for precise torque values and installation guidelines․
Tools and Techniques for Spark Plug Installation
Use a spark plug socket‚ torque wrench‚ and gap gauge for precise installation․ Ensure the new plugs are gapped correctly and screwed in by hand to avoid cross-threading․ Tighten them to the manufacturer’s torque specification using a torque wrench․ Apply dielectric grease to the spark plug boots for a secure‚ moisture-resistant connection‚ ensuring optimal ignition performance and longevity․
Common Maintenance Mistakes to Avoid
Overlooking scheduled maintenance‚ using incorrect replacement parts‚ and failing to tighten components properly can lead to premature wear‚ system failures‚ and costly repairs․ Avoid these errors to ensure reliability and performance․
Overlooking Scheduled Maintenance Items
Neglecting routine tasks like oil changes‚ tire rotations‚ and fluid checks can lead to severe engine damage and system failures․ Staying consistent with the recommended schedule ensures optimal performance‚ prevents breakdowns‚ and maintains fuel efficiency․ Regular inspections help identify potential issues early‚ saving time and money in the long run․
Incorrect Use of Replacement Parts
Using non-OEM or incompatible parts can compromise your Civic’s performance‚ safety‚ and reliability․ Always ensure replacement components meet Honda’s specifications to avoid potential damage or system malfunctions․ Incorrect parts may void warranties and lead to costly repairs․ Adhering to the manual’s guidelines ensures proper functionality and longevity of your vehicle․
Troubleshooting Common Issues
Identify and resolve common problems with your Civic using diagnostic tools and guidelines outlined in the manual․ Address issues promptly to prevent further damage and ensure reliability․
Diagnosing Warning Lights and Error Codes
When warning lights illuminate‚ refer to the manual for guidance on identifying error codes using an OBD-II scanner․ The manual provides detailed explanations of common codes‚ such as engine or transmission issues‚ helping you pinpoint problems quickly․ Addressing these codes promptly ensures minor issues don’t escalate into major repairs‚ maintaining your Civic’s performance and reliability․
Addressing Leaks and Unusual Noises
Identify and resolve fluid leaks‚ such as oil‚ coolant‚ or brake fluid‚ by inspecting hoses‚ gaskets‚ and seals․ Unusual noises‚ like engine ticks or grinding brakes‚ require immediate attention․ The manual provides troubleshooting steps to locate the source and recommends repairs to prevent further damage‚ ensuring your Civic runs smoothly and safely․
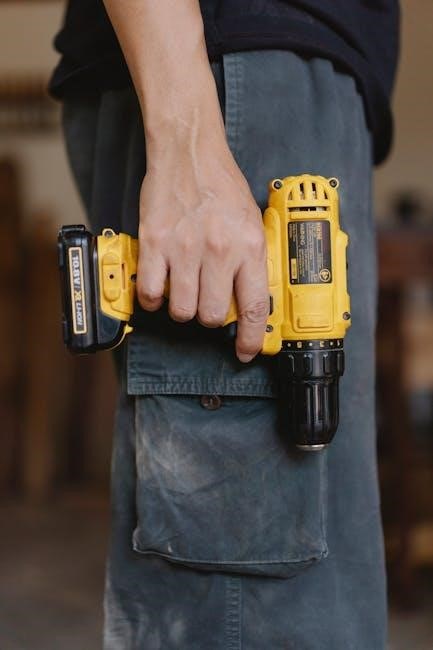
DIY Maintenance Tips and Tools
Easily perform maintenance with essential tools like a socket set‚ multimeter‚ and torque wrench․ Follow safety tips and guidelines to keep your Civic in top condition․
Essential Tools for Home Maintenance
Keep a socket set‚ wrenches‚ and pliers for basic tasks․ A multimeter aids in diagnosing electrical issues‚ while a torque wrench ensures proper bolt tightening․ Jack stands and a drain pan are must-haves for oil changes․ A repair manual provides step-by-step guidance‚ and a tire pressure gauge maintains proper inflation․ These tools empower you to perform maintenance confidently and safely at home․
Safety Precautions for DIY Repairs
Always work in a well-lit area and wear protective gloves and goggles․ Disconnect the battery before starting electrical work to avoid shocks․ Use jack stands for secure lifting‚ ensuring the vehicle is stable․ Never underestimate the importance of consulting the manual for specific procedures․ Prioritize safety to prevent accidents and ensure successful repairs․
Understanding Warranty and Service Options
The 2012 Honda Civic manual outlines warranty coverage‚ service options‚ and authorized center locations․ It explains maintenance plans and extended warranty benefits for owners․
Warranty Coverage for Maintenance and Repairs
The 2012 Honda Civic maintenance manual details warranty coverage‚ including the 3-year/36‚000-mile new vehicle warranty and 5-year/60‚000-mile powertrain warranty․ It outlines repairs covered under warranty and provides guidance on maintaining coverage through proper maintenance․ Understanding these terms ensures owners can utilize warranty benefits effectively for eligible repairs and replacements․
Finding Authorized Service Centers
To locate authorized service centers for your 2012 Honda Civic‚ refer to Honda’s official website or consult the owner’s manual․ Use the “Find a Dealer” tool to search by location‚ ensuring genuine parts and certified technicians are used for maintenance and repairs․ This guarantees compliance with warranty terms and maintains vehicle performance and reliability․