Archive: February 28, 2024

PDF

pfaff sewing machine repair manual pdf

Pfaff sewing machine repair manuals are essential resources for troubleshooting and maintaining these durable, high-performance machines. They provide detailed instructions for diagnosing and fixing common issues, ensuring optimal functionality. Available in PDF format, these manuals cater to various Pfaff models, offering step-by-step guidance for both mechanical and electronic systems. By following the manual, users can address problems independently, saving time and costs. These comprehensive guides are indispensable for hobbyists and professionals alike, ensuring longevity and efficiency of their Pfaff sewing machines.

1.1 Overview of Pfaff Sewing Machines and Their Popularity

Pfaff sewing machines are renowned for their durability, precision, and versatility, making them a favorite among both hobbyists and professionals. Known for their robust construction and advanced features, Pfaff machines cater to a wide range of sewing needs. Their popularity stems from their reliability and ability to handle complex stitching and heavy-duty fabrics. This reputation has made Pfaff a trusted brand in the sewing community worldwide.

1.2 Importance of Having a Repair Manual

Owning a Pfaff sewing machine repair manual is crucial for maintaining and extending the life of your machine. It provides detailed instructions for troubleshooting and fixing issues, saving both time and money. With a manual, users can address problems independently, ensuring optimal performance. It also empowers users with knowledge to understand their machine better, making repairs more accessible and efficient.

Model-Specific Repair Guides

Pfaff sewing machine repair manuals are available for specific models like the 360 261, Creative 7550, and 1221/1222. These guides provide precise instructions tailored to each machine’s unique features and common issues, ensuring effective troubleshooting and maintenance.

2.1 Pfaff 360 261 Repair Manual

The Pfaff 360 261 repair manual is a comprehensive guide for troubleshooting and maintaining this model. Available as a free PDF download, it includes detailed instructions for setup, maintenance, and repair. Users can address mechanical issues, adjust settings, and ensure optimal performance. This manual is a valuable resource for both novice and experienced sewists, promoting machine longevity and efficiency.

2.2 Pfaff Creative 7550 Service Manual

The Pfaff Creative 7550 Service Manual is a detailed guide for maintaining and repairing this advanced sewing machine. Available as a free PDF download, it offers comprehensive instructions for servicing and troubleshooting. Suitable for both professionals and hobbyists, this manual ensures optimal performance and extends the machine’s lifespan.

2.3 Pfaff 1221/1222 Repair Manual

The Pfaff 1221/1222 Repair Manual is a valuable resource for users seeking to maintain or repair their sewing machine. Available as a PDF download, it covers essential troubleshooting and adjustment techniques. This manual is particularly useful for addressing common mechanical issues and ensuring the machine’s longevity. It serves as a comprehensive guide for both hobbyists and experienced sewers.

Safety Precautions and Initial Setup

Always disconnect power before starting repairs and use proper tools to avoid accidents. Follow manual guidelines for safe handling of parts and electrical components during setup.

3.1 Essential Safety Measures Before Starting Repairs

Before beginning repairs, ensure the machine is unplugged to prevent electric shocks. Wear protective gear like gloves and safety glasses. Use appropriate tools and avoid loose clothing that might get caught. Refrain from bypassing safety features and always refer to the manual for specific precautions; Ensure all protective devices are securely refitted after repairs to maintain safety standards.

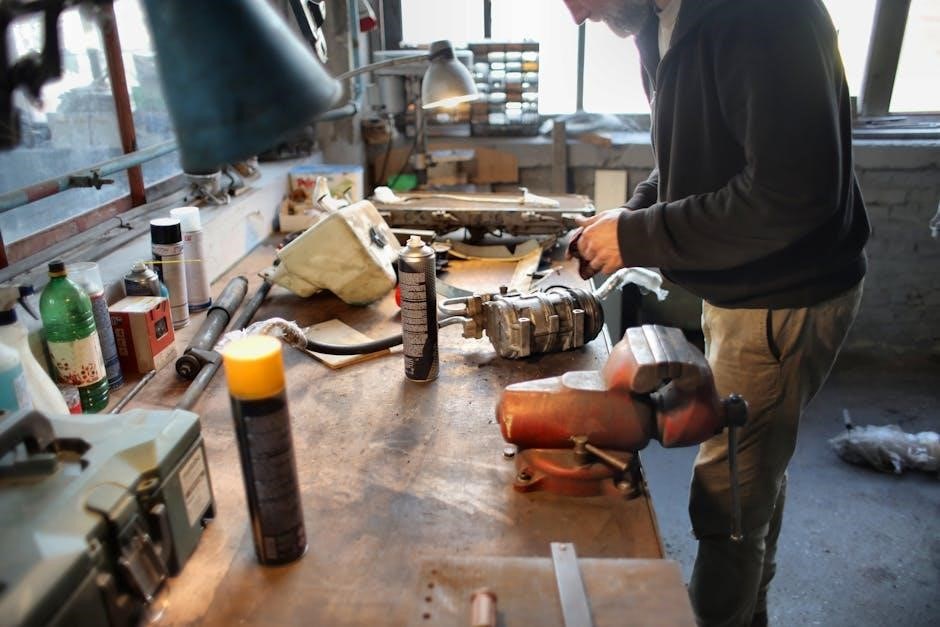
3.2 Tools and Materials Needed for Repair

Essential tools include screwdrivers, pliers, and wrenches for disassembling and reassembling parts. Lubricants and cleaning solutions are necessary for maintaining mechanical components. Replacement parts like needles, belts, and bobbin cases may be required. Always refer to the manual for specific tool recommendations. Ensure all materials are compatible with your Pfaff model to avoid damage and ensure proper functionality.

Common Repairs and Troubleshooting

Common issues include thread jams, tension problems, and electronic glitches. Troubleshooting involves identifying symptoms, checking connections, and adjusting settings. Always refer to the manual for diagnostics.

4.1 Troubleshooting Common Mechanical Issues

Common mechanical issues in Pfaff sewing machines include thread jams, uneven tension, and faulty bobbin holders. Users often report problems with the needle not moving or fabric not feeding properly. These issues can be resolved by consulting the repair manual, which provides detailed diagnostic steps. Regular inspection of internal components and adherence to maintenance routines can prevent such problems. Always ensure proper cleaning and lubrication of moving parts to maintain smooth operation.

4.2 Electronic and Computerized Model Repairs

Electronic Pfaff models, such as the Quilt Expression 4.0, often require attention to their computerized systems. Issues like error messages, sensor malfunctions, or touch screen responsiveness can arise. Repair manuals provide specific troubleshooting steps, such as resetting the system or updating software. Regular maintenance, like cleaning sensors and updating firmware, ensures smooth operation. Always refer to the manual for model-specific solutions.

Accessing and Downloading Repair Manuals

Pfaff repair manuals are readily available as PDF downloads from the official Pfaff Industrial website and trusted platforms like ManualsLib. These resources ensure easy access to guides for various models, enabling users to troubleshoot and repair their machines efficiently.

5.1 Official Pfaff Industrial Website Resources

The official Pfaff Industrial website offers a dedicated section for service and support, providing free PDF downloads of repair manuals for various models, including the Pfaff 360 261 and Creative 7550. These resources are easily accessible and ensure users have authentic, detailed guides for troubleshooting and maintaining their machines effectively. The website also includes technical data and parts lists for comprehensive support.

5.2 Trusted Platforms for PDF Downloads

Besides the official Pfaff Industrial website, trusted platforms like Superior Sewing Machine & Supply LLC and online forums offer free PDF downloads of repair manuals for Pfaff models such as the 360 261, Creative 7550, and 1221/1222. These platforms provide authentic and detailed guides, ensuring users can access reliable resources for troubleshooting and maintaining their sewing machines effectively and safely.

Maintenance and Upkeep Tips

Regular cleaning, lubricating, and servicing are crucial for Pfaff sewing machines. Follow manual guidelines to ensure smooth operation, prevent wear, and extend machine longevity effectively.

6.1 Routine Maintenance for Pfaff Sewing Machines

Regular maintenance is vital for Pfaff machines. This includes cleaning lint and debris, lubricating moving parts, and checking thread tensions. Manuals often outline specific schedules and steps to ensure optimal performance. By adhering to these routines, users can prevent mechanical issues and extend the lifespan of their sewing machines, maintaining their efficiency and reliability over time.

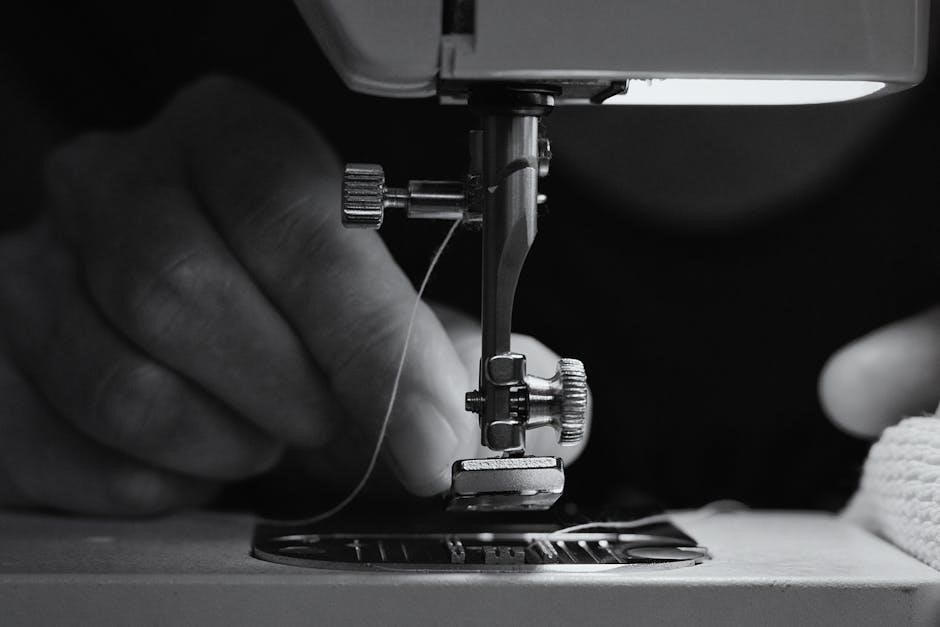
6.2 Cleaning and Lubricating Parts

Cleaning and lubricating are crucial for maintaining Pfaff sewing machines. Remove lint and debris from bobbins, feed dogs, and tension discs. Use recommended oils to lubricate moving parts, ensuring smooth operation. Regular cleaning prevents dust buildup, while proper lubrication reduces friction and wear. Follow manual guidelines for specific cleaning and lubrication steps to keep your machine running efficiently and prolong its lifespan.

Advanced Repair Techniques

Advanced techniques involve precise timing adjustments, tension calibration, and replacing complex components. These specialized procedures require careful attention to detail and adherence to manual guidelines for optimal results.

7.1 Adjusting Timing and Tension

Proper timing and tension adjustments are critical for seamless stitching. Manuals detail how to synchronize hook and needle movements, ensuring fabric feeds smoothly. Regular tension checks prevent thread breaks. Following PDF guides, users can fine-tune these settings, enhancing stitch quality and machine performance. These adjustments require precision, making manual instructions indispensable for achieving professional results.

7.2 Replacing Damaged or Worn-Out Parts

Replacing damaged or worn-out parts ensures optimal performance and prevents further damage. Manuals provide detailed parts lists and repair procedures. DIY replacements are feasible with the right tools. Always use genuine Pfaff parts for reliability. Follow step-by-step instructions to ensure proper installation and alignment, maintaining your machine’s efficiency and extending its lifespan effectively.

Video Tutorials and Visual Guides

Video tutorials and visual guides offer step-by-step instructions for Pfaff sewing machine repairs. Platforms like YouTube provide demonstrations, making complex tasks easier to understand and execute effectively.

8.1 YouTube Channels for Pfaff Repair Tutorials

YouTube channels dedicated to Pfaff sewing machine repairs offer valuable resources. These channels provide step-by-step guides, covering topics like timing adjustments and part replacements. Tutorials often focus on specific models, such as the Pfaff 360 261 or Creative 7550, ensuring detailed instructions for common issues. Visual demonstrations make complex repairs more accessible, helping users diagnose and fix problems confidently. These channels are a vital resource for both beginners and experienced sewists.

8.2 Visual Step-by-Step Repair Guides

Visual step-by-step repair guides are invaluable for Pfaff sewing machine users. These guides, often included in PDF manuals, provide detailed images and diagrams that walk users through complex repairs. Models like the Pfaff 360 261 and Creative 7550 benefit from these visual aids, making it easier to understand and execute repair steps; Available on official Pfaff websites and trusted platforms, these guides are essential for both novice and experienced users, ensuring accurate and efficient fixes.

Community Support and Forums

Online communities and forums dedicated to Pfaff sewing machines offer valuable support. Enthusiasts share repair tips, discuss troubleshooting, and provide guidance, fostering a collaborative environment for machine maintenance and repair.

9.1 Online Communities for Pfaff Sewing Machine Enthusiasts

Online communities and forums dedicated to Pfaff sewing machines provide a wealth of knowledge and support. Enthusiasts share tips, troubleshooting advice, and repair experiences, creating a collaborative space for owners. Platforms like Facebook groups, Reddit forums, and specialized sewing communities offer resources, manuals, and guidance, helping users maintain and repair their machines effectively. These spaces foster connection and problem-solving among Pfaff sewing machine enthusiasts.

9.2 Forum Discussions and User Experiences

Forum discussions and user experiences provide valuable insights into Pfaff sewing machine repair. Enthusiasts share stories of successful repairs, troubleshooting tips, and advice on accessing repair manuals. Many users highlight specific models like the Pfaff Quilt Expression 4.0 and Hobby 4270, discussing common issues and solutions. These exchanges foster a supportive environment for learning and problem-solving, benefiting both new and experienced sewists.

10.1 Importance of Following the Manual

Following the Pfaff repair manual ensures precision and safety during repairs. It provides specific instructions tailored to your machine model, reducing risks of further damage. Adhering to the guidelines helps maintain warranty validity and preserves machine performance. Properly executed repairs extend the lifespan of your Pfaff sewing machine, ensuring reliable operation for years to come.

10.2 Encouragement to Explore and Practice

Exploring and practicing sewing machine repairs can be a rewarding experience. With the help of a Pfaff repair manual, you can gain hands-on experience and improve your skills. Don’t hesitate to experiment with minor adjustments and repairs, as this will enhance your understanding of your machine. The availability of detailed PDF guides and online resources makes it easier to learn and grow as a DIY repair enthusiast. Embrace the journey and empower yourself to maintain your Pfaff sewing machine with confidence!

PDF

david yonggi cho books free download pdf

Dr. David Yonggi Cho, a renowned Korean pastor, founded Yoido Full Gospel Church, the world’s largest congregation. His books, such as The Fourth Dimension and Prayer That Brings Revival, emphasize the Holy Spirit’s role, effective prayer, and church growth strategies. His teachings have significantly influenced global Christianity, offering insights into spiritual growth and ministry practices.

1.1 Brief Biography and Ministry

Dr. David Yonggi Cho, born in 1936, is a prominent Korean pastor and founder of Yoido Full Gospel Church in Seoul, which grew to become the world’s largest congregation. His ministry emphasized the power of the Holy Spirit, prayer, and faith. Cho’s approach to church growth included cell groups and a focus on the “Fourth Dimension,” a spiritual concept he popularized. His teachings have inspired millions globally, blending Pentecostal principles with practical strategies for ministry and personal spiritual growth.

1.2 Impact on Global Christianity

Dr. David Yonggi Cho’s teachings have profoundly shaped modern Pentecostalism and church growth movements worldwide. His books, such as The Fourth Dimension and Prayer That Brings Revival, have been translated into multiple languages, inspiring millions; Cho’s emphasis on the Holy Spirit, prayer, and cell groups revolutionized church structures globally. His influence extends beyond Korea, impacting Christian leaders and congregations, fostering spiritual renewal, and advancing evangelism. His legacy continues to inspire faith and ministry practices across cultures and denominations.

Notable Books by Dr. David Yonggi Cho

Dr. Cho’s books include The Fourth Dimension, Prayer That Brings Revival, Holy Spirit, My Senior Partner, and Successful Home Cell Groups, focusing on spiritual growth and divine interaction.

2.1 “The Fourth Dimension”

In The Fourth Dimension, Dr. David Yonggi Cho explores the spiritual realm where believers can experience God’s power and answers to prayer. This best-selling book reveals principles for living in a higher dimension of faith, emphasizing the Holy Spirit’s role in transforming lives and ministries. Cho shares personal testimonies and biblical insights, guiding readers to unlock spiritual growth and divine interaction; The book is widely available for free PDF download, making its profound teachings accessible to millions seeking a deeper walk with God.

2.2 “Prayer That Brings Revival”

In Prayer That Brings Revival, Dr. David Yonggi Cho emphasizes prayer as the cornerstone of spiritual awakening and church renewal. This book, available for free PDF download, outlines practical strategies for effective prayer, drawing from Cho’s experiences in leading one of the world’s largest churches. He shares how prayer can transform individuals and congregations, fostering personal growth and communal revival. Cho’s insights have inspired millions to deepen their prayer lives and seek God’s transformative power. His teachings remain a vital resource for modern Christian leaders and believers alike.

2.3 “Holy Spirit, My Senior Partner”

In Holy Spirit, My Senior Partner, Dr. David Yonggi Cho explores the dynamic relationship between believers and the Holy Spirit. This book, available as a free PDF download, delves into the practical aspects of relying on the Holy Spirit for guidance, empowerment, and ministry. Cho shares personal testimonies and biblical insights, emphasizing the Spirit’s role in overcoming challenges and achieving God’s purposes. He encourages readers to embrace the Holy Spirit as their “senior partner,” fostering a deeper understanding of His gifts and workings in daily life and ministry.

2.4 “Successful Home Cell Groups”

In Successful Home Cell Groups, Dr. David Yonggi Cho shares practical strategies for fostering church growth through small, relational groups. This book, available as a free PDF download, highlights the importance of prayer, fellowship, and discipleship in home cell groups. Cho emphasizes how these groups helped Yoido Full Gospel Church become one of the world’s largest congregations. He provides insights into organizing and sustaining effective cell groups, offering a blueprint for churches seeking to deepen member engagement and community impact. His approach remains a cornerstone of modern church growth strategies.

Key Themes in Dr. Cho’s Books

Dr. Cho’s books focus on the Holy Spirit, prayer, and church growth strategies, offering spiritual insights and practical advice for believers seeking a deeper faith life.

3.1 The Role of the Holy Spirit

Dr. Cho emphasizes the Holy Spirit as the “senior partner” in ministry and daily life, highlighting His role in empowerment, healing, and guidance. In The Fourth Dimension, Cho describes the Spirit’s power as essential for believers to experience a higher spiritual realm, enabling supernatural breakthroughs and effective prayer. His teachings underscore the Holy Spirit’s gifts and fruit, encouraging believers to rely on Him for ministry success and personal transformation, fostering a deeper relationship with God through the Spirit’s active presence.

3.2 Principles of Effective Prayer

Dr. Cho underscores the transformative power of prayer, advocating for a disciplined and Spirit-led approach. In Prayer That Brings Revival, he outlines principles such as fasting, intercession, and worship, emphasizing prayer as the cornerstone of spiritual awakening. Cho’s teachings highlight the Tabernacle Prayer, a structured method of worship and supplication, which he believes unlocks divine breakthroughs and revivals. His approach to prayer has inspired millions, fostering personal renewal and church growth, leaving a lasting impact on global Christianity.

3.3 Church Growth Strategies

Dr. Cho’s church growth strategies emphasize home cell groups and the Holy Spirit’s empowerment. In Successful Home Cell Groups, he details how small, Spirit-led groups foster intimacy and accountability, driving church expansion. Cho’s approach balances community building with evangelism, creating a dynamic principle of growth. His methods, applied globally, have transformed churches, demonstrating the effectiveness of relational and Spirit-centered strategies. This approach has been pivotal in establishing Yoido Full Gospel Church as a global model for church growth and revival.

How to Download Dr. Cho’s Books for Free

Dr. Cho’s books, like The Fourth Dimension, are available for free download as PDFs on various websites. Public domain resources and open-access platforms offer easy access to his works.

4.1 Websites Offering Free PDF Downloads

Several websites provide free PDF downloads of Dr. David Yonggi Cho’s books, such as The Fourth Dimension and Prayer That Brings Revival. Platforms like inextlevel.org and HolyBooks.com offer easy access to his works. Additionally, websites like archive.org host older editions of his books in the public domain. Readers can explore these resources to download and enjoy Dr. Cho’s teachings on faith, prayer, and spiritual growth conveniently.

4.2 Public Domain and Open-Access Resources

Many of Dr. David Yonggi Cho’s books, such as The Fourth Dimension and Prayer That Brings Revival, are available in the public domain or through open-access platforms. Websites like Project Gutenberg and Internet Archive offer free access to classic works. Additionally, some academic and religious institutions provide open-access repositories where his books can be downloaded. Users can also explore platforms like Google Books for previewed or freely available chapters. Always verify the legality and copyright status before downloading.

Theological Contributions and Impact

Dr. David Yonggi Cho’s teachings revolutionized modern Pentecostalism, emphasizing the Holy Spirit’s active role in church growth and personal faith. His ideas on prayer and spiritual empowerment influenced millions globally.

5.1 Influence on Modern Pentecostalism

Dr. David Yonggi Cho profoundly impacted modern Pentecostalism by emphasizing the Holy Spirit’s active role in church growth and personal faith. His teachings introduced the concept of the Holy Spirit as a “senior partner” in ministry, inspiring countless Pentecostal leaders to adopt Spirit-centered practices. Cho’s emphasis on prayer, spiritual gifts, and faith as a creative force resonated deeply, shaping the movement’s focus on dynamic, experiential worship. His methodologies for church expansion, such as cell groups, became a blueprint for Pentecostal churches worldwide, fostering rapid growth and spiritual renewal.

5.2 Applications in Church Growth Movement

Dr. David Yonggi Cho’s teachings significantly influenced the Church Growth Movement by introducing practical strategies for expanding congregations; His emphasis on home cell groups as a means to foster community and spiritual growth became a cornerstone of modern church growth strategies. Additionally, Cho’s focus on prayer, faith, and the Holy Spirit’s role in ministry provided leaders with actionable methods to implement these strategies. His books offered replicable models, enabling churches worldwide to adopt and adapt his approaches, leading to unprecedented growth and revitalization within the movement.

Controversies Surrounding Dr. Cho

Dr. David Yonggi Cho faced criticism for church practices and legal issues, including fraud allegations. His leadership style and financial dealings sparked debates, dividing public opinion.

6.1 Criticisms of Church Practices

Dr. Cho faced criticism for his church practices, including allegations of financial mismanagement and authoritarian leadership. Some questioned the emphasis on church growth over spiritual depth, while others criticized the use of cell groups as overly aggressive. His teachings on prosperity theology also sparked debate, with critics arguing it prioritized material success over biblical principles. Additionally, the church’s vast wealth and influence led to scrutiny of its financial transparency. These criticisms, while not universally accepted, have been a focal point of discussions about his ministry and legacy.

6.2 Legal Issues and Public Response

Dr; Cho faced legal challenges, including a fraud conviction involving millions of dollars, which sparked widespread public debate. His son, former church chairman, was also implicated, leading to financial transparency concerns. While some supporters defended his integrity, critics highlighted governance failures. The case drew global attention, prompting discussions on accountability in mega-churches. Despite these controversies, Cho’s legacy as a spiritual leader endured, with many focusing on his theological contributions rather than legal setbacks. The public response remained divided, reflecting broader tensions between faith and institutional trust.

Legacy and Continued Relevance

Dr. Cho’s books remain widely read, offering timeless spiritual insights. His teachings on faith and the Holy Spirit continue to inspire global ministry and personal growth efforts.

7.1 Enduring Influence on Christian Literature

Dr. David Yonggi Cho’s books, such as The Fourth Dimension and Prayer That Brings Revival, have left a lasting impact on Christian literature. His writings emphasize the power of the Holy Spirit and effective prayer, offering practical guidance for spiritual growth. These works continue to be widely read and downloaded, especially in PDF formats, making his teachings accessible globally. His influence remains significant, inspiring many to deepen their faith and apply biblical principles in their daily lives and ministries.

7.2 Memorial and Tributes Posthumously

Following Dr. David Yonggi Cho’s passing, Christians worldwide mourned, paying tribute to his transformative ministry. Social media was flooded with appreciation for his books like The Fourth Dimension, which remains a cornerstone of Christian literature. His legacy endures through his writings, with many downloading his books in PDF format to continue learning from his teachings. Tributes highlighted his global impact, celebrating his role in modern Pentecostalism and church growth. His influence continues to inspire believers, ensuring his memory lives on in the hearts of millions.

marie callender’s chicken pot pie cooking instructions microwave

Marie Callender’s Chicken Pot Pie is a beloved comfort food, offering a convenient, flavorful meal. Its flaky crust and hearty filling make it a popular choice for microwave cooking, providing a quick and satisfying option for home dining.

1.1 Overview of the Product

Marie Callender’s Chicken Pot Pie is a convenient, microwaveable meal featuring a flaky crust filled with tender chicken, vegetables, and a savory sauce. Designed for single servings, it offers a comforting, homemade taste with minimal preparation. The product caters to busy individuals seeking a satisfying meal without the hassle of extensive cooking. Its compact size and easy heating options make it a popular choice for quick lunches or dinners. The combination of flavor and convenience has made it a staple in many households.

1.2 Popularity and Convenience

Marie Callender’s Chicken Pot Pie is widely popular due to its delicious, homemade taste and ease of preparation. The microwaveable format makes it a convenient option for quick meals, appealing to busy individuals and families. Its single-serve design allows for portions tailored to personal preferences, enhancing its allure. The combination of a flaky crust and hearty filling, ready in minutes, has made it a favorite for those seeking comfort food without the hassle of extensive cooking. Its popularity stems from balancing taste and convenience perfectly.

Microwave Cooking Instructions

Microwave Marie Callender’s Chicken Pot Pie on High for 5-6 minutes in a 1100-watt oven. Rotate the pie halfway through cooking for even heating and ensure the internal temperature reaches 165°F for safety.

2.1 Key Steps for Microwave Preparation

Place the pot pie in the microwave on a paper towel to absorb moisture. Cook on High for 5-6 minutes in a 1100-watt oven. Rotate the pie halfway through cooking for even heating. After cooking, let it stand for 2 minutes to allow the filling to set. Use a food thermometer to ensure the internal temperature reaches 165°F. Handle the hot pie carefully to avoid burns. Follow these steps for a perfectly cooked, safe, and delicious meal.

2.2 Recommended Cooking Time and Power Level

Cook Marie Callender’s Chicken Pot Pie in the microwave on High (100% power). For a 1100-watt oven, cook for 5-6 minutes. If your microwave has lower wattage, adjust cooking time accordingly. Ensure the internal temperature reaches 165°F for safety. Rotate the pie halfway through cooking for even heating. Avoid cooking below 1100 watts to prevent undercooking. Let it stand for 2 minutes after cooking to allow the filling to set properly before serving.

Safety Precautions

Ensure the internal temperature reaches 165°F to avoid undercooked areas. Use a food thermometer for accuracy. Handle the hot pie carefully to prevent burns.

3.1 Importance of Internal Temperature

Ensuring Marie Callender’s Chicken Pot Pie reaches an internal temperature of 165°F is crucial for food safety. This step eliminates harmful bacteria, preventing potential health risks. Always use a food thermometer to verify doneness, especially in the filling, as the crust may appear cooked before the interior is fully heated. Proper heating guarantees both safety and optimal flavor, making it a vital part of the microwave cooking process.

3.2 Handling Hot Pies Safely

After microwaving, carefully remove the pot pie using oven mitts or tongs to avoid burns. The pie and its filling will be extremely hot, so handle with caution. Let it stand for a few minutes before serving to allow heat to dissipate slightly. Never leave a hot pie unattended, especially around children or pets, as the filling retains heat longer than the crust. Always ensure the pie is placed on a heat-resistant surface to prevent accidental spills or burns.

Tips for Best Results

For optimal results, rotate the pie during cooking and use a high-wattage microwave. Ensure the internal temperature reaches 165°F for food safety and even heating.

4.1 Ensuring Even Cooking

To achieve even cooking, rotate the pot pie halfway through the microwave cooking time. This ensures the filling and crust heat uniformly. Using a high-wattage microwave (1100 watts or more) also helps distribute heat evenly. After cooking, let the pie stand for a minute to allow the heat to distribute fully. This step is crucial for preventing undercooked or overcooked sections. Always follow the recommended cooking time and wattage guidelines for best results.

4.2 Avoiding Undercooked or Overcooked Pies

To prevent undercooked or overcooked pies, monitor the cooking process closely. Ensure the pot pie reaches an internal temperature of 165°F for food safety. If the crust browns too quickly, cover the edges with foil. Avoid overheating, as this can dry out the filling. After cooking, let the pie stand for a minute to check consistency. If undercooked, cook in short increments until heated through. Always follow the recommended time and wattage guidelines for optimal results;

Comparison with Conventional Oven Cooking

Microwaving is quicker than oven cooking but may result in a less crispy crust and slightly different texture for the filling, sacrificing some flavor depth for convenience.

5.1 Time and Effort Differences

Microwave cooking significantly reduces preparation time compared to conventional oven methods; While oven baking requires preheating and up to 1 hour and 40 minutes of cooking, microwaving takes just 5-6 minutes. This convenience saves time and effort, especially for busy individuals. However, the quick cooking time may require closer monitoring to ensure even heating and prevent overcooking. Overall, microwaving offers a faster and more efficient way to enjoy Marie Callender’s Chicken Pot Pie without sacrificing flavor.

5.2 Texture and Taste Variations

Microwave cooking can result in a slightly softer crust compared to oven-baked pies, which often yield a flakier texture. The taste remains rich and savory, but some notice a difference in the crust’s crispiness. Oven cooking allows for better browning and a more even distribution of flavors, while microwaving preserves moisture but may lack the same depth. Both methods deliver delicious results, though texture preferences often dictate the chosen cooking technique.

Nutritional Information

Marie Callender’s Chicken Pot Pie is high in calories and fat, with approximately 1040 calories, 60g fat, and 1760mg sodium per serving. It also contains 96g carbs.

6.1 Caloric and Fat Content

Marie Callender’s Chicken Pot Pie contains approximately 1040 calories per serving, with 60g of fat, including 22g of saturated fat. This makes it a high-calorie, high-fat dish, primarily due to the rich crust and creamy filling. The calorie and fat content are significant, making it more suitable for occasional indulgence rather than regular meals. The dish is a hearty option for those seeking comfort food but should be consumed mindfully due to its nutritional profile.

6.2 Sodium and Carbohydrate Levels

Marie Callender’s Chicken Pot Pie contains 1760mg of sodium and 96g of carbohydrates, making it a high-sodium and carb-rich dish. The sodium content is particularly notable, exceeding daily recommended intake in one serving. The carbohydrates primarily come from the crust and filling ingredients. These levels are significant for those monitoring their sodium or carb intake, emphasizing the importance of moderation in consumption.

Common Mistakes to Avoid

Common mistakes include incorrect wattage usage and not ensuring the pot pie reaches a safe internal temperature. Always follow recommended cooking times and check for thorough cooking to avoid undercooked or unsafe results.

7.1 Incorrect Wattage Usage

Using a microwave with wattage below 1100 can lead to uneven cooking and undercooked portions. Higher wattage ensures faster, more even results. Always verify your microwave’s power level to avoid raw spots and ensure food safety. Incorrect wattage can result in a pie that’s not thoroughly cooked, potentially leading to unsafe food consumption. Always follow the recommended wattage guidelines to achieve the best cooking outcomes and avoid this common mistake.

7.2 Not Checking for Thorough Cooking

One common mistake is not verifying that the pot pie is fully cooked. Undercooked areas can harbor harmful bacteria like Salmonella, especially in raw ingredients. Always ensure the internal temperature reaches 165°F. Use a food thermometer to check the center. If unsure, cook in short increments until fully heated. Neglecting this step can lead to unsafe food consumption and foodborne illness. Proper verification ensures a safe and enjoyable meal, avoiding potential health risks associated with undercooked dishes.

Cooking Marie Callender’s Chicken Pot Pie in the microwave offers convenience and efficiency. By following guidelines, you ensure a safe and delicious meal every time. Enjoy!

8.1 Final Thoughts on Microwave Cooking

Microwave cooking for Marie Callender’s Chicken Pot Pie offers unmatched convenience and efficiency. The process ensures a flaky crust and tender filling, delivering a satisfying meal. Always prioritize safety by checking the internal temperature and handling the hot pie carefully. Avoid common mistakes like incorrect wattage or undercooking. By following the guidelines, you can achieve a perfectly cooked pot pie every time, making it an ideal option for quick and delicious meals.

PDF

quick assessment for dysarthria pdf

Quick Assessment for Dysarthria: Overview

A quick dysarthria assessment involves evaluating speech clarity‚ intelligibility‚ and motor skills efficiently․ Tools like the Frenchay Dysarthria Assessment (FDA) and Newcastle Dysarthria Assessment Tool (N-DAT) streamline the process‚ ensuring timely intervention and accurate diagnosis․

Dysarthria is a speech disorder caused by neurological damage‚ affecting articulation‚ prosody‚ and voice quality․ It can result from stroke‚ traumatic brain injury‚ or progressive conditions like Parkinson’s disease․ Early identification is critical to address communication challenges promptly‚ improving quality of life․ Quick assessments are essential for timely intervention‚ enabling speech-language pathologists (SLPs) to devise targeted treatment plans․ Delays in diagnosis can lead to prolonged communication difficulties‚ impacting social interactions and emotional well-being․ Tools like the Frenchay Dysarthria Assessment (FDA) and Newcastle Dysarthria Assessment Tool (N-DAT) provide structured frameworks for rapid evaluation․ These assessments focus on key domains such as intelligibility‚ speech clarity‚ and functional communication․ By streamlining the evaluation process‚ healthcare providers can prioritize effective rehabilitation strategies‚ ultimately enhancing patient outcomes and reducing caregiver burden․ Quick assessments ensure that individuals with dysarthria receive the support they need without unnecessary delays․

Standardized Assessment Tools for Dysarthria

Standardized tools like the Frenchay Dysarthria Assessment and Newcastle Dysarthria Assessment Tool offer consistent‚ reliable frameworks for evaluating speech disorders‚ ensuring objective and accurate assessments․

Frenchay Dysarthria Assessment (FDA) and Its Key Features

The Frenchay Dysarthria Assessment (FDA) is a widely-used‚ standardized tool designed to evaluate the severity and characteristics of dysarthria in individuals․ It focuses on various aspects of speech‚ including articulation‚ intelligibility‚ and voice quality․ The assessment is divided into several sections‚ each targeting specific speech subsystems‚ such as respiratory support‚ phonation‚ and prosody․ One of its key features is the ability to quantify speech impairments‚ providing a clear and objective framework for clinicians․ Additionally‚ the FDA includes a functional communication scale‚ which measures how effectively an individual can communicate in daily life․ The tool also incorporates a intelligibility test‚ assessing how well speech can be understood by others․ Its structured format ensures consistency across assessments‚ making it a reliable resource for speech-language pathologists․ Furthermore‚ the FDA has been adapted into a computerized version‚ the CFDA‚ which enhances accuracy and efficiency through digital signal processing․ Overall‚ the FDA is a comprehensive and essential tool for diagnosing and managing dysarthria‚ aiding in tailored rehabilitation plans․

Newcastle Dysarthria Assessment Tool (N-DAT): Clinical Application

The Newcastle Dysarthria Assessment Tool (N-DAT) is a specialized clinical instrument designed to evaluate and manage dysarthria effectively․ It provides a structured framework for assessing speech impairments‚ focusing on key aspects such as articulation‚ voice quality‚ and intelligibility․ N-DAT is particularly valued for its ability to guide targeted interventions‚ enabling speech-language pathologists (SLPs) to create personalized treatment plans․ The tool emphasizes functional communication‚ helping clinicians understand how dysarthria impacts daily interactions․ N-DAT also facilitates longitudinal monitoring‚ allowing SLPs to track progress over time and adjust therapies accordingly․ Its user-friendly design ensures that assessments can be conducted efficiently‚ making it a practical choice for clinical settings․ By addressing both the physical and functional dimensions of dysarthria‚ N-DAT plays a crucial role in enhancing patient outcomes and improving quality of life․ Its application is widely recognized in neurorehabilitation and speech therapy‚ making it an indispensable resource for clinicians․

Dysarthria Profile: A Comprehensive Scoring System

The Dysarthria Profile is a detailed scoring system designed to assess the severity and characteristics of dysarthria systematically․ It evaluates various speech dimensions‚ including intelligibility‚ articulation‚ and voice quality‚ providing a comprehensive overview of a patient’s communication abilities․ The tool assigns numerical scores to different aspects of speech‚ allowing clinicians to track progress and tailor interventions effectively․ Its structured approach ensures consistency in assessments‚ making it a reliable resource for speech-language pathologists (SLPs)․ The Dysarthria Profile also considers the impact of dysarthria on functional communication‚ offering insights into how impairments affect daily life․ By combining quantitative and qualitative data‚ it supports both diagnostic accuracy and personalized treatment planning․ This tool is particularly useful in clinical and research settings‚ aiding in the development of targeted therapies and enhancing patient outcomes․ Its comprehensive nature makes it an essential component of dysarthria assessment and management strategies․

Perceptual and Acoustic Analysis in Dysarthria Assessment

Perceptual and acoustic analysis evaluates speech clarity‚ voice quality‚ and articulation‚ providing insights into dysarthria severity and type through advanced auditory and instrumental measurements․

Role of Speech-Language Pathologists (SLPs) in Dysarthria Evaluation

Speech-Language Pathologists (SLPs) play a pivotal role in dysarthria evaluation by conducting comprehensive assessments‚ utilizing tools like the Frenchay Dysarthria Assessment and Newcastle Dysarthria Assessment Tool․ They analyze speech clarity‚ intelligibility‚ and motor skills to determine the severity and type of dysarthria․ SLPs also assess the impact of dysarthria on functional communication and quality of life‚ often incorporating patient-reported outcomes such as the Living with Dysarthria Questionnaire․ Their expertise in perceptual and acoustic analysis allows for accurate diagnosis and tailored intervention planning․ Additionally‚ SLPs may employ advanced technologies‚ including computerized assessments like the Computerised Frenchay Dysarthria Assessment Procedure (CFDA)‚ to enhance evaluation accuracy and efficiency․ Their comprehensive approach ensures that patients receive appropriate support to improve communication abilities and overall well-being․

Technological Advancements in Dysarthria Assessment

Technological advancements like the Computerised Frenchay Dysarthria Assessment Procedure (CFDA) use digital signal processing for objective and efficient dysarthria evaluation‚ enhancing accuracy and scalability for remote assessments․

Computerised Frenchay Dysarthria Assessment Procedure (CFDA)

The Computerised Frenchay Dysarthria Assessment Procedure (CFDA) is a digital tool designed to enhance the accuracy and efficiency of dysarthria evaluations․ It utilizes advanced digital signal processing (DSP) to analyze speech patterns‚ offering objective and reliable results․ The CFDA incorporates key components of the traditional Frenchay Dysarthria Assessment (FDA)‚ such as intelligibility tests at word and sentence levels‚ but automates the process for faster outcomes․ This technology enables clinicians to assess speech clarity‚ articulation‚ and prosody with greater precision․ By reducing subjectivity‚ the CFDA improves diagnostic consistency and supports timely intervention․ Additionally‚ its digital format allows for remote assessments‚ making it accessible for patients with mobility challenges․ The CFDA is particularly valuable for speech-language pathologists (SLPs)‚ as it provides detailed reports to track progress and tailor treatment plans effectively․ This innovative approach represents a significant advancement in dysarthria assessment‚ blending tradition with modern technology for better patient care․

Quality of Life and Functional Communication in Dysarthria

Dysarthria significantly impacts daily life‚ affecting communication and functional interactions․ Assessments like the Living with Dysarthria Questionnaire measure the emotional and social effects‚ guiding interventions to improve quality of life․

Living with Dysarthria Questionnaire: Measuring Impact on Daily Life

The Living with Dysarthria Questionnaire (LWDQ) is a comprehensive tool designed to assess the impact of dysarthria on a patient’s daily life and emotional well-being․ It evaluates various domains‚ including communication difficulties‚ emotional distress‚ and participation in social activities․ By understanding the broader effects of dysarthria beyond speech clarity‚ the LWDQ provides valuable insights for tailoring rehabilitation strategies․ The questionnaire is structured to gather both qualitative and quantitative data‚ offering a holistic view of how dysarthria influences a patient’s quality of life․ This makes it an essential component in multidisciplinary care plans‚ ensuring that interventions address not only the physical aspects of speech but also the psychological and social challenges faced by individuals with dysarthria․

PDF

free fun music worksheets pdf

Discover a world of music education with free fun music worksheets PDF, designed for students of all ages. These engaging resources include activities like note names, instrument identification, and rhythmic exercises, making learning music enjoyable and accessible for everyone. Perfect for teachers and parents, these worksheets are available as downloadable PDFs, offering a variety of fun and educational exercises to suit different skill levels and grades.

What Are Music Worksheets?

Music worksheets are educational tools designed to help students learn and practice various aspects of music theory and appreciation. They typically include activities like identifying notes, matching instruments, and completing rhythmic patterns. These worksheets are versatile, catering to different age groups and skill levels, from preschool to advanced learners. Many are available as free PDF downloads, making them easily accessible for teachers, parents, and students. They often feature engaging designs and fun exercises to keep learning interactive and enjoyable. Whether focusing on note names, instrument recognition, or musical symbols, music worksheets provide a structured way to explore the world of music while reinforcing key concepts in an organized manner.

Why Use Free Music Worksheets?

Using free music worksheets offers numerous benefits for both educators and learners. They provide an affordable and accessible way to teach music theory, note recognition, and instrument awareness. These resources save time and costs, allowing teachers to focus on creating engaging lesson plans. Additionally, free worksheets cater to diverse learning needs, offering activities for various age groups and skill levels. They often include fun and interactive exercises, making music education enjoyable for students. With the ability to download and print instantly, these worksheets are convenient for classroom or home use. They also encourage consistent practice, helping students build a strong foundation in music. Overall, free music worksheets are a valuable tool for fostering a love of music while making learning both effective and enjoyable.

Types of Music Worksheets

Music worksheets come in various forms, including note recognition, rhythm exercises, and instrument identification. They also feature activities like matching games, crosswords, and puzzles, ensuring fun and interactive learning for all ages.

Note Names and Values

Mastering note names and values is a fundamental step in music education. These worksheets introduce students to essential music symbols, such as whole notes, half notes, and quarter notes, helping them understand their durations and roles in a composition. Activities include tracing, copying, and identifying notes on the treble and bass clefs, with exercises tailored for different skill levels. Interactive puzzles, crosswords, and matching games make learning note names and values an engaging experience. Worksheets often incorporate visual aids, ensuring that students can recognize and reproduce notes accurately. This foundational knowledge is crucial for reading sheet music and developing musical literacy, making these worksheets a valuable tool for both classroom and home learning.

Instrument Identification Activities

Instrument identification activities are a vibrant way to introduce students to the world of musical instruments. These worksheets feature engaging exercises such as quizzes, wordsearches, crossword puzzles, and matching games, designed to help learners recognize and remember different instruments. From orchestra instruments like violins and trumpets to percussion tools like timpani and bongo drums, these activities cater to various age groups and skill levels. Many worksheets include colorful illustrations and fun challenges, making learning interactive and enjoyable. For younger students, tracing and coloring activities are available, while older learners can explore more complex instrument-related puzzles. These resources are perfect for classroom use or homeschooling, providing an entertaining yet educational approach to understanding musical instruments and their roles in different genres of music;

Benefits of Using Music Worksheets

Music worksheets offer a versatile and engaging way to enhance musical knowledge. They provide structured learning, improve understanding of concepts like notes and rhythms, and make practice enjoyable for students of all ages.

Educational Value

Free fun music worksheets PDF are an excellent tool for fostering musical understanding in students. They provide structured exercises that teach essential concepts such as note names, values, and musical symbols. These resources often include activities like matching games, crosswords, and puzzles, which make learning engaging and interactive. Worksheets are designed for various skill levels, catering to students from pre-k to 6th grade, ensuring age-appropriate content. They also cover a wide range of topics, including instrument identification, rhythm exercises, and music theory basics. By using these worksheets, students gain a solid foundation in music literacy while developing critical thinking and problem-solving skills. The educational value lies in their ability to simplify complex musical ideas, making them accessible and enjoyable for young learners. These tools are invaluable for teachers and parents seeking to enrich music education effectively.

Fun and Engaging Learning

Free fun music worksheets PDF transform learning into an enjoyable experience, blending education with entertainment. These resources feature interactive activities like matching games, crosswords, and puzzles that captivate students’ interest. Colorful designs, themed exercises, and hands-on tasks make music education feel like play. For example, princess-themed color-by-note worksheets combine creativity with learning, while instrument identification games spark curiosity. These activities are tailored for various age groups, ensuring they remain both challenging and fun. By incorporating visual and interactive elements, these worksheets keep students engaged, fostering a love for music while reinforcing essential skills. They turn practice into a delightful adventure, making music education accessible and enjoyable for all learners. This approach ensures that students stay motivated and eager to explore the world of music.

How to Use Music Worksheets Effectively

Integrate free fun music worksheets PDF into lesson plans or use them as homework to reinforce musical concepts. These resources cater to diverse learning styles, ensuring effective and enjoyable practice.

Integrating Worksheets into Lesson Plans

Enhance your music lessons by seamlessly incorporating free fun music worksheets PDF into your curriculum. Start by identifying key concepts you want to teach, such as note recognition or rhythm, and select worksheets that align with these objectives. For younger students, use colorful and interactive activities like matching games or puzzles to keep them engaged while learning note names and musical symbols. For older students, introduce more complex exercises like composing simple melodies or identifying intervals. Pair these worksheets with hands-on activities, such as playing instruments or singing songs, to create a well-rounded learning experience. Regularly review and adjust your lesson plans to ensure the worksheets complement your teaching goals and keep students motivated and excited about music.

Using Worksheets as Homework or Practice

Free fun music worksheets PDF are an excellent tool for reinforcing learning outside the classroom. Assigning these worksheets as homework allows students to practice music theory, note recognition, and instrument identification at their own pace. Choose activities that align with recent lessons, such as rhythm exercises or matching games, to ensure continuous progress. For younger students, include engaging tasks like coloring musical symbols or tracing notes to make practice enjoyable. Older students can benefit from more advanced exercises like identifying intervals or composing simple melodies. Providing clear instructions and answer keys helps students review their work independently. Regular homework assignments with these worksheets ensure consistent practice, reinforcing musical concepts and building confidence in their abilities. This approach makes learning music both fun and effective, even outside the classroom setting.

Popular Resources for Free Music Worksheets

Explore top sites like Music Tech Teacher and Music Fun for diverse free music worksheets PDF. These platforms offer engaging puzzles, theory exercises, and activities for all skill levels, making them favorites among educators and students alike.

Music Tech Teacher

Music Tech Teacher is a premier destination for free music worksheets PDF, offering a wide range of engaging activities for students. This platform provides puzzles, quizzes, and lessons designed to help learners read, write, compose, and publish music. With a focus on integrating technology into music education, it caters to both teachers and students. Resources include mazes, crosswords, and instrument identification games, making learning fun and interactive. For example, the “I Love Music” maze and “Play in the Band” activities are popular choices. These worksheets are suitable for various skill levels, from basic note recognition to advanced composition. Music Tech Teacher is a go-to resource for educators seeking innovative ways to teach music theory and appreciation.

Music Fun

Music Fun is a top destination for free fun music worksheets PDF, offering a variety of engaging and interactive activities for students of all ages. Their resources include themed exercises, such as princess-themed color-by-note and color-by-rhythm sheets, which make learning note names and rhythms fun and creative. Additionally, they provide worksheets for identifying instruments, tracing musical symbols, and understanding basic music theory. With activities like crosswords, word transfers, and hidden stories, Music Fun ensures that learning music is both educational and enjoyable. Their resources are suitable for different skill levels and cater to both young learners and advanced students, making them a versatile tool for educators and parents alike. These free PDF downloads are perfect for creating a dynamic and engaging music education experience.

Advanced Topics in Music Worksheets

Explore advanced music theory with free fun music worksheets PDF, covering complex concepts like rhythm, timing, and composition. These resources challenge learners to deepen their musical understanding through interactive exercises.

Rhythm and Timing Exercises

Engage students with rhythm and timing exercises from free fun music worksheets PDF. These activities help develop a strong sense of musical pulse and coordination. Worksheets include matching games, fill-in-the-blank exercises, and color-by-rhythm tasks that make learning fun. Students can practice identifying time signatures, rests, and note values through interactive puzzles. Advanced sheets focus on complex rhythms, syncopation, and meter changes. These exercises are perfect for reinforcing foundational skills while keeping students motivated. With vibrant designs and varied difficulty levels, they cater to learners of all ages and skill levels, ensuring a enjoyable and effective learning experience.

Music Theory and Composition

Deepen musical understanding with music theory and composition worksheets from free fun music worksheets PDF. These resources introduce students to fundamental concepts like scales, chords, and harmony through interactive activities. Worksheets include composing simple melodies, arranging rhythms, and solving music theory puzzles. They also cover advanced topics like the circle of fifths and key signatures. Designed for all skill levels, these exercises foster creativity and critical thinking. Students can explore composing their own music while learning to read and write sheet music. These engaging worksheets make music theory accessible and enjoyable, encouraging students to express their musical ideas confidently. They are perfect for classroom use or independent study, providing a comprehensive foundation in music theory and composition.

liftmaster myq manual pdf

Welcome to the LiftMaster MyQ Manual PDF, your comprehensive guide to understanding and utilizing the MyQ smart garage door system. This manual provides detailed instructions, troubleshooting tips, and setup guidance to help you maximize the potential of your MyQ-enabled devices. Whether you’re installing a new system or optimizing an existing one, this resource ensures a seamless and efficient experience with LiftMaster’s innovative smart garage solutions.

1.1 Overview of the LiftMaster MyQ System

The LiftMaster MyQ System is a smart garage door control platform designed to enhance convenience, security, and connectivity. It allows users to monitor and operate their garage doors remotely via the MyQ app, ensuring seamless integration with compatible devices and smart home systems. This system offers advanced features like remote access, customizable alerts, and compatibility with various LiftMaster garage door openers and accessories, providing a modern solution for garage automation.

1.2 Importance of the MyQ Manual for Users

The MyQ Manual is essential for users to understand and optimize their LiftMaster MyQ system. It provides step-by-step guides for installation, troubleshooting, and feature customization, ensuring seamless operation. The manual also highlights safety precautions and advanced settings, helping users maximize their smart garage door experience with confidence and efficiency.

Setting Up the LiftMaster MyQ System

Setting up your LiftMaster MyQ system involves downloading the MyQ app, pairing devices, and configuring Wi-Fi connectivity for seamless smart garage door control and integration.

2.1 Downloading and Installing the MyQ App

Download the myQ App from the App Store or Google Play. Follow the in-app instructions to create an account and register your device. Ensure your smartphone has a stable Wi-Fi connection for seamless setup and smart garage door control.

2.2 Pairing the MyQ Device with Your Garage Door Opener

Open the myQ App and select “Add Device” to begin pairing. Enter your garage door opener’s serial number or scan the QR code. Follow the app’s prompts to complete the pairing process, ensuring your device is connected to your opener for remote access and control.

2.3 Configuring Wi-Fi Connectivity for MyQ

Open the myQ App and navigate to the settings menu. Select “Wi-Fi Setup” and choose your network from the available options. Enter your Wi-Fi password and follow the app’s instructions to complete the connection. Ensure your router is compatible and your internet connection is stable for optimal performance.

Key Features of the LiftMaster MyQ System

The LiftMaster MyQ System offers remote garage door control, smart home integration, real-time notifications, and customizable settings for enhanced convenience and security.

3.1 Remote Garage Door Control via the MyQ App

The MyQ App enables seamless remote control of your garage door, allowing you to open, close, or monitor its status from anywhere. Real-time notifications alert you to door activity, ensuring added security and peace of mind. This feature integrates with smart home systems, providing a convenient and connected experience for users.

3.2 Timer-to-Close (TTC) Feature

The Timer-to-Close (TTC) feature automatically closes your garage door after a set period, enhancing security and convenience. This function, accessible via the MyQ app, ensures your garage door closes even if you forget, providing peace of mind and added protection for your home.

3.3 Integration with Smart Home Devices

Seamlessly integrate your LiftMaster MyQ system with popular smart home platforms like Google Assistant and Amazon Alexa. Control your garage door with voice commands or synchronize it with other smart devices for a fully connected home experience, enhancing convenience and automation.

Troubleshooting Common Issues

Addressing common issues with your LiftMaster MyQ system is essential for maintaining smooth operation. This section provides solutions for connectivity problems, LED indicator malfunctions, and compatibility concerns, ensuring your smart garage door system functions optimally at all times. Follow the troubleshooting steps to resolve issues efficiently and effectively.

4.1 Resolving Connectivity Problems

Experiencing connectivity issues with your LiftMaster MyQ system? Ensure a stable Wi-Fi connection and power cycle your router and MyQ device. Check for firmware updates and verify device compatibility with Security 2.0. Consult the manual for step-by-step guidance to quickly restore connectivity and optimize performance.

4.2 Fixing LED Indicator Issues

LED indicators on your LiftMaster MyQ device not functioning properly? Refer to the manual for diagnostic guidance. Check connections, ensure proper power supply, and verify firmware updates. If issues persist, reset the device or contact customer support for further assistance to resolve LED-related problems effectively.

4.3 Addressing Compatibility Concerns

Ensure your LiftMaster MyQ system works seamlessly by verifying device compatibility. Check model numbers, firmware versions, and ensure all components are MyQ-enabled. Consult the manual or LiftMaster’s website for compatibility charts. If issues arise, update firmware or contact support for assistance in resolving compatibility conflicts effectively.

Advanced Settings and Customization

Explore advanced customization options for your LiftMaster MyQ system, including remote control programming, motion detection setup, and tailored garage door opener settings for enhanced functionality and personalization.

5.1 Programming the MyQ Remote Control

Program the MyQ Remote Control by pressing the Learn button on your opener, then the remote button. The LED will flash. Press the remote button three times to complete synchronization. Ensure the remote is within range and the opener is powered. This process is quick and ensures compatibility with Security 2.0 for enhanced security and functionality.

5.2 Setting Up Motion Detection and Alerts

Enable motion detection and alerts through the MyQ app for real-time notifications. Access the settings menu, select motion detection, and adjust sensitivity. Enable alerts for door activity or unusual movements. Pair with the LiftMaster Smart Garage Camera for live video feed upon detection, ensuring enhanced security and convenience for your garage.

5.3 Customizing Garage Door Opener Settings

Customize your garage door opener settings via the MyQ app for personalized convenience; Adjust door opening height, enable timer-to-close, and customize lighting controls. Access advanced settings through the MyQ dashboard to tailor operations to your needs, ensuring seamless integration with your smart home system for enhanced functionality and user experience.

Safety and Security Features

The MyQ system prioritizes safety with secure encryption, ensuring only authorized users can access your garage. Features like motion detection alerts and timer-to-close enhance security, providing peace of mind.

6.1 Understanding MyQ Security 2.0

MyQ Security 2.0 enhances protection with advanced encryption, ensuring secure communication between devices; It prevents unauthorized access and supports compatibility with modern smart home systems. Real-time alerts and secure login features safeguard your garage, offering peace of mind and reliable operation through the MyQ app.

6.2 Enabling Two-Factor Authentication

Enhance security by enabling two-factor authentication (2FA) for your MyQ account. This feature adds an extra layer of protection, requiring both your password and a verification code sent to your device. 2FA ensures unauthorized access is prevented, safeguarding your garage door controls and personal data from potential breaches.

6.3 Warning Labels and Safety Precautions

Adhere to all warning labels and safety precautions provided in the LiftMaster MyQ manual. Ensure proper installation and operation to avoid risks, such as severe injury from one-piece or swinging doors. Always reference the official LiftMaster website for detailed safety guidelines and instructions to prevent accidents.

Compatible Accessories and Devices

Discover the range of MyQ-compatible accessories and devices designed to enhance your smart garage experience. These include MyQ-enabled lighting, LiftMaster Smart Garage Camera, and wireless keyless entry systems. Visit the LiftMaster website for a full list of compatible products.

7.1 MyQ-Enabled Lighting Accessories

Enhance your garage experience with MyQ-enabled lighting accessories, designed to integrate seamlessly with your smart garage system. These accessories allow you to control interior and exterior lighting directly through the MyQ app, ensuring convenience and energy efficiency. Compatible with MyQ garage door openers, they offer a unified smart home solution. Visit LiftMaster.com for a full list of compatible lighting products and setup guides.

7.2 LiftMaster Smart Garage Camera Integration

The LiftMaster Smart Garage Camera integrates seamlessly with your MyQ system, offering 1080p live-streaming, 360-degree manual rotation, and motion detection. Monitor your garage remotely through the MyQ app for enhanced security. For detailed setup and features, refer to the LiftMaster website.

7.3 Wireless Keyless Entry Compatibility

The Wireless Keyless Entry models 940EV and 940EVC are compatible with Chamberlain 315 MHz or 390 MHz garage door openers. These devices work seamlessly with MyQ, allowing you to monitor and control your garage door via the MyQ app. Requires a Wi-Fi-enabled smartphone, tablet, or laptop and broadband internet connection for full functionality.

MyQ App Navigation and Controls

The MyQ app offers intuitive navigation, enabling users to control and monitor their garage door opener remotely. Features include real-time activity tracking, customizable notifications, and seamless management of multiple garage doors from a single interface;

8.1 Navigating the MyQ Dashboard

Navigating the MyQ dashboard is straightforward, with a user-friendly interface designed for ease of use. The home screen displays real-time garage door status, recent activity, and quick-action buttons for opening or closing doors. Customize your view by organizing devices, setting notifications, and accessing advanced settings for a personalized experience.

8.2 Monitoring Garage Door Activity

Monitor your garage door activity effortlessly with the MyQ app. Receive real-time notifications when your garage door opens or closes, ensuring you stay informed. The app also maintains a history log of all door activities, allowing you to track usage patterns and maintain security. This feature provides peace of mind and enhances remote management capabilities, integrating seamlessly with smart home systems for a connected experience.

8.3 Adjusting Settings for Multiple Garage Doors

Easily customize settings for multiple garage doors using the MyQ app. Configure each door independently, set unique timers, and enable alerts for specific doors. The app allows real-time monitoring and synchronized controls, ensuring seamless management of all your garage doors from a single interface. This feature streamlines operations and enhances convenience for users with multiple doors.

Maintenance and Updates

Regularly update your MyQ system to ensure optimal performance. Clean sensors, check Wi-Fi connectivity, and replace worn-out accessories. Follow the manual for firmware updates and maintenance tips to keep your garage door operating smoothly and securely.

9.1 Regular Maintenance Tips for MyQ Devices

Ensure your MyQ devices function optimally with regular maintenance. Clean sensors and cameras, check Wi-Fi connectivity, and inspect battery levels. Replace worn-out parts like remotes or keyless entry pads; Refer to the LiftMaster MyQ Manual PDF for detailed steps to maintain performance and security of your smart garage system.

9.2 Updating Firmware and Software

Regularly update your MyQ firmware and software to ensure optimal performance and security. Use the MyQ app to check for updates and follow the prompts to install the latest versions. Keeping your system up-to-date enhances functionality, resolves bugs, and maintains compatibility with connected devices. Refer to the manual for detailed guidance.

9.3 Cleaning and Replacing Accessories

Regularly clean sensors and accessories to maintain optimal performance. Replace batteries in remotes and sensors as needed. For damaged parts, refer to the LiftMaster MyQ Manual PDF or visit the official website for genuine replacement accessories. Ensure all replacements are compatible with your MyQ system for uninterrupted functionality.

MyQ Compatibility with LiftMaster Models

Ensure your LiftMaster model is MyQ-compatible for seamless integration. Models like the 8550 Elite and WLED Elite Series support MyQ technology. Check compatibility with Security 2.0 for enhanced functionality and refer to the LiftMaster MyQ Manual PDF for a full list of compatible devices.

10.1 LiftMaster Models Compatible with MyQ

The MyQ system is compatible with select LiftMaster models, including the 8550 Elite Series, 8355W, and 8500 Wall Mount Openers; Ensure your model supports MyQ technology by referencing the LiftMaster MyQ Manual PDF or checking the product specifications for compatibility with Security 2.0 features.

10.2 Checking Compatibility with Security 2.0

Verify if your LiftMaster model supports Security 2.0 by consulting the LiftMaster MyQ Manual PDF or the official LiftMaster website. Compatible models, such as the 8550 Elite Series, 8355W, and 8500 Wall Mount Openers, ensure enhanced security and seamless functionality with MyQ-enabled devices and accessories.

10.3 Non-Compatible Devices and Workarounds

Some older LiftMaster models, like those with a yellow learn button, are not compatible with MyQ or Assure Link. For such devices, consider using a smart garage hub or universal remote as a workaround to maintain functionality and control through the MyQ app.

Resources and Support

Visit the official LiftMaster website for comprehensive support, including manuals, troubleshooting guides, and replacement parts. Contact MyQ customer support directly for assistance with setup or technical issues.

11.1 Accessing the Official LiftMaster Website

Visit the official LiftMaster website for comprehensive resources, including the MyQ manual PDF, troubleshooting guides, and FAQs. Explore the support section to find product manuals, replacement parts, and customer support contact information for assistance with your MyQ system.

11.2 Contacting MyQ Customer Support

For assistance, contact MyQ Customer Support via phone, email, or live chat through the official LiftMaster website. The support team is available to address troubleshooting, product inquiries, and technical issues related to your MyQ system. Visit the support section for contact details and additional resources.

11.3 Finding Replacement Parts and Accessories

Visit the official LiftMaster website to find genuine replacement parts and accessories for your MyQ system. Use the site’s search tool to locate specific components by product model or description. Ensure compatibility by referencing your device’s model number. Genuine parts guarantee optimal performance and safety for your MyQ-enabled garage door opener. Shop now.

Mastering your LiftMaster MyQ system enhances convenience and security. Follow best practices, register your device, and keep software updated for optimal performance. Explore new features and stay informed about the latest innovations for a smarter garage experience. Visit LiftMaster for support and updates.

12.1 Maximizing the Potential of MyQ

To fully utilize your LiftMaster MyQ system, explore its advanced features like remote access, scheduling, and smart home integration. Regularly update your app and firmware for enhanced functionality. Customize settings to suit your lifestyle and explore new features to optimize your garage door control experience. Stay informed about the latest updates and innovations to get the most out of your MyQ system.

12.2 Best Practices for Long-Term Use

For long-term use, ensure your LiftMaster MyQ system remains updated with the latest firmware and app versions. Regularly monitor activity logs and customize settings to meet your needs. Enable security features like two-factor authentication and review warning labels for safe operation. Follow the manual’s maintenance tips to keep your system running smoothly and securely over time.

12.3 Staying Updated with MyQ Innovations

Stay informed about the latest MyQ innovations by regularly checking for firmware updates and new app features. Enable notifications to receive updates on security enhancements, compatibility improvements, and feature expansions. Visit the LiftMaster website or app for the newest tools to enhance your smart garage experience and maintain optimal performance.

ophthalmic scribe study guide pdf

An ophthalmic scribe study guide PDF is a comprehensive resource designed to help aspiring scribes master the fundamentals of ophthalmology documentation and prepare for certification exams.

Overview of the Ophthalmic Scribe Role

An ophthalmic scribe plays a vital role in healthcare‚ assisting physicians by accurately documenting patient medical records during exams. They ensure detailed‚ precise‚ and timely entries‚ allowing doctors to focus on diagnosis and treatment. Scribes also prepare necessary documentation‚ maintain patient confidentiality‚ and organize records for future reference. Their work supports efficient clinical workflows and enhances patient care quality. This role requires strong communication skills‚ attention to detail‚ and familiarity with ophthalmic terminology. By streamlining documentation‚ scribes enable physicians to prioritize patient interactions and deliver high-quality care. Their contributions are essential in modern healthcare settings.

Importance of the Ophthalmic Scribe Study Guide PDF

The ophthalmic scribe study guide PDF is a vital educational tool for individuals pursuing a career in ophthalmology documentation. It provides a comprehensive overview of the role‚ covering essential topics like eye anatomy‚ ophthalmic terminology‚ and documentation standards. This guide helps aspiring scribes understand the intricacies of patient records and prepares them for certification exams‚ such as the Ophthalmic Scribe Certification (OSC). By offering practical insights and real-world examples‚ the guide ensures scribes are well-equipped to assist physicians effectively. It also serves as a valuable resource for staying updated on the latest trends and requirements in ophthalmic documentation.

Role and Responsibilities of an Ophthalmic Scribe

An ophthalmic scribe assists physicians by accurately documenting patient medical records‚ preparing exam reports‚ and maintaining clear communication between healthcare providers and patients.

Documentation of Patient Medical Records

Accurate documentation is a cornerstone of an ophthalmic scribe’s role. This involves recording detailed patient histories‚ exam findings‚ diagnoses‚ and treatment plans. Scribes must ensure all information is clear‚ concise‚ and organized‚ using proper ophthalmic terminology. They document visual acuity‚ intraocular pressure‚ and results from tests like OCT or fundus exams. Maintaining precise records ensures continuity of care and serves as a legal reference. The ability to capture complex medical details efficiently is essential‚ making this task both challenging and critical in ophthalmology practice. The study guide emphasizes mastering this skill to excel in real-world scenarios.

Assisting the Physician During Exams

Ophthalmic scribes play a vital role in supporting physicians during patient exams. They ensure all necessary equipment and documents are ready‚ streamlining the examination process. Scribes actively listen to the physician’s findings‚ preparing to document accurately. They may also assist with positioning patients or handling instruments‚ allowing the physician to focus on the exam. Effective communication and anticipation of the physician’s needs are key skills emphasized in the study guide. By optimizing exam efficiency‚ scribes contribute to better patient care and reduce the physician’s administrative burden‚ enabling them to concentrate on diagnosis and treatment.

Maintaining Patient Confidentiality

Maintaining patient confidentiality is a cornerstone of an ophthalmic scribe’s responsibilities. Scribes handle sensitive medical information‚ making it crucial to adhere to HIPAA guidelines and other privacy laws. The study guide emphasizes the importance of securing records‚ both physical and digital‚ to prevent unauthorized access. Scribes must avoid discussing patient details in public areas and ensure that only authorized personnel access medical records. Confidentiality extends to electronic health records‚ requiring strong passwords and secure login procedures. Breaches can lead to legal consequences‚ highlighting the need for vigilance. The guide provides practical tips to help scribes uphold patient privacy and maintain trust.

Key Skills and Knowledge Required

The ophthalmic scribe study guide PDF highlights essential skills‚ including eye anatomy‚ ophthalmic terminology‚ and proficiency in electronic health records to ensure accurate and efficient documentation of patient exams and diagnoses.

Eye Anatomy and Physiology

The ophthalmic scribe study guide PDF emphasizes the importance of understanding eye anatomy and physiology‚ including the structure and function of the cornea‚ retina‚ lens‚ and optic nerve. This knowledge is crucial for accurately documenting diagnoses and treatments. The guide also covers how these components interact to enable vision and how diseases like glaucoma and cataracts affect them. By mastering this foundation‚ scribes can better assist physicians and maintain precise medical records. Understanding eye anatomy is essential for effective communication and accurate documentation in ophthalmic care settings.

Ophthalmic Terminology and Abbreviations

The ophthalmic scribe study guide PDF dedicates a section to ophthalmic terminology and abbreviations‚ ensuring scribes understand industry-specific terms. Mastering these is critical for accurate documentation and effective communication. Common terms include visual acuity‚ intraocular pressure‚ and refraction. Abbreviations like OD (right eye)‚ OS (left eye)‚ and OU (both eyes) are frequently used. The guide provides practice exercises to reinforce these concepts‚ enabling scribes to document patient exams and procedures efficiently. Proficiency in ophthalmic terminology ensures clear and precise documentation‚ which is vital for patient care and physician collaboration.

Understanding Ophthalmic Procedures

The ophthalmic scribe study guide PDF emphasizes the importance of understanding ophthalmic procedures‚ including diagnostic tests and surgical interventions. Scribes must familiarize themselves with procedures like slit-lamp examinations‚ visual field testing‚ and fundus photography. Additionally‚ understanding surgical procedures such as cataract removal or glaucoma implants is essential for accurate documentation. The guide provides detailed explanations of each procedure‚ its purpose‚ and expected outcomes. This knowledge ensures scribes can document patient encounters precisely‚ facilitating effective communication between the physician and other healthcare providers. Accurate documentation of procedures is critical for continuity of care and legal compliance.

Ophthalmic Scribe Certification

The Ophthalmic Scribe Certification (OSC) is a credential verifying expertise in creating and maintaining patient records. The study guide PDF aids preparation for the exam‚ ensuring proficiency.

Overview of the Ophthalmic Scribe Certification (OSC)

The Ophthalmic Scribe Certification (OSC) is a professional credential designed to validate expertise in documenting patient care under physician supervision. It assesses knowledge of ophthalmic terminology‚ procedures‚ and record-keeping standards. The certification ensures scribes can accurately capture medical histories‚ diagnoses‚ and treatment plans. Earning the OSC demonstrates commitment to excellence in ophthalmic care and enhances career opportunities. The study guide PDF provides essential preparation materials‚ covering key topics and practical exam strategies to help candidates succeed. This certification is a valuable asset for both new and experienced scribes aiming to advance their skills and credibility in the field.

Exam Preparation and Study Materials

Effective exam preparation for the Ophthalmic Scribe Certification (OSC) requires a structured approach using reliable study materials. The ophthalmic scribe study guide PDF offers a detailed overview of key topics‚ including eye anatomy‚ ophthalmic terminology‚ and common procedures. It also provides practice questions and case studies to simulate real exam scenarios. Additional resources like flashcards and online courses can enhance understanding and retention. By focusing on accurate documentation practices and electronic health records (EHR) skills‚ the study guide ensures comprehensive preparation. Regular review and active learning strategies are essential for mastering the material and achieving certification success.

Study Guide Content

The ophthalmic scribe study guide PDF includes detailed sections on eye anatomy‚ ophthalmic terminology‚ and procedures‚ along with practical tips for effective learning and exam preparation.

Key Topics Covered in the Study Guide

The ophthalmic scribe study guide PDF covers essential topics such as eye anatomy‚ ophthalmic terminology‚ common eye diseases‚ and documentation best practices. It also includes sections on electronic health records (EHR) and certification exam preparation. Additionally‚ the guide provides an in-depth review of ophthalmic procedures and diagnostic techniques‚ ensuring a thorough understanding of the field. Practical examples and case studies are included to enhance learning. This comprehensive approach ensures that aspiring scribes are well-prepared for both their roles and the Ophthalmic Scribe Certification (OSC) exam.

Practical Tips for Effective Studying

To maximize learning‚ incorporate active study techniques such as flashcards and practice exams. Focus on understanding key concepts rather than memorizing details. Dedicate time to review eye anatomy and common ophthalmic conditions regularly. Use the study guide PDF to identify weak areas and prioritize those topics. Create a structured study schedule and stick to it. Additionally‚ simulate real-world scenarios to apply theoretical knowledge. Engaging with study groups or online forums can also enhance understanding. By combining these strategies‚ aspiring scribes can efficiently prepare for both their roles and the Ophthalmic Scribe Certification (OSC) exam.

Common Ophthalmic Conditions

The ophthalmic scribe study guide PDF covers key conditions like glaucoma‚ cataracts‚ and retinal diseases‚ essential for accurate documentation in ophthalmic settings.

Glaucoma‚ Cataracts‚ and Other Common Eye Diseases

The ophthalmic scribe study guide PDF provides detailed insights into prevalent eye conditions such as glaucoma‚ cataracts‚ and retinal diseases. Understanding these conditions is crucial for accurate documentation. Glaucoma involves increased intraocular pressure‚ often leading to vision loss if untreated. Cataracts are characterized by lens opacity‚ affecting vision clarity. Other common conditions include macular degeneration and diabetic retinopathy‚ which require precise documentation of symptoms and treatments. The guide emphasizes how to record diagnoses‚ treatments‚ and patient histories effectively‚ ensuring clear communication between healthcare providers and compliance with medical standards. This knowledge is vital for ophthalmic scribes to excel in their roles.

Diagnosis and Treatment Overview

The ophthalmic scribe study guide PDF provides a detailed overview of how to document diagnoses and treatments accurately. It covers the use of diagnostic tools like OCT scans and visual field tests‚ as well as common treatment options such as topical medications‚ laser therapy‚ and surgical interventions. The guide emphasizes the importance of recording treatment responses and adjusting plans based on patient progress. By mastering this section‚ scribes can ensure clear communication between healthcare providers and accurate documentation of patient care‚ which is essential for effective treatment outcomes in ophthalmology. This knowledge is vital for both certification and real-world application.

Electronic Health Records (EHR)

The ophthalmic scribe study guide PDF highlights the importance of accurate EHR documentation‚ ensuring seamless communication and compliance with healthcare standards in ophthalmology practices.

Importance of Accurate Documentation

Accurate documentation in EHR is critical for patient care‚ legal compliance‚ and effective communication between healthcare providers. Errors in documentation can lead to misdiagnoses‚ inappropriate treatments‚ and legal consequences. The ophthalmic scribe study guide PDF emphasizes the need for precise and detailed records‚ ensuring clarity and consistency in patient data. Proper documentation also supports billing accuracy and maintains patient trust. By adhering to EHR best practices‚ ophthalmic scribes play a vital role in upholding high standards of care and operational efficiency in ophthalmology practices.

Best Practices for Using EHR Systems

Using EHR systems effectively requires adherence to best practices‚ such as standardizing terminology and ensuring real-time documentation. Regularly auditing records for accuracy and completeness is essential to maintain data integrity. Scribes should utilize built-in templates to streamline documentation while avoiding unnecessary autofill options that may lead to errors. Staying updated on EHR system updates and participating in training sessions can enhance proficiency. These practices not only improve efficiency but also ensure compliance with regulatory standards‚ making the ophthalmic scribe study guide PDF a valuable resource for mastering these skills.

The ophthalmic scribe study guide PDF equips aspiring scribes with essential skills and knowledge‚ ensuring success in this critical role and paving the way for certification.

Final Thoughts on Becoming a Successful Ophthalmic Scribe

Becoming a successful ophthalmic scribe requires dedication‚ continuous learning‚ and a strong foundation in ophthalmology. By mastering eye anatomy‚ terminology‚ and documentation practices‚ scribes can excel in their roles. staying updated on the latest medical advancements and EHR systems is crucial for delivering accurate and efficient patient care. The ophthalmic scribe study guide PDF serves as an invaluable resource‚ providing the knowledge and skills needed to thrive in this rewarding profession. With persistence and a commitment to excellence‚ aspiring scribes can achieve certification and make a meaningful impact in healthcare.

Additional Resources for Continued Learning

Beyond the ophthalmic scribe study guide PDF‚ there are numerous resources to enhance learning. Online courses‚ webinars‚ and professional organizations offer hands-on training and updates on the latest ophthalmology advancements; Flashcard sets and comprehensive study courses are excellent for reinforcing knowledge. Additionally‚ joining professional groups or forums provides networking opportunities and access to real-world insights. These resources ensure continuous improvement‚ helping scribes stay updated and proficient in their roles. By leveraging these tools‚ aspiring and experienced scribes can deepen their expertise and contribute effectively to patient care and medical documentation.

regirock raid guide

Regirock, the Rock-type Legendary Pokémon, is a challenging Raid Boss in Pokémon GO. This guide provides strategies, counters, and tips to help trainers succeed in defeating it;

1.1 Overview of Regirock in Pokémon GO Raids

Regirock, a Tier 5 Legendary Raid Boss, is known for its high CP of 42,768 and rock-solid defense. As a pure Rock-type, it’s vulnerable to Fighting, Ground, Steel, Water, and Grass moves. Appearing in both standard and Shadow Raids, Regirock challenges trainers with its durability. Coordination and powerful counters are essential for success. Its limited-time events and high demand make it a priority for many players seeking to add it to their collection.

1.2 Importance of Understanding Regirock’s Strengths and Weaknesses

Understanding Regirock’s strengths and weaknesses is crucial for raid success. Its high defense makes it a durable opponent, while its Rock-type moves can deal significant damage. Knowing its vulnerabilities to Fighting, Ground, Steel, Water, and Grass types allows trainers to select effective counters. This knowledge ensures efficient team composition and maximizes damage output, making it indispensable for both new and experienced players aiming to defeat Regirock efficiently.

Regirock’s Stats and Moveset

Regirock, a Rock-type Pokémon, has a CP of 42,768 and high defense. Its moves include Rock Throw, Stone Edge, and Earthquake, making it a formidable Tier 5 Raid Boss.

2.1 Regirock’s CP and Raid Boss Tier

Regirock is a Tier 5 Legendary Raid Boss with a CP of 42,768. Its high defense and Rock-type moves make it a challenging opponent. Trainers need strong counters like Fighting, Ground, or Water-type Pokémon to succeed. Shadow Regirock, with a CP of 35,300, is equally formidable, requiring coordinated team efforts. Its stats emphasize defense, making it a tough but rewarding target to defeat and capture.

2.2 Common Moves Regirock Uses in Raids

Regirock often uses Rock-type moves like Rock Throw and Stone Edge, which deal significant damage. It also utilizes Lock-On, a unique move that boosts its next attack, making it unpredictable. Additionally, Regirock can use Earthquake, a powerful Ground-type move. These moves, combined with its high defense, make Regirock a formidable opponent. Trainers must be prepared with counters that exploit its weaknesses to minimize damage and secure a victory.

Best Counters for Regirock Raids

The best counters for Regirock are strong Fighting, Ground, Steel, Water, and Grass-type Pokémon, such as Mega Lucario, Necrozma, Primal Groudon, and Shadow Groudon due to their effectiveness.

3.1 Type Effectiveness Against Regirock

Regirock, as a Rock-type Pokémon, is highly vulnerable to Fighting, Ground, Steel, Water, and Grass-type moves. These types deal super-effective damage, making them ideal for countering Regirock in raids. Its Rock typing also makes it resistant to Normal, Fire, Poison, Flying, and Bug-type attacks. Exploiting its weaknesses is crucial for maximizing damage output and ensuring a successful raid. Understanding its type effectiveness helps trainers choose the most effective Pokémon and moves for battle.

3.2 Top Pokémon to Use Against Regirock

Top picks include Mega Lucario, Primal Groudon, and Necrozma (Dusk Mane). Mega Lucario excels with Aura Sphere and Power-Up Punch, while Primal Groudon dominates with Precipice Blades and Earthquake. Water-types like Primal Kyogre and Grass-types such as Mega Sceptile also perform well. Shadow Groudon and Swampert are strong alternatives. Pairing these Pokémon with their respective powerful moves ensures maximum damage output against Regirock in raids.

3.3 Recommended Moves for Counters

Optimal moves for Regirock counters include Mega Lucario’s Aura Sphere and Power-Up Punch, Primal Groudon’s Precipice Blades and Earthquake, and Necrozma (Dusk Mane)’s Metal Claw and Sunsteel Strike. Swampert shines with Mud Shot and Hydro Pump, while Mega Sceptile excels with Razor Leaf and Leaf Blade. These moves exploit Regirock’s weaknesses, ensuring maximum damage output and increasing your team’s chances of success in raids.

Raid Strategy and Team Composition

Assemble a diverse team of 3-5 trainers, ensuring a mix of types and move sets. Coordinate strategies, focusing on synergy and dodging. Mega Evolutions can enhance damage output.

4.1 Ideal Number of Trainers Needed

Regirock Raids typically require a team of 3-5 trainers for success, depending on their Pokémon’s strength and move sets. While 3 skilled trainers can defeat it, having 6-8 ensures a safer and faster victory. Ensure your team includes a mix of Fighting, Ground, and Water-type counters to exploit Regirock’s weaknesses effectively.

4.2 Coordinating with Your Team for Success

Effective teamwork is crucial in Regirock Raids. Coordinate your attacks to maximize damage output while minimizing downtime. Ensure each trainer focuses on specific roles, such as dealing damage or providing support. Communication is key—use tools like Discord or in-game signals to synchronize strategies and guarantee a smooth victory against this formidable Raid Boss.

Catching Regirock

Use a Golden Razz Berry for the highest catch chance. Aim carefully and throw when Regirock is in a vulnerable state post-raid to secure a successful catch.

5.1 Best Berries to Use for Catching

Golden Razz Berries significantly increase catch rates, making them ideal for securing Regirock. Standard Razz Berries also help, while Pinap Berries can grant extra Candy if needed.

5.2 Tips for Successfully Catching Regirock

Catch Regirock by using Golden Razz Berries for higher success rates. Aim for excellent throws and use Pinap Berries for extra Candy. Ensure your team is well-prepared to weaken it first.

Shadow Regirock Raid Guide

Shadow Regirock is a formidable Raid Boss with high defense. Use Fighting, Ground, or Water-type Pokémon and coordinate with your team to secure a victory efficiently.

6.1 Differences in Shadow Regirock’s Stats

Shadow Regirock boasts a max CP of 3,530, with a stat distribution of 179 ATK, 309 DEF, and 190 STA. Compared to its regular form, it has lower CP but retains high defense, making it a tanky Raid Boss. Its stats emphasize endurance over offensive power, requiring trainers to focus on exploiting its weaknesses effectively during battles. This shadow variant remains a formidable challenge due to its defensive capabilities and stamina.

6.2 Strategies for Defeating Shadow Regirock

Shadow Regirock’s high defense makes it durable, requiring focused strategies. Use Fighting, Ground, Grass, Steel, or Water-type Pokémon like Mega Lucario or Necrozma. Mega Evolutions and Shadow Pokémon boost your team’s offensive power. Coordinate with allies to maximize damage output and minimize downtime. Utilize high-DPS moves such as Aura Sphere or Mud Shot to exploit its weaknesses effectively. Team composition and move selection are key to overcoming its resilience.

Role of Mega Evolutions in Regirock Raids

Mega Evolutions significantly boost your Pokémon’s power, offering a strategic advantage. Mega Lucario and Mega Sceptile shine with enhanced movesets, dealing massive damage and exploiting Regirock’s weaknesses effectively in raids.

7.1 Best Mega Pokémon to Use Against Regirock

The top Mega Pokémon to counter Regirock include Mega Lucario (Fighting/Steel) with Aura Sphere and Power-Up Punch, and Mega Sceptile (Grass/Dragon) with Solar Beam. Both exploit Regirock’s vulnerabilities effectively. Additionally, Primal Groudon (Ground) and Primal Kyogre (Water) are excellent choices, offering strong type advantages. These Mega Evolutions significantly boost damage output, making them indispensable in raids against Regirock.

7.2 How Mega Evolutions Impact the Raid

Mega Evolutions drastically enhance raid performance against Regirock by boosting type effectiveness and dealing massive damage. They also provide valuable buffs to allies, improving overall team synergy. Their high CP and powerful moves make them crucial for securing victories, especially in challenging raids. Utilizing Mega Pokémon like Lucario or Groudon can turn the tide, ensuring a successful battle against this formidable Rock-type Legendary.

Shadow Pokémon in Regirock Raids

Shadow Pokémon offer significant attack boosts but lower defense, making them high-risk, high-reward options. Their power can be crucial in defeating Regirock, though careful team coordination is essential.

8.1 Using Shadow Pokémon as Counters

Shadow Pokémon can be powerful counters in Regirock Raids due to their increased attack power. Shadow Groudon, with its high defense and Ground-type moves, is a top choice. Similarly, Shadow Tyranitar and Shadow Metagross excel with their Fighting- and Steel-type attacks. Mega Gyarados (Shadow) also performs well with its Water-type moves. These Shadow Pokémon can deal massive damage but require careful strategy due to their lower defense stats.

8.2 Benefits and Risks of Shadow Pokémon

Shadow Pokémon offer higher attack power, making them formidable against Regirock. However, their lower defense and HP can make them fragile in prolonged battles. While they excel at dealing damage, their vulnerability requires strategic use. Trainers must weigh the benefits of increased damage output against the risks of potential faints, ensuring proper team support and move selection to maximize their effectiveness in Raids.

Raid Availability and Timing

Regirock Raids are periodically available, typically during weekends in May and limited-time events. These events often feature Shadow Regirock, offering unique challenges and rewards.

9.1 When Regirock Raids Typically Occur

Regirock Raids commonly take place during weekends in May, as part of special events. These Raids are often featured as Shadow Raids, offering a chance to battle and catch Shadow Regirock. Additionally, limited-time events, such as the Ancient Recovered events, include Regirock alongside other Regi Pokémon, making these periods ideal for encountering it. Trainers should stay alert during these times to participate.

9.2 Limited-Time Events Featuring Regirock

Regirock often appears in limited-time events, such as the “Ancient Recovered” event in June 2023, featuring Regirock alongside other Regi Pokémon. Shadow Regirock was also highlighted in May 2025 Shadow Raids. Additionally, events like the “Regi Unveiled” event in May 2024 brought Regirock back to Raids, offering unique opportunities to battle and catch it. These events often coincide with the introduction of new Mega Evolutions or Shadow Pokémon, enhancing the challenge and excitement for trainers.

Advanced Tips for Experienced Trainers

For experienced trainers, leveraging Mega Evolutions, coordinating team moves, and optimizing damage output are key to efficiently defeating Regirock in high-level raids.

10.1 Maximizing Damage Output

To maximize damage output against Regirock, focus on using Mega Evolutions like Mega Lucario or Primal Groudon, and Shadow Pokémon with high attack stats. Ensure your team coordinates moves to exploit Regirock’s weaknesses, primarily Fighting, Ground, and Steel types. Use super effective moves like Aura Sphere or Mud Shot to deal significant damage. Dodging Regirock’s powerful attacks is crucial to maintain your Pokémon’s health and stamina, allowing for sustained pressure. Pair these strategies with the right berries to secure a successful catch post-battle.

10.2 Minimizing Damage Taken

To minimize damage taken during Regirock Raids, prioritize using tanky Pokémon with high defense stats, such as Shadow Swampert or Tyranitar. Utilize defensive moves like Protect or Substitute to buy time for your team to heal or reposition. Additionally, Mega Evolutions like Mega Lucario can provide aura sphere buffs to your team while maintaining offensive pressure. Coordinate with your team to stagger attacks and reduce incoming damage, ensuring sustained pressure without sacrificing Pokémon health. Using berries or potions strategically can also help sustain your team throughout the battle.

Mastering Regirock Raids requires understanding its strengths, using optimal counters, and coordinating with your team. Prepare thoroughly and stay adaptable for future encounters in Pokémon GO’s evolving meta.

11.1 Final Thoughts on Mastering Regirock Raids

Defeating Regirock requires a strategic approach, leveraging its weaknesses and utilizing powerful counters. By understanding its moveset and coordinating with your team, you can overcome this formidable Raid Boss. Stay updated with the latest Pokémon GO trends and adapt your strategies to ensure success in future encounters with this legendary Rock-type Pokémon.

11.2 Preparing for Future Regirock Encounters

Stay prepared for future Regirock Raids by strengthening your team with top counters like Mega Lucario and Necrozma. Regularly update your Pokémon’s movesets and consider Mega Evolutions for added power. Participate in daily Raid Hours and limited-time events to maximize your chances of encountering Regirock. Keep an eye on Pokémon GO’s event calendar to anticipate its return and plan your strategy accordingly for success.

PDF

d12 bus schedule pdf

The D12 bus schedule is a crucial resource for planning efficient travel, offering detailed timetables, route maps, and accessibility features to ensure seamless public transportation experiences.

1.1 Overview of the D12 Bus Route

The D12 bus route provides essential connectivity across key neighborhoods, including LeDroit Park and Bloomingdale, offering routes along Florida Avenue and downtown access via the G8 line. Designed for efficiency, the route ensures passengers can plan journeys effectively, with the PDF schedule detailing stops and frequencies. Accessibility features, such as those outlined in the Title VI Program, ensure equal access for all riders, making the D12 a vital transportation option.

1.2 Importance of the D12 Bus Schedule PDF

The D12 Bus Schedule PDF is a vital resource for passengers, offering a clear and accessible format to plan trips efficiently. It provides detailed timetables, route maps, and service alerts, ensuring riders stay informed. Available for download online or offline, the PDF enables seamless access to essential travel information, making it indispensable for both regular commuters and occasional users. Its comprehensive details help in navigating the route effectively, ensuring a smooth and timely journey for all passengers.

How to Access the D12 Bus Schedule PDF

The D12 Bus Schedule PDF is easily accessible online through official transit websites or offline at local transit stations and customer service centers.

2.1 Online Platforms for Downloading the Schedule

Access the D12 Bus Schedule PDF via official transit websites, such as SamTrans or local transportation portals, ensuring up-to-date and accurate information for efficient travel planning.

2.2 Offline Methods to Obtain the Schedule

Offline access to the D12 Bus Schedule PDF is available through printed copies at local transit offices, community centers, or libraries. Additionally, some organizations provide printed versions upon request, ensuring accessibility for those without internet access. This method is ideal for passengers preferring physical copies for easy reference during travel planning.

Key Information in the D12 Bus Schedule

The D12 Bus Schedule includes detailed timetables, route maps, and accessibility features, ensuring passengers can plan their journeys efficiently and access essential travel information.

3.1 Timetable Details and Frequency

The D12 Bus Schedule provides precise departure and arrival times, frequency of service during peak and off-peak hours, and special schedules for weekends or holidays. This ensures passengers can plan their trips accurately. Detailed timetables are organized by direction and time of day, making it easy to track bus arrivals and plan connections. Regular updates are made to reflect any changes in service frequency or timing.

3.2 Route Map and Stops

The D12 bus schedule includes a detailed route map, highlighting all stops along the journey. This map provides a clear visual representation of the bus route, helping passengers identify key locations and plan their travel. Stops are listed in order, with corresponding timetable information to ensure easy navigation. The route map also indicates major landmarks and transfer points, making it easier for riders to connect to other services if needed.

Planning Your Journey with the D12 Schedule

The D12 schedule helps you plan efficiently by understanding the timetable layout and using the route map to identify stops and connections, ensuring smooth travel experiences.

4.1 Understanding the Timetable Layout

The D12 timetable is structured to show departure times, stops, and travel duration, arranged in a grid format. Each row represents a specific bus trip, while columns denote time points and destinations. This layout allows passengers to quickly identify the best route and timing for their journey, ensuring efficient planning and minimizing delays. The clear organization helps users navigate the schedule with ease.

4.2 Tips for Efficient Travel Planning

  • Plan Ahead: Review the D12 timetable in advance to identify the most convenient departure times and stops.
  • Check Service Alerts: Stay informed about any schedule changes or disruptions to avoid unexpected delays.
  • Use Route Maps: Familiarize yourself with the route map to navigate efficiently and transfer between lines if needed.
  • Set Reminders: Use digital tools to set alerts for your scheduled bus times, ensuring you never miss a departure.

Accessibility and Compliance

The D12 bus schedule adheres to accessibility standards, ensuring equal access for all passengers, including those with disabilities, in compliance with Title VI regulations and ADA guidelines.

5;1 Title VI Program and Equal Access

The D12 bus schedule complies with the Title VI Program, ensuring equal access to public transportation for all individuals regardless of race, color, or national origin. This program mandates that transit agencies provide equitable services, including language accessibility and non-discriminatory practices, to create an inclusive environment for all passengers. By adhering to these federal guidelines, the D12 bus service promotes fairness and equality in transportation services.

5.2 Special Services for Passengers with Disabilities

The D12 bus schedule incorporates special services for passengers with disabilities, ensuring accessible and inclusive travel options. Features include wheelchair-accessible buses, priority seating areas, and audible announcements. Additionally, the schedule provides information on assistive services and accommodations, such as ramps and securement systems for mobility devices. These services aim to enhance the travel experience for all passengers with disabilities, promoting independence and ease of use throughout the journey.

Service Alerts and Updates

Stay informed about service changes, disruptions, and updates through SMS alerts, mobile apps, or website notifications to plan your D12 bus journey efficiently and avoid delays.

6.1 How to Stay Informed About Schedule Changes

To stay updated on D12 bus schedule changes, passengers can subscribe to SMS alerts, download the official transit app, follow social media updates, or visit the official transit website for real-time information and service notifications, ensuring they are always informed about any disruptions or adjustments to the schedule.

6.2 Impact of Service Alerts on Your Journey

Service alerts can significantly impact your travel plans by causing delays, detours, or even route cancellations. Stay informed to adjust your commute accordingly, as unexpected changes may require alternative routes or longer travel times. Always check for the latest updates before your trip to avoid disruptions and ensure a smooth journey, especially during peak hours or special events.

Future Changes to the D12 Bus Schedule

Future modifications to the D12 bus schedule may include new stops or adjusted timetables to enhance service efficiency and better serve the community’s needs.

7.1 Upcoming Adjustments to the Route

The D12 bus route may undergo modifications to optimize service efficiency and accommodate growing passenger needs. These changes could include adding new stops or realigning existing routes based on rider feedback and population growth. The adjustments aim to improve connectivity and reduce travel times. Passengers are encouraged to check the latest D12 bus schedule PDF for updates and plan their journeys accordingly to adapt to the new route configurations.

7.2 Public Feedback and Its Role in Schedule Updates

Public feedback plays a vital role in shaping the D12 bus schedule updates. Passengers’ opinions, gathered through surveys, community meetings, and online portals, help identify service gaps and improve route efficiency. This collaborative approach ensures the schedule aligns with community needs, enhancing overall travel experiences. Regular reviews of feedback enable transit authorities to make data-driven adjustments, ensuring the D12 bus schedule remains responsive and user-friendly for all passengers.

Contact Information and Support

For inquiries or assistance, contact the San Mateo County Transit District at (800) 660-4287, email customer.service@samtrans.com, or visit their office at 1250 San Carlos Ave, San Carlos, CA.

8.1 Customer Service for Schedule-Related Queries

For schedule-related inquiries, contact SamTrans Customer Service at (800) 660-4287 or via email at customer.service@samtrans.com. Representatives are available Monday-Friday, 7:00 AM to 7:00 PM, to assist with trip planning, route information, and PDF downloads. Visit their website for additional resources or to submit feedback through the online contact form.

8.2 Reporting Issues or Suggestions

To report issues or provide suggestions regarding the D12 bus schedule, contact SamTrans Customer Service via email at customer.service@samtrans.com or call (800) 660-4287. You can also submit feedback through their website using the online contact form. Include details about your experience, such as the date, time, and route, to help them address your concerns effectively. Your input aids in improving the overall service quality and schedule accuracy.

PDF

find missing side when given perimeter worksheet pdf

Learning to find missing sides using perimeter worksheets is essential for geometry skills. These exercises help students calculate unknown side lengths when the total perimeter is given, enhancing problem-solving abilities and understanding of shape properties.

1.1 Understanding the Importance of Perimeter in Geometry

The perimeter is a fundamental concept in geometry, representing the total length around a shape. It is crucial for solving problems involving missing sides, as it provides the total length to work with. Understanding perimeter helps in calculating unknown side lengths, enhancing spatial awareness, and applying mathematical skills to real-world scenarios. Mastering perimeter concepts is essential for progressing in geometry and tackling more complex shapes and calculations.

1.2 Benefits of Using Worksheets for Learning

Worksheets provide an interactive and structured way to practice finding missing sides. They offer clear problems and solutions, making learning hands-on and engaging. Regular practice with worksheets helps students master perimeter calculations, build confidence, and develop problem-solving skills. These resources cater to different learning paces, ensuring a thorough understanding of geometry concepts and their practical applications.

Rectangles and Missing Sides

Rectangles and their properties are fundamental in geometry. Worksheets focus on finding missing sides using the perimeter, helping students understand the relationship between side lengths and total perimeter.

2;1 Calculating the Missing Side of a Rectangle

To find the missing side of a rectangle when the perimeter is given, use the formula: perimeter = 2 × (length + width). If one side is unknown, rearrange the formula to solve for the missing side. For example, if the perimeter is 20 and the length is 5, the width can be calculated as (20 ⎯ 2 × 5) / 2 = 5. This method ensures accurate results and strengthens understanding of rectangular properties.

2.2 Understanding Opposite Sides in Rectangles

In rectangles, opposite sides are equal, meaning the length of one side is the same as the length of the side directly across from it. This property simplifies finding missing sides when the perimeter is known. By recognizing that opposite sides are equal, students can use the known side lengths to calculate the missing ones efficiently, ensuring accurate results in perimeter-related problems.

Triangles and Missing Sides

Finding missing sides in triangles involves using the perimeter and applying the triangle inequality theorem to determine unknown lengths accurately, an essential skill in geometry.

3.1 Calculating the Missing Side of a Triangle

To find the missing side of a triangle when the perimeter is given, subtract the sum of the two known sides from the total perimeter. This method works for all triangles, whether equilateral, isosceles, or scalene. Ensure the calculated side length adheres to the triangle inequality theorem, which states that the sum of any two sides must exceed the third. This approach is widely used in worksheets and real-world applications to solve for unknown side lengths efficiently.

3.2 Applying the Triangle Inequality Theorem

The Triangle Inequality Theorem states that the sum of any two sides must exceed the third side. When finding a missing side using the perimeter, subtract the known sides from the perimeter. Ensure the calculated side satisfies the theorem: a + b > c, a + c > b, and b + c > a. This verification ensures the sides form a valid triangle, crucial for accurate geometry solutions.

Irregular Shapes and Missing Sides

Irregular shapes add complexity. Given the perimeter, students find the missing side by subtracting known sides, enhancing their understanding of polygon properties and spatial reasoning.

4.1 Calculating the Missing Side of Irregular Shapes

Calculating the missing side of irregular shapes involves summing all known sides and subtracting from the total perimeter. This method applies to any polygon, ensuring accuracy and understanding of perimeter concepts through practical exercises.

4.2 Analyzing Different Types of Polygons

Analyzing polygons involves understanding their sides, angles, and symmetry. Regular polygons, like squares, have equal sides and angles, simplifying calculations. Irregular polygons, with varying side lengths, require careful measurement or calculation of missing sides using the perimeter. This skill enhances problem-solving abilities and geometric understanding, preparing students for complex shape analysis.

A Step-by-Step Guide to Finding Missing Sides

Start by identifying known side lengths and the total perimeter. Subtract the sum of known sides from the perimeter to find the missing side. Apply this method to various shapes like rectangles and triangles, ensuring accuracy in calculations. This approach simplifies solving real-world problems involving perimeters and missing side lengths.

5.1 Using Perimeter Formulas for Different Shapes

For rectangles, the perimeter formula is ( P = 2 imes (length + width) ). Given the perimeter, subtract the known sides to find the missing one. For triangles, the perimeter is the sum of all three sides, so subtracting the two known sides from the total gives the missing length. For irregular shapes, sum the known sides and subtract from the perimeter to determine the missing side. These formulas provide a clear pathway for solving problems involving perimeters and missing sides across various shapes.

5.2 Solving Real-World Problems with Missing Sides

Real-world problems often involve finding missing sides when the perimeter is known, such as in construction or crafting. By understanding perimeter formulas for different shapes, you can apply these principles to solve practical issues. For example, if building a fence, knowing the total perimeter and some side lengths allows you to determine the missing side, ensuring accurate material measurements. This skill enhances problem-solving abilities and real-world application of geometric concepts.

Worksheets for Practicing Missing Side Problems

Worksheets offer targeted practice for finding missing sides using perimeter. They include various shapes like rectangles, triangles, and irregular polygons, helping students master the concept effectively.

6.1 Finding the Missing Side in Rectangles

Worksheets focus on rectangles, where opposite sides are equal. Students use the perimeter formula P = 2(length + width) to find missing sides. Given the perimeter and one side, they solve for the unknown side. These exercises enhance understanding of perimeter calculations and problem-solving skills, essential for geometry. Regular practice helps students master the concept of missing sides in rectangles efficiently.

6.2 Finding the Missing Side in Triangles

Worksheets often include triangle problems where students calculate the missing side using the perimeter. Given two sides, the third can be found by subtracting their sum from the total perimeter. For example, if a triangle has sides of 5 and 6 units and a perimeter of 15 units, the missing side is 4 units. This exercise helps students understand perimeter calculations and ensures they grasp the triangle inequality theorem, which states that the sum of any two sides must exceed the third. Regular practice with these problems reinforces geometric principles and enhances problem-solving skills.

6.3 Finding the Missing Side in Irregular Shapes

Finding the missing side of irregular shapes involves calculating the total perimeter and subtracting the sum of the known sides. For example, if an irregular shape has sides of 4, 5, and 7 units, and a perimeter of 20 units, the missing side is 4 units (20 ⎯ 4 ⎯ 5 ⏤ 7 = 4). These exercises help students develop spatial reasoning and problem-solving skills, especially with complex shapes. Worksheets often include visual aids to simplify the process, making it easier for learners to grasp the concept and apply it to real-world scenarios.

Practical Applications of Finding Missing Sides

Finding missing sides is useful in real-world scenarios like fencing, construction, and landscaping. Knowing the perimeter helps calculate materials needed, ensuring projects are completed efficiently and accurately.

7.1 Real-World Scenarios Involving Perimeter Calculations

Perimeter calculations are vital in construction, landscaping, and fencing. For example, knowing the total perimeter allows professionals to determine missing side lengths, ensuring accurate material measurements. This skill is essential for projects like building fences or creating rectangular gardens, where precise planning prevents waste and ensures efficiency. Such practical applications highlight the importance of mastering perimeter-based problem-solving in various professions.

7.2 Enhancing Problem-Solving Skills

Practicing with perimeter worksheets sharpens logical thinking and mathematical reasoning. By solving for missing sides, students develop the ability to apply formulas accurately and think critically about shape properties. These exercises build confidence and prepare learners for more complex geometry challenges, fostering a strong foundation in problem-solving that extends beyond academics into real-world applications.

Common Mistakes to Avoid

Common mistakes include incorrect arithmetic when calculating missing sides and misapplying perimeter formulas. Always double-check calculations and ensure all sides are accounted for accurately.

8.1 Misapplying Formulas

One common mistake is misapplying perimeter formulas, especially for irregular shapes or polygons. Students often confuse formulas for different shapes or forget to account for all sides. For example, using a triangle’s perimeter formula for a rectangle leads to incorrect results. Always ensure the correct formula is applied based on the shape type. Double-checking calculations and formulas is crucial to avoid errors in finding missing sides.

8.2 Not Considering All Sides

A frequent error is neglecting to consider all sides of a shape when calculating the perimeter. For irregular polygons, this is particularly common, as students may overlook one or more sides. Always count and verify each side’s length before solving. Missing a side leads to incorrect perimeter calculations and wrong answers for the missing side length. Ensure all sides are accounted for to achieve accurate results in your worksheets.

Educational Resources and Tools

Explore a variety of worksheets, PDFs, and online platforms designed to help students practice finding missing sides using perimeter calculations. These tools offer comprehensive exercises and interactive learning experiences to enhance geometry skills.

9.1 Recommended Worksheets and PDFs

Discover a variety of worksheets and PDFs tailored for practicing missing side problems. These resources, designed for different grade levels, offer exercises with clear instructions and visual aids. Many include answer keys for easy grading and self-checking. Customize templates to suit learning needs, with options for rectangles, triangles, and irregular shapes. Access these tools through educational websites, ensuring comprehensive practice for students mastering perimeter calculations.

9.2 Online Tools for Practice

Enhance learning with interactive online tools designed for practicing missing side problems. Websites like EffortlessMath.com and Corbettmaths.com offer interactive calculators, video tutorials, and customizable exercises. These resources provide immediate feedback, helping students identify mistakes. Many tools feature visual aids and step-by-step solutions, making complex concepts easier to grasp. Utilize these platforms to reinforce skills and gain confidence in calculating perimeters and missing side lengths effectively.

Mastery of finding missing sides using perimeter worksheets enhances geometry skills. Regular practice with PDF resources and online tools fosters problem-solving abilities and solidifies understanding of shape properties.

10.1 Summary of Key Concepts

Mastering the calculation of missing sides in shapes using perimeter worksheets is crucial for geometry proficiency; By understanding perimeter formulas and applying them to rectangles, triangles, and irregular polygons, students develop essential problem-solving skills. Regular practice with PDF worksheets and online tools reinforces these concepts, ensuring a strong foundation in shape properties and real-world applications.

10.2 Encouragement for Further Practice

Consistent practice with perimeter worksheets is key to mastering missing side calculations. Encourage students to explore various shapes and problems, gradually increasing difficulty; Utilize PDF resources and online tools for interactive learning. Celebrate progress and emphasize the importance of persistence. As skills improve, introduce real-world applications to highlight the practical value of their knowledge. Keep practicing, and soon finding missing sides will become second nature!

References

Recommended resources include EffortlessMath.com, Corbettmaths.com, and Grade 3 Geometry Worksheets. These provide PDFs, exercises, and video tutorials for mastering missing side calculations and perimeter problems.

11.1 Suggested Reading and Resources

For further practice, explore EffortlessMath.com and Corbettmaths.com. These sites offer comprehensive worksheets and video tutorials on finding missing sides. Additionally, “Perimeter and Missing Sides in Rectangles and Triangles” worksheets provide targeted exercises. PDF resources include “Grade 3 Geometry Worksheet” and “Area and Perimeter Problems.” These tools cater to various skill levels, ensuring a robust understanding of perimeter calculations and missing side problems.