Archive: March 28, 2024

PDF

filetype:pdf birds of north america zim

North America is home to an extraordinary diversity of bird species‚ with over 2‚000 species documented‚ each adapted to unique habitats‚ from arctic tundras to tropical wetlands.

1.1 Overview of Bird Species and Their Distribution

North America hosts over 2‚000 bird species‚ distributed across diverse habitats‚ from Arctic tundras to tropical wetlands. Field guides like The Sibley Field Guide to Birds of Eastern North America and The Golden Guide to Birds of North America by Robbins‚ Bruun‚ and Zim provide detailed insights. Species like cavity-nesting birds‚ with 85 types in North America‚ highlight the region’s avian richness‚ adapting to forests‚ grasslands‚ and coastal areas‚ with distributions varying by season and geography.

1.2 The Importance of Bird Diversity in Ecosystems

Birds play a vital role in maintaining ecological balance‚ serving as pollinators‚ seed dispersers‚ and pest controllers. Their diversity ensures healthy ecosystems‚ with species like cavity-nesting birds contributing to forest regeneration. Birds also act as indicators of environmental health‚ reflecting habitat quality and climate change impacts. Protecting bird diversity is essential for preserving ecosystem services and biodiversity‚ as their loss could disrupt nutrient cycles‚ forest growth‚ and predator-prey dynamics across North America.

Cavity-Nesting Birds of North America

North America hosts 85 cavity-nesting bird species‚ primarily inhabiting forests‚ with 72 species in the western U.S. These birds are crucial for forest ecosystems and biodiversity.

2.1 Characteristics and Habitat Requirements

Cavity-nesting birds in North America rely on tree cavities or nesting boxes for breeding. They are primarily found in forested areas‚ requiring specific tree conditions like snags or dead branches. These birds play a vital role in forest ecosystems‚ contributing to seed dispersal and insect control. Their habitat needs vary‚ but they often depend on mature trees with suitable cavities. Land managers increasingly recognize the importance of preserving such habitats.

2.2 Role in Forest Ecosystems and Population Trends

Cavity-nesting birds are crucial for forest ecosystems‚ aiding in seed dispersal and insect control. They often create nesting sites used by other species‚ enhancing biodiversity. With 85 species in North America‚ their populations are closely tied to forest health. Conservation efforts focus on habitat preservation‚ as loss and climate change threaten these birds. Monitoring reveals declining trends in some areas‚ emphasizing the need for sustainable forest management.

Field Guides for Bird Identification

Essential tools for birders‚ field guides like The Sibley Field Guide and The Golden Guide provide detailed species accounts‚ vibrant illustrations‚ and range maps for accurate identification.

3.1 The Sibley Field Guide to Birds of Eastern North America

The Sibley Field Guide to Birds of Eastern North America‚ authored by David A. Sibley‚ is a compact yet comprehensive resource for identifying bird species in the region. First published in 2003‚ it offers detailed descriptions‚ range maps‚ and exquisite illustrations‚ making it indispensable for birders. Its smaller format enhances portability while maintaining the depth of information from Sibley’s broader North American guide‚ ensuring accuracy and accessibility for enthusiasts and experts alike.

3.2 The Golden Guide to Birds of North America by Robbins‚ Bruun‚ and Zim

The Golden Guide to Birds of North America‚ co-authored by Robbins‚ Bruun‚ and Zim‚ is a seminal work renowned for its detailed descriptions and vibrant illustrations. First published in 1966‚ it remains a trusted resource‚ offering comprehensive insights into North America’s avifauna. The guide’s user-friendly format‚ including color-coded range maps and Jim Coe’s exceptional artwork‚ makes it a favorite among bird enthusiasts‚ blending scientific accuracy with accessibility for both novices and experienced birders.

Birds of North America: Ecological Roles

Birds play crucial roles as pollinators‚ seed dispersers‚ and pest controllers‚ while also serving as indicators of environmental health‚ vital for maintaining ecological balance.

4.1 Pollinators‚ Seed Dispersers‚ and Pest Controllers

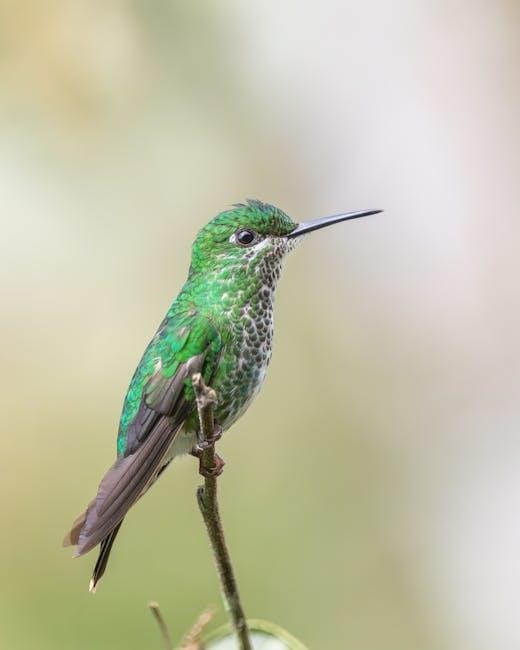
Birds significantly contribute to ecosystems by pollinating plants‚ dispersing seeds‚ and controlling insect populations. Hummingbirds‚ for instance‚ aid pollination‚ while cavity-nesting birds like woodpeckers regulate pest numbers‚ ensuring forest health and biodiversity.

4.2 Birds as Indicators of Environmental Health

Birds serve as vital indicators of environmental health‚ reflecting changes in ecosystems due to pollution‚ climate change‚ and habitat loss. Declines in cavity-nesting birds‚ for example‚ signal broader forest ecosystem challenges. Their sensitivity to environmental shifts makes them crucial for monitoring and understanding ecological balance‚ aiding in early detection of threats and guiding conservation strategies to protect biodiversity.

Conservation Efforts for North American Birds

Conservation efforts focus on habitat restoration‚ protection programs‚ and sustainable land management to safeguard bird populations. Field guides like Zim’s aid in identifying species‚ supporting informed conservation practices.

5.1 Habitat Management and Protection Programs

Habitat management and protection programs are crucial for preserving bird populations. These initiatives focus on restoring and maintaining ecosystems‚ such as forests and wetlands‚ to support biodiversity. Land managers play a key role in implementing practices that ensure sustainable habitats for cavity-nesting birds and other species. Such efforts help maintain ecological balance and protect vulnerable bird populations from habitat loss and environmental changes.

5.2 Challenges in Conserving Cavity-Nesting Birds

Habitat loss‚ climate change‚ and competition for nesting sites pose significant challenges for cavity-nesting birds. Human activities‚ such as logging and urbanization‚ reduce tree cavities‚ impacting breeding and survival. Additionally‚ invasive species and predators threaten these birds. Conservation efforts must address these factors to protect vulnerable populations and ensure the long-term sustainability of cavity-nesting bird species in North America.

The Impact of Climate Change on Bird Populations

Rising temperatures alter migration patterns‚ disrupt breeding cycles‚ and reduce food availability‚ threatening North America’s bird populations’ survival and biodiversity.

6.1 Shifts in Migration Patterns and Breeding Habits

Climate change is altering the timing of bird migrations and breeding cycles‚ with many species arriving earlier at breeding grounds due to rising temperatures. This shift disrupts synchronization with food sources‚ leading to reduced reproductive success. Some birds adapt by adjusting their migration routes or nest initiation‚ while others struggle to cope‚ facing habitat mismatches and increased competition. These changes threaten population stability and biodiversity across North America.

6.2 Vulnerability of Specific Species to Environmental Changes

Certain bird species in North America are particularly vulnerable to environmental shifts‚ such as rising temperatures and habitat loss. Species like the Northern Saw-whet Owl and Eastern Black Rail face threats from shrinking habitats and altered prey distributions. Temperature increases disrupt food webs‚ affecting insectivorous birds‚ while sea-level rise endangers coastal nesting species. These vulnerabilities highlight the urgent need for targeted conservation efforts to protect at-risk populations and their ecosystems.

Bird Migration Patterns in North America

North America hosts intricate bird migration patterns‚ with species traveling across vast distances seasonally‚ influenced by environmental changes and habitat availability‚ showcasing remarkable adaptability and endurance.

7.1 Key Migration Routes and Stopover Sites

North America’s bird migration routes include the Pacific‚ Central‚ and Atlantic Flyways‚ with critical stopover sites like the Gulf Coast‚ Chesapeake Bay‚ and Prairie Potholes providing essential resting and feeding grounds for millions of birds annually‚ ensuring their survival during long-distance journeys between breeding and wintering habitats.

7.2 Adaptations for Long-Distance Migration

Birds migrating across North America exhibit remarkable adaptations‚ including stored fat reserves for energy‚ efficient metabolic rates‚ and innate navigational abilities using celestial cues and Earth’s magnetic fields. Many species also synchronize their migrations with seasonal changes to optimize food availability and breeding success‚ while flocking behavior reduces predation risks and enhances flight efficiency during their arduous journeys.

Birding as a Hobby and Its Contributions to Science

Birding has evolved from a hobby into a vital tool for scientific research‚ with enthusiasts contributing to species identification‚ population monitoring‚ and conservation efforts through citizen science projects.

8.1 The Role of Citizen Science in Bird Conservation

Citizen science plays a crucial role in bird conservation by engaging enthusiasts in data collection‚ monitoring populations‚ and studying habitat health. Programs like FeederWatch and Breeding Bird Surveys rely on volunteers to gather data‚ which informs conservation strategies. These efforts enhance public awareness and foster collaboration between amateur birders and professional researchers‚ ultimately aiding in the protection of species and ecosystems.

8.2 Popular Birding Destinations in North America

North America boasts iconic birding destinations‚ such as the Gulf Coast‚ Cape May‚ and the Rio Grande Valley‚ known for their rich avian diversity and migratory hotspots. These regions attract enthusiasts due to their unique ecosystems and seasonal bird concentrations. The Sibley and Golden Guides highlight these areas‚ offering insights into spotting rare species and understanding their habitats‚ making them essential stops for both novice and experienced birders.

Managing Forest Lands for Bird Habitats

Sustainable forest practices‚ such as selective logging and reforestation‚ are crucial for maintaining bird habitats. These methods ensure nesting sites and food sources are preserved‚ supporting biodiversity.

9.1 Practices for Supporting Cavity-Nesting Birds

Conservation efforts for cavity-nesting birds focus on preserving dead trees and installing nest boxes. These practices provide critical nesting sites‚ as many species rely on tree cavities for reproduction. Land managers often retain deadwood during forestry operations to maintain habitat diversity. Additionally‚ sustainable logging practices and reforestation projects help ensure the long-term survival of these birds by restoring their natural environments.

9.2 Balancing Forestry and Wildlife Conservation

Forestry and wildlife conservation must coexist to protect cavity-nesting birds. Selective logging and reforestation ensure forest regeneration while preserving habitats. Certification programs‚ like the Forest Stewardship Council‚ promote sustainable practices. By maintaining old-growth forests and diversifying tree species‚ ecosystems remain resilient‚ supporting both industry and biodiversity. These balanced approaches safeguard cavity-nesting birds and other wildlife‚ ensuring long-term ecological health.

The Cultural and Historical Significance of Birds

Birds have inspired art‚ folklore‚ and spirituality across North America‚ symbolizing freedom and beauty. Indigenous cultures and early settlers relied on birds for sustenance and cultural symbolism.

10.1 Birds in Art‚ Literature‚ and Indigenous Cultures

Birds have long been celebrated in art‚ literature‚ and Indigenous cultures across North America‚ symbolizing freedom‚ beauty‚ and spiritual connection. Indigenous peoples often depicted birds in storytelling and rituals‚ while European settlers documented them in ornithological works like The Birds of America by John James Audubon. Eagles‚ doves‚ and ravens hold symbolic meanings‚ reflecting the deep cultural and historical significance of birds in shaping human identity and creativity.

10.2 The Legacy of Bird Conservation in North America

Bird conservation in North America has a rich legacy‚ marked by significant milestones like the Migratory Bird Treaty Act of 1918 and the Endangered Species Act of 1973. These efforts have protected critical habitats and restored populations of iconic species such as the Bald Eagle and Whooping Crane. Organizations like the Audubon Society have championed these causes‚ while public awareness campaigns have fostered a culture of stewardship‚ ensuring birds continue to thrive for future generations.

multi mile trail guide hlt

Overview of the Trail Guide HLT

The Trail Guide HLT is a versatile all-season tire designed for CUVs‚ SUVs‚ light trucks‚ and vans‚ offering year-round traction and a 50‚000-mile warranty.

The Trail Guide HLT is a high-quality‚ all-season tire designed for drivers seeking reliability and performance across various road conditions. Engineered for use on CUVs‚ SUVs‚ light trucks‚ and vans‚ this tire excels in providing consistent traction and durability. Its robust design ensures excellent grip on both paved highways and light off-road surfaces‚ making it a versatile choice for everyday driving and adventures alike. The Trail Guide HLT is built to deliver long-lasting performance‚ with features that enhance stability‚ comfort‚ and fuel efficiency. Whether navigating city streets or exploring rugged trails‚ this tire is crafted to meet the demands of modern drivers‚ offering a balance of strength and agility for a smooth‚ confident ride.

1.2 Key Features and Benefits

The Trail Guide HLT stands out for its exceptional all-season traction‚ ensuring stability on diverse surfaces‚ from dry highways to wet or light off-road conditions. Designed with durability in mind‚ it features a robust tread compound and reinforced construction for extended lifespan. One of its key benefits is its versatility‚ making it suitable for CUVs‚ SUVs‚ light trucks‚ and vans. Drivers also appreciate its quiet ride and fuel efficiency‚ enhancing overall driving comfort. With a 50‚000-mile warranty‚ the Trail Guide HLT offers peace of mind and long-term value. Its balanced performance and reliability make it an excellent choice for both daily commuting and adventure seekers‚ providing a cost-effective solution without compromising on quality or performance.

Design and Construction

The Trail Guide HLT features an optimized tread pattern with advanced rubber compounds‚ reinforced sidewalls‚ and a symmetric design for enhanced durability and performance.

2.1 Tread Pattern and Technology

The Trail Guide HLT features a sophisticated tread pattern designed for consistent performance across various surfaces. Its symmetric design ensures even wear and stability‚ while the advanced rubber compounds enhance traction in both wet and dry conditions. The tread pattern incorporates circumferential grooves for improved water evacuation‚ reducing hydroplaning risks. Additionally‚ the tire’s unique shoulder design maximizes contact with the road‚ improving handling and responsiveness. The technology behind the tread pattern also contributes to fuel efficiency by minimizing rolling resistance. These features collectively ensure a smooth and quiet ride‚ making the Trail Guide HLT a reliable choice for everyday driving and light off-road adventures.

  • Symmetric tread design for even wear and stability
  • Advanced rubber compounds for enhanced traction
  • Circumferential grooves for water evacuation
  • Optimized shoulder design for better road contact

2.2 Tire Composition and Materials

The Trail Guide HLT is constructed with high-quality materials to ensure durability and performance. The tire features a durable rubber compound that resists wear and tear‚ providing long-lasting tread life. Reinforced sidewalls enhance strength and stability‚ especially for light off-road use. The tire’s internal structure includes multiple layers of polyester and steel belts‚ which improve ride comfort and resistance to punctures. These materials work together to deliver a balance of strength‚ flexibility‚ and reliability‚ making the Trail Guide HLT suitable for a variety of driving conditions. The careful selection of materials also contributes to its overall durability and ability to handle heavy loads.

  • Durable rubber compound for extended tread life
  • Reinforced sidewalls for added strength
  • Multiple layers of polyester and steel belts
  • Resistant to punctures and wear

Performance and Handling

The Trail Guide HLT delivers exceptional performance with responsive steering and stable cornering. Its advanced tread design ensures consistent traction on both wet and dry surfaces.

  • Responsive steering for precise control
  • Stable cornering and smooth handling
  • Consistent traction across various road conditions

3.1 Traction and Stability on Different Surfaces

The Trail Guide HLT excels in providing traction and stability across diverse surfaces‚ ensuring a smooth and controlled driving experience. Its unique tread pattern is designed to maximize grip on both dry and wet roads‚ reducing the risk of hydroplaning. For off-road adventures‚ the tire’s aggressive shoulder design enhances stability on uneven terrain‚ offering drivers confidence and control. Additionally‚ the tire performs well in light snow conditions‚ making it a reliable choice for year-round use. The combination of advanced technology and durable materials ensures consistent performance‚ delivering safety and reliability for drivers navigating various road conditions.

3.2 Fuel Efficiency and Noise Reduction

The Trail Guide HLT is engineered to deliver impressive fuel efficiency‚ making it a cost-effective choice for drivers. Its optimized tread compound reduces rolling resistance‚ which enhances fuel economy while maintaining traction. Additionally‚ the tire’s advanced design incorporates noise-reducing features‚ ensuring a quieter ride. The variable pitch tread pattern minimizes vibrations and road noise‚ creating a more comfortable driving experience. These features make the Trail Guide HLT an excellent option for drivers seeking a balance between performance and efficiency. The combination of fuel savings and reduced noise levels ensures a smooth and economical journey‚ whether on highways or city streets.

Safety and Durability

The Trail Guide HLT is built with robust materials for extended durability‚ ensuring reliable performance under various conditions. Its sturdy construction supports heavy loads and towing demands‚ making it a safe choice for drivers seeking long-term reliability and peace of mind on the road.

4.1 Load Capacity and Towing Ability

The Trail Guide HLT is engineered to handle substantial loads‚ making it ideal for vehicles that frequently tow trailers or carry heavy cargo. Its reinforced sidewalls and durable tread compound ensure stability even under maximum load conditions. The tire’s load capacity is designed to meet the demands of SUVs‚ light trucks‚ and vans‚ providing consistent performance without compromising safety. Additionally‚ the HLT’s traction capabilities enhance control during towing‚ reducing the risk of swaying and maintaining directional stability. This makes it a reliable choice for drivers who need a tire that can manage both daily driving and heavy-duty tasks with equal efficiency and reliability.

4.2 Warranty and Longevity

The Multi Mile Trail Guide HLT is backed by a robust warranty program‚ offering a 50‚000-mile coverage that ensures peace of mind for drivers. Designed for long-term reliability‚ the tire features a durable tread compound that resists wear and tear‚ ensuring consistent performance over time. Its advanced construction minimizes the risk of premature degradation‚ making it a cost-effective choice for drivers seeking a tire with extended longevity. Additionally‚ the warranty covers defects in workmanship and materials‚ further enhancing its value. With proper maintenance‚ the Trail Guide HLT is built to deliver reliable service for many miles‚ making it a dependable option for both everyday driving and adventurous excursions.

Maintenance and Care

Regular tire pressure checks and rotations are essential for optimal performance. Proper maintenance ensures even tread wear‚ extends tire life‚ and enhances overall safety on the road.

5.1 Proper Tire Pressure and Rotation

Maintaining the correct tire pressure is crucial for optimal performance and safety. Check pressure monthly and before long trips‚ ensuring it matches the vehicle’s specifications. Regular tire rotations‚ every 6‚000 to 8‚000 miles‚ promote even tread wear and extend the life of your Trail Guide HLT tires. Proper rotation patterns‚ as recommended by the manufacturer‚ help maintain consistent traction and handling. Under-inflated tires can lead to reduced fuel efficiency and increased wear‚ while over-inflation may compromise comfort and grip. By adhering to these maintenance routines‚ drivers can ensure their tires perform reliably‚ providing consistent traction and durability over the 50‚000-mile warranty period.

5.2 Inspection and Repair Tips

Regular inspections are essential to ensure the longevity and performance of your Trail Guide HLT tires. Check the tread depth using a penny test or a tread depth gauge‚ ensuring it remains above the legal minimum. Inspect for punctures‚ cuts‚ or uneven wear‚ which may indicate misalignment or improper inflation. Look for cracks or bulges on the sidewalls‚ as these can lead to failure. Address any issues promptly to prevent further damage. For repairs‚ use only authorized service centers to maintain the warranty. Rotate tires as recommended and balance them annually to maintain even wear and stability. Proper care ensures your tires deliver consistent traction and durability over their 50‚000-mile warranty period;

The Multi Mile Trail Guide HLT stands out as a top choice for drivers seeking reliable‚ all-season performance. Designed for CUVs‚ SUVs‚ and light trucks‚ it delivers exceptional traction in diverse conditions while maintaining fuel efficiency. With a 50‚000-mile warranty‚ it offers durability and value. Proper maintenance‚ such as regular tire pressure checks and rotations‚ ensures optimal performance. Its balanced design provides stability and comfort‚ making it a versatile option for everyday driving and adventures alike. Whether navigating city streets or rugged terrains‚ the Trail Guide HLT proves to be a dependable and cost-effective choice for drivers prioritizing both safety and longevity.

nikon coolpix p500 user manual

The Nikon Coolpix P500 is a versatile superzoom camera designed for photography enthusiasts and casual users alike․ It features a 36x optical zoom, 12․1 MP CMOS sensor, and HD video recording capabilities, making it ideal for capturing detailed images and videos with ease․

1․1 Overview of the Camera

The Nikon Coolpix P500 is a compact digital camera featuring a 12․1 MP CMOS sensor, 36x optical zoom, and 7․5 cm LCD screen․ It supports HD video recording and includes image stabilization for sharp images․ Designed for versatility, it offers automatic and manual controls, catering to both casual users and photography enthusiasts․ The camera’s ergonomic design and intuitive interface make it easy to navigate, while its advanced features ensure high-quality results in various shooting conditions․

1․2 Key Features and Specifications

The Nikon Coolpix P500 boasts a 12․1 MP CMOS sensor, delivering crisp images with vibrant colors․ It features a powerful 36x optical zoom lens, covering a wide focal range, and a 7․5 cm LCD screen for easy viewing․ The camera supports HD video recording and includes optical image stabilization to reduce blur․

Additional features include manual controls, scene modes, and a user-friendly interface․ Its compact design and advanced technologies make it suitable for capturing high-quality photos in various lighting conditions, offering flexibility for both casual and creative photography․

Getting Started with the Nikon Coolpix P500

Unpack and charge the camera, insert the memory card, and familiarize yourself with the controls․ Power on and navigate the menu for initial settings and mode selection․

2․1 Unboxing and Initial Setup

Upon unboxing, ensure all components are included: camera, battery, charger, USB cable, and manual․ Insert the battery into the compartment and charge it fully before use․ Use a sufficiently charged battery to prevent the camera from turning off during setup․ Insert a compatible memory card into the slot․ Plug the camera into a power source if needed․ Familiarize yourself with the camera’s exterior, including the lens, viewfinder, and control buttons․ Handle the camera gently to avoid damage․

2․2 Charging the Battery and Inserting the Memory Card

Connect the provided battery to the charger and plug it into a power source․ Allow the battery to charge fully before first use․ Once charged, insert the battery into the camera’s compartment, ensuring it clicks securely into place․ Next, locate the memory card slot, typically on the side or bottom of the camera․ Insert a compatible memory card gently but firmly until it locks into position․ Ensure the card is properly seated to avoid data loss or camera malfunction during use․

2․3 Basic Camera Controls and Layout

The Nikon Coolpix P500 features an intuitive control layout designed for easy navigation․ The mode dial on top allows quick access to shooting modes, while the shutter button and zoom lever are ergonomically placed for comfortable use․ The rear navigation buttons provide access to menu settings, playback, and deletion options․ The LCD screen dominates the back, offering a clear view of images and settings․ Familiarizing yourself with these controls ensures smooth operation, whether you’re a novice or an experienced photographer․

Shooting Modes and Settings

The Nikon Coolpix P500 offers a range of shooting modes, including Auto, Scene, and Manual modes, allowing users to customize settings for optimal photography results with ease and flexibility․

3․1 Auto Mode and Scene Modes

The Nikon Coolpix P500’s Auto Mode simplifies photography by automatically adjusting settings for optimal results․ Scene Modes, such as Portrait, Landscape, and Night Portrait, allow users to tailor settings to specific shooting scenarios․ These modes enhance image quality by optimizing focus, exposure, and color balance, making it easier to capture stunning photos without manual adjustments․ The camera’s intelligent system ensures that even in challenging lighting conditions, the output remains vibrant and detailed․

3․2 Manual Controls (P, S, A, M Modes)

The Nikon Coolpix P500 offers advanced manual controls through P (Program), S (Shutter Priority), A (Aperture Priority), and M (Manual) modes․ These modes provide photographers with precise control over settings like shutter speed, aperture, and ISO․ P mode allows quick adjustments while maintaining automatic balance, while S and A modes let users prioritize shutter speed or aperture for creative effects․ M mode offers full manual control, enabling experienced users to fine-tune every aspect of their shots for optimal results in various lighting conditions․

3․4 Customizing Settings for Optimal Results

Customizing settings on the Nikon Coolpix P500 enhances photography outcomes․ Users can adjust white balance, ISO sensitivity, and autofocus modes to suit specific scenes․ The camera allows saving favorite settings for quick access, streamlining the shooting process․ Additionally, customizing the Quick Menu enables fast adjustments to frequently used options, ensuring that no moment is missed․ These personalizations empower photographers to tailor the camera’s performance to their creative vision and capture images with precision and clarity in diverse conditions․

Focusing and Metering

The Nikon Coolpix P500 offers advanced autofocus and manual focus options, ensuring sharp images․ Metering modes, including matrix and spot, help achieve precise exposure control for optimal results․

4․1 Understanding Autofocus and Manual Focus

The Nikon Coolpix P500 features an advanced autofocus system for quick and accurate focusing․ Half-press the shutter to lock focus, ensuring sharp images․ Manual focus is also available, allowing precise control by adjusting via the camera’s controls; Switching between modes is seamless, catering to both automatic and manual shooting preferences for enhanced creativity and accuracy in various photography scenarios․

4․2 Metering Modes and Exposure Compensation

The Nikon Coolpix P500 offers multiple metering modes: Matrix, Center-weighted, and Spot; Matrix metering analyzes the entire scene for balanced exposure, while Center-weighted prioritizes the center․ Spot metering focuses on a specific area for precise light measurement․ Exposure compensation allows adjustments of ±2 EV in 1/3-stop increments, enabling fine-tuning of brightness․ Use the rotary multi-selector to adjust settings, ensuring optimal exposure in challenging lighting conditions while maintaining creative control over your images․

Image Quality and Settings

The Nikon Coolpix P500 delivers high-quality images with its 12․1 MP CMOS sensor, offering detailed shots․ It supports various formats, including JPEG and RAW, ensuring versatility for photographers․

5․1 Adjusting Image Resolution and Compression

Adjusting the image resolution and compression on the Nikon Coolpix P500 allows users to optimize file sizes and quality․ The camera offers multiple resolution settings, including 12M (4000×3000), 8M (3264×2448), and 4M (2272×1704)․ Compression options range from Fine to Basic, with Fine providing the highest quality and Basic reducing file sizes․ Lower resolutions and higher compression are ideal for sharing, while higher settings are best for printing․ This feature ensures flexibility in balancing image quality and storage needs, catering to various user preferences and requirements․

5․2 White Balance and Color Settings

Adjusting the white balance and color settings on the Nikon Coolpix P500 enhances image accuracy and personal style․ The camera offers various white balance options like Auto, Daylight, Cloudy, Shade, Fluorescent, and Incandescent, each tailored to specific lighting conditions․ Auto mode adapts automatically, while Daylight and Cloudy settings optimize for natural light variations․ Fluorescent and Incandescent modes correct for artificial light color casts․ Additionally, color settings include options like Standard for neutral tones and Vivid for enhanced color saturation․ Custom color profiles allow users to fine-tune saturation, contrast, and color balance, enabling a personalized look․ Saving these settings ensures quick access, making it easier to achieve consistent results across different shooting scenarios․ Properly setting these options ensures accurate color representation and aligns with the photographer’s creative intent, making them essential for capturing images that reflect the desired mood and style․

Zoom and Lens Capabilities

The Nikon Coolpix P500 boasts a powerful 36x optical zoom lens, enabling detailed long-distance shots․ Its 24mm wide-angle lens captures broad scenes, while the CMOS sensor ensures sharp images․

6․1 Using the 36x Optical Zoom Effectively

The Nikon Coolpix P500’s 36x optical zoom allows capturing distant subjects with remarkable clarity․ To use it effectively, ensure image stabilization is enabled to reduce blur․ For sharp results, use a tripod when zooming to the maximum extent․ When shooting moving subjects, half-press the shutter to lock focus and tracking․ Avoid excessive zoom in low light to maintain image quality․ Experiment with composition to make the most of the zoom range, ensuring your subject remains the focal point․

6․2 Image Stabilization and Reducing Blur

Image stabilization on the Nikon Coolpix P500 minimizes camera shake and blur, especially at high zoom levels․ Enable VR (Vibration Reduction) in the camera settings for sharper results․ Hold the camera firmly, with one hand supporting the lens․ Use a tripod for maximum stability, particularly in low light․ Avoid moving the camera during exposure․ Half-press the shutter to lock focus, then fully press to capture․ These techniques ensure clearer images, even when using the 36x zoom or shooting handheld in challenging conditions․

Movie Recording and Playback

The Nikon Coolpix P500 allows HD video recording with clear audio․ Use a tripod for stability and external audio for better sound quality; Playback options include on-camera video review and HDMI output for sharing on larger screens․

7․1 Recording HD Video and Audio Tips

The Nikon Coolpix P500 captures stunning HD videos at 1080p resolution․ For smooth footage, use a tripod to minimize camera shake․ To enhance audio quality, consider using an external microphone, as built-in mics can pick up ambient noise․ When recording moving subjects, enable continuous autofocus for sharp focus․ Ensure sufficient lighting for vibrant colors and detail․ Avoid zooming excessively during recording to maintain stability․ Use the camera’s HDMI output for direct playback on larger screens․

7․2 Playing Back and Editing Videos

To playback videos on the Nikon Coolpix P500, press the playback button․ Use the zoom control to review footage in detail․ For editing, the camera offers basic trimming options․ Connect the camera to a computer via HDMI or USB to transfer videos for advanced editing․ Use Nikon’s software or third-party tools for enhancing clips․ Ensure videos are stored on an external drive for safekeeping․ This process allows for efficient video management and post-production workflows․

Customizing the Camera

Customize the Nikon Coolpix P500 by setting up personalized menus and shortcuts․ Adjust settings to suit your preferences for quick access to frequently used features․

8․1 Setting Up Custom Menus and Shortcuts

Customize the Nikon Coolpix P500 by creating personalized menus and shortcuts․ Access the menu system to organize settings according to your preferences․ Assign frequently used functions to shortcut buttons for quick access․ This feature enhances shooting efficiency and streamlines your workflow․ You can also save custom configurations for different photography scenarios․ To learn more, refer to the user manual for detailed steps on setting up custom menus and shortcuts effectively․

8․2 Updating Firmware and Software

Regularly updating the Nikon Coolpix P500’s firmware and software ensures optimal performance and access to new features․ Check the current firmware version in the camera’s menu․ Visit Nikon’s official website to download the latest updates․ Use a memory card or USB connection for installation․ Ensure the camera is fully charged and avoid interruptions during the update process․ Updated firmware can improve autofocus accuracy, image quality, and overall camera functionality․ Always follow the provided instructions carefully to prevent potential issues․

Maintenance and Troubleshooting

Regularly clean the camera and lens with a soft cloth to prevent smudges․ Monitor battery life and avoid extreme temperatures․ Check for firmware updates to resolve issues․

9․1 Cleaning the Camera and Lens

Regular cleaning is essential to maintain the Nikon Coolpix P500’s performance․ Use a soft, dry cloth to gently wipe the camera body and lens․ For stubborn smudges, lightly dampen the cloth with distilled water, but avoid harsh chemicals․ Never touch the lens surface with bare hands, as oils can leave residue; Turn off the camera before cleaning to prevent damage․ Store the camera in a protective case to minimize dust exposure and ensure optimal image quality․

9․2 Common Issues and Solutions

Common issues with the Nikon Coolpix P500 include overheating during extended use and lens error messages․ To resolve overheating, turn the camera off and let it cool down․ For lens errors, gently clean the lens with a soft cloth and ensure no debris obstructs its movement․ Autofocus issues can often be fixed by resetting the camera to default settings or using the center focus point․ Refer to the manual for troubleshooting steps to maintain optimal performance and address any operational problems promptly․

The Nikon Coolpix P500 offers impressive features like 36x zoom and HD video, making it a versatile choice for photography․ For optimal use, refer to the manual and explore online resources for tips and troubleshooting guides to enhance your shooting experience․

10․1 Summary of Key Features and Capabilities

The Nikon Coolpix P500 is a high-performance superzoom camera with a 36x optical zoom lens, delivering exceptional reach and clarity․ It features a 12․1 MP CMOS sensor, capturing sharp images and smooth HD videos․ The camera offers various shooting modes, including Auto, Scene, and manual controls, allowing for creative flexibility․ With image stabilization, it reduces blur and ensures steady shots․ This versatile device is designed for both enthusiasts and casual users, providing robust features and ease of use for capturing memorable moments․

10․2 Recommended Reading and Online Resources

For deeper understanding, explore the Photographer’s Guide to the Nikon Coolpix P500 by Alexander White, offering detailed insights into camera operations․ Visit Nikon’s official website for downloadable manuals and firmware updates․ Online forums and tutorials provide tips for maximizing the camera’s potential․ Additionally, user-generated content on photography websites shares practical advice for improving your skills with the P500․ These resources help you unlock advanced features and enhance your photography experience․

PDF

pdf 7.3 powerstroke wiring diagram

The 7․3 Powerstroke wiring diagram is a detailed guide for understanding the electrical system of Ford’s iconic diesel engine․ Available as a PDF, it provides comprehensive schematics for the 2003 Ford F-250, covering circuits, connectors, and components․ This resource is essential for diagnostics, repairs, and custom modifications, offering a clear visual representation of the engine’s electrical layout․

Understanding the 7․3 Powerstroke Wiring Diagram

The 7․3 Powerstroke wiring diagram simplifies the complexity of the engine’s electrical system, allowing users to identify circuits, components, and connections efficiently for diagnostics and repairs․

Overview of the 7․3 Powerstroke Engine and Its Electrical System

The 7․3 Powerstroke engine is a legendary diesel powerplant known for its reliability and performance․ Its electrical system is complex, comprising wiring, sensors, and control modules that ensure optimal operation․ The engine relies on a sophisticated network of circuits to manage fuel injection, emissions, and electrical accessories․ The wiring diagram provides a detailed map of these connections, making it easier to diagnose and repair issues․ Understanding this system is crucial for maintaining the engine’s performance and addressing common electrical problems․ The PDF wiring diagram offers a clear, organized view of the entire electrical setup, ensuring precise troubleshooting and modifications․

Key Components of the Wiring Diagram

The 7․3 Powerstroke wiring diagram includes essential components like color-coded wires, connectors, and control modules․ It details circuits for fuel injection, emissions, and electrical accessories․ The PDF version, such as the 61-page document for the 2003 Ford F-250, provides a clear layout of the engine’s electrical system․ Key elements include the powertrain control module, fuel injectors, and sensor connections․ The diagram also highlights fuses, relays, and grounding points․ By referencing this guide, users can identify components and troubleshoot issues efficiently․ Online forums and communities often share these diagrams, ensuring accessibility for DIY repairs and modifications․ The detailed schematics make it easier to understand and work with the engine’s complex electrical setup․

Sources for the 7․3 Powerstroke Wiring Diagram

Official Ford websites, service centers, and auto repair shops provide access to detailed wiring diagrams․ Specialized automotive sites and retailers also offer downloadable PDF versions․

Official Ford Manuals and Documentation

Official Ford manuals are the most reliable source for the 7․3 Powerstroke wiring diagram․ These documents, available in PDF format, are meticulously detailed to ensure accuracy․ They cover electrical circuits, component locations, and system operations, making them indispensable for technicians and enthusiasts․ Ford’s official documentation is typically accessible through authorized dealerships or the Ford Motor Company’s website․ Additionally, many Ford service centers provide these manuals free of charge or for a nominal fee, ensuring users have access to authentic and comprehensive resources for their vehicles․

Online Marketplaces and Forums

Online marketplaces like eBay offer PDF versions of the 7․3 Powerstroke wiring diagram, often as downloadable files․ These documents are typically detailed, covering electrical systems and components․ Forums such as Reddit’s r/FordDiesels and the Ford Powerstroke Diesel Forum are invaluable resources, with community members sharing diagrams and expertise․ Many users have uploaded wiring diagrams for specific models, such as the 2001 Ford F-250, making them easily accessible․ These platforms also provide a space for discussion, allowing users to ask questions and receive guidance from experienced technicians and enthusiasts, ensuring accurate and reliable information․

Specialized Automotive Websites

Specialized automotive websites are a reliable source for obtaining the 7․3 Powerstroke wiring diagram in PDF format․ Websites like Autozone, O’Reilly Auto Parts, and AllData offer detailed wiring diagrams tailored to specific vehicle models․ These platforms provide accurate and up-to-date information, ensuring compatibility with your truck’s electrical system․ Many sites allow users to search by make, model, and year, making it easier to find the exact diagram needed․ Additionally, official Ford websites and forums often host or link to these resources, ensuring authenticity․ These specialized platforms are indispensable for technicians and DIY enthusiasts alike, offering comprehensive guides for troubleshooting and repairs․

How to Read and Interpret the Wiring Diagram

Understanding symbols, color codes, and connections is key to interpreting the 7․3 Powerstroke wiring diagram․ Use the legend to identify components and trace circuits for diagnostics and repairs․

Identifying Symbols and Codes

The 7․3 Powerstroke wiring diagram uses standardized symbols and codes to represent electrical components․ Start by locating the legend, which explains each symbol, such as batteries, fuses, and relays․ Color-coded wires indicate specific circuits, with colors like red for power and black for ground․ Codes on connectors and components help trace wiring paths․ For example, “F1․0” might denote a specific fuse location․ Referencing the diagram’s key ensures accurate identification of elements like sensors and actuators․ This step is crucial for diagnosing issues or making modifications․ Community forums and Ford manuals often provide additional insights for interpreting complex symbols and codes effectively․

Understanding Color Coding and Connections

The 7․3 Powerstroke wiring diagram relies heavily on color coding to simplify identification of electrical circuits․ Each wire is assigned a specific color, such as red for constant power or black for ground connections․ This system helps technicians trace wiring paths quickly and accurately․ Connections are further defined by unique identifiers and labels, ensuring clarity․ The diagram also outlines connector types and their locations, making it easier to identify where components link together․ By following the color-coded scheme, users can avoid confusion and ensure safe, accurate repairs or modifications․ This method is especially crucial for complex systems like the 7․3L diesel engine, where misidentification could lead to malfunctions․ The PDF diagrams available on platforms like eBay and Ford forums provide detailed color keys for reference․

Tools and Software for Viewing and Editing Wiring Diagrams

Tools like Adobe Acrobat and electrical diagram software enable viewing and editing of PDF wiring diagrams, essential for understanding and modifying the 7․3 Powerstroke electrical system effectively․

PDF Viewers and Editors

For viewing and editing 7․3 Powerstroke wiring diagrams, reliable PDF viewers like Adobe Acrobat Reader or Foxit Reader are essential․ These tools allow users to zoom, search, and bookmark specific sections․ Advanced editors such as Adobe Acrobat Pro or PDF-XChange Editor enable modifications like annotations or highlighting, which can be useful for marking repairs or modifications․ Additionally, free alternatives like SumatraPDF provide lightweight solutions for basic viewing needs․ These tools ensure that users can effectively manage and interact with complex wiring diagrams, making diagnostics and repairs more efficient․ They are indispensable for working with detailed electrical schematics in PDF format․

Electrical Diagram Software

Specialized electrical diagram software simplifies the process of viewing and editing 7․3 Powerstroke wiring diagrams․ Tools like AutoCAD, SolidWorks Electrical, and CircuitStudio provide advanced features for creating and modifying schematics․ These programs allow users to design, simulate, and analyze electrical circuits, ensuring accuracy and compatibility with the engine’s specifications․ Additionally, some software offers libraries of symbols and components specific to automotive systems, making it easier to interpret and update wiring diagrams․ These tools are particularly useful for professionals and enthusiasts who need to customize or repair the electrical system of their 7․3L Powerstroke engine effectively․ They enhance productivity and precision in electrical diagnostics and modifications․

Tips for Finding the Correct Wiring Diagram

Ensure your 7․3 Powerstroke wiring diagram matches your vehicle’s year, model, and engine specifications․ Cross-reference with forums and official Ford documents for accuracy․ Use online communities for verified sources and updates․

Matching the Diagram to Your Vehicle’s Specifications

Ensuring the 7․3 Powerstroke wiring diagram matches your vehicle’s specifics is crucial․ Verify the year, model, and engine details to avoid mismatches․ For example, a 2003 Ford F-250 with a V8 7․3L DSL requires a diagram tailored to its electrical system․ Check the diagram’s compatibility with your truck’s drivetrain, such as 4WD, as configurations can vary․ Using the wrong diagram may lead to confusion or electrical issues․ Always cross-reference with your vehicle’s VIN or consult repair manuals to confirm accuracy․ This ensures proper troubleshooting and modifications, especially for complex systems like the 7․3 Powerstroke․ Accuracy is key to safe and effective repairs․

Using Online Communities and Forums

Online communities and forums are invaluable resources for locating and understanding the 7․3 Powerstroke wiring diagram․ Platforms like the Ford Powerstroke Diesel Forum and r/FordDiesels on Reddit offer extensive discussions and shared files․ Users often post requests for specific diagrams, such as the 2001 Ford F250 SD Lariat wiring schematic, and receive helpful responses․ These communities provide access to verified diagrams, tips for interpretation, and troubleshooting advice․ Engaging with experienced members can help ensure accuracy and safety when working with electrical systems․ Additionally, forums often include attachments or links to PDF files, making it easier to find the exact diagram needed for your vehicle․ Active participation can yield faster and more reliable results․

Common Issues and Solutions

Common issues include incorrect or incomplete diagrams․ Solutions involve verifying sources, matching specifications, and consulting forums for accurate and vehicle-specific wiring information․

Troubleshooting Electrical Problems

Troubleshooting electrical issues with the 7․3 Powerstroke often starts with the wiring diagram․ Identify faulty sensors, connectors, or wiring by cross-referencing the diagram with error codes․ Common problems include blown fuses, corroded connections, or malfunctioning components like the PCM or ICP sensor․ Use a multimeter to test voltage and continuity, ensuring readings match the specifications in the diagram․ Referencing forums and repair manuals alongside the wiring diagram can help pinpoint issues․ Always ground the truck properly and disconnect the battery before working on electrical systems to avoid further damage or safety risks․

Updating or Replacing Wiring Diagrams

Updating or replacing wiring diagrams for the 7․3 Powerstroke ensures accuracy and compatibility with modifications or repairs․ Access the latest PDF versions from sources like eBay or Ford forums, which offer detailed schematics for specific models․ When updating, verify the diagram matches your vehicle’s year and specifications․ Replacing outdated diagrams helps avoid confusion during troubleshooting or custom installations․ Always use official Ford documentation or trusted sources to ensure reliability․ Regular updates are crucial for maintaining electrical system integrity, especially after modifications․ Keep backups of previous versions for reference, and consult professionals if unsure about changes or compatibility․

Legal and Safety Considerations

Always use official 7․3 Powerstroke wiring diagrams to ensure compliance with legal standards and safety protocols․ Unauthorized modifications can lead to electrical hazards or legal consequences․ Follow proper guidelines when handling wiring to avoid risks and ensure system reliability․ Adhere to local regulations and manufacturer recommendations for safe and legal electrical work․

Importance of Using Official Diagrams

Using official 7․3 Powerstroke wiring diagrams ensures accuracy and reliability when diagnosing or modifying your vehicle’s electrical system․ These diagrams are created by Ford specifically for your engine, providing precise details about wiring layouts, connectors, and components․ Official diagrams minimize the risk of errors that could lead to electrical failures or safety hazards․ They are legally compliant and adhere to industry standards, offering a trusted reference for technicians and enthusiasts alike․ Relying on official sources guarantees that the information is up-to-date and relevant to your vehicle, ensuring safe and effective electrical work․

Safety Precautions When Working with Wiring

When working with the 7․3 Powerstroke wiring diagram, always prioritize safety to avoid electrical shocks or damage․ Disconnect the battery before starting any repairs to prevent live currents․ Use insulated tools to handle wires and connectors, and ensure proper grounding․ Never improvise repairs without consulting the official diagram, as incorrect wiring can lead to system failures or fires․ Wear protective gear, including gloves and safety glasses, to minimize risks․ If unsure about a procedure, seek professional assistance to ensure compliance with safety standards․ Following these precautions protects both you and your vehicle from potential hazards․

The 7․3 Powerstroke wiring diagram is an indispensable resource for understanding and maintaining the electrical system of Ford’s 7․3L diesel engine․ Whether for diagnostics, repairs, or modifications, this diagram provides a clear and detailed guide․ By following the outlined steps and safety precautions, users can confidently navigate the complexities of their vehicle’s wiring․ Remember to always consult official sources or professional mechanics for accurate and reliable results․ Proper use of the wiring diagram ensures optimal performance, safety, and longevity of the engine․ It’s a vital tool for anyone working with this iconic diesel powerplant․

horizon t101 owners manual

The Horizon T101 Treadmill Owner’s Manual provides essential guidance for optimal use and maintenance. It covers setup‚ features‚ and troubleshooting‚ ensuring a safe and effective workout experience. Access it online for detailed instructions and support.

Overview of the Horizon T101 Treadmill

The Horizon T101 Treadmill is a durable‚ foldable fitness machine designed for home use. It offers a range of features‚ including adjustable speed and incline settings‚ pre-set programs‚ and manual controls. The treadmill is built for comfort and convenience‚ with a sturdy frame and a quiet motor. Its compact design makes it ideal for small spaces while still providing a robust workout experience. Regular maintenance‚ such as belt lubrication‚ ensures longevity and smooth operation. This model is a popular choice for users seeking a reliable and versatile treadmill for their fitness goals.

Importance of Reading the Owners Manual

Reading the Horizon T101 Treadmill Owner’s Manual is crucial for safe and effective use. It provides detailed instructions for assembly‚ operation‚ and maintenance‚ ensuring optimal performance. The manual highlights safety precautions‚ proper usage guidelines‚ and troubleshooting tips to prevent damage and injuries. Familiarizing yourself with the manual helps you understand the treadmill’s features‚ such as speed and incline settings‚ pre-set programs‚ and custom workout options. It also outlines warranty details and maintenance routines‚ like belt lubrication and alignment‚ to extend the lifespan of your treadmill. By following the manual‚ you can maximize your workout experience and protect your investment.

Downloading and Printing the Horizon T101 Owners Manual

The Horizon T101 Owners Manual is available for free download as a PDF from the official Horizon Fitness website. Printing it ensures easy reference for setup‚ maintenance‚ and troubleshooting.

Steps to Download the PDF Version

To download the Horizon T101 Owners Manual‚ visit the official Horizon Fitness website. Navigate to the “Manuals & Support” section and select the T101 model. Click on the “Download PDF” option to access the manual. Ensure you have a PDF reader installed to view the document. Save the file to your device for easy access. For added convenience‚ bookmark the page or save the link for future reference. This ensures you always have the guide handy for troubleshooting or setup needs.

Printing the Manual for Easy Reference

Printing the Horizon T101 Owners Manual ensures easy access to essential information. Use a standard printer with high-quality paper for clarity. Print in color if needed‚ or opt for black and white to save ink. Bind the pages securely for durability. Keep the printed manual near your treadmill for quick reference during assembly‚ troubleshooting‚ or operation. This convenient format allows you to flip through sections effortlessly‚ making it ideal for hands-on tasks or quick consultations; Ensure the print settings match the PDF layout for proper formatting.

Key Features and Benefits of the Horizon T101 Treadmill

The Horizon T101 offers a foldable design‚ durable construction‚ and a powerful motor for smooth operation. It features a cushioned deck for joint protection and user-friendly controls.

Speed and Incline Settings

The Horizon T101 treadmill provides a versatile range of speed and incline options‚ allowing users to customize their workouts. The speed can be adjusted from 0.5 to 10 mph‚ catering to both walkers and runners. Incline settings range from 0 to 10%‚ offering varied intensity levels. These features enable users to target specific fitness goals‚ whether it’s a low-intensity walk or a challenging incline run. The controls are easily accessible‚ making adjustments seamless during exercise.

Pre-Set Programs and Custom Workout Options

The Horizon T101 treadmill offers a variety of pre-set programs designed to meet diverse fitness goals‚ such as weight loss‚ endurance‚ and interval training. Users can choose from 10 pre-programmed workouts‚ each with unique intensity levels. Additionally‚ the treadmill allows for custom workout creation‚ enabling users to tailor speed‚ incline‚ and duration to their preferences. This flexibility ensures a personalized exercise experience‚ keeping workouts engaging and effective. The manual provides detailed instructions on how to navigate and utilize these features for optimal results.

Maintenance and Troubleshooting

Regular lubrication and belt alignment are crucial for smooth operation. The manual provides troubleshooting solutions for common issues‚ ensuring quick resolution and optimal treadmill performance over time.

Lubrication and Belt Alignment Instructions

Regular lubrication ensures smooth treadmill operation. Apply silicone-based lubricant every 3 months or 150 miles. Avoid petroleum-based products‚ as they can damage the belt. After lubrication‚ walk on the treadmill for 5 minutes to distribute the lubricant evenly. For belt alignment‚ adjust the bolts if the belt drifts. Tighten the walking belt if it sags excessively. Proper maintenance prevents wear and tear‚ ensuring optimal performance and longevity of your Horizon T101 treadmill.

Common Issues and Solutions

Common issues with the Horizon T101 treadmill include the belt not moving‚ uneven alignment‚ or error messages. Ensure the power cord is securely plugged in and the safety key is inserted properly. If the belt misaligns‚ adjust the alignment bolts. For error codes‚ refer to the manual or reset the console. Lubrication issues can cause friction; apply silicone-based lubricant as recommended. Regular maintenance and troubleshooting can resolve most problems‚ ensuring smooth operation and extending the treadmill’s lifespan.

Assembly and Operation Guidelines

The Horizon T101 treadmill requires careful assembly‚ following the step-by-step guide. Once assembled‚ insert the safety key‚ plug in the power‚ and familiarize yourself with the controls for smooth operation.

Step-by-Step Assembly Instructions

Begin by carefully unpacking all components and hardware. Follow the manual to attach the handlebars‚ install the console‚ and secure the frame. Tighten all bolts firmly. Next‚ align the walking belt and ensure proper tracking. Plug in the power cord and test the treadmill at a low speed. Finally‚ insert the safety key and perform a trial run to ensure smooth operation. Refer to the diagrams for visual guidance and double-check all connections for safety.

Starting the Treadmill and Basic Controls

Insert the safety key into the console and plug in the power cord. Press the “Start” button to initialize the treadmill. Use the speed and incline buttons to adjust settings during your workout. The console displays time‚ speed‚ incline‚ and calories burned. Press “Stop” to pause or “Emergency Stop” to halt immediately. Ensure the safety key is securely attached to your clothing for automatic shutdown if needed. Familiarize yourself with preset programs and manual controls for a customizable exercise experience.

Safety Precautions and Warnings

Always use the safety key and ensure proper footing. Avoid loose clothing and check the treadmill for damage before use. Follow weight limits strictly.

Emergency Stop and Safety Key Usage

The Horizon T101 Treadmill features an emergency stop system for immediate cessation of operation. Always insert the safety key before use and ensure it is securely attached to your clothing. In case of an emergency‚ pull the key to stop the treadmill instantly. Regularly inspect the safety key and tether for damage. Proper footwear is essential to prevent accidents. Avoid loose clothing that may catch in moving parts. Ensure the treadmill is on a level surface and follow weight limits to maintain stability and safety during workouts.

Proper Usage and Weight Limits

The Horizon T101 Treadmill has a maximum user weight limit of 325 pounds. Always use the treadmill on a level‚ stable surface and ensure the safety key is attached to your clothing. Avoid loose clothing or long hair near moving parts. Users should wear proper footwear and avoid overreaching or leaning excessively. Follow the recommended usage guidelines in the manual to ensure safe and effective workouts. Adhere to the weight limit to maintain equipment integrity and performance‚ as outlined by Horizon Fitness recommendations.

Warranty Information

The Horizon T101 Treadmill offers a lifetime warranty for the motor and 5 years for parts and labor. Proper registration and maintenance are required for validity.

Coverage Details for Motor and Parts

The Horizon T101 Treadmill warranty includes a lifetime guarantee for the motor and 5 years for parts and labor. The structural frame is also covered for 5 years. Proper registration and maintenance‚ as outlined in the manual‚ are required to ensure validity. This comprehensive coverage provides peace of mind‚ knowing your investment is protected against defects in materials and workmanship. Regular maintenance‚ such as belt lubrication and alignment‚ must be performed to uphold warranty conditions. Always refer to the manual for specific details on warranty terms and requirements.

Conditions for Warranty Validity

The Horizon T101 Treadmill warranty is valid only if the product is registered and used as intended. Proper installation‚ maintenance‚ and adherence to the manual’s guidelines are required. Any modifications or negligence void the warranty. Regular maintenance‚ such as lubrication and belt alignment‚ must be performed as specified. The warranty is non-transferable and applies only to the original owner. Keep records of maintenance and repairs to ensure warranty claims are processed smoothly. Failure to comply with these conditions may result in coverage denial.

Connecting the Treadmill to Apps and Devices

The Horizon T101 treadmill connects to third-party fitness apps‚ enabling workout data syncing and enhanced tracking. The owner’s manual provides step-by-step integration instructions for seamless connectivity.

Compatibility with Third-Party Fitness Apps

The Horizon T101 treadmill is compatible with various third-party fitness apps‚ allowing users to track workouts seamlessly. It supports popular platforms like MyFitnessPal for data syncing. The treadmill can connect to apps via Bluetooth or Wi-Fi‚ enabling users to monitor speed‚ incline‚ and heart rate. This integration enhances the workout experience by offering personalized tracking and detailed performance analysis. The owner’s manual provides step-by-step instructions for syncing and troubleshooting connectivity issues‚ ensuring a smooth and efficient app integration process for all users.

Software Updates and Integration Instructions

The Horizon T101 treadmill supports software updates to enhance performance and add new features. Users can download the latest updates from Horizon Fitness’s official support page. Follow the manual’s instructions to install the update‚ ensuring the treadmill is connected to a power source. The T101-05 software update‚ for example‚ includes bug fixes and feature improvements. After updating‚ sync the treadmill with compatible apps for a seamless workout experience. Always refer to the manual for detailed integration steps and troubleshooting tips to maintain optimal functionality and connectivity.

schmetz needles guide

SCHMETZ sewing machine needles are renowned for their precision and quality, offering versatile solutions for both home crafters and industrial applications․ Their innovative color coding system simplifies needle selection, ensuring optimal performance across various fabrics and sewing tasks․

Understanding Schmetz Sewing Machine Needles

SCHMETZ sewing machine needles are crafted with precision, featuring a flat shank and scarf design․ They include key components like blade, groove, eye, and point, ensuring smooth stitching across fabrics and reducing issues like skipped stitches or thread breakage․

Key Components of Schmetz Needles

SCHMETZ needles feature a flat shank and scarf, essential for proper machine alignment․ The blade determines needle thickness, while the groove guides the thread․ The eye size varies to accommodate different thread types, reducing breakage․ The needle point is tailored for fabric type, ensuring precise penetration․ Additional components include the butt, tip, and color-coded shoulder, which indicates needle type and size․ These elements work together to enhance stitching quality and minimize issues like skipped stitches or thread breakage, making SCHMETZ needles highly reliable for various sewing applications․

How to Read the Schmetz Needle Packaging

Schmetz needle packaging includes essential information to help users make informed decisions․ The top color band indicates the needle type, such as universal, stretch, or jean, while the bottom band signifies the needle size․ Numerical labels on the packaging represent the needle size, with higher numbers indicating thicker needles․ Additional symbols or text may denote special features, like nonstick coatings or metallic finishes․ Always refer to the packaging for specific details about the needle’s intended use, thread compatibility, and fabric suitability to ensure optimal sewing performance․

Choosing the Right Schmetz Needle

Selecting the right Schmetz needle involves matching needle type and size to fabric and thread․ Consider fabric weight, thread thickness, and sewing task requirements for optimal results․

How to Determine Needle Type Based on Fabric

The type of Schmetz needle is determined by the fabric’s characteristics․ Universal needles are suitable for general sewing, while specialized options like stretch or jeans needles are designed for specific fabrics․ For delicate materials, metallic needles are ideal, reducing thread stress․ The top color band on Schmetz needles indicates the type, making selection straightforward․ Always choose a needle that matches your fabric to ensure smooth stitching and prevent damage․

How to Select Needle Size According to Thread and Fabric

The needle size is determined by the fabric thickness and thread type․ Thicker fabrics and heavier threads require larger needles, while lighter fabrics need finer sizes․ For example, size 70 needles suit lightweight fabrics like cotton batiste, while size 80 is ideal for medium-weight cotton․ Larger sizes, such as 90 or 100, are better for heavy materials like denim․ The bottom color band on Schmetz needles indicates the size, helping you choose the right one for your project․ Proper sizing ensures smooth stitching and prevents thread breakage․

Schmetz Needle Color Coding Guide

Schmetz needles feature a color coding system for easy identification․ The top band indicates needle type, while the bottom band shows size, ensuring quick selection․

Top Color Band: Indicating Needle Type

The top color band on Schmetz needles identifies the needle type, ensuring compatibility with specific fabrics․ Colors like white (universal), yellow (stretch), orange (jersey), and blue (jean) guide sewists in selecting the right needle for their projects, enhancing stitching accuracy and fabric care․ This system streamlines the selection process, making it easier to achieve professional results․

Bottom Color Band: Indicating Needle Size

The bottom color band on Schmetz needles indicates the needle size, which corresponds to the blade’s diameter․ Sizes range from 60 to 120, with larger numbers representing thicker needles․ For example, a size 70 needle has a 0․70mm blade diameter․ This sizing system helps sewists choose the right thickness for their fabric type, ensuring proper penetration and stitch formation․ The color coding provides a quick reference, making it easier to select the appropriate needle size for lightweight or heavy-duty projects, optimizing sewing performance and fabric compatibility․

Specialized Schmetz Needles

Schmetz offers a range of specialized needles, including metallic, twin, and trimming options, designed for specific fabrics and techniques, ensuring superior performance in diverse sewing applications․

Schmetz Metallic Needles for Delicate Fabrics

Schmetz Metallic needles are designed for sewing delicate fabrics, featuring an elongated eye to reduce thread stress․ This minimizes breakage and ensures smooth stitching․ The nonstick coating prevents adhesion, reducing skipped stitches and improving glideability․ Ideal for lightweight materials, these needles are engineered for precision and durability, making them a reliable choice for crafting intricate or sensitive fabrics with ease and professionalism․

Schmetz Twin and Trimming Needles

Schmetz Twin needles are designed for creating parallel stitches, making them ideal for hemming and decorative sewing․ They feature two blades, allowing for two rows of stitching in a single pass․ Trimming needles, on the other hand, are engineered with a specialized blade to trim excess fabric as you sew, perfect for overlocking edges․ Both types are crafted for precision and durability, ensuring professional-quality results for a variety of sewing tasks, from heavy-duty projects to intricate detailing․

Maintenance and Care for Schmetz Needles

Proper maintenance and care of Schmetz needles ensure optimal performance․ Regularly inspect for damage, store in protective cases, and avoid using damaged needles to prevent thread breakage and skipped stitches․

Preventing Thread Breakage and Skipped Stitches

Preventing thread breakage and skipped stitches with Schmetz needles involves using the correct needle size and type for your fabric․ The black nonstick coating on some needles reduces thread adhesion, minimizing issues․ Regularly inspect needles for damage and replace them if worn or bent․ Proper thread tension and consistent fabric feeding also play a crucial role․ Using high-quality threads and ensuring the needle is compatible with your fabric type further enhances stitching performance and reduces the risk of breakage or skipped stitches․

Proper Storage and Handling of Needles

Proper storage and handling of Schmetz needles ensure longevity and performance․ Store needles in protective cases or containers, organizing them by type and size to avoid mixing․ Handle needles by the shank to prevent oil from fingers affecting the blade․ Keep them away from direct sunlight and moisture to avoid rust․ Regularly clean and inspect needles before use․ Store unused needles in their original packaging or a secure, dry location to maintain quality and prevent damage or loss․

Troubleshooting Common Issues with Schmetz Needles

Troubleshooting common issues with Schmetz needles involves identifying problems like thread breakage or skipped stitches, often caused by incorrect needle size, improper tension, or dull needles․ Regular maintenance and correct needle selection can prevent these issues, ensuring smooth sewing performance․

Why Needles Break or Cause Thread Breakage

Needles break or cause thread breakage due to improper needle size, incorrect needle type, or dull needles․ Using a needle too small for the fabric can lead to breakage, while a dull needle causes thread stress․ Improper tension, incorrect threading, or damaged needles also contribute․ Regularly inspecting and replacing needles, along with proper threading and tension adjustment, can prevent these issues․ Choosing the right needle for the fabric and thread ensures smooth sewing and reduces breakage risks․

Resolving Tension Issues with Schmetz Needles

Tension issues with Schmetz needles can often be resolved by adjusting the machine’s tension settings․ Ensure the needle is properly seated and the thread is correctly threaded through the needle’s eye․ Using the correct needle size and type for the fabric helps maintain even tension․ Regularly cleaning the machine and checking for thread tangles can also prevent tension problems․ If issues persist, re-threading the machine or consulting the sewing machine’s manual may be necessary to restore optimal stitching performance․

Additional Resources

Explore the official SCHMETZ Needle Guide PDF for detailed charts and size recommendations․ Their comprehensive needle chart and ABC guide provide essential insights for optimal needle selection and usage․

Schmetz Needle Charts and Size Guides

Schmetz provides detailed needle charts and size guides to help users select the right needle for their sewing projects․ These resources outline needle types, sizes, and applications, ensuring optimal performance․ The official SCHMETZ Needle Guide PDF offers comprehensive tables and diagrams, making it easier to match needles to specific fabrics and threads․ Additionally, the guide includes practical tips for reducing thread breakage and skipped stitches, enhancing overall sewing efficiency․

Downloading the Official Schmetz Needle Guide PDF

The official SCHMETZ Needle Guide PDF is a valuable resource for sewers, offering detailed charts, size guides, and practical tips․ Available for download on the SCHMETZ website, this comprehensive guide covers needle types, sizes, and fabric applications․ It includes color coding explanations, thread compatibility, and troubleshooting advice․ The guide is compact at 55 pages, making it easy to reference․ While the actual size may challenge older users, its informative content ensures optimal needle selection for any sewing project, enhancing efficiency and precision․

PDF

holt mcdougal algebra 1 answer key pdf

The Holt McDougal Algebra 1 Answer Key is a comprehensive resource providing detailed solutions and explanations for homework, quizzes, and tests․ It aligns with the textbook, offering step-by-step guidance and real-world examples to enhance understanding․ This tool is invaluable for students and educators, ensuring mastery of algebraic concepts and skills․

1․1 Overview of the Resource

The Holt McDougal Algebra 1 Answer Key is a detailed guide designed to support students and educators in mastering algebraic concepts․ It provides step-by-step solutions, explanations, and examples for homework, quizzes, and tests․ The resource is structured to align with the Holt McDougal Algebra 1 textbook, ensuring seamless integration with classroom materials․ It covers fundamental topics like equations, functions, and graphs, while also offering practical applications to real-world problems․ This comprehensive tool helps students build confidence and understanding, serving as an essential supplement for academic success in algebra․

1․2 Importance for Students and Educators

The Holt McDougal Algebra 1 Answer Key is a vital tool for both students and educators, providing clear solutions and explanations to complex algebra problems․ For students, it serves as a reliable study aid, helping to clarify misunderstandings and reinforce learning․ Educators benefit by using it to create assessments, verify solutions, and ensure alignment with curriculum goals․ The resource fosters academic confidence and proficiency, making it an indispensable companion for achieving success in algebra․ Its detailed approach supports individualized learning and classroom instruction, ensuring a strong foundation for higher-level math․

Where to Find the Answer Key Online

The Holt McDougal Algebra 1 Answer Key can be found on official Holt McDougal websites and various third-party educational platforms․ It’s also available as a downloadable PDF, ensuring easy access for students and educators needing quick solutions and study aids․

2․1 Official Sources and Websites

The Holt McDougal Algebra 1 Answer Key is available on the official Holt McDougal website, ensuring authenticity and alignment with the curriculum․ Students and educators can access it directly through their online platforms or by logging into their accounts․ Additionally, the answer key is included in the Holt McDougal Algebra 1 Homework Practice Workbook, which can be purchased or accessed digitally․ Official sources guarantee accurate and comprehensive solutions, making them the most reliable option for academic support․ They also provide additional resources, such as practice problems and real-world examples, to enhance learning․

2․2 Third-Party Educational Platforms

Third-party educational platforms like MathHelp․com and Course Hero offer Holt McDougal Algebra 1 answer keys, providing step-by-step solutions and real-world examples․ These platforms cater to students needing additional support, offering accessible resources beyond official sources․ They often include practice problems, video tutorials, and interactive tools․ While they may require subscriptions or purchases, they provide flexible learning options․ However, users should verify the accuracy of answers, as some content may be user-generated․ These platforms are valuable supplements for mastering algebraic concepts, especially for self-paced learners seeking extra guidance․

Structure and Organization of the Answer Key

The Holt McDougal Algebra 1 Answer Key is organized chapter-by-chapter, aligning with the textbook․ It includes detailed solutions, real-world examples, and covers all modules like quadratic equations and data analysis․ The key also incorporates homework practice workbook answers, ensuring comprehensive support for students․ Each section is clearly labeled, making it easy to navigate and find specific solutions quickly․ This structured approach helps students track their progress and understand complex concepts effectively․

3․1 Chapter-by-Chapter Breakdown

The Holt McDougal Algebra 1 Answer Key is meticulously organized to mirror the textbook’s structure, with solutions provided for each chapter․ Every chapter is divided into sections, offering detailed explanations for homework problems, quizzes, and tests․ The key includes answers to exercises on quadratic equations, functions, graphs, and data analysis, ensuring comprehensive coverage․ Each chapter’s breakdown allows students to easily locate specific problems and review concepts․ This alignment with the textbook enables seamless integration into study routines, helping students identify areas needing extra attention and reinforcing their understanding of algebraic principles․

3․2 Homework Practice Workbook Inclusion

The Holt McDougal Algebra 1 Answer Key includes comprehensive solutions for the Homework Practice Workbook, ensuring students can verify their answers and understand each step․ The workbook covers a wide range of topics, from basic algebraic expressions to advanced functions and data analysis․ Each problem is accompanied by a detailed explanation, reinforcing learning and problem-solving skills․ This inclusion allows students to practice regularly and gain confidence in their abilities․ The workbook’s alignment with the answer key makes it an essential tool for self-study and reinforces concepts taught in the classroom, helping students achieve mastery of algebraic principles․

Key Features and Benefits

The Holt McDougal Algebra 1 Answer Key offers detailed step-by-step solutions, real-world applications, and practice problems aligned with the textbook, enhancing understanding and problem-solving skills effectively․

4․1 Detailed Solutions and Explanations

The Holt McDougal Algebra 1 Answer Key provides in-depth, step-by-step solutions for every problem, ensuring clarity and understanding․ It breaks down complex concepts into manageable parts, making it easier for students to grasp algebraic principles․ Each solution is accompanied by detailed explanations, helping learners identify their mistakes and improve their problem-solving skills․ The answer key aligns perfectly with the textbook, covering topics from quadratic equations to data analysis․ By offering clear, logical steps, it enables students to follow along confidently and educators to reinforce lessons effectively․

4․2 Real-World Applications and Examples

The Holt McDougal Algebra 1 Answer Key incorporates real-world applications, making algebra relevant and engaging․ It connects abstract concepts to practical scenarios, such as finance, science, and everyday problem-solving․ Detailed examples illustrate how algebraic principles apply to real-life situations, helping students understand the relevance of their studies․ From calculating distances in geometry to analyzing data trends, the answer key bridges theory with application, fostering a deeper appreciation for algebra’s role in the world․ This approach ensures learners can apply their skills beyond the classroom, making math more relatable and meaningful․

Common Challenges and Solutions

The Holt McDougal Algebra 1 Answer Key presents challenges such as incomplete answers and accessibility issues for some users․ However, utilizing official sources and educational platforms can help resolve these problems, ensuring uninterrupted learning and understanding․

5․1 Incomplete or Missing Answers

Some users may encounter incomplete or missing answers in the Holt McDougal Algebra 1 Answer Key, particularly in downloaded PDF versions․ This issue often arises from outdated or unofficial sources․ To address this, students and educators can cross-reference with the official textbook or access reliable online platforms like MathHelp․com․ Additionally, reaching out to teachers or using supplementary materials can provide clarification․ Ensuring the use of the most recent edition and verifying the source of the answer key can help mitigate this problem, promoting a smoother learning experience for algebra concepts and problem-solving skills․

5․2 Accessibility Issues for Some Users

Accessibility issues may arise for some users when accessing the Holt McDougal Algebra 1 Answer Key, particularly in PDF formats․ Users with visual impairments or those relying on assistive technologies may face challenges due to incompatible file formats or lack of alt text․ Additionally, limited availability of the answer key in alternative formats, such as audiobooks or large print, can hinder accessibility․ To address this, educators and students can explore online platforms offering adaptable resources or request accommodations through schools․ Ensuring equal access is crucial for fostering an inclusive learning environment and supporting diverse student needs effectively․

Tips for Effective Use

  • Use the answer key alongside your textbook for cross-referencing solutions․
  • Review incorrect answers to understand common mistakes․
  • Focus on specific problem types to master key concepts․

6․1 Using the Answer Key with Textbooks

Using the Holt McDougal Algebra 1 Answer Key alongside your textbook enhances learning by providing step-by-step solutions and real-world examples․ Cross-reference chapters and problems to ensure alignment with your studies․ This approach helps reinforce concepts, clarify doubts, and improve problem-solving skills․ Students can verify their work, identify mistakes, and gain confidence․ Educators can also use it for lesson planning and assessments․ By integrating the answer key with textbook material, learners achieve a deeper understanding of algebraic principles and their practical applications․ This combination is essential for mastering the curriculum and excelling in exams․

6․2 Focusing on Specific Problem Types

Focusing on specific problem types in the Holt McDougal Algebra 1 Answer Key helps students target their weaknesses and improve efficiency․ By identifying common problem categories, such as quadratic equations or word problems, learners can prioritize their study time․ The answer key provides detailed solutions, enabling users to review and master each type․ This approach allows for a deeper understanding of algebraic concepts and their applications․ Regular practice with specific problem types enhances problem-solving skills and builds confidence for exams and real-world challenges․

The Holt McDougal Algebra 1 Answer Key is an invaluable resource for mastering algebraic concepts․ It provides detailed solutions, step-by-step explanations, and real-world examples, ensuring a comprehensive understanding․ Whether for homework, quizzes, or tests, this tool supports students and educators alike․ By leveraging the answer key, learners can build confidence and problem-solving skills․ For those seeking additional support, official sources and educational platforms offer easy access to this essential guide, making it a cornerstone for algebraic success․

samsung rf4287hars instruction manual

Product Overview

The Samsung RF4287HARS is a high-efficiency French door refrigerator, featuring advanced cooling technology, adjustable shelving, and a built-in ice maker․ It offers superior storage flexibility with humidity-controlled drawers and an intuitive user interface for optimal performance․

1․1 Key Features of the Samsung RF4287HARS Refrigerator

The Samsung RF4287HARS offers a water filtration system, ice maker, and humidity-controlled drawers․ Its advanced cooling technology ensures even temperature distribution․ The refrigerator features adjustable shelving, a spacious interior, and energy-saving modes․ Additional highlights include a touch screen display for easy controls and a quiet operation design, making it both functional and efficient for modern kitchens․ It also supports smart home integration, enhancing user convenience․

1․2 Design and Build Quality

The Samsung RF4287HARS features a sleek, modern design with a durable stainless steel finish․ Its French door layout provides easy access to contents, while the ergonomic handles ensure smooth operation․ The interior is built with high-quality materials, including spill-proof shelves and drawers․ The overall construction emphasizes both aesthetic appeal and long-lasting performance, ensuring reliability and style in any kitchen setting․ The design also supports energy efficiency and noise reduction․

Installation Requirements

Ensure adequate space for proper door swing and ventilation․ Check electrical compatibility and water supply connections․ Level the fridge to maintain even cooling and prevent damage during operation․

2․1 Space and Electrical Requirements

Ensure the area provides adequate clearance for door swing and proper ventilation; The refrigerator requires a dedicated 120V grounded outlet and minimum surrounding space for optimal airflow․ Measure the installation site to confirm dimensions match the fridge’s specifications for a seamless fit and safe operation․

2․2 Initial Setup and Leveling

Place the refrigerator on a firm, level surface to ensure stable operation․ Use the adjustable leveling feet to balance the unit, preventing uneven installation․ Check the leveling indicators to confirm proper alignment, as an unbalanced fridge may cause performance issues․ This step is crucial for maintaining even cooling and preventing damage to internal components during operation․

2․3 Connecting Water and Ice Dispenser

Connect the water supply line to a cold water source and ensure it is securely attached to the refrigerator’s inlet valve․ Replace the water filter with a genuine Samsung filter to maintain water quality․ After installation, run several cycles through the dispenser to flush out any debris or air bubbles for clean operation․ Proper connection ensures optimal performance of both water and ice features․

Initial Setup and Configuration

Power on the refrigerator and follow the initialization process․ Set temperature and humidity levels according to your preferences․ Customize shelf and drawer settings for optimal storage organization․

3․1 First-Time Power-On and Initialization

When you first power on the Samsung RF4287HARS, ensure it is properly plugged into a grounded outlet․ The refrigerator will automatically enter initialization mode, during which it will run a self-diagnostic check․ This process ensures all features are functioning correctly․ Allow the system to complete its cycle before adjusting settings or using the appliance․

3․2 Setting Temperature and Humidity Controls

The Samsung RF4287HARS allows easy adjustment of temperature and humidity settings․ Use the control panel buttons to set the refrigerator between 33°F-41°F and freezer at -4°F to 5°F․ The display will show the set temperatures and beep when confirmed․ Humidity drawers can be set to high or low based on storage needs․ Ensure optimal cooling by waiting 24 hours after initial setup before using the ice maker․

3․4 Customizing Shelf and Drawer Settings

The Samsung RF4287HARS allows easy customization of shelves and drawers to maximize storage․ Adjust shelves by lifting and sliding them to fit tall items․ Humidity-controlled drawers can be set to high or low based on food type․ Use the crisper drawers for fruits and vegetables, and the bottom drawer for meats or large items․ Ensure proper spacing for optimal air circulation and freshness․

Operating the Refrigerator

Operate the Samsung RF4287HARS by adjusting temperature settings via the control panel․ Use the ice maker and water dispenser as needed, ensuring proper door sealing for efficiency․

4․1 Daily Use and Best Practices

For optimal performance, organize storage efficiently using adjustable shelves and humidity-controlled drawers․ Regularly check door seals to ensure proper closing and energy efficiency․ Clean the refrigerator’s condenser coils periodically to maintain cooling performance․ Always store food at recommended temperatures, and avoid overcrowding to ensure proper air circulation․ Follow these practices to extend the appliance’s lifespan and maintain its functionality․

4․2 Using the Ice Maker and Water Dispenser

To use the ice maker, ensure the water supply is connected and the ice maker is activated via the control panel․ For the water dispenser, press and hold your glass against the sensor until water flows․ Regularly replace the water filter to maintain taste and quality․ Clean the dispenser area to prevent mineral buildup and ensure smooth operation․

4․3 Adjusting Door Settings and Seals

Ensure proper door alignment by adjusting hinges if necessary․ Inspect door seals regularly for damage or wear․ Clean seals with mild soap to maintain a tight closure․ If seals are damaged, replace them to prevent air leaks and maintain optimal temperature․ Proper door alignment and seal integrity are crucial for energy efficiency and consistent cooling performance․

Maintenance and Care

Regularly clean the interior and exterior to maintain hygiene․ Check door seals for damage and ensure proper alignment․ Replace worn-out parts promptly for optimal performance․

5․1 Cleaning the Interior and Exterior

Regular cleaning ensures optimal performance and hygiene․ Wipe the interior with a mild detergent solution, paying attention to shelves and drawers․ For the exterior, use a soft cloth to avoid scratches․ Clean door seals to maintain a tight closure․ Avoid harsh chemicals, as they may damage surfaces․ Dry all areas thoroughly after cleaning to prevent moisture buildup and maintain a fresh environment․

5․2 Replacing the Water Filter

To maintain water quality, replace the filter every 6 months or as indicated․ Turn off the water supply, then press the release button near the filter․ Remove the old filter and discard it․ Insert the new filter (e․g․, DA29-00020B) and rotate it clockwise until it clicks․ Turn the water supply back on and flush the system by dispensing 2-3 gallons to ensure proper function and clean water flow․

5․3 Checking and Replacing Other Filters

Regularly inspect and replace other filters, such as the air filter, to maintain optimal performance․ The air filter is usually located at the rear or bottom of the refrigerator․ Replace it every 6-12 months or when visibly dirty․ Check for signs of wear or damage on all filters and ensure to use genuine Samsung parts for replacements to guarantee compatibility and efficiency․

Troubleshooting Common Issues

The Samsung RF4287HARS manual provides solutions for error codes, temperature fluctuations, and ice maker malfunctions․ Refer to the troubleshooting guide for quick fixes and Samsung support․

6․1 Identifying and Solving Error Codes

The Samsung RF4287HARS manual includes a detailed list of error codes, such as E13, E14, and E15, which indicate specific issues like temperature sensors or communication errors․ Users can diagnose problems by referencing the code definitions and following step-by-step solutions provided in the troubleshooting section․ Regular maintenance and resetting the appliance often resolve these issues quickly and effectively, ensuring optimal performance and longevity of the refrigerator․

6․2 Addressing Temperature Fluctuations

Temperature fluctuations in the Samsung RF4287HARS can be resolved by checking door seals for proper closure and ensuring adequate ventilation around the appliance․ Verify that temperature sensors are functioning correctly and that settings are within the recommended range․ If issues persist, resetting the refrigerator or checking for error codes like E13 or E14 in the manual may provide further guidance for correction․

6․3 Fixing Ice Maker and Water Dispenser Problems

For ice maker issues, ensure the water supply is turned on and the ice maker is switched on․ Check for blockages in the ice chute and verify the water filter is clean; If the dispenser isn’t functioning, inspect the tubing for kinks and ensure proper water pressure․ Referencing the manual for error codes like E13 or E14 can also guide troubleshooting steps effectively․

Replacement Parts and Accessories

Genuine Samsung parts like water filters, shelves, and door seals ensure optimal performance․ These accessories maintain efficiency and longevity, aligning with the refrigerator’s advanced features perfectly always․

7․1 Recommended Parts for Maintenance

Essential maintenance parts include the DA29-00020B water filter and 04609101000 replacement filter, ensuring clean water and ice․ Additionally, DA63-07384A door seals maintain optimal cooling․ Regularly replacing these parts enhances performance and extends the appliance’s lifespan, aligning with Samsung’s quality standards for reliability and efficiency in the RF4287HARS model․

7․2 Where to Buy Genuine Samsung Parts

Genuine Samsung parts for the RF4287HARS can be purchased through Samsung’s official website, authorized retailers, or trusted online marketplaces like Fix․com․ Ensure authenticity by verifying the seller’s credentials to avoid counterfeit products․ Purchasing from these sources guarantees compatibility and maintains your refrigerator’s performance and warranty, ensuring long-term reliability and customer satisfaction with your Samsung appliance․

Energy Efficiency and Savings

The Samsung RF4287HARS features advanced energy-saving technology, optimizing power consumption while maintaining superior cooling performance․ Its eco-friendly design helps reduce utility bills and environmental impact significantly, making it a cost-effective and sustainable choice for homeowners seeking efficiency without compromising on functionality or convenience․

8․1 Understanding Energy-Saving Features

The Samsung RF4287HARS incorporates cutting-edge energy-saving technologies, such as smart sensors that detect temperature changes and optimize cooling cycles․ Its adaptive compressor adjusts operation based on load, reducing unnecessary energy use․ Additionally, the eco-mode setting further minimizes power consumption without compromising performance, making it an ideal choice for eco-conscious households․

These features not only lower electricity bills but also contribute to a reduced environmental footprint․ The manual provides detailed insights into how these technologies work, helping users maximize energy efficiency․

8․2 Tips for Reducing Energy Consumption

To minimize energy use with the Samsung RF4287HARS, keep the refrigerator at the optimal temperature (37-40°F for the fridge, 0°F for the freezer)․ Avoid overloading shelves, as this can reduce airflow and increase energy consumption․ Use the eco-mode feature when possible and ensure door seals are tight to prevent cold air from escaping․ Regularly cleaning the condenser coils also improves efficiency․ Additionally, check the door alarm to address any issues promptly․

  • Keep shelves organized for better airflow․
  • Avoid frequent door openings to maintain internal temperature․
  • Use the “Energy-Saving” mode when the fridge is less full․

Safety Precautions

Always follow safety guidelines to ensure safe operation․ Keep children away from moving parts and use the child lock feature; Avoid electrical hazards and store flammable materials properly․

  • Prevent children from playing with doors or controls․
  • Ensure proper installation to avoid tipping risks․

9․1 General Safety Guidelines

Ensure the refrigerator is installed on a stable, level surface to prevent tipping․ Keep children away from moving parts and use the child safety lock․ Avoid exposing the appliance to extreme temperatures or moisture․ Never store flammable materials near the refrigerator․ Always unplug it before performing maintenance or repairs․ Follow the user manual instructions carefully to ensure safe operation and avoid potential hazards․

  • Prevent children from accessing dangerous components․
  • Avoid overloading shelves or drawers․
  • Keep electrical connections dry and secure․

9․2 Child Safety Features

The Samsung RF4287HARS includes child safety features such as a secure lock to prevent accidental opening and access to internal controls․ Parents can activate the child safety lock to ensure children cannot adjust settings or dispense ice and water without supervision․ The refrigerator also features safe button placement and secure door seals to protect children from potential hazards․ Always supervise children near the appliance and teach them to use it responsibly․

  • Activate the child lock to prevent unauthorized access․
  • Ensure children understand the risks of playing with the refrigerator․
  • Regularly inspect the door seals for proper function․

Warranty and Support Information

The Samsung RF4287HARS is backed by a comprehensive warranty covering parts and labor․ For inquiries or assistance, contact Samsung’s dedicated customer support team via phone or online․

  • Visit the official Samsung website for warranty details․
  • Call the Samsung customer service hotline for direct support․
  • Refer to the user manual for specific warranty terms․

10․1 Understanding Your Warranty Coverage

Your Samsung RF4287HARS warranty covers parts and labor for one year from purchase․ Additional extended warranties are available for purchase․ The warranty ensures defective components are repaired or replaced free of charge․
For full details, review the warranty section in the user manual or visit Samsung’s official website․ Keep your proof of purchase for warranty validation․

10․2 Contacting Samsung Customer Support

For assistance with your Samsung RF4287HARS, visit the official Samsung support website․ Navigate to the “Support” section and select your model for troubleshooting guides, manuals, and contact options․
You can reach Samsung customer support via phone, live chat, or email․ Have your model number and purchase date ready for efficient service․ Representatives are available to address warranty claims, repair requests, and technical inquiries․

Upgrading and Customization

Enhance your Samsung RF4287HARS with smart home integration or customize storage solutions for optimal functionality․ Explore upgrade options to improve performance and personalization․

11․1 Upgrading to Smart Home Compatibility

Upgrade your Samsung RF4287HARS refrigerator to integrate seamlessly with smart home systems․ Enable voice control through compatible platforms like Samsung SmartThings or Amazon Alexa․ This upgrade allows remote monitoring and control of temperature settings, ensuring optimal performance and energy efficiency․ Enhance your kitchen experience with cutting-edge smart technology for convenience and modern living․

11․2 Customizing Storage and Shelving

Customize your Samsung RF4287HARS refrigerator with adjustable shelves and drawers for optimal storage․ Humidity-controlled drawers keep produce fresh, while flexible shelving accommodates items of various sizes․ Easily reconfigure the interior to suit your needs, ensuring efficient use of space and maintaining organization for all your groceries․

12․1 Final Tips for Optimal Performance

To maximize the performance of your Samsung RF4287HARS, ensure regular cleaning of the interior and exterior, replace water filters as recommended, and check door seals for tight closure․ Adjust temperature settings according to seasonal needs and organize shelves for efficient storage․ Proper maintenance and adherence to the user manual will enhance longevity and efficiency, ensuring your refrigerator operates at its best․

PDF

jcps teacher salary schedule 24 25 pdf

The 2024-2025 JCPS Teacher Salary Schedule provides an overview of compensation for educators‚ effective July 1‚ 2024. It outlines salary structures‚ benefits‚ and pay increases‚ ensuring fair and competitive wages for teachers and staff. The schedule is pending school board approval in June 2024.

Key Components of the Salary Schedule

The JCPS salary schedule includes salary structure‚ classification‚ and annual calculation based on a 187-day work year. It incorporates stipends‚ bonuses‚ and pay raises‚ ensuring competitive compensation for teachers and staff across different ranks and qualifications.

Salary Structure and Classification

The JCPS Teacher Salary Schedule for 2024-2025 organizes compensation based on educational qualifications and years of experience. Teachers are classified into ranks such as Bachelor’s (BS)‚ Master’s (MA)‚ and Doctorate levels‚ with further subdivisions like BS16‚ MA16‚ and MA32 reflecting additional credits or certifications. The schedule also accounts for specialists and doctoral degrees‚ ensuring differentiated pay scales for varying levels of expertise. Salary steps are determined by years of service‚ with incremental increases rewarding longevity and dedication. The structure ensures transparency and equity‚ providing clear pathways for career advancement and salary growth. The classification system is designed to recognize professional development and educational attainment‚ aligning pay with qualifications to attract and retain highly qualified educators. This systematic approach ensures that teachers are fairly compensated based on their credentials and experience‚ fostering a motivated and skilled workforce.

Basis for Annual Salary Calculation

The JCPS Teacher Salary Schedule for 2024-2025 calculates annual salaries based on a predefined work year of 187 days‚ with a standard 7-hour workday. This structure ensures that teachers are compensated for their contracted time‚ providing a clear and consistent basis for salary determination; The schedule incorporates experience-based steps‚ where teachers receive incremental raises as they gain more years of service. Additionally‚ educators with advanced degrees or specialized certifications are assigned to higher pay tiers‚ reflecting their enhanced qualifications. The annual salary is derived by multiplying the daily rate by the number of contracted days‚ ensuring transparency in the calculation process. This system aligns with the district’s commitment to fair compensation‚ recognizing both experience and educational achievements. The 2024-2025 schedule also includes a 2% salary increase‚ effective July 1‚ 2024‚ further enhancing the competitiveness of JCPS teacher pay.

Salary Increases for 2024-2025

The JCPS Teacher Salary Schedule for 2024-2025 includes a 2% salary increase for teachers‚ effective July 1‚ 2024. This raise is part of a broader effort to enhance teacher compensation and ensure competitive wages. The district has also announced a 14% overall salary increase for employees from 2023 to 2026‚ demonstrating a strong commitment to educator pay. Additionally‚ a 2% salary increase is planned for the 2025-2026 academic year‚ further supporting teacher retention and recruitment. The salary adjustments are designed to recognize the dedication and hard work of JCPS staff while addressing the rising cost of living. The increases have been approved by the school board as part of the district’s budget allocation for the upcoming fiscal year. This move aligns with JCPS’s goal of maintaining its reputation as a competitive employer in the education sector.

Payment Schedule and Paychecks

For the 2024-2025 school year‚ JCPS teachers and staff receive their paychecks on a regular schedule‚ with payments issued on the 15th and the last working day of each month. This ensures consistent cash flow for employees throughout the year. The annual salary is calculated based on a 187-day work year‚ with a 7-hour workday. Payments are distributed via direct deposit‚ and employees can access detailed pay stubs online through the district’s payroll portal. The payment schedule aligns with the district’s fiscal calendar‚ which runs from July 1‚ 2024‚ to June 30‚ 2025. Additional stipends or bonuses‚ if applicable‚ are incorporated into the regular pay cycle. JCPS also provides optional payment deferment plans to help employees manage their finances effectively. The district ensures transparency by publishing the payment schedule in advance‚ allowing staff to plan accordingly. This structured approach reflects JCPS’s commitment to maintaining a reliable and efficient compensation system for its employees.

Certified Teacher Salary Scale

The 2024-2025 Certified Teacher Salary Scale for JCPS is designed to compensate educators based on their qualifications‚ experience‚ and academic credentials. The scale is divided into ranks‚ including Bachelor’s (BS)‚ Master’s (MA)‚ and Doctorate levels‚ with additional steps for years of service. Teachers with a Bachelor’s degree start at a base salary‚ while those with advanced degrees‚ such as MA or Doctorate‚ receive higher compensation. The schedule also includes incremental raises for each year of experience‚ ensuring that veteran teachers are appropriately recognized. For instance‚ a teacher with a Bachelor’s degree and 25 years of experience falls under Rank I‚ Step 25‚ with an annual salary of $92‚359.77. The 2024-2025 schedule reflects a 2.0% increase from the previous year‚ aligning with the district’s commitment to competitive wages. This structured approach ensures fairness and transparency‚ rewarding educators for their dedication and professional growth.

Classified Staff Salary Scale

The 2024-2025 JCPS Classified Staff Salary Scale outlines compensation for support staff‚ including paraprofessionals‚ secretaries‚ nutrition services‚ custodians‚ and other non-teaching roles. Salaries are determined based on job classification‚ experience‚ and hours worked. Classified staff are typically paid hourly‚ with rates varying by role and seniority. For example‚ custodial and nutrition services staff may earn between $12 and $18 per hour‚ depending on experience. Paraprofessionals and secretaries often start at higher hourly rates‚ reflecting their specialized roles. The 2024-2025 schedule includes a 2.0% increase for all classified positions‚ ensuring competitive wages for support staff. This scale is designed to recognize the essential contributions of classified employees‚ providing a fair and structured compensation system. The JCPS Classified Staff Salary Scale is approved by the school board and aligns with district budget allocations for the 2024-2025 fiscal year.

Substitute Teacher Pay Rates

The JCPS Substitute Teacher Pay Rates for the 2024-2025 school year are designed to attract and retain qualified educators to support classroom needs. Substitute teachers are compensated on an hourly basis‚ with rates varying depending on their qualifications and the duration of their assignment. For example‚ substitute teachers with a bachelor’s degree may earn a higher hourly rate compared to those without. The pay structure also includes incentives for long-term assignments‚ with rates increasing after a certain number of consecutive days in the same role. Additionally‚ JCPS offers bonuses for substitutes who work a high volume of days during the school year‚ further enhancing their compensation. The district ensures timely payments through a biweekly payroll schedule‚ providing financial stability for substitutes. These rates are part of JCPS’s broader effort to maintain a robust and reliable substitute teaching pool‚ ensuring continuity in education for students.

Special Stipends and Bonuses

JCPS offers special stipends and bonuses to recognize and reward employees for their dedication and specialized contributions. These incentives are designed to enhance retention and recruitment efforts. For the 2024-2025 school year‚ stipends are available for teachers in specific programs‚ such as AIS (Academic Intervention Services) and Choice Zone initiatives‚ with payments distributed quarterly. Additionally‚ substitute teachers who work a high volume of days may qualify for bonuses‚ acknowledging their critical role in maintaining educational continuity. Other stipends include payments for math and reading specialists‚ with amounts varying by school level—elementary‚ middle‚ or high school. These stipends are part of JCPS’s commitment to supporting educators in high-need areas and specialized roles. The district ensures that all stipends and bonuses are clearly outlined in the salary schedule‚ providing transparency and fairness for all employees. These additional payments contribute to the overall compensation package‚ making JCPS a competitive employer in the education sector.

Salary Schedule Approval Process

The approval process for the JCPS Teacher Salary Schedule 2024-2025 involves a detailed review and validation by the JCPS Board of Education. The proposed schedule is typically presented to the board in May or June of each year for final approval. Key stakeholders‚ including district administrators and teacher representatives‚ collaborate to ensure the schedule aligns with district goals‚ budget constraints‚ and educator needs. Once approved‚ the schedule is officially implemented‚ effective July 1‚ 2024; The process emphasizes transparency‚ with the final document made available to all employees and the public through the JCPS website. This ensures accountability and clear communication of compensation details. The approval process also considers feedback from previous years to make necessary adjustments‚ ensuring the schedule remains fair and competitive. By following this structured approach‚ JCPS ensures that the salary schedule reflects its commitment to supporting educators while maintaining fiscal responsibility.

Comparing JCPS Salaries to State and National Averages

JCPS teacher salaries for the 2024-2025 academic year are competitive compared to state and national averages. According to recent data‚ the average teacher salary in Kentucky is approximately $54‚574‚ while JCPS teachers earn slightly higher‚ with salaries ranging around $56 per hour‚ translating to nearly $74‚000 annually. Nationally‚ the average teacher salary is about $61‚000‚ making JCPS salaries more attractive; This reflects JCPS’s commitment to offering wages that align with or exceed regional and national benchmarks. The district’s salary schedule also includes a planned 2% increase for the 2025-2026 academic year‚ further enhancing its competitiveness. These competitive wages are part of JCPS’s strategy to attract and retain top teaching talent‚ ensuring high-quality education for students. By maintaining salaries above state and national averages‚ JCPS demonstrates its dedication to supporting educators and fostering a positive work environment.

Future Salary Projections

Looking ahead‚ JCPS has outlined ambitious plans to continue enhancing teacher compensation. A proposed 2% salary increase is scheduled for the 2025-2026 academic year‚ building on the current 2% raise for 2024-2025. Additionally‚ a 5% pay raise was recently approved by the school board‚ demonstrating a strong commitment to teacher pay growth. These increases are part of a broader strategy to ensure JCPS salaries remain competitive and attractive to educators. The district also aims to implement an 11% salary increase over the next three years‚ which would significantly boost teacher wages and further align them with national standards. These projections underscore JCPS’s dedication to investing in its workforce and maintaining its reputation as a leader in educator compensation. By prioritizing salary growth‚ JCPS seeks to attract and retain top teaching talent‚ ensuring long-term success for both teachers and students. These plans are subject to school board approval and ongoing budgetary considerations.

15 count manual arms

The 15-Count Manual Arms is a dynamic upper-body exercise targeting strength and endurance. It engages multiple muscle groups‚ promoting coordination and flexibility‚ ideal for full-body conditioning and overall fitness.

Definition and Overview

The 15-Count Manual Arms is a specialized exercise focusing on controlled arm movements‚ typically involving weights or resistance. It is characterized by a structured sequence of 15 counts‚ emphasizing precise form and timing. This exercise targets the upper body‚ particularly the deltoids‚ biceps‚ and triceps‚ while also engaging core muscles for stability. The movement pattern involves raising and lowering the arms in a specific rhythm‚ promoting strength‚ endurance‚ and coordination. Its versatility allows for variations in intensity‚ making it suitable for both beginners and advanced practitioners. The 15-Count Manual Arms is widely recognized for its efficiency in building muscular definition and improving overall upper-body functionality.

Historical Background and Origins

The 15-Count Manual Arms exercise traces its roots to military training and martial arts practices‚ where precise‚ repetitive movements were used to build discipline and strength. Originally designed to enhance upper-body endurance‚ it evolved into a structured routine emphasizing timing and control. The exercise gained popularity in the mid-20th century as a versatile training tool for both athletes and general fitness enthusiasts. Its origins are tied to the development of resistance training‚ where the focus was on functional movements that mimic real-world actions. Over time‚ the 15-Count Manual Arms has been adapted into various fitness programs‚ maintaining its core principles while catering to different fitness levels and goals. Its enduring appeal lies in its simplicity and effectiveness‚ making it a staple in many training regimens worldwide.

Modern Applications and Popularity

The 15-Count Manual Arms exercise has gained significant traction in modern fitness routines due to its versatility and effectiveness. It is widely used in CrossFit‚ group classes‚ and personal training sessions for its ability to improve coordination‚ strength‚ and cardiovascular endurance; The exercise is favored for its simplicity‚ requiring no equipment and minimal space‚ making it accessible to individuals of all fitness levels. Its popularity has also grown in rehabilitation settings‚ where it is used to restore shoulder mobility and strength after injuries. Additionally‚ the 15-Count Manual Arms is often incorporated into home workout plans‚ appealing to those who prefer efficient and time-effective training. Its adaptability and benefits have solidified its place as a staple in modern fitness culture.

Physical and Technical Aspects

The 15-Count Manual Arms involves controlled arm movements‚ emphasizing proper form and technique. It requires coordination‚ timing‚ and consistent tempo to maximize efficiency and minimize strain.

Muscle Groups Engaged

The 15-Count Manual Arms primarily engages the deltoids‚ biceps‚ and triceps‚ targeting shoulder mobility and arm strength. The pectoralis major also contributes during the movement‚ enhancing chest activation. Additionally‚ the core muscles‚ including the abdominals and obliques‚ are activated to maintain stability and proper form throughout the exercise. This comprehensive engagement makes it an effective upper-body workout‚ improving overall muscle endurance and coordination. Regular practice strengthens these muscle groups‚ enhancing posture and functional strength while reducing the risk of injury when performed correctly.

Proper Form and Technique

Proper form for 15-Count Manual Arms begins with a stable stance‚ feet shoulder-width apart‚ and hands at shoulder height. Engage the core to maintain a neutral spine and balance. Arms should move in a controlled‚ synchronized manner‚ avoiding momentum. Focus on smooth transitions between positions to maximize efficiency and minimize strain. Keep elbows slightly bent to reduce joint stress. Practice slow‚ deliberate movements to ensure precision and full range of motion. Avoid arching the back or letting the arms drop below shoulder level. Maintain consistent pacing and breathing to sustain form throughout the exercise. Proper technique ensures safety and effectiveness‚ engaging the target muscles without unnecessary strain.

Common Mistakes to Avoid

Common mistakes when performing 15-Count Manual Arms include using excessive momentum‚ which reduces the effectiveness of the exercise. Avoid letting the arms swing uncontrollably‚ as this can strain the shoulders and joints. Another mistake is failing to maintain a neutral spine‚ leading to poor posture and potential back pain. Keep the core engaged to stabilize the body. Additionally‚ some individuals drop their arms too low or raise them too high‚ deviating from the optimal range of motion. Ensure arms stay at shoulder height throughout. Neglecting to warm up before starting can also increase the risk of injury. Focus on controlled‚ precise movements to maximize benefits and prevent strain.

Training and Progression

The 15-Count Manual Arms is a versatile exercise that can be integrated into various workout routines. Start with shorter sets and gradually increase intensity or resistance for progression.

Beginner Modifications and Adjustments

For beginners‚ starting with a reduced range of motion or shorter sets can make the 15-Count Manual Arms more manageable. Using lighter weights or resistance bands can also help build strength gradually. Modifying the exercise to focus on controlled movements ensures proper form and reduces injury risk. Beginners can also alternate between partial reps and full extensions to build endurance. Incorporating pauses during the movement can enhance focus and muscle engagement. Gradually increasing the intensity as strength improves is key to progression. Prioritizing form over speed helps prevent strain and ensures effective targeting of the intended muscle groups.

Intermediate and Advanced Variations

Intermediate and advanced practitioners can enhance the 15-Count Manual Arms by incorporating tempo changes‚ such as slow eccentrics or explosive contractions‚ to increase intensity. Alternating arms or performing unilateral reps challenges balance and isolates muscle groups. Adding weight or resistance‚ such as using dumbbells or cables‚ amplifies the workout. Advanced variations include integrating dynamic movements‚ like rotational presses or side-to-side shifts‚ to engage the core and improve coordination. Combining the exercise with other upper-body movements‚ such as chest presses or lateral raises‚ creates a compound exercise for full-spectrum development. These variations keep the routine engaging while pushing physical limits‚ ensuring continued progress and adaptation. Proper form remains essential to maximize benefits and prevent injury.

Progressive Overload and Consistency

Progressive overload is essential for continuous improvement in 15-Count Manual Arms. Gradually increasing the intensity ensures muscle growth and strength gains over time. This can be achieved by adding repetitions‚ extending the duration‚ or incorporating weighted resistance. Consistency is key; regular practice reinforces muscle memory and enhances endurance; Aim to challenge yourself weekly‚ whether by increasing volume or intensity. Tracking progress helps maintain motivation and ensures adherence to the training program. Over time‚ these consistent efforts lead to noticeable improvements in strength‚ coordination‚ and overall physical fitness. Staying committed to progressive overload ensures the exercise remains effective and engaging‚ fostering long-term success and muscular development. Regularity and incremental challenges are the cornerstones of mastery in this exercise.

Safety and Recovery

Proper warm-ups‚ hydration‚ and rest are crucial for safety and recovery. Avoiding overexertion prevents injuries‚ while post-exercise stretches enhance flexibility and reduce muscle soreness effectively.

Possible Injuries and Prevention

When performing 15-Count Manual Arms‚ common injuries include shoulder strains‚ wrist sprains‚ and elbow discomfort due to overexertion or poor form. To prevent these‚ ensure proper warm-ups and maintain correct technique throughout the exercise. Overtraining should be avoided‚ as it can lead to fatigue and increased risk of injury. Strengthening the surrounding muscles through auxiliary exercises can also enhance stability and reduce strain. Listening to your body and taking regular breaks is essential for long-term safety and effectiveness. Consulting a fitness professional to review your form can further minimize injury risks and optimize performance.

Recovery Techniques and Best Practices

After performing 15-Count Manual Arms‚ proper recovery is crucial to avoid muscle fatigue and soreness. Begin with a dynamic warm-down‚ including light cardio and stretching to relax the shoulders‚ wrists‚ and elbows. Foam rolling the arms and upper back can help reduce tension and improve blood flow. Hydration and a balanced diet rich in protein and carbohydrates aid muscle repair. Allow 48 hours of rest between intense sessions to prevent overtraining. Incorporating yoga or light cross-training can enhance flexibility and active recovery. Prioritizing sleep is also vital for overall muscle regeneration and performance improvement. By following these practices‚ you can maintain consistency and achieve long-term benefits from the exercise.

The 15-Count Manual Arms is a versatile and effective exercise for building strength and endurance. Consistent practice yields lasting benefits‚ making it a valuable addition to any fitness routine.

Final Thoughts and Benefits

Incorporating the 15-Count Manual Arms into your workout routine offers numerous benefits. It enhances upper body strength‚ improves coordination‚ and boosts endurance. This exercise is versatile‚ suitable for both beginners and advanced individuals‚ making it a great addition to any fitness plan. Regular practice can lead to noticeable improvements in muscle tone and overall physical fitness. Additionally‚ it requires minimal equipment‚ allowing you to train effectively anywhere. The mental focus required to maintain proper form also contributes to improved discipline and concentration. Overall‚ the 15-Count Manual Arms is a valuable exercise for achieving a stronger‚ more balanced physique.

Encouragement for Continued Practice

Consistency is key when mastering the 15-Count Manual Arms. Embrace the challenge and celebrate small victories as you progress. This exercise not only strengthens your physique but also enhances mental discipline and focus. Remember‚ every repetition brings you closer to your fitness goals. Stay motivated by tracking your improvements and setting achievable milestones. Whether you’re a seasoned athlete or just starting out‚ persistent practice will yield lasting results. Keep pushing forward‚ and enjoy the transformative benefits of this powerful workout. Your dedication will pay off‚ inspiring confidence and a stronger‚ healthier you.