Archive: August 29, 2024

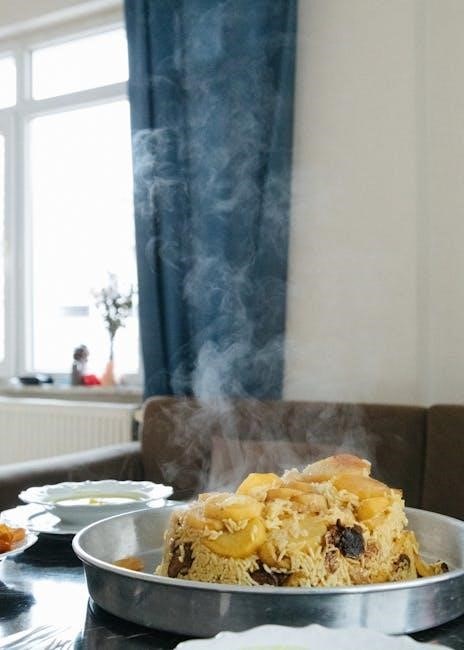
red baron french bread pizza instructions

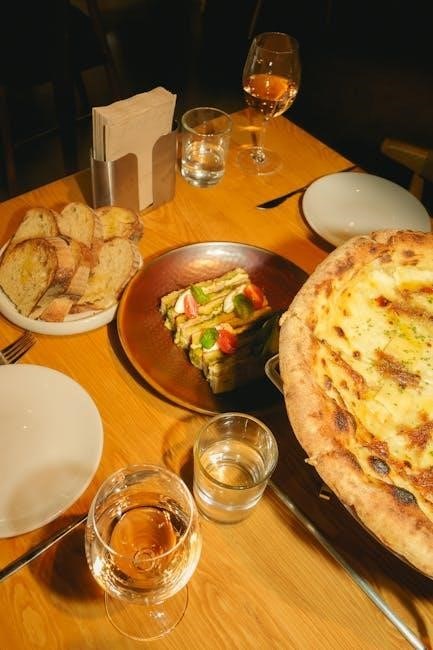
Red Baron French Bread Pizza is a beloved frozen pizza option, offering a crispy French bread crust topped with flavorful ingredients like pepperoni, cheese, and vegetables. Its popularity stems from its convenience, making it a perfect choice for quick meals.

1.1 Overview of Red Baron French Bread Pizza

Red Baron French Bread Pizza is a delicious and convenient frozen pizza option that combines the crispiness of French bread with the savory flavors of traditional pizza. The crust is made from authentic French bread, offering a perfect balance of crunch on the outside and softness on the inside. Topped with ingredients like pepperoni, mozzarella cheese, and a variety of vegetables, it provides a satisfying meal that appeals to both kids and adults. The pizza is designed to be easy to prepare, with options to cook it in the oven, air fryer, or microwave, ensuring a quick and tasty meal any time of the day. Its popularity lies in its versatility and flavorful profile, making it a great choice for snacks, light meals, or casual gatherings.

1.2 Popularity and Convenience

Red Baron French Bread Pizza is widely popular due to its ease of preparation and delicious flavor profile. It serves as a convenient meal solution for busy individuals and families, offering a quick way to enjoy a homemade pizza experience without the hassle. The pizza can be cooked in multiple ways—oven, air fryer, or microwave—making it adaptable to various preferences and time constraints. Its frozen format ensures long shelf life, allowing users to stock up and cook only what they need. Additionally, the portion size is ideal for personal meals or sharing, catering to both small and large gatherings. This combination of taste, flexibility, and ease has made Red Baron French Bread Pizza a favorite for many seeking a satisfying and stress-free meal option.

Ingredients and Supplies

Red Baron French Bread Pizza requires French bread, pizza sauce, shredded mozzarella cheese, and toppings like pepperoni, mushrooms, or bell peppers. Essential supplies include a baking sheet, utensils, and an oven or microwave for cooking.

2.1 Essential Components

The foundation of Red Baron French Bread Pizza lies in its essential components: crispy French bread as the crust, rich pizza sauce, and a generous layer of shredded mozzarella cheese. These elements provide the perfect base for a delicious meal, ensuring a balance of flavors and textures. The French bread offers a sturdy yet soft base, while the pizza sauce adds tanginess and the cheese delivers creaminess. Together, these components create a satisfying and flavorful starting point for your pizza, ready to be customized with your favorite toppings.

2.2 Recommended Toppings

Red Baron French Bread Pizza can be personalized with a variety of toppings to suit your taste preferences. Classic options include pepperoni, mushrooms, bell peppers, onions, and olives, offering a traditional pizza experience. For a meaty twist, consider adding sausage or bacon for extra flavor. Veggie lovers can opt for fresh vegetables like tomatoes or spinach to enhance the dish. Cheese enthusiasts might enjoy additional layers of mozzarella or parmesan for creaminess. Experiment with combinations like ham and pineapple for a sweet and savory touch or load up with multiple meats for a hearty option. The key is to balance flavors and textures without overwhelming the crispy French bread crust. Fresh ingredients will elevate the overall taste, making each bite satisfying and delicious.

2.3 Necessary Tools

To prepare and cook a Red Baron French Bread Pizza, you’ll need a few essential tools. Start with a conventional oven or toaster oven for baking, or an air fryer for a crisper texture. A microwave can also be used for quicker preparation. Additional tools include a baking sheet lined with parchment paper for oven cooking, a cutting board for slicing the pizza, and a knife for portioning. Oven mitts are recommended for handling the hot baking sheet, and a serving spatula will help transfer the pizza to a plate. For air fryer cooking, ensure the basket is clean and properly positioned. These tools will make the process efficient and safe, ensuring your pizza turns out perfectly cooked and ready to enjoy.

Cooking Instructions

Red Baron French Bread Pizza can be cooked in an oven, air fryer, or microwave. Preheat the oven to 375°F for 20-23 minutes, or use the air fryer at 400°F for 6-8 minutes. For a quick option, microwave on high for 1-2 minutes, then bake at 425°F for 8-10 minutes. Always follow the package instructions for best results.

3.1 Oven Method

To achieve the perfect Red Baron French Bread Pizza using the oven method, preheat your oven to 375°F (or 400°F for a toaster oven). Remove the pizza from its packaging and place it directly on a baking sheet. Bake for 20 to 23 minutes, or until the cheese is fully melted and the crust is golden brown. For an extra crispy crust, you can bake the pizza directly on the oven rack. Ensure the pizza is cooked through and let it stand for 2 to 3 minutes before serving. Always follow the package instructions for precise cooking times and temperatures to guarantee the best results. This method ensures a crispy exterior and a soft, cheesy interior.

3.2 Air Fryer Method

For a quicker and crisper cooking experience, the air fryer method is ideal. Place the Red Baron French Bread Pizza directly in the air fryer basket, ensuring it lies flat. Cook at 375°F for 6 to 8 minutes, or until the crust is golden brown and the cheese is melted and bubbly. Halfway through cooking, gently shake the basket to ensure even heating. This method yields a perfectly cooked pizza with a crispy crust and flavorful toppings in less time than traditional oven baking. It’s a great option for those seeking a fast yet satisfying meal or snack.

3;3 Microwave Instructions

For a quick and convenient option, microwave cooking is ideal. Place the Red Baron French Bread Pizza on a microwave-safe plate and cook on high for 1 minute 15 seconds to 2 minutes 15 seconds, depending on your microwave’s power. The pizza will be hot and the cheese will be melted. For an extra crispy crust, you can optionally bake it in a preheated oven at 425°F for an additional 7-9 minutes after microwaving. Remove carefully with oven mitts and let stand for 2-3 minutes before serving. This method ensures a fast and satisfying meal, perfect for those short on time.

Creative Toppings

Elevate your Red Baron French Bread Pizza with unique toppings like shrimp, arugula, or dried tomatoes for a gourmet twist, or try classic combinations for a delicious meal.

4.1 Classic Combinations

Classic combinations for Red Baron French Bread Pizza include timeless favorites like pepperoni, mushrooms, onions, and olives. These toppings complement the crispy French bread crust and rich, tangy sauce perfectly, creating a balanced flavor profile. For a hearty option, pair pepperoni with extra cheese for an indulgent treat. Mushrooms and onions add a savory, earthy note, while olives provide a briny contrast. These combinations are simple yet satisfying, making them a go-to for quick, delicious meals. They’re also versatile, allowing you to customize based on your preferences. Whether you’re a fan of spicy pepperoni or the umami of mushrooms, these classic topping combinations ensure a flavorful and satisfying experience every time.

4.2 Customization Ideas

Customizing your Red Baron French Bread Pizza allows you to tailor it to your taste preferences. For a meat lover’s twist, add extra pepperoni, ham, or bacon bits. Vegetarians can load up on roasted vegetables like zucchini, spinach, or bell peppers. Gourmet enthusiasts might enjoy unique toppings such as shrimp, artichoke hearts, or caramelized onions. For a spicy kick, sprinkle red pepper flakes or jalapeños. Fresh herbs like basil or oregano can add a bright, aromatic flavor.Experimenting with different cheeses, such as feta or parmesan, can also enhance the pizza’s depth. These customization ideas let you transform a simple frozen pizza into a personalized culinary delight, perfect for any meal or snack.

Meal Ideas and Serving Suggestions

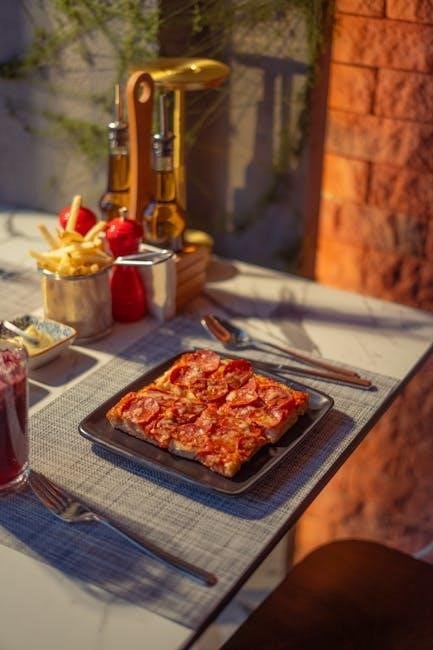
Red Baron French Bread Pizza pairs perfectly with a fresh green salad, garlic knots, or a side of roasted vegetables for a well-rounded meal.

5.1 Side Options

Enhance your Red Baron French Bread Pizza meal with complementary side dishes that add variety and flavor. A fresh green salad with mixed greens, cherry tomatoes, and a light vinaigrette offers a refreshing contrast to the rich pizza. Garlic knots or breadsticks are another delicious option, providing a satisfying crunch and a touch of savory goodness. For a heartier option, roasted vegetables like broccoli, zucchini, or sweet potatoes, seasoned with herbs and olive oil, make a nutritious and tasty pairing. Additionally, a bowl of warm soup, such as tomato soup or creamy broth, complements the pizza perfectly. These side options create a well-rounded and satisfying meal for any occasion.

5.2 Occasion Ideas

Red Baron French Bread Pizza is a versatile meal perfect for various occasions. It’s ideal for family movie nights, offering a quick and delicious option everyone will enjoy. For casual gatherings or parties, it serves as a satisfying snack or light meal. Busy weeknights call for its convenience, providing a stress-free dinner solution. Additionally, it’s a great choice for sports events or game nights, pairing well with dips and beverages. Its portability also makes it suitable for picnics or outdoor events. Whether you’re hosting a crowd or enjoying a cozy night in, Red Baron French Bread Pizza is a crowd-pleaser that fits any setting. Its ease and flavor ensure it’s always a hit.

Frequently Asked Questions

Common queries include optimal cooking times, methods, and tips for achieving crispy crusts. Questions also arise about reheating, shelf life, and customizing toppings for enhanced flavor.

6.1 Common Queries

Users often ask about the best cooking methods for Red Baron French Bread Pizza, seeking tips for a crispy crust and melted cheese. Queries include ideal oven temperatures, baking times, and alternative cooking options like air fryers or microwaves. Many wonder how to prevent the crust from burning and how to reheat leftovers effectively. Additionally, questions arise about customizing toppings without affecting cooking performance. Ensuring the pizza is heated through while maintaining crispiness is a frequent concern. These queries highlight the desire for perfect results every time, whether cooking for one or several people.

6.2 Troubleshooting Tips

For a perfect Red Baron French Bread Pizza, address common issues like uneven cooking or a too-dark crust by adjusting oven racks and monitoring temperature. If cheese isn’t melting, ensure the oven is preheated and the pizza is placed directly on the rack. To avoid undercooked sections, rotate the pizza halfway through baking. For a crisper crust, bake on a baking sheet rather than the oven floor. If using a microwave, avoid overcooking to prevent a soggy texture. Always follow recommended times and temperatures to achieve the ideal balance of crispiness and meltness. These tips help ensure a satisfying and evenly cooked meal every time.

Red Baron French Bread Pizza offers a convenient and delicious meal solution for any occasion. With its crispy crust, melty cheese, and customizable toppings, it satisfies cravings effortlessly. Whether baked in the oven, air fryer, or microwave, the pizza delivers consistent quality. Its versatility makes it ideal for family dinners, quick snacks, or casual gatherings. By following the simple cooking instructions and troubleshooting tips, you can achieve perfection every time. Stock your freezer with Red Baron French Bread Pizza for a hassle-free, flavorful meal that’s ready in minutes. Perfect for busy lifestyles, it remains a top choice for pizza lovers seeking convenience without compromising taste.

aroma rice cooker steam instructions

Discover the versatility of the Aroma Rice Cooker with its advanced steaming capabilities․ Perfect for cooking rice and steaming vegetables, this cooker features a built-in steam basket and automatic shut-off, ensuring perfectly cooked meals every time․

Overview of the Aroma Rice Cooker

The Aroma Rice Cooker is a versatile kitchen appliance designed to simplify meal preparation․ Known for its ease of use, it combines rice cooking with steaming capabilities, making it ideal for one-pot meals․ Popular among home cooks, it features a built-in steam basket, automatic shut-off, and a keep-warm function, ensuring perfectly cooked rice and steamed foods․ Its compact design and user-friendly interface make it a convenient addition to any kitchen․ Whether you’re preparing healthy meals or experimenting with new recipes, the Aroma Rice Cooker offers a reliable and efficient cooking experience․ Its durability and multifunctional features have made it a favorite for both beginners and experienced cooks alike․

Importance of Proper Steaming Techniques

Mastering proper steaming techniques is crucial for achieving optimal results with the Aroma Rice Cooker․ Correctly using the steam basket ensures evenly cooked vegetables, fish, and other foods without overcooking․ Proper timing is essential to retain nutrients and texture, while monitoring water levels prevents burning․ Incorrect techniques can lead to undercooked or mushy textures, detracting from the meal’s quality․ By following guidelines, users can unlock the full potential of their Aroma Rice Cooker, ensuring delicious and healthy dishes every time․ This method enhances flavors and maintains food’s natural goodness, making it a vital skill for home cooks seeking perfection in their culinary creations․

Key Features of the Aroma Rice Cooker

The Aroma Rice Cooker offers advanced features like a steam basket, multiple cooking functions, and automatic shut-off․ These features ensure versatile and efficient meal preparation․

Multiple Cooking Functions

The Aroma Rice Cooker is designed to handle a variety of cooking tasks beyond just rice․ It offers multiple functions, including steaming, sautéing, and simmering․ With these features, users can prepare a wide range of dishes, from hearty grains to flavorful vegetables and proteins․ The cooker’s digital interface allows for easy selection of different modes, making it simple to switch between cooking rice, steaming vegetables, or preparing one-pot meals․ Additionally, some models come with timers, enabling you to schedule your cooking in advance․ This versatility makes the Aroma Rice Cooker a convenient addition to any kitchen, suitable for both novice and experienced cooks alike․

Steam Basket and Tray

The Aroma Rice Cooker comes equipped with a convenient steam basket and tray, designed to make steaming a variety of foods easy and efficient․ The steam basket allows for healthy cooking of vegetables, meats, and fish, while the tray ensures even steam distribution․ Both components are durable and dishwasher-safe, making cleanup a breeze․ The steam basket is perfect for preparing side dishes or entire meals, while the tray provides additional space for larger quantities․ This feature enhances the cooker’s versatility, enabling users to cook rice and steam foods simultaneously․ The steam basket and tray are essential for creating balanced, nutritious meals with minimal effort, making them a standout feature of the Aroma Rice Cooker․

Automatic Shut-Off and Keep Warm

The Aroma Rice Cooker features an automatic shut-off function and a keep warm mode, ensuring your meals are perfectly cooked and ready when you are․ Once cooking is complete, the cooker automatically switches to the keep warm setting, maintaining the ideal temperature for up to several hours․ This prevents overcooking and keeps rice fluffy and steam-cooked foods fresh․ The automatic shut-off eliminates the need for constant monitoring, while the keep warm function offers convenience for busy households․ These features work seamlessly together, providing peace of mind and ensuring that your dishes remain hot and ready to serve whenever you need them․ This dual functionality enhances the cooker’s usability and makes it a reliable addition to any kitchen․

Step-by-Step Instructions for Steaming with Aroma Rice Cooker

Measure water, place the steam basket, add food, and set the timer․ The cooker automatically handles the rest, ensuring perfectly steamed dishes every time with ease․

Preparing Rice for Cooking

Start by rinsing the rice under cold water to remove excess starch and impurities․ Measure the rice accurately using the provided cup․ Add water according to the recommended ratio (typically 1:1․2 for white rice)․ For optimal results, soak the rice for 15-30 minutes to soften the grains․ Drain well and place the rice in the inner pot of the Aroma Rice Cooker․ Ensure the pot is clean and dry before adding the rice․ Proper preparation ensures even cooking and prevents sticking․ Avoid overfilling the pot to allow for expansion during cooking․ These steps ensure perfectly cooked rice every time, ready for steaming or serving․

Setting Up the Rice Cooker

Place the inner pot into the Aroma Rice Cooker, ensuring it aligns with the cooker’s base for even heat distribution․ Plug in the cooker and select the desired cooking function using the control panel․ Add the prepared rice and water mixture to the inner pot, ensuring not to exceed the maximum water level․ If using the steam function, place vegetables or other food in the steam basket and position it over the rice․ Close the lid tightly to trap steam and flavors․ Double-check all components are securely in place before turning on the cooker․ Proper setup ensures efficient cooking and prevents any issues during the process․ Always refer to the manual for specific settings and guidelines to achieve the best results․ This step is crucial for optimal performance and safety․ The cooker is now ready to begin the cooking cycle․

Using the Steam Function

To use the steam function on your Aroma Rice Cooker, start by preparing the food you wish to steam, such as vegetables, fish, or meat․ Place these items in the steam basket, ensuring they are evenly distributed for consistent cooking․ Once the rice and water are in the inner pot, position the steam basket over the pot, aligning it securely․ Close the lid tightly to trap steam and promote even cooking․ Select the steam function on the control panel and set the timer according to the food’s requirements․ The cooker will automatically generate steam from the boiling water below, infusing your food with moisture and flavor․ Avoid opening the lid during steaming to maintain optimal results․ Once the timer sounds, carefully remove the steam basket with oven mitts or tongs to serve․ This method ensures healthy, flavorful meals with minimal effort․ Always refer to the manual for specific steam settings tailored to your ingredients․ Proper use of the steam function enhances the overall cooking experience․

Timing and Monitoring

Timing and monitoring are crucial when using the Aroma Rice Cooker’s steam function․ Always refer to the instruction manual for recommended steaming times based on the type of food․ Once the cooker is set to the steam function, the timer will guide the process․ Avoid opening the lid too frequently, as this can release steam and affect cooking consistency․ Instead, monitor the timer and let the cooker complete its cycle․ For delicate foods like fish or vegetables, shorter steam times are usually sufficient, while heartier ingredients may require longer durations․ Once the timer sounds, turn off the cooker and allow it to cool slightly before serving․ Proper timing ensures your dishes are perfectly cooked and retain their nutrients․ Monitoring also helps prevent overcooking, ensuring a flavorful and healthy meal․

Serving and Cleaning

Once your meal is cooked, carefully remove the steam basket and inner pot from the Aroma Rice Cooker․ Serve the perfectly steamed dishes hot, ensuring even distribution of flavors․ For rice, gently fluff it with a fork before serving to achieve a light, fluffy texture․ Cleaning is essential to maintain your cooker’s performance․ Wash the inner pot, steam basket, and any accessories with warm soapy water, as they are typically dishwasher-safe․ Wipe the exterior with a damp cloth to remove any splatters․ Regular cleaning prevents residue buildup and ensures optimal functionality․ After cleaning, dry all parts thoroughly to avoid moisture retention․ Proper serving and cleaning routines will extend the lifespan of your Aroma Rice Cooker and keep it in great condition for future meals․ Consistent maintenance ensures your cooker remains a reliable kitchen companion․ Regular care also prevents the growth of bacteria and odors, keeping your kitchen fresh․ By following these simple steps, you can enjoy your Aroma Rice Cooker for years to come․ Always refer to the manual for specific cleaning recommendations to ensure you’re using the best practices for your model․ Proper cleaning and serving techniques are key to maximizing your cooking experience with the Aroma Rice Cooker․ This attention to detail will help preserve the quality of your meals and the longevity of your appliance․ Cleaning and serving are the final steps in creating a delicious, hassle-free cooking experience․

Common Mistakes to Avoid

Overfilling the inner pot can lead to uneven cooking, while not rinsing rice properly may result in sticky or undercooked grains․ Avoid these errors for perfect results․

Overfilling the Inner Pot

Overfilling the inner pot is a common mistake that can lead to uneven cooking and messy cleanup․ The Aroma Rice Cooker requires proper space for steam to circulate evenly;

  • Filling beyond the max line can cause rice to overflow during cooking․
  • This may result in undercooked rice or a sticky texture․
  • Always use the provided measuring cup and adhere to guidelines․

Leaving adequate space ensures optimal performance and prevents overflow issues․ Refer to the measurement chart for precise water and rice ratios to achieve perfect results every time․

Not Rinsing Rice Properly

Not rinsing rice thoroughly can lead to less-than-desirable results when using the Aroma Rice Cooker․ Excess starch on the rice grains can cause them to cling together, resulting in a sticky or mushy texture․

  • Rinse rice under cold water until the water runs clear to remove excess starch and impurities․
  • Proper rinsing ensures separate, fluffy grains and better overall texture․
  • Skipping this step may also affect the cooker’s ability to steam evenly․

Take an extra minute to rinse your rice for a superior cooking experience with the Aroma Rice Cooker․ This simple step enhances both flavor and texture, making it worth the effort․

Troubleshooting Tips

Identify common issues like undercooked rice or insufficient steam by checking water levels, steam basket placement, and cooker settings․ Adjust as needed for optimal results․

Undercooked Rice

If your rice turns out undercooked, check water levels and ensure the lid was sealed properly during cooking․ Insufficient water or steam escaping can cause this issue․ Adjust the water ratio next time, using the measurement chart provided․ Also, verify that the cooker’s inner pot is clean and free of residue, as this can affect heat distribution․ Allow the rice to rest for a few minutes after cooking before fluffing with a fork to ensure even moisture absorption․ If the problem persists, consult the user manual for troubleshooting specific to your model․

Insufficient Steam

Insufficient steam can hinder cooking efficiency․ Ensure the water level in the inner pot matches the recommended amount for the rice or food being cooked․ Always rinse rice thoroughly before cooking, as excess starch can clog the steam vent․ Check the steam basket and vent for blockages and clean them regularly․ If using the steam function for vegetables or proteins, make sure the tray is properly placed and aligned․ Inadequate water or improper positioning of the steam basket can reduce steam production․ Refer to the user manual for specific guidelines on water ratios and steam function usage to optimize performance․

The Aroma Rice Cooker is a versatile kitchen essential that simplifies cooking and steaming processes․ With its advanced features like automatic shut-off and a built-in steam basket, it ensures perfectly cooked meals every time․ Proper techniques and maintenance, such as rinsing rice and cleaning the steam vent, are key to optimal performance․ By following the instructions and avoiding common mistakes, users can enjoy a wide range of dishes, from fluffy rice to healthy steamed vegetables․ This cooker not only enhances cooking efficiency but also supports a healthier lifestyle․ For any issues, refer to the user manual or Aroma’s customer support for troubleshooting tips․ The Aroma Rice Cooker truly offers a convenient and reliable way to prepare delicious, one-pot meals for the whole family․

river guide

A river guide is an expert who navigates and leads groups along rivers, ensuring safety and enhancing the experience with their knowledge of currents, ecosystems, and terrain.

1.1 Importance of River Guides for Navigation and Safety

River guides are crucial for ensuring safe and successful navigation. They possess extensive knowledge of water currents, hazards, and terrain, helping groups avoid dangerous situations. Guides also provide expertise in using safety equipment and emergency procedures, minimizing risks. Their role enhances the overall experience, allowing participants to focus on enjoyment while navigating rivers confidently and responsibly.

1.2 Brief History of River Guides and Their Evolution

River guiding traces its roots to ancient times, with indigenous communities using rivers for transportation and trade. Early guides were skilled navigators, passing down knowledge through generations. Over centuries, river guiding evolved from essential survival skills to organized expeditions. Modern guides now combine traditional expertise with advanced safety protocols and environmental awareness, ensuring sustainable and safe river exploration while preserving historical practices.

Understanding Rivers and Their Characteristics

Rivers vary in flow, from slow to rapid currents, and feature diverse landscapes like canyons and waterfalls, supporting rich ecosystems that sustain biodiversity.

2.1 Types of Rivers and Their Unique Features

Rivers come in various forms, each with distinct characteristics. Mountain rivers are fast-flowing with rapids, while meandering rivers wind slowly, creating oxbow lakes. Braided rivers have multiple channels, offering habitats for diverse wildlife. Anastomosing rivers feature complex networks of interconnected channels. Each type presents unique challenges and opportunities for exploration, shaping the experiences of river guides and adventurers alike.

2.2 River Ecosystems and Biodiversity

Rivers support rich biodiversity, hosting countless aquatic and terrestrial species. Fish, amphibians, and birds thrive in these ecosystems, relying on rivers for food and habitat. Riverbanks are home to diverse plant life, creating corridors for wildlife migration. The variety of species found in rivers underscores their ecological importance, making conservation efforts critical to maintaining these vibrant environments for future generations.

Safety Precautions for River Travel

Always wear a life jacket, check weather conditions, carry a first aid kit, and inform someone of your travel plans to ensure a safe river experience.

3.1 Essential Safety Gear and Equipment

For river travel, essential safety gear includes a properly fitting life jacket, a sturdy helmet, and a first aid kit. Carry a whistle, ropes, and a repair kit for emergencies. A waterproof bag can protect valuables, while a map and compass aid navigation. Communication devices like a two-way radio or satellite phone are crucial in remote areas. Proper apparel, such as wetsuits or quick-drying clothing, enhances comfort and safety.

3.2 Understanding River Hazards and How to Avoid Them

Rivers pose hazards like strong currents, underwater obstacles, and changing water levels. Identify risks by reading the river’s flow, spotting eddies, and avoiding debris. Use safety lines and scout ahead to navigate safely. Portage around dangerous sections if needed. Stay alert to weather changes that can swell rivers. Knowledge and preparedness are key to minimizing risks and ensuring a safe river experience for everyone involved.

Navigation Skills for River Guides

Navigation skills are crucial for river guides, involving reading currents, using maps, and predicting water behavior to ensure safe and efficient river travel for all participants.

4.1 Reading River Currents and Water Levels

Reading river currents and water levels is essential for river guides to navigate safely. Understanding the flow, eddies, and depth helps in identifying potential hazards. Guides analyze water clarity, speed, and seasonal changes to predict river behavior. Visual cues like wave patterns and vegetation alignment aid in decision-making. Accurate interpretations ensure smooth passage, minimizing risks for both crew and equipment. This skill is vital for maintaining control and safety during river adventures.

4.2 Using Maps and Compasses for River Navigation

Using maps and compasses is crucial for river navigation. Guides rely on topographic maps to identify river features, bends, and potential hazards; A compass helps determine direction, especially in low-visibility areas. By aligning maps with magnetic north and triangulating positions using landmarks, guides ensure accurate navigation. This skill, combined with knowledge of river behavior, enhances precision and safety, making it indispensable for river guides, even with modern GPS technology available.

Choosing the Right Equipment for River Adventures

Selecting the right gear is essential for river adventures. Durable boats, safety equipment, and appropriate apparel ensure both functionality and comfort in varying water conditions.

5.1 Selecting the Best Boats for Different River Conditions

Choosing the right boat for river adventures is crucial. For calm waters, inflatable or recreational kayaks are ideal. Whitewater rivers demand sturdy, maneuverable rafts or specialized kayaks. Consider durability, stability, and size based on the river’s flow and obstacles. Lightweight materials enhance portability, while reinforced designs withstand rough conditions. Ensure the boat matches the river’s intensity and your group’s needs for a safe and enjoyable experience.

5.2 Apparel and Gear for Comfort and Protection

Proper apparel and gear are essential for river guides. Quick-drying, moisture-wicking fabrics keep you comfortable in varying conditions. A well-fitted life jacket is mandatory for safety. Sturdy footwear with good grip prevents slipping on wet surfaces. Sunscreen, hats, and lightweight rain gear protect against elements. Additional items like dry bags and first-aid kits ensure preparedness. Layering clothing helps adapt to changing temperatures, enhancing both comfort and protection during river excursions.

Environmental Considerations for River Guides

River guides must prioritize environmental stewardship, minimizing waste and promoting sustainable practices to protect fragile river ecosystems and preserve natural beauty for future generations.

6.1 Conservation Efforts to Protect River Ecosystems

Conservation efforts for river ecosystems involve protecting habitats, reducing pollution, and promoting sustainable practices. Guides play a key role by educating travelers about eco-friendly behaviors and supporting local initiatives that preserve biodiversity and water quality. Collaborative actions with communities and organizations ensure long-term protection of these vital environments, benefiting both wildlife and future generations.

6.2 Minimizing Your Impact on the River Environment

Minimizing your impact on the river environment involves leaving no trace behind. Proper waste disposal, avoiding chemical pollutants, and respecting wildlife habitats are essential. Guides encourage travelers to stay on designated paths, avoid disturbing flora, and refrain from feeding wildlife. Promoting sustainable tourism practices ensures rivers remain pristine for future generations while maintaining biodiversity and ecological balance.

Tips for Beginners and Experienced River Guides

Beginners should focus on learning river dynamics and safety protocols, while experienced guides refine navigation skills. Practice adaptability, stay alert, and share knowledge to enhance river exploration experiences.

7.1 Best Practices for First-Time River Explorers

For first-time river explorers, start by planning your route thoroughly, checking water levels, and understanding basic river dynamics. Always wear safety gear, including a life jacket and helmet. Begin with calm waters to build confidence and gradually progress to more challenging currents. Stay alert to obstacles like rocks or strong currents, and learn basic paddling or navigation techniques. Consider hiring an experienced guide or joining a group to ensure a safe and enjoyable experience. Respect the environment, and never venture without proper preparation and knowledge.

7.2 Advanced Techniques for Seasoned River Guides

Seasoned river guides should master advanced water reading, including identifying hidden obstacles and subtle current patterns. Develop precision in maneuvering various watercraft, such as kayaks or rafts, in tight spaces. Enhance rescue techniques, like swiftwater rescues, to ensure group safety. Learn to adapt navigation strategies based on changing river conditions and weather forecasts. Refine leadership skills by managing group dynamics and decision-making under pressure. Continually update knowledge of river ecosystems and safety protocols to maintain expertise and provide exceptional experiences while minimizing environmental impact.

Popular River Destinations Around the World

Explore iconic rivers like the Amazon, Nile, Colorado, Mekong, Danube, and Yangtze, each offering unique adventures, cultural experiences, and breathtaking natural beauty.

8.1 Iconic Rivers for Recreation and Adventure

The Colorado River, known for its thrilling rapids, offers unforgettable rafting experiences through the Grand Canyon. The Amazon River, with its lush rainforest surroundings, provides serene canoeing opportunities. The Nile River, famous for its historical significance, invites travelers to explore its tranquil waters via felucca sailboats. The Mekong River, teeming with biodiversity, is a hotspot for kayaking and wildlife spotting. Each river promises unique adventures, blending nature, culture, and excitement for all explorers.

8.2 Hidden Gems for Unique River Experiences

Discover the Futaleufú River in Chile, renowned for its crystal-clear waters and thrilling rapids. The Alsek River in Canada offers a remote wilderness adventure with breathtaking glaciers. For a serene experience, explore the Sava River in Slovenia, surrounded by picturesque landscapes. These lesser-known rivers provide unforgettable journeys, blending adventure, nature, and cultural immersion for those seeking off-the-beaten-path experiences.

Legal and Ethical Guidelines for River Guides

Understanding permits, regulations, and environmental respect is crucial for river guides to ensure lawful and sustainable tourism practices while protecting ecosystems and communities.

9.1 Permits and Regulations for River Travel

Obtaining necessary permits and adhering to local regulations are essential for river travel. Guides must comply with environmental impact assessments and safety standards to ensure legal and sustainable tourism practices. Failure to follow regulations can result in fines or access restrictions. Always verify requirements with local authorities before embarking on a river adventure to guarantee a safe and lawful experience for everyone involved.

9.2 Ethical Practices for River Tourism

Ethical river tourism involves minimizing environmental impact and respecting local communities. Guides should promote sustainable practices, such as avoiding litter, preserving wildlife habitats, and supporting local economies. Encouraging responsible behavior among tourists ensures the conservation of river ecosystems for future generations. By adhering to ethical guidelines, river guides play a vital role in maintaining the natural beauty and cultural integrity of river destinations worldwide.

River guides are essential for safe and enriching river experiences, offering expertise and passion. Embrace the adventure while respecting nature, ensuring rivers remain vibrant for future generations.

10.1 Summarizing Key Takeaways for River Guides

River guides play a crucial role in ensuring safety, navigating currents, and preserving ecosystems. Key takeaways include mastering navigation skills, understanding river hazards, and adhering to environmental practices. Effective communication, preparedness, and respect for nature are essential. Continuous learning and adaptability enhance a guide’s expertise, ensuring memorable and secure river adventures for all participants. Embracing these principles fosters a deeper connection with rivers and their ecosystems.

10.2 Encouragement to Explore and Respect Rivers

Embrace the beauty and tranquility of rivers while fostering a deep respect for these vital ecosystems. By exploring responsibly, we can appreciate their natural wonders and play a role in their preservation. Encourage others to join in caring for our rivers, ensuring their sustainability for future generations to enjoy. Let’s celebrate and protect these lifelines of our planet with passion and dedication.

PDF

certificate of liability insurance form pdf fillable

A Certificate of Liability Insurance is a document verifying insurance coverage, outlining policy limits, coverage types, and effective dates. It serves as proof of insurance without granting rights to the holder, often required for contracts or vendor agreements.

1.1 Understanding the Purpose and Importance

A Certificate of Liability Insurance is a critical document verifying insurance coverage, protecting businesses from risks. It ensures compliance with contracts and vendor requirements, proving policy existence and details. This certificate is essential for third parties to confirm coverage quickly, safeguarding all involved in commercial activities or events.

What is a Certificate of Liability Insurance Form?

A Certificate of Liability Insurance Form is a document summarizing policy details, including coverage limits, types, and effective dates, verifying insurance coverage for the insured.

2.1 Definition and Structure

A Certificate of Liability Insurance Form is a one-page document that provides a concise summary of an insurance policy. It includes key details such as coverage limits, types of coverage, effective dates, and the insurance company’s information. The structure typically features sections for policyholder details, coverage specifics, and insurer information, making it a clear and organized proof of insurance. It is often provided as a fillable PDF for ease of use.

2.2 Key Components of the Form

The form includes the policyholder’s name, insurer details, policy numbers, and coverage periods. It outlines coverage types, limits, and conditions, ensuring clarity and compliance. Additional sections may cover remarks or special requirements, making it a comprehensive yet concise document for verifying insurance details efficiently.

ACORD 25: The Standard Liability Insurance Certificate

ACORD 25 is the widely recognized standard for Certificates of Liability Insurance, providing essential policy details in a fillable PDF format for efficient verification of coverage.

3.1 Overview of ACORD Form 25

ACORD Form 25 is a standardized certificate of liability insurance, providing a concise summary of policy details. It includes coverage limits, policy numbers, and effective dates, ensuring clarity and compliance. This one-page document is fillable, making it easy to manage and verify insurance coverage efficiently. It serves as proof of insurance without altering policy terms.

3.2 How to Fill Out the ACORD 25 Form

Filling out the ACORD 25 form requires entering accurate policyholder and insurer details. Include coverage limits, policy numbers, and effective dates. Specify additional insured parties and conditions. Ensure all fields are completed clearly, using fillable PDF tools for efficiency. Review for accuracy and compliance with policy terms before issuing to maintain professionalism and legal integrity.

Fillable PDF Features and Benefits

Fillable PDFs offer editable fields, digital signatures, and saveable changes, streamlining document management and reducing errors for efficient certificate processing.

4.1 Advantages of Using a Fillable PDF Format

A fillable PDF format offers ease of use, efficiency, and accuracy. It enables quick editing, digital signatures, and error reduction, ensuring compliance and professionalism. The ability to save and print completed forms streamlines document management, saving time and resources. Additionally, fillable PDFs are environmentally friendly and accessible across devices, making them a practical choice for modern business needs and legal requirements.

4.2 Tools for Editing and Managing Fillable Forms

Popular tools like Adobe Acrobat, pdfFiller, and DocHub enable easy editing and management of fillable PDF forms. These platforms offer features such as form filling, digital signatures, and form validation, ensuring accuracy and compliance; Online solutions also provide storage and sharing options, streamlining workflows and enhancing collaboration for businesses and individuals handling liability insurance certificates.

Key Elements of a Fillable Certificate

A fillable certificate includes policyholder details, coverage limits, insurance company information, and policy numbers. These elements ensure clarity and accuracy in verifying insurance coverage effectively.

5.1 Policyholder Information

The policyholder information section requires the insured’s full legal name, business address, and contact details. This ensures the certificate accurately reflects the insured party and facilitates communication. It is crucial for verifying coverage and maintaining records, ensuring all parties involved can identify the insured without ambiguity. This section is fundamental for the certificate’s validity and clarity.

5.2 Coverage Details and Limits

Coverage details and limits outline the scope and extent of insurance protection, including liability types (e.g., bodily injury, property damage) and maximum payout amounts per incident or annually. This section specifies the policy’s coverage period and any exclusions or conditions, ensuring clarity on what is insured and the financial boundaries of the policy. It is essential for verifying compliance with contractual or regulatory requirements.

5.3 Insurance Company and Policy Numbers

The insurance company and policy numbers section identifies the issuer and specific policy details. It includes the insurer’s name, address, and policy numbers, verifying the authenticity of the coverage. This information is crucial for validation and ensures that all parties involved can reference the policy directly, providing transparency and accountability in business transactions. It is a key element for maintaining accurate records;

Common Uses of a Certificate of Liability Insurance

A certificate of liability insurance is commonly used for business contracts, vendor requirements, events, and commercial activities, ensuring compliance and verifying coverage for third parties.

6.1 Business Contracts and Vendor Requirements

A Certificate of Liability Insurance is often required for business contracts and vendor agreements to verify coverage and ensure accountability. It provides proof of insurance, protecting all parties involved in a project or service agreement. Vendors and contractors typically must provide this document before starting work, as it ensures compliance with risk management standards and avoids potential liability issues.

6.2 Events, Rentals, and Commercial Activities

Certificates of Liability Insurance are essential for events, rentals, and commercial activities, ensuring organizers and vendors have proper coverage. They verify insurance details, protecting against potential risks and ensuring compliance with venue or rental agreements. This document is often mandated for commercial spaces, events, or equipment rentals to mitigate liability exposure and safeguard all involved parties effectively.

Legal and Compliance Considerations

A Certificate of Liability Insurance does not alter policy terms and must comply with legal and industry standards, ensuring accuracy and adherence to regulatory requirements.

7.1 Understanding the Legal Implications

A Certificate of Liability Insurance does not constitute a contract or alter policy terms. It provides proof of coverage but does not grant rights to the certificate holder. Legal implications include compliance with industry standards and ensuring accuracy to avoid disputes. The certificate must reflect policy terms accurately and adhere to regulatory requirements, as it is issued solely for informational purposes.

7.2 Compliance with Industry Standards

Compliance with industry standards is crucial for a Certificate of Liability Insurance. The document must adhere to formats like ACORD 25, ensuring all required details are included. It should accurately reflect policy terms, coverage limits, and additional insured provisions. Compliance ensures the certificate meets legal and regulatory requirements, avoiding potential disputes or legal issues.

Best Practices for Issuing a Certificate

Always verify policy details, ensure accuracy, and use official templates. Include disclaimers stating the certificate does not alter coverage. Sign and date the document, and distribute securely.

8.1 Accuracy and Completeness

Ensuring the certificate is accurate and complete is critical. Verify policy numbers, coverage limits, and effective dates. Double-check all details, including the insured’s name and insurance company information. Any errors or omissions can lead to legal or contractual issues. Always review the document thoroughly before issuance to avoid misunderstandings or compliance violations.

8.2 Adherence to Policy Terms

Adhering to policy terms ensures compliance with the insurer’s requirements. The certificate must reflect the actual policy conditions, including coverage limits and exclusions. Misrepresentation can invalidate the certificate or lead to disputes. Always align the certificate details with the policy terms to maintain its validity and avoid potential legal complications.

How to Obtain a Fillable Certificate

Obtain a fillable certificate through insurance providers or online templates. Ensure compliance and clarity by using professional platforms or PDF editors to download, fill, and manage the form efficiently.

9.1 Through Insurance Providers

Insurance providers typically issue certificates of liability insurance directly to policyholders. Contact your provider’s customer service or dedicated certificate department to request a fillable PDF. They will verify policy details and ensure the certificate meets legal and industry standards. Providers often have standardized templates, guaranteeing accuracy and compliance with requirements. This method ensures the certificate is valid and recognized by third parties.

9.2 Using Online Templates

Online platforms offer downloadable fillable PDF templates for certificates of liability insurance. Websites like Handypdf.com provide customizable forms that can be edited and printed. These templates are designed to meet industry standards, ensuring compliance and professionalism. Users can easily input policy details, coverage limits, and additional remarks. Online templates are a convenient and cost-effective solution for generating certificates quickly and efficiently, ideal for businesses and individuals requiring prompt documentation.

Step-by-Step Guide to Filling the Form

Enter the policyholder’s name, address, and policy details. Specify coverage limits, effective dates, and conditions. Ensure all information is accurate and aligns with the insurance policy terms.

10.1 Entering Policyholder and Insurer Details

Start by accurately entering the policyholder’s name, address, and contact information. Include the insurer’s name, policy number, and effective dates. Ensure all details match the insurance policy to avoid discrepancies. This step is critical for verifying the insured party and the coverage provider. Double-check for errors to prevent delays or legal issues. Accurate entry ensures the certificate’s validity and compliance with requirements.

10.2 Specifying Coverage Limits and Conditions

Clearly outline the coverage limits, such as liability amounts per incident or aggregate. Define the policy’s effective and expiration dates. Include any endorsements or exclusions modifying the standard coverage. Specify additional insured parties if applicable. Ensure all details align with the policy terms to prevent misunderstandings. Accurate specification of coverage limits and conditions ensures compliance and provides clear proof of insurance requirements. Be precise for legal accuracy and clarity.

Tools and Resources for Managing Certificates

Utilize PDF editors and form management software for efficient customization and organization of certificates. Online platforms offer templates and tools to generate and manage fillable forms, ensuring accuracy and compliance with industry standards. These resources streamline the process of creating and maintaining certificates of liability insurance.

11.1 PDF Editors and Form Management Software

PDF editors like Adobe Acrobat and form management software enable easy customization of fillable certificates. Tools such as pdfFiller and Handypdf.com allow users to edit, sign, and download forms efficiently. These platforms support real-time collaboration and ensure accuracy, making it simpler to manage and store liability insurance certificates digitally while maintaining compliance with industry standards.

11.2 Online Platforms for Certificate Generation

Online platforms like Handypdf.com and pdfFiller provide pre-designed templates for generating certificates. Users can download, customize, and print fillable forms instantly. These platforms offer tools for easy editing, signing, and sharing, streamlining the process. They ensure compliance with industry standards and provide efficient solutions for creating and managing liability insurance certificates digitally.

PDF

far from the tree pdf

Far from the Tree by Andrew Solomon explores how families navigate profound differences, challenging the notion that children must resemble their parents. Through poignant storytelling, Solomon examines identity, acceptance, and the unifying power of diversity, offering a deeply humane perspective on human connection and resilience.

Understanding the Title and Its Significance

The title Far from the Tree reimagines the adage “the apple doesn’t fall far from the tree,” which suggests children resemble their parents. Solomon uses this metaphor to explore families where children are profoundly different, challenging traditional notions of identity and belonging. The title signifies the emotional and psychological journeys of parents and children navigating extraordinary circumstances, emphasizing how differences, rather than sameness, often define family bonds. It underscores the transformative power of love and acceptance in understanding and embracing these divergences, highlighting the resilience and unity that emerge from diversity.

The Core Theme: Differences as a Unifying Force

At the heart of Far from the Tree lies the revolutionary idea that differences, rather than similarities, are what ultimately unite us. Solomon argues that the extraordinary challenges faced by families with exceptional children reveal the profound ways in which diversity fosters connection and understanding. By exploring experiences such as deafness, autism, and prodigious talents, the book shows how these differences, while often perceived as isolating, can deepen empathy and create stronger familial bonds. This theme challenges societal norms, advocating for a world where diversity is celebrated as the essence of human unity and resilience.

Author Background: Andrew Solomon

Andrew Solomon, a renowned psychologist, writer, and activist, is the author of the National Book Award-winning Far from the Tree. He is a professor at Columbia University and a prominent contributor to major media outlets.

Andrew Solomon’s Professional Journey

Andrew Solomon is a distinguished psychologist, author, and advocate. His academic career includes serving as a professor of psychology at Columbia University. Beyond academia, Solomon is a frequent contributor to prominent media outlets such as The New Yorker, NPR, and The New York Times Magazine. He has also held leadership roles, including president of PEN American Center. His work bridges psychology, literature, and activism, earning him widespread recognition. Solomon’s writing often explores themes of identity, resilience, and human diversity, as seen in his award-winning books like Far from the Tree and The Noonday Demon.

His Contributions to Psychology and Literature

Andrew Solomon has made significant contributions to both psychology and literature through his insightful writings. His book Far from the Tree offers a profound exploration of family dynamics and identity, earning widespread acclaim. Solomon’s work bridges psychology and literature, providing deeply human narratives that resonate broadly. His contributions extend beyond writing, as he lectures and advocates for understanding and acceptance of diversity. His ability to weave psychological research with compelling storytelling has established him as a leading voice in both fields, enriching public and academic discourse alike.

Central Themes of the Book

Far from the Tree delves into identity, acceptance, and the transformative power of diversity, exploring how differences within families shape love, resilience, and human connection.

Identity and Acceptance in Families

Far from the Tree examines how families navigate the complexities of identity and acceptance when children differ profoundly from their parents. Through deeply personal stories, Solomon illustrates how parents of children with deafness, autism, or other exceptional traits often undergo a transformative journey. This journey involves moving from initial shock and denial to eventual acceptance and love. The book highlights how families learn to embrace their children’s unique identities, finding meaning and strength in the process. Solomon argues that acceptance is not passive but an active, evolving process that fosters resilience and deepens familial bonds.

Diversity as the Essence of Human Connection

Far from the Tree posits that diversity is the cornerstone of human connection, uniting us through our differences rather than despite them. Solomon argues that it is precisely our unique traits—whether physical, neurological, or cultural—that foster empathy and understanding. By sharing stories of families navigating deafness, autism, and other exceptionalities, the book illustrates how diversity challenges societal norms and enriches lives. This perspective transforms differences from potential divides into bridges of shared humanity, emphasizing that our variations are what make us relatable and connected. Solomon’s work underscores the profound beauty of human diversity as a unifying force.

Categories of Differences Explored

Far from the Tree examines a wide range of differences, including deafness, dwarfism, autism, schizophrenia, prodigies, criminal tendencies, and exceptional talents, highlighting human diversity.

Deafness, Dwarfism, and Physical Disabilities

Far from the Tree delves into the experiences of families with children who are deaf, have dwarfism, or live with physical disabilities. Solomon explores how these differences shape identity and family dynamics, emphasizing resilience and adaptability. Deafness, for instance, is portrayed not as a limitation but as a unique cultural identity, while dwarfism highlights societal perceptions of physical norms. Physical disabilities are examined through the lens of acceptance and the challenges of navigating a world not designed for them. These stories underscore the universal struggle for understanding and the profound ways families grow through love and adaptation.

Autism, Schizophrenia, and Neurodiversity

Far from the Tree examines the complexities of autism, schizophrenia, and neurodiversity, revealing how families navigate these conditions with profound emotional depth; Solomon highlights the challenges of understanding and accepting neurodiverse experiences, while also celebrating the unique perspectives they bring. Through intimate storytelling, he illustrates how these differences reshape family dynamics, fostering resilience and redefining notions of normalcy. The book underscores the importance of empathy and acceptance in bridging the gaps between neurodiverse individuals and their loved ones, ultimately enriching familial bonds.

Prodigies, Criminal Tendencies, and Exceptional Talents

Far from the Tree delves into the extraordinary challenges faced by families with prodigies, criminal tendencies, and exceptional talents. Solomon explores how these traits, though often celebrated, can strain family relationships and create emotional turmoil. He examines the tension between nurturing exceptional abilities and maintaining familial harmony, offering a nuanced view of how parents grapple with pride, guilt, and uncertainty. Through these stories, Solomon reveals how society’s expectations of excellence can both inspire and isolate, highlighting the complex interplay between genius, morality, and family dynamics.

Real-Life Stories and Case Studies

Far from the Tree presents compelling real-life stories of families navigating extraordinary challenges, including deafness, autism, and schizophrenia. These case studies reveal emotional struggles and resilience.

Profiles of Families and Their Journeys

Far from the Tree delves into the lives of families navigating extraordinary differences, such as deafness, autism, and schizophrenia. Solomon shares intimate stories of parents and children, revealing their struggles with identity, acceptance, and societal expectations. These profiles highlight the emotional challenges of raising exceptional children, from the isolation of deafness to the complexities of neurodiversity. Through these journeys, Solomon illustrates how families find meaning and resilience, transforming their experiences into opportunities for growth and understanding. The book underscores the universal human quest for connection and belonging, despite profound differences.

Emotional and Psychological Challenges

Far from the Tree reveals the profound emotional and psychological struggles families face when raising children with exceptional differences. Parents often grapple with guilt, fear, and societal judgment, while children confront identity crises and self-acceptance. The book highlights internal conflicts, such as the tension between loving unconditionally and longing for a “normal” child. Families navigate isolation, stigma, and the pressure to adapt, while seeking acceptance in a world that often marginalizes differences. Solomon’s narratives expose the raw emotional landscape of these journeys, illustrating how resilience and love can emerge from profound challenges.

Impact and Reception

Far from the Tree has received widespread critical acclaim, earning awards like the National Book Critics Circle Award. It became a New York Times bestseller, resonating deeply with readers and sparking essential discussions on identity, diversity, and human connection.

Critical Acclaim and Awards

Far from the Tree has garnered significant critical acclaim, earning the National Book Critics Circle Award and becoming a New York Times bestseller. Critics praise its profound exploration of human diversity, with Solomon’s compassionate storytelling and meticulous research receiving widespread admiration. The book’s ability to transcend traditional narratives on identity and family has solidified its place as a landmark work in contemporary literature. Its success underscores the universal resonance of its themes, making it a cherished read for scholars and general audiences alike.

Reader Responses and Cultural Significance

Readers have embraced Far from the Tree for its emotional depth and thought-provoking narratives, finding solace in its exploration of identity and acceptance. The book has sparked meaningful conversations about diversity and resilience, resonating deeply with families and individuals navigating differences. Its cultural significance lies in its ability to challenge societal norms and foster empathy, making it a vital contribution to contemporary discourse on human connection and understanding.

The book’s impact extends beyond literature, inspiring a documentary and widespread discussion. It has become a symbol of acceptance, celebrating the richness of human diversity and encouraging a more inclusive world. Solomon’s work continues to leave a lasting impression, proving that stories of difference can unite us all.

Far from the Tree offers a profound message about embracing diversity and finding unity in differences. It highlights the transformative power of acceptance and the resilience of the human spirit, leaving readers with a deeper understanding of identity and connection.

The Broader Message of the Book

Far from the Tree conveys a powerful message about diversity and unity, emphasizing that differences, rather than similarities, often unite us. Through exploring exceptional challenges faced by families, Solomon underscores the idea that love and acceptance transcend prejudice. By sharing stories of resilience, the book highlights the universal human struggle to find identity and belonging. This broader message encourages readers to embrace diversity as a fundamental aspect of the human condition, fostering empathy and understanding across all walks of life.

Final Thoughts on Identity and Unity

Far from the Tree leaves readers with a profound understanding of identity and unity, illustrating that true connection lies in embracing diversity. Solomon’s work shows that while differences may isolate, they also have the power to unite. By celebrating the uniqueness of individuals and families, the book inspires a shift in perspective, encouraging acceptance and compassion. Ultimately, it reminds us that human experiences, though varied, are deeply intertwined, fostering a sense of shared humanity that transcends individual challenges.

sleeper retaining wall design guide

A sleeper retaining wall is a cost-effective, durable solution for terracing slopes and creating level areas․ Constructed using materials like concrete or treated timber, these walls offer versatility and aesthetic appeal, blending seamlessly into landscape designs while providing structural support for soil retention․

What Are Sleeper Retaining Walls?

Sleeper retaining walls are structures built using horizontal sleepers, typically made of concrete or treated timber, to retain soil and prevent erosion․ They are versatile, durable, and aesthetically pleasing, often used in landscaping to create level areas or manage slopes․ These walls provide structural support while blending into natural environments, making them a popular choice for both residential and commercial applications․

Advantages and Applications

Sleeper retaining walls offer numerous advantages, including cost-effectiveness, durability, and versatility․ They are ideal for landscaping projects, such as terracing slopes, creating level areas, and managing erosion; Suitable for both residential and commercial use, these walls provide structural support while enhancing aesthetic appeal․ Their strength and low maintenance make them a practical solution for retaining soil in various settings, from gardens to large-scale developments․

Planning and Preparation

Planning involves assessing site needs, leveling ground, and marking layouts․ Ensure compliance with local permits and structural requirements for a stable foundation․

Determining Purpose and Height

Clarify the wall’s purpose, such as managing slopes or creating level areas․ Measure the height difference to determine structural needs․ Ensure the design aligns with site conditions, soil type, and water table levels․ Height impacts material selection and complexity, so accurate assessment is crucial for safety and functionality․ Compliance with engineering standards is essential for stability and durability․

Site Preparation and Permits

Clear and level the site, ensuring a minimum 200mm gap behind the wall for backfill․ Check local regulations and obtain necessary permits․ Ensure proper drainage and alignment by marking the site with pegs and string lines․ Verify ground conditions, including slopes and water tables, to ensure compliance with engineering standards and safety requirements before construction begins․

Design Considerations

Designing a sleeper retaining wall involves selecting materials, ensuring structural integrity, and complying with engineering standards․ Factors like soil conditions, water tables, and drainage must be carefully considered to ensure stability and longevity, while also meeting local building codes and regulations for safe and efficient construction․

Materials and Structural Integrity

Concrete and treated timber sleepers are popular choices, offering durability and strength․ Concrete sleepers provide a 50-year lifespan, while H4 hardwood sleepers resist termites․ Proper material selection ensures structural integrity, with considerations for soil conditions and load-bearing capacity to guarantee long-term stability and safety in retaining wall construction․

Engineering and Compliance

Engineering design must comply with local standards, ensuring safety and efficiency․ Australian Standards guide structural calculations, while tools like Structural Toolkit aid in precise designs․ Compliance involves soil cohesion assessments and drainage requirements, ensuring retaining walls are both durable and legally approved for various applications, from residential to commercial use․

Step-by-Step Construction Guide

Constructing a sleeper retaining wall involves marking the site, digging holes, placing sleepers, and backfilling to ensure stability, proper drainage, and a level area․

Site Marking and Layout

Start by clearing and leveling the site․ Mark the wall’s location with pegs and string lines at both ends, ensuring proper alignment․ For sleepers, mark crosses at 1․8-meter intervals․ Use a string line to guide the layout, ensuring the wall is straight and level․ Leave 200mm behind the wall for backfill material, and verify all measurements before proceeding to digging․

Post-Hole Digging and Concrete Placement

Dig holes at 2010mm centres for 2․0m sleepers or 2410mm for 2․4m sleepers, with a minimum diameter of 450mm for a 1m-high wall․ Depth should match the wall’s height requirements․ Pour concrete into each hole, ensuring it fully encapsulates the post․ Leave approximately 100mm at the top for backfill material to secure the sleeper in place firmly․

Backfilling and Compaction

After placing the sleepers, backfill with free-draining soil, compacting in layers to prevent settling․ Proper drainage is crucial to avoid water pressure․ Use a plate compactor or hand tamper for even compaction, ensuring the structure remains stable and secure, effectively supporting the retained soil without shifting․

Drainage Solutions

Install perforated pipes and gravel behind the wall to redirect water, preventing pressure buildup․ Ensure proper drainage to maintain structural integrity and longevity of the retaining wall․

Perforated Pipes and Gravel

Perforated pipes and gravel are essential for effective drainage behind sleeper retaining walls․ The pipe, typically 60-100mm in diameter, is placed at the base of the wall to collect and redirect water․ Gravel surrounding the pipe ensures proper water flow and prevents clogging․ This system minimizes hydrostatic pressure and protects the wall from erosion, ensuring long-term stability and structural integrity․

Water Management Strategies

Effective water management is crucial for sleeper retaining walls․ Ensure surface water is diverted away using swales or drains․ Install an impermeable membrane behind the wall to prevent water seepage․ Regularly inspect drainage systems to maintain efficiency․ Proper water management enhances structural stability and prevents erosion, ensuring the wall’s longevity and performance over time․

Installation Tips and Best Practices

Use string lines for alignment and ensure drainage with perforated pipes and gravel․ Proper backfilling and compaction are essential for stability․ Follow manufacturer guidelines for materials․

Alignment and Leveling

Proper alignment and leveling are critical for structural integrity and visual appeal․ Use pegs and string lines to mark the layout, ensuring the wall is straight and plumb․ Check each layer with a spirit level, making adjustments as needed․ Misalignment can lead to instability, so verify alignment regularly during construction․ Ensure posts are vertically aligned and sleepers are evenly spaced for a professional finish․

Construction Pitfalls to Avoid

Avoid inaccurate site marking, as it leads to misalignment․ Ensure holes are dug to the correct depth and diameter for stability․ Neglecting proper drainage can cause water buildup and structural damage․ Backfilling without compaction may weaken the wall․ Avoid using undersized materials, as they compromise safety․ Always check soil conditions and load-bearing capacity to prevent failure․ Proper planning prevents costly repairs․

Common Mistakes to Avoid

Ensure proper drainage to prevent water buildup․ Avoid insufficient backfilling, which can weaken the wall’s stability․ Neglecting soil compaction risks structural failure․ Incorrect hole sizing and spacing compromise integrity․ Always verify material specifications to ensure durability and safety․

Design and Construction Oversights

Overlooking proper drainage systems, such as perforated pipes and gravel, can lead to water accumulation and structural damage․ Improperly sized or spaced holes for posts compromise stability․ Neglecting soil compaction and backfilling procedures weakens the wall’s foundation․ Using untreated materials in high-moisture environments risks rot and decay․ Always adhere to engineering guidelines to ensure long-term durability and safety․

Drainage and Soil Issues

Drainage and soil conditions are critical in sleeper retaining wall design․ Poor drainage can cause water buildup, leading to pressure and erosion․ Soil type and compaction significantly impact wall stability․ Ensure proper backfilling and use perforated pipes with gravel to prevent water retention․ Level and compact the ground thoroughly to avoid settlement issues and maintain structural integrity over time․

Maintenance and Repair

Regular inspection is essential to ensure the longevity of sleeper retaining walls․ Clean drainage systems, check for cracks, and address any soil settlement promptly to prevent structural damage․

Regular Inspection and Upkeep

Regularly inspect your sleeper retaining wall to ensure its stability and longevity․ Check for cracks, damage to sleepers or posts, and signs of soil settlement․ Ensure drainage systems, including perforated pipes and gravel, are clear and functioning properly․ Address any vegetation growth behind the wall that could cause damage․ Monitor for erosion or water pooling, and repair any issues promptly to prevent structural compromise․

Cost Considerations

Sleeper retaining walls are an economical solution for soil retention․ Budgeting should account for materials like concrete sleepers, treated timber, and drainage systems, ensuring long-term efficiency and savings․

Budgeting and Material Costs

Budgeting for a sleeper retaining wall involves calculating costs for materials like concrete sleepers, treated timber, and drainage systems․ Prices vary based on material quality and quantity․ Concrete sleepers are durable and cost-effective, while treated timber offers a natural aesthetic․ Plan for additional expenses like gravel, pipes, and labor․ Measure the wall’s height and length to estimate material quantities accurately․ Proper planning ensures efficient budgeting and long-term savings․

Long-Term Savings and Efficiency

Durable materials like concrete sleepers offer a 50-year lifespan, minimizing repairs and replacements․ Proper drainage systems, including perforated pipes and gravel, reduce water damage risks․ These features lower maintenance costs and enhance structural stability․ Additionally, they prevent soil erosion and ensure the wall remains effective over decades, providing long-term efficiency and cost savings for homeowners․

Case Studies and Examples

Successful sleeper wall projects include residential landscapes and rural properties․ A 50-meter concrete sleeper wall in a rural setting demonstrated exceptional durability and aesthetic integration with the surroundings․

Successful Sleeper Wall Projects

A 50-meter concrete sleeper wall in a rural setting demonstrated exceptional durability and aesthetic integration․ Residential landscapes have utilized timber sleepers for garden terraces, blending naturally with surroundings․ Commercial applications include parking lot retaining walls, showcasing structural integrity and cost efficiency․ These projects highlight how sleeper walls can adapt to diverse needs while maintaining functionality and visual appeal․

Lessons Learned and Best Practices

Ensure proper drainage by installing perforated pipes and gravel to prevent water buildup․ Always level the site meticulously to avoid structural issues․ Use high-quality materials, such as treated timber or durable concrete sleepers, for longevity․ Regular inspections and maintenance are crucial to identify and address potential weaknesses early․ Consulting engineers for complex designs ensures compliance and stability, especially in challenging soil conditions․

A well-designed sleeper retaining wall offers durability and aesthetic value․ Proper planning, drainage, and material selection ensure long-term stability and functionality, enhancing any landscape effectively․

Building a sleeper retaining wall requires proper site preparation, including leveling and marking the area․ Use perforated drainage pipes and gravel to ensure water management․ Backfilling and compaction are critical for stability․ Choose durable materials like concrete sleepers or treated timber․ Always comply with local engineering standards and perform regular maintenance to extend the wall’s lifespan․

Encouragement and Next Steps

With proper planning and execution, a sleeper retaining wall can transform your outdoor space․ Start small if you’re a DIY novice, or consult professionals for larger projects․ Remember to follow local building codes and perform regular inspections․ By adhering to these principles, you’ll create a safe, functional, and visually appealing structure that enhances your property for years to come․

trimble ez guide 250

The Trimble EZ-Guide 250 is a versatile GPS guidance system designed for agricultural applications, offering precision farming solutions with ease of use and reliability.

1.1 Overview of the Trimble EZ-Guide 250 System

The Trimble EZ-Guide 250 is a high-performance GPS guidance system designed for precision agriculture. It provides accurate field navigation, enabling farmers to optimize planting, spraying, and harvesting operations. The system is lightweight, durable, and easy to install on various agricultural vehicles. With its user-friendly interface, the EZ-Guide 250 allows operators to create and manage guidance lines, monitor progress, and adjust settings on the go. It supports WAAS (Wide Area Augmentation System) for enhanced positioning accuracy, making it suitable for both small-scale and large-scale farming operations. Additionally, the system is compatible with a range of steering systems, ensuring versatility and adaptability to different farm equipment.

1.2 Key Features and Benefits

The Trimble EZ-Guide 250 offers a range of features that enhance agricultural operations. Its high-accuracy GPS guidance ensures precise field navigation, reducing overlap and optimizing input use. The system supports WAAS (Wide Area Augmentation System) for improved positioning, and its sunlight-readable display provides clear visibility in all conditions. The EZ-Guide 250 is compatible with various steering systems, including Trimble’s EZ-Steer, for automated guidance. It also allows for easy data transfer and integration with other farm management tools. Farmers benefit from reduced operational costs, increased efficiency, and the ability to work accurately even in challenging field conditions. These features make the EZ-Guide 250 a reliable choice for modern farming needs.

Installation and Setup of the Trimble EZ-Guide 250

Installation involves mounting the GPS antenna, connecting hardware, and configuring software. Ensure compatibility with your equipment and follow calibration steps for optimal performance.

2.1 Hardware Requirements and Compatibility

The Trimble EZ-Guide 250 requires a WAAS-enabled GPS antenna for precision guidance. Ensure your tractor or equipment is compatible with the system’s steering adapter. Installation involves mounting the antenna, connecting the display unit, and linking to your vehicle’s steering system. Compatibility varies across tractor models, so verify the required adapters or modules before setup. Proper hardware installation is critical for accurate GPS performance and auto-steer functionality. Refer to Trimble’s compatibility guide to ensure all components work seamlessly with your machinery.

2.2 Software Configuration and Calibration

Configuring the Trimble EZ-Guide 250 involves installing the latest software updates and setting up the display unit. Ensure the GPS settings are correctly configured for your location and tractor speed. Calibration is essential for accurate performance—follow on-screen prompts to complete the process, ensuring the system aligns with your equipment. Proper antenna alignment and signal strength checks are crucial. Common issues like incorrect settings or antenna placement can cause positioning errors. Refer to the user manual for detailed calibration steps. Regular software updates and proper setup ensure optimal functionality and prevent disengagement problems during operation. Always verify settings before use to maintain precision and reliability.

Operational Tips and Best Practices

Regularly check antenna placement and ensure a clear sky view for optimal GPS performance. Maintain system updates and calibrate settings to prevent disengagement issues during operation.

3.1 Navigating the User Interface

The Trimble EZ-Guide 250 features an intuitive user interface designed for simplicity and efficiency. The touchscreen display provides clear navigation through menus, allowing easy access to key functions like GPS tracking, field mapping, and system settings. Users can quickly switch between views, such as map, guidance, and status screens, using clearly labeled tabs. The interface also supports customizable layouts, enabling operators to prioritize frequently used features. For optimal usability, the system incorporates visual feedback, such as color-coded indicators for GPS signal strength and guidance accuracy. Regularly updating the software ensures access to the latest interface improvements and features.

3.2 Optimizing GPS Performance

Ensuring optimal GPS performance with the Trimble EZ-Guide 250 is crucial for accurate guidance. Begin by mounting the GPS antenna in an unobstructed location, free from interference. Regularly update the system software and maps to maintain performance. Calibrate the GPS system periodically, especially after hardware changes. Clear any obstructions around the antenna to maintain signal strength. In areas with weak signals, consider using WAAS or EGNOS for improved accuracy. Monitor signal strength via the interface and adjust the antenna if necessary. These steps help minimize errors and ensure precise navigation during farming operations, enhancing overall efficiency and productivity. Regular maintenance and updates are key to sustained performance.

Troubleshooting Common Issues

Common issues with the Trimble EZ-Guide 250 include GPS positioning errors and auto-steer disengagement. Check antenna connections, recalibrate systems, and ensure software updates for optimal functionality.

4.1 Resolving GPS Positioning Errors

GPS positioning errors with the Trimble EZ-Guide 250 often arise from hardware or software issues. Ensure the antenna is securely connected and free from obstructions. Check for firmware updates, as outdated software can cause malfunctions. If the system displays “Cannot set A: No GPS position,” restart the device and recalibrate the GPS. Verify satellite signal strength and ensure no physical obstructions are blocking the antenna’s view of the sky. Additionally, review the system’s settings to confirm that the GPS mode is correctly configured for your location and operation type. Persistent issues may require contacting Trimble support for further assistance.

4.2 Addressing Auto-Steer Disengagement Problems

Auto-steer disengagement issues with the Trimble EZ-Guide 250 can occur due to various factors, such as loss of GPS signal or system calibration errors. First, ensure the GPS antenna has a clear view of the sky and is free from obstructions. Check the wiring connections to confirm they are secure and undamaged. Restart the system and recalibrate the auto-steer function to restore proper operation. If the problem persists, verify that the software is up to date, as outdated versions may cause compatibility issues. Additionally, ensure the vehicle’s speed and steering sensors are properly aligned and functioning correctly. If issues remain unresolved, consult the user manual or contact Trimble support for further assistance.

Warranty and Support Information

Trimble provides a comprehensive warranty covering defects in materials and workmanship for the EZ-Guide 250. Users can access technical support through Trimble’s official channels for assistance.

5.1 Understanding Trimble’s Warranty Policy

Trimble’s warranty for the EZ-Guide 250 ensures the product is free from defects in materials and workmanship. The warranty period typically covers the system for a specified duration, providing repair or replacement of faulty components. It’s essential to review the warranty terms to understand what is covered and any exclusions. Users should also note that Trimble reserves the right to determine the type of remedy, whether it’s a fix, minor update, or major upgrade. Proper registration and maintenance of the device are often required to maintain warranty validity. This policy underscores Trimble’s commitment to quality and customer satisfaction.

5.2 Accessing Technical Support and Resources

Trimble provides comprehensive technical support for the EZ-Guide 250, ensuring users have access to assistance when needed. Resources include online manuals, troubleshooting guides, and video tutorials. Customers can contact support through phone, email, or live chat for personalized help. Additionally, Trimble’s official website offers a knowledge base with FAQs and software updates. Authorized resellers, like Vantage Ireland, also provide localized support and training. Regular firmware updates are available to enhance system performance and address any issues. By leveraging these resources, users can maximize their system’s functionality and resolve problems efficiently, maintaining optimal productivity in their agricultural operations.

The Trimble EZ-Guide 250 remains a reliable, user-friendly solution for precision agriculture, with potential for future upgrades to enhance performance and adapt to evolving farming needs.

6.1 The Role of the EZ-Guide 250 in Modern Agriculture

The Trimble EZ-Guide 250 plays a pivotal role in modern agriculture by providing precise GPS guidance, enhancing operational efficiency, and reducing input waste; Its user-friendly interface and compatibility with various agricultural systems make it a valuable tool for farmers seeking to optimize their workflows. The system supports sustainable farming practices by enabling accurate field navigation and seed placement, which helps in minimizing environmental impact. Additionally, the EZ-Guide 250 contributes to the digital transformation of agriculture by offering real-time data and improved decision-making capabilities. Its reliability and adaptability ensure it remains a cornerstone for farmers aiming to maximize productivity and profitability in today’s competitive agricultural landscape.

6.2 Potential Upgrades and Enhancements

The Trimble EZ-Guide 250 may see future upgrades to enhance its performance and adapt to evolving agricultural needs. Potential improvements could include advanced GPS modules for better accuracy, enhanced software features for data analysis, and integration with emerging technologies like autonomous farming systems. Upgrades to the user interface could further streamline operations, making it even more intuitive for farmers. Additionally, expansions in compatibility with newer equipment and systems may be explored to ensure the EZ-Guide 250 remains a versatile tool. These enhancements would aim to boost efficiency, reduce costs, and support sustainable farming practices, ensuring the system continues to meet the demands of modern agriculture;

avaya 1416 user manual

Welcome to the Avaya 1416 User Manual, your comprehensive guide to understanding and using the Avaya 1416 Digital Deskphone effectively. This manual provides detailed instructions for installation, configuration, and operation, ensuring optimal use of its advanced features and capabilities.

1.1 Overview of the Avaya 1416 Phone

The Avaya 1416 Digital Deskphone is a reliable, feature-rich communication device designed for efficient call management. It offers 16 programmable buttons, a monochrome display, and hands-free speakerphone functionality. Part of the Avaya IP Office system, it supports advanced capabilities like call logging and contact management, making it ideal for small to medium-sized businesses seeking scalable and user-friendly telephony solutions.

1.2 Purpose of the User Manual

The Avaya 1416 User Manual is designed to help users understand and utilize the phone’s features effectively. It provides comprehensive guidance on setup, configuration, and operation, ensuring seamless communication. This manual also offers troubleshooting tips and maintenance advice, empowering users to resolve issues and optimize their experience with the Avaya 1416 Digital Deskphone.

Key Features of the Avaya 1416 Phone

The Avaya 1416 features a high-resolution display, programmable buttons for customization, advanced call management options, and a handsfree speakerphone for enhanced communication convenience and efficiency.

2.1 Display and Programmable Buttons

The Avaya 1416 features a high-resolution display for clear visibility of call details and menus. It includes 16 programmable buttons, supporting call appearances and feature assignments, allowing users to customize their communication experience with ease and efficiency.

2.2 Call Management Features

The Avaya 1416 offers advanced call management features, including call forwarding, transfer, and conference calling. Users can easily manage multiple calls with call appearance buttons and soft keys for functions like hold, mute, and call park. These features enhance productivity and streamline communication workflows, ensuring efficient handling of incoming and outgoing calls.

2.3 Handsfree Speakerphone Functionality

The Avaya 1416 features a built-in handsfree speakerphone, allowing users to make and receive calls without lifting the handset. The speakerphone includes a high-quality microphone and speaker for clear audio. This functionality is ideal for conference calls, enabling multiple participants to engage in conversations effortlessly. The handsfree mode can be activated using the speakerphone button or through menu settings.

Installation and Setup

This section guides you through unpacking, physical installation, network connection, and initial setup of the Avaya 1416 phone for seamless functionality.

3.1 Unpacking and Physical Installation

Carefully unpack the Avaya 1416 phone, ensuring all components, including the handset, base, and cables, are included. Inspect for damage and place the phone on a flat, stable surface. Connect the power and network cables securely, ensuring proper alignment. Handle the phone with care to avoid damage, and avoid exposing it to extreme temperatures or moisture.

3.2 Connecting the Phone to the Network

Connect the Avaya 1416 phone to your network using the provided Ethernet cable. Plug one end into the phone’s Ethernet port and the other into a compatible network switch or router. Ensure the phone has power, either via a PoE-enabled port or an external power adapter. The phone will automatically connect if properly configured within your IP Office system. Verify connectivity by checking the network settings or contacting your system administrator for assistance.

3.3 Initial Configuration Steps

After connecting the phone to the network, access the phone’s settings menu to configure basic preferences. Select the appropriate network settings and ensure the phone is properly synchronized with the Avaya IP Office system. Assign programmable buttons as needed for call appearances or features. Refer to the system administrator for specific configuration requirements or advanced setup options.

Basic Operations

The Avaya 1416 supports essential call management features, including making and answering calls, using the call log, and accessing basic handling options like hold and transfer.

4.1 Making and Answering Calls

Making and answering calls on the Avaya 1416 is straightforward. To make a call, lift the handset or press the speakerphone button. Dial the number using the keypad. To answer, lift the handset or press the Answer button. Use the call log to view recent calls and redial numbers. The phone also supports handsfree mode for convenient call handling.

  • Lift the handset or press the speakerphone button to initiate a call.
  • Dial the desired number using the keypad.
  • Answer incoming calls by lifting the handset or pressing the Answer button.
  • Access the call log to view and manage recent calls.
  • Use the speakerphone for handsfree conversations.

4.2 Using the Call Log and Contacts

The Avaya 1416 allows you to view and manage recent calls and contacts effortlessly. Access the call log to review incoming, outgoing, and missed calls. Use the Contacts feature to store and dial frequently used numbers. Navigate through the call log using soft keys, and add new contacts by pressing the Contacts button, then selecting the More and New options.

  • Press the Contacts button to access stored numbers.
  • Use the More soft key to view additional options.
  • Select the New soft key to add a new contact.
  • Enter the name and number using the dial pad.

4.3 Basic Call Handling Features

The Avaya 1416 offers essential call management tools for efficient communication. Hold, transfer, and forward calls with ease using soft keys; Mute calls to maintain privacy and use the speakerphone for hands-free conversations. These features ensure seamless call handling, enhancing your productivity and user experience.

  • Hold calls to temporarily pause conversations.
  • Transfer calls to other extensions or numbers.
  • Forward incoming calls to another phone or voicemail.
  • Use mute to prevent background noise.
  • Activate speakerphone for hands-free interactions.

Advanced Features

The Avaya 1416 offers advanced features like call forwarding, transfer, conference calling, and programmable buttons for enhanced communication efficiency. These features allow users to customize their communication experience and streamline workflows for better productivity.

5.1 Call Forwarding and Transfer

The Avaya 1416 supports call forwarding and transfer, enabling users to redirect incoming calls to another extension or external number. Call transfer allows seamless handover of calls to other team members, while call forwarding ensures calls reach the intended recipient even when the user is unavailable. These features enhance flexibility and productivity in managing communications.

5.2 Conference Calling and Multi-Party Calls

The Avaya 1416 supports conference calling, allowing users to host multi-party calls with up to three participants. To initiate a conference, press the ‘Conf’ soft key during an active call, dial the additional party, and merge the calls. This feature enhances collaboration and streamlines communication, making it ideal for team discussions or client meetings.

5.3 Customizing Programmable Buttons

The Avaya 1416 allows customization of programmable buttons to suit individual preferences. Users can assign buttons for call appearances, feature access, or speed dialing. Programming can be done via the phone’s interface or through system administrator settings, enabling personalized workflow efficiency and quick access to frequently used functions.

Troubleshooting Common Issues

Troubleshooting common issues ensures optimal performance of the Avaya 1416. Address connectivity problems, audio quality, and system errors by checking network connections, restarting the device, or resetting to factory settings if necessary.

6.1 Diagnosing Connectivity Problems

Diagnose connectivity issues by checking network cables, ensuring the phone is powered on, and verifying the IP address. Check for LED indicators showing connection status. If issues persist, restart the phone or reset to factory settings. Consult the manual for detailed steps to resolve network and hardware-related problems efficiently;

6.2 Resolving Audio and Call Quality Issues

To address audio or call quality problems, first ensure the network connection is stable. Adjust the volume using the control buttons and check for mute status. Test with a compatible headset or handset. Restart the phone or perform a factory reset if issues persist. Ensure firmware is up-to-date, as outdated software may cause audio disruptions.

6.3 Restarting and Resetting the Phone

Restart the Avaya 1416 by powering it off, waiting 10 seconds, and then turning it back on. For a factory reset, press and hold the * and # keys while powering on. This restores default settings but may require reconfiguration. Contact Avaya support if issues persist after restarting or resetting the device.

Maintenance and Updates

Maintain the Avaya 1416 by regularly cleaning the handset and display. Ensure firmware updates are installed promptly to enhance performance and security.

7.1 Cleaning and Care of the Phone

Regularly clean the Avaya 1416 phone using a soft, dry cloth to wipe down the handset, display, and buttons. Avoid harsh chemicals or abrasive materials that may damage the surface. For tougher stains, slightly dampen the cloth with water, but ensure no moisture seeps into openings. Clean the speaker and microphone grilles gently to maintain audio clarity and performance.

7.2 Updating Firmware and Software

Regularly update the Avaya 1416 phone’s firmware and software to ensure optimal performance and access to the latest features. Visit Avaya’s official support website (support.avaya.com) to download the most recent updates. Follow the on-screen instructions to install the updates, ensuring the phone is connected to the network. Updates may enhance functionality, security, and compatibility. Always use Avaya-approved updates to maintain system integrity and compliance with manufacturer guidelines.

7.3 Backup and Restore Procedures

Regular backups of the Avaya 1416 phone’s configuration and contact data are essential to prevent data loss. Use the phone’s built-in backup feature to save settings and contacts to a secure location. During restoration, upload the backup file to retrieve previous configurations and ensure uninterrupted operation. This process is particularly useful during system upgrades or troubleshooting scenarios.

Accessories and Optional Equipment

The Avaya 1416 supports various accessories, including button modules, compatible headsets, and power supplies, to enhance functionality and user experience. These options are detailed in this section.

8.1 Button Modules and Expansion Units

The Avaya 1416 supports button modules like the DBM32, which adds 32 programmable buttons for call appearances or features. These modules enhance functionality, allowing users to access more lines or shortcuts. They are scalable, enabling users to expand the phone’s capabilities as needed. Compatible expansion units ensure seamless integration with the Avaya 1416, improving efficiency for users managing multiple calls or features.

8.2 Compatible Headsets and Handsets

The Avaya 1416 supports a range of compatible headsets and handsets, enhancing user comfort and call quality. These accessories are designed to integrate seamlessly with the phone, offering clear audio and durability. Users can choose from wired or wireless options, ensuring flexibility in their communication setup. Properly pairing these devices with the 1416 ensures optimal performance and user satisfaction.

8.3 Power and Network Accessories

The Avaya 1416 supports various power and network accessories to ensure reliable operation. These include power adapters, PoE (Power over Ethernet) switches, and network cables. Properly connecting these accessories ensures optimal performance and maintains stable connectivity. They are designed to integrate seamlessly with the phone, providing a robust and efficient communication experience for users.

Legal and Compliance Information

This section outlines essential legal and compliance details, including safety precautions, regulatory certifications, and the End-User License Agreement, ensuring adherence to Avaya’s standards and policies.

9.1 Safety Precautions and Warnings

Ensure safe usage by avoiding unauthorized modifications and using only approved accessories. Keep the phone away from water and extreme temperatures. Avoid using cell phones or two-way radios nearby, as they may cause interference. In case of power outages, do not attempt to use the phone until power is restored. Follow all safety guidelines to prevent damage or hazards.

9.2 Regulatory Compliance and Certifications

The Avaya 1416 phone complies with regulatory standards, including FCC, CE, and UL certifications, ensuring safe and legal operation. It meets global standards for electromagnetic compatibility and safety. Avaya adheres to all applicable regulations, and the device is designed to operate within specified parameters. For specific certifications, refer to the product documentation or contact Avaya support for detailed information.

9.3 End-User License Agreement

The End-User License Agreement (EULA) outlines the terms and conditions for using Avaya 1416 phone software. Users must comply with all clauses to ensure legal use. The agreement covers software rights, usage restrictions, and intellectual property protections.

By using the device, users agree to indemnify Avaya against claims arising from unauthorized modifications or misuse. Adherence to the EULA is mandatory for proper functionality and support.

Contacting Avaya Support

Avaya provides support through various channels. For further technical assistance, call the provided telephone number or visit their official website for online resources and documentation.

10.1 Technical Support Contact Information

Avaya offers dedicated technical support to assist with any issues. Contact Avaya through their official support telephone number or visit their website for comprehensive online resources. Regional support numbers are also available for localized assistance, ensuring prompt resolution to your queries and concerns.

10.2 Online Resources and Documentation

Avaya provides extensive online resources, including user manuals, quick start guides, and technical documentation, accessible via their official website. The database contains over 1 million PDF manuals, covering the Avaya 1416 and other models. Regular updates ensure the latest information is available. Visit www.avaya.com for direct access to these resources, including the “1408/1416 Phone User Guide” and “Installation Manual.”

10.3 Reporting Fraud or Security Issues

If you suspect toll fraud or security breaches, contact Avaya support immediately. Visit www.avaya.com for contact details or call the designated support number. Provide detailed information about the issue to assist in prompt resolution. Avaya prioritizes security and offers guidance to mitigate risks and protect your system from unauthorized access or fraudulent activities.

PDF

printable new home construction checklist pdf

A printable new home construction checklist PDF is essential for organizing and tracking progress. It simplifies the building process, ensuring all steps are followed and deadlines met. By using a PDF format, you can easily access and update the checklist, keeping your project on track from start to finish. This guide provides a comprehensive overview of how checklists can streamline your construction journey and help maintain control over your new home’s development.

1.1 Importance of a Printable Checklist

A printable new home construction checklist PDF is crucial for staying organized and ensuring no steps are overlooked. It provides a clear, tangible guide to track progress, set deadlines, and maintain accountability. Having a physical or downloadable format allows easy access and updates, reducing the risk of miscommunication. This tool helps homeowners and contractors stay aligned, ensuring the project meets expectations and complies with all requirements. It’s indispensable for managing the complexity of building a new home.

1.2 Benefits of Using a PDF Format

Using a PDF format for your new home construction checklist offers numerous advantages. PDFs are universally compatible, ensuring accessibility across devices. They are easy to share with contractors and stakeholders, promoting clear communication; PDFs also preserve formatting, preventing layout issues. Additionally, they can be easily updated and saved, making them ideal for tracking progress. This format is secure and professional, making it the preferred choice for managing complex construction projects efficiently and effectively.

Pre-Construction Planning

Effective pre-construction planning ensures a smooth process. Start with budgeting, land survey, and hiring reliable contractors. Create a detailed timeline and gather necessary permits early to avoid delays and ensure compliance with local regulations. Proper planning sets the foundation for a successful project, helping you stay organized and prepared for each phase of your new home’s construction. This step is crucial for achieving your vision within budget and timeline constraints.

2.1 Budgeting and Financial Preparation

Budgeting and financial preparation are critical steps in new home construction. Start by setting a realistic budget, including contingencies for unexpected costs. Secure financing early and review all financial obligations. A printable new home construction checklist PDF can help track expenses and ensure accountability. Regularly review and update your budget to avoid overspending. Proper financial planning ensures your project stays on track and aligns with your financial goals, preventing costly delays and stress.

2.2 Land Survey and Site Selection

Conducting a land survey ensures the site is suitable for construction. Verify property boundaries, zoning laws, and environmental factors. Site selection involves evaluating terrain, drainage, and accessibility. A printable new home construction checklist PDF can help document these details. Proper land preparation prevents costly issues later. Ensure the site is cleared and graded before moving forward. This step is vital for a smooth construction process and achieving your dream home’s layout and functionality.

2.3 Hiring Contractors and Architects

Hiring reliable contractors and architects is crucial for a successful project. Ensure they are licensed, insured, and experienced. Compare quotes and portfolios to find the best fit. Use your printable new home construction checklist PDF to track interviews, references, and contract details. Clear communication and a detailed scope of work are essential to avoid misunderstandings. This step ensures your vision is translated into a well-executed design and construction plan.

Site Preparation and Foundation Work

Site preparation and foundation work are critical for a sturdy build. Your printable new home construction checklist PDF ensures proper land clearing, excavation, and foundation laying, preventing future issues.

3.1 Clearing the Land and Grading

Clearing the land and grading are initial steps in site preparation. A printable new home construction checklist PDF ensures all debris is removed and the ground is leveled properly. This process prevents future structural issues by creating a stable base for construction; Proper grading also directs water away from the foundation, reducing the risk of flooding and damage. A well-prepared site sets the stage for a successful build.

3.2 Excavation and Foundation Laying

Excavation and foundation laying are critical steps in new home construction. A printable checklist ensures proper digging of footings, walls, and slabs. Soil stability and accurate measurements are verified before pouring concrete. Inspections are conducted to confirm the foundation meets building codes. Properly laid foundations prevent structural issues and ensure a durable base for the home. This step is non-negotiable for long-term stability and safety, making it a priority in your construction checklist.

3.4 Utility Installation (Water, Electricity, Sewage)

Utility installation is a vital phase in new home construction. Ensure water, electricity, and sewage lines are properly connected. A printable checklist helps track trenching, line installation, and meter setup. Inspections and permits are mandatory to meet local codes. Proper connections prevent future issues, ensuring safe and reliable services. This step is crucial for functionality and must be meticulously documented in your construction checklist.

Framing and Structural Construction

Framing involves erecting walls and roof structures, ensuring stability. Inspect for proper alignment and secure connections. Verify materials like wood or steel meet standards. A checklist ensures all structural elements are inspected and approved before proceeding to the next phase, guaranteeing a safe and durable framework for your new home.

4.1 Erecting Walls and Roof Framing

Erecting walls and roof framing is a critical phase in construction. Ensure all load-bearing walls are properly aligned and secured. Inspect roof trusses for accuracy and stability. Verify that materials like wood or steel meet local building codes. Use a checklist to confirm all structural elements are level, plumb, and securely fastened. This step ensures the home’s framework is sturdy and ready for subsequent installations, such as windows and doors, while maintaining safety and durability.

4.2 Installing Windows and Doors

Installing windows and doors requires precision to ensure proper fit and function. Verify that all openings are correctly measured and framed. Check for proper sealing to prevent air leaks and water damage. Ensure hardware is securely fastened and operates smoothly. Use a checklist to confirm alignment, leveling, and compliance with local building codes. This step ensures natural light, ventilation, and energy efficiency while maintaining the structural integrity of your new home.

4.3 Ensuring Structural Integrity

Structural integrity is crucial for safety and durability. Use a checklist to verify that load-bearing walls, beams, and foundations are correctly installed. Ensure all materials meet building codes and inspections are passed; Check for proper alignment and anchorage of structural elements. Address any defects promptly to prevent costly repairs. A thorough review ensures your home can withstand environmental stresses and remains secure for years to come.

Installation of Systems

This phase involves installing plumbing, HVAC, electrical wiring, and insulation. Use a checklist to ensure all systems are correctly fitted and meet safety standards for functionality and efficiency.

5.1 Plumbing and HVAC Systems

Installing plumbing and HVAC systems requires precision to ensure proper water flow, heating, and cooling. A checklist helps verify that pipes, fixtures, and ductwork are correctly fitted and tested. It ensures that water pressure is adequate, drains function properly, and HVAC systems operate efficiently. Regular inspections during installation prevent future issues, ensuring the systems are safe, functional, and meet building codes. This step is crucial for a comfortable and energy-efficient home.

5.2 Electrical Wiring and Outlets

A checklist for electrical wiring and outlets ensures all components are safely installed and functional. It verifies proper installation of circuit breakers, outlets, switches, and lighting fixtures. Inspections confirm that wiring meets safety standards and codes, preventing hazards. Testing ensures all outlets and circuits operate correctly before final approval. This step guarantees reliable power distribution and enhances home safety and functionality, avoiding costly future repairs. Proper electrical setup is vital for modern living and convenience.

5.3 Insulation and Ventilation

Ensure proper insulation installation in attics, walls, and basements for energy efficiency. Verify all gaps are sealed to prevent air leaks. Check that ventilation systems, including fans and ductwork, are installed correctly. Inspect for adequate airflow to maintain air quality and prevent moisture buildup. Confirm that vents are functional and properly routed. This step ensures a comfortable, energy-efficient home with optimal climate control and reduced risk of mold or structural damage from poor ventilation.

Interior and Exterior Finishing

This phase involves completing the interior with drywall, painting, flooring, and cabinets. The exterior includes siding, trim, and landscaping. Ensure all finishes meet quality standards and specifications, completing the home’s aesthetic and functional requirements.

6.1 Drywall Installation and Painting

Drywall installation begins with hanging and securing panels, ensuring smooth joints. Taping, mudding, and sanding follow to create a seamless surface. Painting involves priming and applying finish coats, with attention to color consistency and coverage. Inspect for defects like cracks or unevenness before moving to flooring. Proper ventilation and drying times are crucial for a professional finish. Ensure all surfaces meet quality standards and are ready for final inspections. This step brings the interior spaces to life, preparing them for occupancy;

6.2 Flooring and Cabinets

Installing flooring involves measuring, cutting, and securing materials like hardwood, tile, or carpet. Cabinets are fitted into designated spaces, ensuring alignment and levelness. Hardware and finishes are added for functionality and aesthetics. Inspect for defects, proper sealing, and alignment. Ensure flooring is durable and cabinets are securely fastened. This step enhances the home’s interior, providing both functionality and visual appeal. Proper installation ensures longevity and meets design specifications, completing the interior space effectively.

6.3 Exterior Siding and Landscaping

Exterior siding installation ensures weatherproofing and aesthetic appeal. Materials like vinyl, brick, or wood are securely fastened and sealed. Landscaping involves grading the yard to slope away from the foundation, planting trees or shrubs, and installing gutters. Ensure all elements are properly aligned and secured. This step finalizes the home’s curb appeal and ensures proper drainage and structural protection. A well-executed exterior enhances both functionality and visual appeal, completing the home’s exterior finish.

Final Inspection and Move-In

The final inspection ensures all work is complete and meets standards. Address any remaining issues, confirm the home is safe, and obtain necessary certificates. This step prepares you for a smooth move-in.

7.1 Conducting a Final Walkthrough

A final walkthrough ensures your new home meets all specifications and is free from defects. Use your printable checklist to inspect electrical systems, plumbing, HVAC, and finishes. Check for proper installation of fixtures, appliances, and flooring. Document any issues or repairs needed, ensuring they are resolved before closing. This step guarantees everything functions as intended, providing peace of mind for a smooth transition into your new home.

7.2 Addressing Punch List Items

After the final walkthrough, use your printable checklist to address all punch list items. Prioritize repairs and ensure every issue is resolved. Track progress meticulously to avoid delays; This step is crucial for a smooth handover, ensuring your new home is move-in ready. Don’t rush—every detail matters for your satisfaction and the home’s functionality.

7.3 Obtaining Certificates of Occupancy

Once all inspections are passed and punch list items are resolved, secure the certificate of occupancy. This document confirms your home meets local building codes and is safe for living. Ensure it’s issued before finalizing the purchase or moving in. Your printable checklist should include a section to track this final approval, ensuring compliance and completing the construction process smoothly.

Additional Resources

Explore downloadable PDF templates and expert tips for customizing your new home checklist. These resources ensure a well-organized and stress-free construction process from start to finish.

8.1 Downloadable PDF Checklist Templates

Downloadable PDF checklist templates provide a convenient way to track your new home construction progress. These templates are customizable, covering stages from foundation to final inspection. They include task lists, timelines, and space for notes, ensuring no detail is overlooked. Many templates are free and easily accessible online, offering a structured approach to manage your project efficiently. They are ideal for homeowners seeking to stay organized and ensure a smooth construction process from start to finish.

8.2 Tips for Customizing Your Checklist

Customizing your new home construction checklist ensures it fits your specific needs. Start by adding personal notes and deadlines for each task. Prioritize tasks based on importance and timelines. Include checkboxes or progress bars to visually track completion. Tailor sections for site preparation, framing, and inspections. Use highlighting or color-coding for critical items. Regularly update the checklist as your project evolves. This personalized approach helps you stay organized and ensures no details are overlooked during construction.

sample employee benefits guide

An employee benefits guide is a comprehensive document outlining the perks and advantages offered to employees․ It serves as a central resource, ensuring clarity and accessibility․ Organizations use customizable templates to create visually engaging guides, tailored to their specific needs․ These documents play a crucial role in enhancing employee satisfaction and engagement by providing detailed information about health insurance, retirement plans, and other benefits․ A well-designed guide fosters transparency, helping employees make informed decisions about their compensation packages․ It also reflects the company’s commitment to supporting its workforce, which can improve morale and retention rates․ By centralizing benefits information, the guide simplifies communication and ensures all employees are well-informed about available programs․ This section introduces the concept, highlighting its importance in modern workplace dynamics and setting the stage for exploring specific benefits in detail․ Understanding the structure and purpose of an employee benefits guide is essential for both employers and employees, as it directly impacts job satisfaction and organizational success․

1․1 Importance of Employee Benefits Guides

An employee benefits guide is crucial for fostering transparency and trust within an organization․ It provides a clear overview of all offered benefits, ensuring employees understand their value․ By centralizing this information, companies can enhance employee engagement and satisfaction․ Customizable templates, like those from Flipsnacks and Foleon, allow organizations to create visually appealing and comprehensive guides․ These documents not only inform but also demonstrate the company’s commitment to its workforce․ A well-crafted benefits guide can improve morale, aid in recruitment, and support retention by showcasing the total compensation package effectively․

1․2 Purpose of a Sample Employee Benefits Guide

The primary purpose of a sample employee benefits guide is to provide a clear, organized, and accessible overview of the benefits offered by an organization․ It serves as a customizable template that companies can tailor to their specific needs, ensuring that employees understand the value of their compensation package․ By centralizing information, the guide simplifies communication and enhances employee engagement․ It also aids in recruitment by showcasing the benefits effectively․ The guide’s design emphasizes visual appeal and clarity, making complex information easy to digest․ Additionally, it ensures compliance with legal standards, providing accurate and transparent details about each benefit offered․

Types of Employee Benefits

Employee benefits are categorized into core, voluntary, and fringe benefits․ Core includes health insurance and retirement plans, voluntary covers dental and vision, and fringe offers perks like company cars and gym memberships․

2․1 Core Benefits (Health Insurance, Retirement Plans)

Core benefits form the foundation of an employee benefits package․ Health insurance is a primary offering, providing medical coverage to employees and their families․ Retirement plans, such as 401(k)s, help employees secure their future by offering employer-matched contributions․ These benefits are essential for attracting and retaining talent, as they address fundamental needs․ They also contribute to employee well-being and financial stability, fostering a loyal and motivated workforce․ By including these core benefits, organizations demonstrate a commitment to their employees’ long-term health and financial security, creating a positive work environment․

2․2 Voluntary Benefits (Dental, Vision, Life Insurance)

Voluntary benefits, such as dental, vision, and life insurance, are optional perks that employees can elect to participate in, often contributing to the cost․ These benefits enhance overall well-being and provide additional financial security․ Dental insurance covers routine and major procedures, while vision insurance includes eye exams and corrective lenses․ Life insurance offers a safety net for employees’ families in case of unforeseen events․ Voluntary benefits are valuable for attracting talent and improving job satisfaction, as they allow employees to tailor their benefits package to personal needs․ They also demonstrate an organization’s commitment to employee well-being beyond core offerings․

2․3 Fringe Benefits (Company Cars, Gym Memberships)

Fringe benefits are additional perks provided to employees, enhancing their overall compensation package․ Examples include company cars, gym memberships, and wellness programs․ These benefits are often tax-deductible for employers and can be a valuable incentive for attracting and retaining talent․ Fringe benefits also contribute to employee well-being and job satisfaction, fostering a positive work environment․ They are typically supplementary to core benefits and are not mandated by law․ By offering fringe benefits, organizations can differentiate themselves in a competitive job market and demonstrate a commitment to employee satisfaction and health․ These perks also help in creating a more engaged and motivated workforce․

Customizing Your Employee Benefits Guide

Customizing your benefits guide ensures it aligns with your organization’s unique needs and brand identity․ Use templates to create visually engaging, informative documents that employees will appreciate․

3․1 Tailoring Benefits to Your Organization’s Needs

Tailoring benefits to your organization’s needs ensures relevance and effectiveness․ Start by assessing your workforce’s demographics and preferences to identify which benefits matter most․ For instance, a younger workforce might prioritize student loan repayment or professional development opportunities, while older employees may value robust retirement plans․ Consider industry standards and competitor offerings to remain competitive․ Align benefits with your company’s culture and goals, such as wellness programs for health-focused organizations or flexible work arrangements for tech startups․ Regularly gather employee feedback to refine your offerings and ensure they meet evolving needs․ By customizing benefits, you create a package that resonates with your team, fostering satisfaction and loyalty․ This step is crucial for maximizing the impact of your employee benefits guide and ensuring it addresses specific organizational objectives․ Tailoring benefits not only enhances employee morale but also strengthens your employer brand, making it easier to attract and retain top talent in a competitive market․

3․2 Designing Visually Engaging Documents

Designing visually engaging documents is key to ensuring employees interact with and understand their benefits; Use customizable templates that align with your brand, incorporating colors, fonts, and imagery that reflect your organization’s identity․ Add charts, infographics, and images to break down complex information into digestible sections․ Ensure the layout is clean and organized, with clear headings and bullet points for easy navigation․ Avoid clutter by balancing text and whitespace․ Consider digital formats for enhanced accessibility, allowing employees to access the guide anytime, anywhere․ A well-designed benefits guide not only enhances readability but also reinforces your company’s commitment to transparency and employee satisfaction․

Legal and Compliance Considerations

Understanding tax implications and adhering to IRS guidelines is crucial when designing employee benefits․ Ensure compliance with legal requirements to avoid penalties and maintain transparency in documentation․

4․1 Understanding Fringe Benefits Tax Implications

Fringe benefits, such as company cars or gym memberships, may have tax implications for both employers and employees․ The IRS classifies these benefits and determines their taxable status․ Employers must report fringe benefits on employees’ W-2 forms if they exceed certain thresholds․ For instance, personal use of a company car may result in taxable income․ It’s essential to consult IRS guidelines to ensure accurate reporting and compliance․ Proper documentation and understanding of tax rules help organizations avoid penalties and maintain financial integrity․ This section provides clarity on navigating tax requirements for fringe benefits effectively․

4․2 Adhering to IRS Guidelines for Benefits

Compliance with IRS guidelines is crucial when structuring employee benefits․ Employers must ensure that all benefits align with federal tax regulations to avoid penalties․ The IRS provides detailed rules for reporting and taxing benefits, such as health insurance, retirement plans, and fringe benefits․ Accurate documentation and timely reporting are essential to maintain compliance․ For example, employers must report certain benefits on employees’ W-2 forms and adhere to contribution limits for retirement plans․ Staying informed about IRS updates ensures that benefits are administered correctly, minimizing legal risks and financial repercussions․ Proper compliance also helps employees understand their taxable income and benefits accurately․

Presenting the Benefits Guide to Employees

Presenting the benefits guide effectively ensures employees understand and appreciate their compensation package․ Using clear, concise language and visually engaging designs enhances comprehension and engagement․ Regular updates and accessible formats, such as digital versions, help maintain employee awareness and satisfaction․

5․1 Communicating Benefits Effectively

Effective communication of employee benefits ensures clarity and understanding, fostering appreciation and engagement․ Use clear, jargon-free language and visually appealing formats like infographics or bullet points․ Highlight key benefits, such as health insurance or retirement plans, to emphasize their value․ Digital formats, like interactive PDFs or online portals, enhance accessibility․ Regular updates and reminders keep employees informed about changes or deadlines․ Tailor messaging to address diverse needs, ensuring all groups feel included․ Provide contact information for HR or benefits specialists to answer questions․ By presenting benefits clearly and concisely, employers can maximize employee satisfaction and utilization of offered programs, ensuring a positive workplace experience․

5․2 Using Templates for Consistency

Using templates ensures consistency in presenting employee benefits, maintaining a professional and organized appearance․ Templates streamline the creation process, allowing customization while preserving a uniform style․ They enable quick updates and ensure all information is clear and accessible․ By incorporating brand-specific visuals and formatting, templates align with the company’s identity, enhancing recognition and trust․ Pre-designed elements like infographics and tables simplify complex data, making it easier for employees to understand․ Templates also reduce errors and save time, enabling HR teams to focus on more strategic tasks․ Consistency fosters credibility, ensuring employees receive accurate and visually appealing benefits information every time․

A well-crafted employee benefits guide is essential for fostering a positive workplace culture and ensuring employees fully understand their compensation package․ By leveraging customizable templates and clear communication, organizations can enhance transparency and engagement․ The next step involves regular updates and feedback collection to refine the guide, ensuring it remains relevant and aligned with employee needs․ Continuous improvement and open dialogue are key to maximizing the guide’s effectiveness and supporting long-term employee satisfaction and retention․

6․1 Final Thoughts on Implementing Employee Benefits

Implementing a well-structured employee benefits guide is crucial for fostering transparency, engagement, and trust within an organization․ By providing clear, accessible information, companies can empower employees to make informed decisions about their compensation and perks․ Customizable templates and visually appealing designs ensure the guide is both professional and aligned with the company’s brand․ Regular updates and feedback loops are essential to keep the document relevant and tailored to evolving employee needs․ Ultimately, a thoughtfully designed benefits guide not only enhances employee satisfaction but also strengthens the organization’s ability to attract and retain top talent․

6․2 Encouraging Feedback for Improvements

Encouraging feedback is vital for refining and enhancing employee benefits guides․ Employers should create opportunities for employees to share their thoughts through surveys, focus groups, or anonymous feedback forms․ This ensures that the guide remains relevant and addresses the needs of the workforce․ Regular follow-ups and clear communication about changes made based on feedback foster trust and engagement․ By valuing employee input, organizations demonstrate their commitment to continuous improvement and employee satisfaction․ This collaborative approach not only strengthens the benefits program but also enhances the overall workplace experience, ensuring the guide evolves alongside the organization’s goals and employee expectations․