Archive: November 30, 2024

blomberg dishwasher user manual

Safety Precautions

Always read the user manual carefully, especially safety instructions, to ensure optimal use and avoid accidents. Load dishes properly to prevent breakage during cycles and ensure wash arms are unobstructed for proper function.

1.1 General Safety Guidelines

Always follow the user manual’s safety instructions carefully to ensure safe operation. Avoid leaning on the dishwasher and keep children away during operation. Wear gloves when handling sharp or hot items. Ensure the dishwasher is installed on a stable, level surface to prevent tipping. Regularly inspect hoses and connections for damage. Never operate the dishwasher if it is damaged or malfunctioning. Properly handle detergents and rinse aids, as misuse can cause harm. Maintain the appliance regularly to ensure optimal performance and safety.

1.2 Handling Detergents Safely

Always handle detergents and rinse aids with care to avoid exposure. Use gloves when handling detergents to prevent skin irritation. Store detergents out of children’s reach in a cool, dry place; Follow the recommended dosage to avoid excess residue and potential harm. In case of accidental ingestion or contact with eyes, rinse thoroughly and seek medical help immediately. Ensure the dishwasher’s detergent dispenser is closed properly before starting a cycle. Use eco-friendly detergents if possible, and always check for compatibility with your Blomberg dishwasher model.

1.3 Avoiding Overloading the Dishwasher

Avoid overloading the dishwasher to ensure optimal cleaning performance and prevent damage. Place items securely to avoid breakage and blockage of wash arms. Do not nest dishes tightly, as this may prevent water and detergent from reaching all surfaces. Large or bulky items should be positioned away from the center to maintain proper water circulation. Overloading can lead to poor cleaning results and potential damage to the appliance. Always refer to the user manual for specific loading guidelines for your Blomberg dishwasher model.

Installation Instructions

Follow installation instructions carefully to ensure proper setup. Choose a suitable location, ensure the dishwasher is level, and connect water and power supplies correctly for optimal function.

2.1 Choosing the Right Location

Selecting the right location for your Blomberg dishwasher is crucial for optimal performance. Ensure the dishwasher is installed near a water supply, power outlet, and drainage system. Avoid placing it in direct sunlight or areas prone to moisture accumulation. The location should also be level to prevent vibration and noise during operation. Additionally, choose a spot that allows easy access for maintenance and ensures proper ventilation. Always refer to the user manual for specific installation guidelines to guarantee safety and efficiency.

2.2 Leveling the Dishwasher

Proper leveling of your Blomberg dishwasher is essential to ensure smooth operation and minimize noise. Use a spirit level to check the dishwasher’s alignment. Adjust the adjustable feet at the base to achieve even balance. Ensure the dishwasher is level both from side to side and front to back. Improper leveling can lead to vibration, poor performance, or even damage to the appliance. Always follow the instructions provided in the user manual for accurate leveling to maintain optimal functionality and longevity of your dishwasher.

2.3 Connecting Water and Power Supply

Connect the water supply hose to the dishwasher’s inlet valve, ensuring it is securely attached to avoid leaks. Use a water supply line with a shut-off valve to control water flow. For the power supply, plug the dishwasher into a grounded electrical outlet rated for the appliance’s voltage. Always turn off the water and power supply before installing or servicing the dishwasher. Refer to the user manual for specific instructions on connecting these supplies safely and correctly to ensure proper function and avoid potential hazards. Regular checks are recommended to maintain safety and efficiency.

Loading the Dishwasher

Load dishes according to manual instructions, ensuring proper placement. Secure large items at the bottom and delicate items on top. Avoid blocking wash arms for optimal cleaning.

3.1 Organizing Dishware

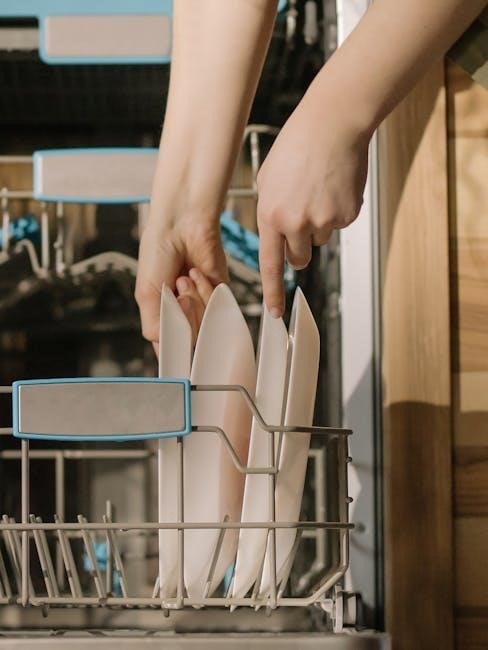
Properly organize dishware by placing larger items like plates and bowls at the bottom rack. Utensils should be secured in designated holders to prevent movement. Delicate items, such as glasses and fine china, should be placed on the top rack to avoid chipping or breaking. Ensure items do not block the wash arms, as this can hinder water circulation. For optimal cleaning, face dirty dishes toward the center and avoid overcrowding. Always refer to the user manual for specific loading recommendations to maximize efficiency and protect your dishes.

3.2 Securing Utensils and Small Items

Place utensils like forks, knives, and spoons in designated holders to prevent them from moving during cycles. Small items, such as lids or small bowls, should be secured in specialized compartments to avoid displacement. Ensure no items are nested or overlapping, as this can hinder proper cleaning. For fragile or lightweight items, use clips or adjustable tines to keep them stable. Always face dirty surfaces toward the center of the dishwasher for optimal water flow. Regularly check for blockages caused by small items in wash arms or filters to maintain efficiency.

3.3 Protecting Delicate Items

Place delicate items, such as glassware or fine china, in the upper rack to minimize exposure to intense water jets. Use a soft rack or protective covers to prevent scratches and chips. Ensure items like bowls or lightweight dishes are secured and won’t move during cycles; Face dirty surfaces downward to allow water to rinse effectively. Avoid overcrowding, as this can cause damage. For extra protection, select a gentle cycle or adjust settings as recommended in the user manual. Always check for specific guidelines for fragile items to ensure safe washing.

Operating the Dishwasher

Start by selecting the appropriate wash program based on load type and soil level. Ensure the rinse aid and detergent are correctly set. Begin the cycle and monitor progress.

4.1 Starting a Wash Cycle

To start a wash cycle, open the dishwasher door and ensure all dishes are properly arranged according to the user manual. Close the door firmly to secure the lock. Select the desired wash program based on the soil level and type of dishes. Adjust settings like temperature or rinse aid if necessary. Press the start button to initiate the cycle. Ensure the dishwasher is not overloaded and that wash arms are unobstructed for proper water flow. Monitor the cycle progress through the display if available.

Always check for blockages and ensure detergent is correctly loaded before starting.

4.2 Selecting the Right Wash Program

Selecting the right wash program ensures optimal cleaning based on the soil level and type of dishes. Choose from options like Heavy Duty for heavily soiled items, Normal for everyday use, or Light/Deli for delicate items. Adjust temperature settings for energy efficiency or fragile items. Consult the user manual for program details tailored to your dishwasher model. Proper program selection enhances cleaning performance and protects your dishes. Always match the program to the load for best results.

Ensure the selected program aligns with the dishware and soil level for optimal performance.

4.3 Using Rinse Aid and Detergents

Using rinse aid and detergents correctly ensures sparkling clean dishes. Fill the rinse aid dispenser as needed to prevent water spots. Use the recommended detergent type and amount for your dishwasher model. Avoid overloading the detergent dispenser, as this can affect wash performance. Adjust rinse aid levels based on water hardness, as indicated in the user manual. Proper use of these aids enhances cleaning efficiency and prevents residue buildup. Refer to the manual for specific guidelines to maintain optimal results and extend the dishwasher’s lifespan.

Maintenance and Care

Regular maintenance ensures your Blomberg dishwasher operates efficiently. Clean filters after each use, descale every 3-6 months, and check for blockages to maintain performance and longevity.

5.1 Cleaning the Filters

Regularly cleaning the filters is essential for maintaining your Blomberg dishwasher’s performance. Locate the filters at the bottom of the dishwasher and remove them by twisting gently. Rinse under warm water to eliminate food particles and debris. Ensure they are completely dry before reinstalling; This simple maintenance step prevents clogs and ensures optimal water flow during wash cycles, leading to cleaner dishes and improved efficiency. Cleaning the filters after each use is recommended for best results.

5.2 Descaling the Dishwasher

Descaling your Blomberg dishwasher is crucial to remove mineral buildup and maintain performance, especially in hard water areas. Turn off the water and power supply before starting. Use a dishwasher descaling solution or vinegar and run an empty cycle. After descaling, check and adjust the water hardness level in the settings to ensure optimal operation. Regular descaling prevents limescale damage and keeps your dishwasher running efficiently. Refer to your user manual for specific instructions tailored to your model for the best results and to maintain warranty validity.

5.3 Checking for Blockages

Regularly inspect the dishwasher’s filters, wash arms, and drain for blockages to ensure proper water flow and cleaning efficiency. Remove any food debris or residue from the filters and rinse them thoroughly before reinstalling. Check the wash arms for obstructions and clean out any particles. If you notice poor cleaning performance, run a cleaning cycle or a hot water cycle with a dishwasher cleaner. Always refer to your user manual for specific instructions on checking and maintaining your Blomberg dishwasher to keep it running smoothly and prevent damage.

Troubleshooting Common Issues

Check error codes for specific issues, reset the dishwasher if necessary, and address unusual noise or vibration. Consult the user manual for detailed solutions and guidance.

6.1 Identifying Error Codes

Identify error codes displayed on your Blomberg dishwasher to diagnose issues. Refer to the user manual for specific code meanings and recommended solutions. Common errors relate to water supply, drainage, or sensor malfunctions. If an error code appears, ensure the dishwasher is properly installed and maintained. Resetting the appliance or checking connections may resolve the issue. For persistent problems, consult the troubleshooting section or contact customer support for assistance. Always follow the manual’s guidance to avoid further complications and ensure safe operation;

6.2 Resetting the Dishwasher

To reset your Blomberg dishwasher, turn it off and unplug it from the power source if possible. Wait for 30 seconds to allow the system to reset. Plug it back in and restart the dishwasher. If the issue persists, check the power supply and ensure the door is properly closed. Refer to the user manual for specific reset procedures if necessary. Regular resets can help maintain optimal performance. Always follow safety guidelines to avoid accidents or damage to the appliance.

6.3 Addressing Noise or Vibration

If your Blomberg dishwasher is causing excessive noise or vibration, ensure it is properly leveled and installed on a stable surface. Check for loose items or overloaded racks, as they can cause imbalance during cycles. Verify that the door is closed securely and adjust the feet if necessary. If noise persists, inspect for blockages in filters or spray arms. Refer to the user manual for specific troubleshooting steps or contact customer support for assistance. Proper installation and maintenance can help minimize noise and vibration issues.

Energy Efficiency and Eco-Friendly Practices

Optimize energy consumption by using eco-friendly wash programs and ensuring full loads. Check the dishwasher’s energy label for efficiency ratings and maintain proper detergent usage for eco-conscious operation.

7.1 Optimizing Energy Consumption

To optimize energy consumption, use the eco-friendly wash program for lightly soiled dishes. Ensure the dishwasher is fully loaded to minimize cycles and reduce energy usage. Regularly descale the dishwasher to maintain efficiency and check the water hardness level for optimal performance. Using rinse aid can improve drying efficiency, reducing energy needed for heat. Refer to the user manual for specific program details and adjust settings based on load size and soil level for maximum energy savings.

7.2 Water Conservation Tips

To conserve water, run full loads in your Blomberg dishwasher, as it uses the same amount of water regardless of load size. Select the eco-friendly program for lightly soiled dishes to reduce water consumption. Regularly check and clean filters and spray arms to ensure efficient water distribution. Adjust the water hardness level as recommended in the manual to optimize water usage. Avoid pre-rinsing dishes, as this can waste water; instead, scrape off large food particles before loading. Proper maintenance ensures the dishwasher operates efficiently, conserving water with each cycle.

PDF

tardive dyskinesia fact sheet pdf

Overview of Tardive Dyskinesia

Tardive Dyskinesia (TD) is a chronic condition causing involuntary, repetitive facial, tongue, and limb movements. It often results from long-term antipsychotic use, affecting treatment adherence and quality of life.

1.1 Definition and Characteristics

Tardive dyskinesia (TD) is a chronic movement disorder characterized by involuntary, repetitive muscle movements. Common symptoms include facial grimacing, tongue protrusions, and lip smacking. These movements are often rhythmic and can affect various body parts, such as the face, neck, arms, and trunk. TD typically develops after prolonged use of antipsychotic medications, particularly first-generation antipsychotics, and can significantly impact quality of life.

1.2 Prevalence and Significance

Tardive dyskinesia (TD) is a significant side effect of long-term antipsychotic use, particularly with first-generation drugs. It affects up to 50% of patients on prolonged therapy, making it a critical concern in psychiatric care. TD can impair quality of life, stigmatize patients, and complicate treatment adherence. Early recognition and intervention are essential to prevent irreversible symptoms and improve patient outcomes.

Signs and Symptoms of Tardive Dyskinesia

Tardive dyskinesia involves involuntary movements, such as facial grimacing, tongue protrusion, lip smacking, and choreoathetoid limb movements. These symptoms can be mild or severely disruptive to daily life.

2.1 Common Symptoms

Common symptoms of tardive dyskinesia include involuntary facial movements like grimacing, tongue protrusion, lip smacking, and rapid eye blinking. Patients may also exhibit limb movements, neck twitches, and choreoathetoid posturing. These movements are often repetitive and can range from mild to severe, potentially impacting daily activities and social interactions. Early recognition is crucial for effective management.

2.2 severity of Movements

2.2 Severity of Movements

The severity of TD movements varies, ranging from mild, subtle twitches to severe, disabling patterns. Mild cases may involve slight facial grimacing or tongue movements, while moderate cases include noticeable limb tremors. Severe TD can cause significant distress, affecting speech, eating, and overall quality of life. The progression and intensity often correlate with medication duration and individual susceptibility.

Risk Factors for Developing Tardive Dyskinesia

Risk factors include prolonged use of antipsychotics, especially first-generation drugs, older age, and underlying mental health conditions. Genetic predisposition and longer treatment duration also increase susceptibility.

3.1 Medication-Related Risks

Long-term use of antipsychotic medications, particularly first-generation drugs like haloperidol, significantly increases TD risk. Second-generation antipsychotics, such as risperidone, also carry risks but to a lesser extent. The longer the medication use, the higher the likelihood of developing TD. Certain antidepressants and anti-nausea drugs can also contribute to this condition.

3.2 Patient-Specific Risk Factors

Certain patient characteristics increase TD risk, including advanced age, female gender, and longer duration of treatment. A history of brain disorders or previous movement issues also elevates susceptibility. Additionally, lower doses of antipsychotics over extended periods can still pose significant risks, highlighting the importance of individualized treatment plans and regular monitoring.

Diagnosis and Assessment of Tardive Dyskinesia

Diagnosis involves clinical evaluation, including physical exams and medical history. Healthcare providers assess symptoms and movement patterns to confirm TD, aiding early detection and treatment planning.

4.1 Clinical Evaluation

Clinical evaluation for TD involves a detailed physical exam, review of medical history, and assessment of involuntary movements. Tools like the Abnormal Involuntary Movement Scale (AIMS) aid in evaluating severity. Healthcare providers use these assessments to confirm diagnosis and guide treatment. Educational resources and monitoring are essential for accurate diagnosis and effective management of TD symptoms.

4.2 Screening Tools and Scales

Screening tools like the Abnormal Involuntary Movement Scale (AIMS) are widely used to assess TD severity. These standardized scales help healthcare providers evaluate movement symptoms systematically. Regular use of such tools ensures early detection and monitoring of TD progression, aiding in timely interventions and personalized treatment plans for patients.

Treatment Options for Tardive Dyskinesia

Tardive Dyskinesia treatment includes FDA-approved medications like AUSTEDO XR and non-drug strategies to manage symptoms. Early intervention and personalized plans are key to improving quality of life.

5.1 Medications Approved for TD

Medications like AUSTEDO XR and others are FDA-approved to treat TD, reducing involuntary movements. These drugs target neurotransmitter imbalances, providing symptom relief. Regular monitoring ensures efficacy and minimizes side effects, offering hope for managing TD effectively.

5.2 Non-Drug Coping Strategies

Non-drug strategies like stress management, exercise, and relaxation techniques can help alleviate TD symptoms. Joining support groups and educating oneself about the condition empowers patients to cope effectively. These approaches complement medical treatments, improving overall well-being and quality of life for individuals with TD.

5.3 Lifestyle Modifications

Lifestyle changes, such as regular physical activity, balanced nutrition, and adequate rest, can help manage TD symptoms. Stress reduction techniques like meditation or yoga may also alleviate discomfort. Staying informed and educated about TD empowers patients to actively participate in their care and make informed decisions about their health.

Managing Tardive Dyskinesia Symptoms

Effective management of TD symptoms involves routine monitoring, patient education, and individualized care plans. Early detection and tailored interventions improve quality of life and treatment outcomes.

6.1 Routine Screening and Monitoring

Routine screening for TD involves regular clinical assessments to detect involuntary movements early. Tools like the Abnormal Involuntary Movement Scale (AIMS) help monitor progression. Early detection allows timely intervention, minimizing symptom severity and improving outcomes. Patients on long-term antipsychotics should be screened periodically to ensure prompt management and reduce treatment complications.

6.2 Patient Education and Support

Patient education is crucial for managing TD. Providing fact sheets, videos, and access to online communities helps patients and caregivers understand the condition. Regular updates and support resources empower individuals to recognize symptoms early and adhere to treatment plans. Informed care fosters better outcomes and improves overall quality of life for those affected by TD.

Resources and Support for Patients and Caregivers

Downloadable fact sheets, videos, and online communities provide essential guidance and support for managing TD. These resources help patients and caregivers navigate treatment and daily challenges effectively.

7.1 Downloadable Fact Sheets and Guides

Downloadable fact sheets provide comprehensive overviews of TD, including risk factors, symptoms, and treatment options. These guides offer detailed insights into managing the condition, with tools for tracking symptoms and understanding medication effects. They also emphasize the importance of routine screenings and informed decision-making, serving as valuable resources for patients and caregivers seeking to improve their understanding of TD.

7.2 Online Communities and Forums

Online communities and forums offer supportive spaces for patients and caregivers to share experiences and advice. These platforms provide access to video guides, personal stories, and expert insights, helping individuals better understand and manage TD. They also foster connections, reducing feelings of isolation and empowering those affected to navigate their condition with greater confidence and awareness.

Recent Research and Developments

Recent research highlights advancements in understanding TD’s pathophysiology, exploring new therapeutic targets, and developing innovative treatments to manage symptoms effectively.

8.1 Emerging Therapies and Studies

Emerging therapies, such as VMAT2 inhibitors, show promise in managing TD symptoms. Ongoing clinical trials are exploring novel treatments, including targeted medications and non-invasive interventions, to address the condition effectively without worsening symptoms, offering hope for improved patient outcomes and quality of life.

8.2 Advances in Understanding TD Pathophysiology

Research reveals TD involves dopamine receptor hypersensitivity and neuroplasticity changes. Long-term antipsychotic use alters brain pathways, leading to involuntary movements. Studies highlight oxidative stress and mitochondrial dysfunction as contributing factors, deepening understanding of TD’s biological mechanisms and guiding development of targeted therapies.

The Importance of Early Intervention

Early recognition of TD symptoms is crucial for effective management. Prompt action can reduce severity and improve quality of life for patients.

Identifying TD early ensures timely interventions, potentially minimizing long-term impacts and enhancing treatment outcomes.

9.1 Recognizing Symptoms Early

Early detection of TD symptoms, such as facial grimacing, tongue movements, and lip smacking, is vital for effective intervention. Recognizing these signs promptly allows healthcare providers to assess and address the condition before it progresses, improving treatment outcomes and quality of life for patients.

9.2 Impact on Treatment Outcomes

Early intervention significantly enhances treatment outcomes for TD, reducing symptom severity and improving patient functionality. Timely adjustments to medication and the use of approved therapies can slow progression and minimize the condition’s impact on daily life, offering better long-term management and improved quality of life for those affected.

Advancements in treatments and increased awareness provide hope for TD patients, offering improved symptom management and enhanced quality of life in the future.

10.1 Summary of Key Points

Tardive dyskinesia (TD) is a chronic movement disorder linked to long-term antipsychotic use, causing involuntary facial, tongue, and limb movements. Early detection and personalized treatments, including medications like VMAT2 inhibitors and non-drug strategies, improve outcomes. Patient education, routine screenings, and support resources are crucial for managing TD effectively and enhancing quality of life.

10.2 Hope and Options for Patients

While tardive dyskinesia presents challenges, advancements in treatment and support offer hope. Approved medications like VMAT2 inhibitors and emerging therapies provide symptom relief. Lifestyle changes, non-drug strategies, and patient education empower individuals to manage TD effectively. Early intervention and access to downloadable resources, videos, and online communities enhance quality of life and foster a sense of control for those affected.

mastercraft garage door weather stripping instructions

Mastercraft Garage Door Weather Stripping provides durable, high-quality solutions to seal gaps and protect against drafts, moisture, and pests. Designed for easy installation, it enhances energy efficiency and door performance.

1.1 Importance of Weather Stripping for Garage Doors

Weather stripping is essential for sealing gaps around garage doors, preventing drafts, moisture, and pests from entering. It enhances energy efficiency by maintaining consistent temperatures inside the garage. This protection also reduces wear on the door and helps prevent damage from harsh weather conditions, ensuring long-term durability and performance of your garage door system.

1.2 Overview of Mastercraft Garage Door Weather Stripping

Mastercraft Garage Door Weather Stripping offers premium, durable solutions designed to protect against harsh weather conditions. Available in various models, it features advanced materials like high-quality rubber and vinyl, ensuring flexibility and longevity. The weather stripping is tailored for easy installation, with options like kerf-style and PVC stop molding, making it a versatile choice for different garage door types and needs.

Preparing for Installation

Preparing for installation involves unplugging the door opener for safety, ensuring manual operation, and thoroughly cleaning the door surface to ensure proper weather stripping adhesion.

2.1 Safety Precautions: Unplugging the Door Opener

Unplugging the garage door opener is crucial for safety, ensuring the door remains stationary during installation. This step prevents accidental operation and protects against potential injuries or damage.

2.2 Manual Operation and Securing the Door

Switching to manual operation ensures the door remains stationary during installation. Pull the emergency release handle to disengage the opener. Clamp the door firmly in place using vice grips on both sides to prevent movement. This step guarantees safety and stability while working on the weather stripping.

2.3 Cleaning the Door Surface

Clean the garage door’s edges and surrounding areas with soap and water to remove dirt, grease, and old adhesive. A clean surface ensures proper adhesion of the new weather stripping. Allow the surface to dry completely before proceeding with installation for optimal results.

Tools and Materials Needed

Essential tools include a measuring tape, utility knife, and screwdriver. Materials needed are weather stripping kits, adhesive, and fasteners for a secure installation process.

3.1 List of Required Tools

To install Mastercraft Garage Door Weather Stripping, gather essential tools: a measuring tape for accurate cuts, a utility knife or scissors for trimming, and a screwdriver for removing old stripping. Additional items like clamps, gloves, and a cleaning cloth ensure a smooth and safe installation process.

3.2 Types of Weather Stripping Kits Available

Mastercraft offers various weather stripping kits, including vinyl, rubber, and kerf-style options. Vinyl kits are durable and easy to install, while rubber kits provide excellent flexibility. Kerf-style kits are designed for doors with grooves, ensuring a snug fit. Each type is tailored to specific needs, offering reliable sealing and long-lasting performance for garage doors.

Step-by-Step Installation Guide

This guide provides a detailed process for installing Mastercraft weather stripping, ensuring a tight seal and enhanced garage door performance through proper preparation and application techniques.

4.1 Removing the Old Weather Stripping

Begin by inspecting the existing weather stripping for damage or wear. Disconnect the garage door opener and switch to manual operation. Clamp the door securely in place. Use a screwdriver or utility knife to gently pry and remove the old stripping, taking care not to damage the door or frame. Dispose of the old material safely.

4.2 Measuring and Cutting the New Stripping

Measure the garage door’s perimeter to determine the required length of weather stripping. Use a tape measure to assess each side, ensuring accurate dimensions. Mark the weather stripping material with a pencil at the measured length. Cut the stripping using a utility knife or sharp scissors, taking care to maintain straight edges for a proper fit.

4.3 Applying the New Weather Stripping

Peel the backing from the weather stripping and align it with the door’s edges, starting at one corner. Press firmly to ensure a strong adhesive bond. Work around the perimeter, smoothing out air bubbles. Ensure the stripping fits snugly into any grooves or kerfs. Check for proper alignment and a tight seal to prevent gaps or leaks after installation.

Maintaining and Inspecting the Weather Stripping

Regularly inspect the weather stripping for wear, cracks, or loose sections. Clean debris and dirt to ensure proper sealing. Replace damaged parts promptly to maintain efficiency and durability.

5.1 Regular Inspection Tips

Inspect weather stripping quarterly for signs of wear, cracks, or detachment. Check door edges and thresholds for gaps. Ensure all sections are tightly secured and free from debris. Look for brittleness or fraying, which may indicate aging. Test door closure to ensure a snug seal. Address issues promptly to maintain energy efficiency and prevent damage.

5.2 Cleaning and Replacing Damaged Sections

Clean weather stripping with mild soap and water to remove dirt and grime. For damaged sections, measure the affected area and cut a replacement piece. Peel the old stripping and press the new one firmly into place, ensuring a tight seal. Regular maintenance extends durability and maintains the door’s energy efficiency and protection against elements.

Common Mistakes to Avoid

Incorrect measurements and improper application of weather stripping are common errors, leading to poor sealing and reduced effectiveness. Ensure precise cuts and firm adhesion for optimal results.

6.1 Improper Measurement and Cutting

Incorrect measurements lead to poor fitting, while uneven cuts reduce sealing efficiency. Always use a tape measure and precise cutting tools. Ensure the weather stripping aligns perfectly with the door’s edges for optimal performance and avoid rough cuts that compromise effectiveness.

6.2 Incorrect Application Techniques

Improper alignment and insufficient adhesive pressure can cause the weather stripping to loosen over time. Always follow the manufacturer’s instructions for temperature and surface preparation. Ensure the stripping is pressed firmly onto the clean, dry surface to create a tight seal and prevent future adjustments or replacements.

Troubleshooting Common Issues

Identify gaps, leaks, or loose sections by inspecting the weather stripping regularly. Clean debris and reapply adhesive if necessary to ensure a tight, durable seal.

7.1 Addressing Gaps and Leaks

Inspect the weather stripping for gaps or leaks. Clean debris from the door surface and stripping to ensure proper adhesion. Trim excess material with a utility knife and reapply adhesive if necessary. For persistent gaps, consider using additional sealant or replacing damaged sections to maintain a tight, weatherproof seal.

7.2 Fixing Loose or Detached Stripping

For loose or detached weather stripping, clean the area thoroughly. Apply adhesive to the back of the stripping and press firmly onto the door frame. Use clamps or weights to hold it in place until the adhesive sets. If detachment is frequent, inspect the surface for dirt or moisture and ensure proper preparation before reattaching.

Additional Tips for Optimal Performance

Ensure a tight seal by aligning the weather stripping correctly. Regularly inspect for wear and tear. Clean the stripping with mild soap and water for longevity. Maintain dry surfaces before installation to enhance adhesion and prevent future detachment. These steps ensure your Mastercraft weather stripping performs optimally, protecting your garage effectively. Proper care extends its lifespan and efficiency.

8.1 Sealing Large Gaps Effectively

For large gaps, use kerf weather stripping, designed to accommodate wider spaces. Measure the gap accurately and cut the stripping slightly longer. Apply it firmly, ensuring a tight seal. Clean and dry the surface first for optimal adhesion. Use additional fasteners if necessary for extra security. This ensures a durable, weather-tight seal, improving energy efficiency and protecting your garage from drafts and moisture.

8.2 Ensuring Longevity of the Weather Stripping

Regularly inspect and clean the weather stripping to maintain its effectiveness. Use mild soap and water to remove dirt and debris. Avoid harsh chemicals that may damage the material. Replace worn or damaged sections promptly. Ensure proper installation with a tight seal to prevent wear. Choose high-quality materials, like PVC or thermoplastic, designed for durability and resistance to temperature changes.

Comparing Mastercraft Weather Stripping Models

Mastercraft offers various weather stripping models, each designed for specific garage door types. Compare features, durability, and compatibility to select the best option for your needs.

9.1 Features of Different Mastercraft Models

Mastercraft offers a range of weather stripping models with distinct features. The Ideal Door 3-1/2 model is known for its durability and thermal insulation, while the Mastercraft 36 model provides superior flexibility in extreme temperatures. Some models feature vinyl or rubber materials, ensuring a tight seal and long-lasting performance. Each model is designed to cater to specific garage door types and sizes.

9.2 Choosing the Right Model for Your Garage Door

Selecting the right Mastercraft model depends on your garage door’s size, material, and climate. Measure your door’s perimeter and check product specifications for compatibility. Ideal Door models suit standard sizes, while Mastercraft 36 is perfect for larger doors. Consider weather conditions—vinyl models are durable, while rubber offers flexibility in extreme temperatures. Match your door type for optimal performance and longevity.

Congratulations on completing the installation! Ensure all strips are securely attached. Check for gaps and test door operation. Your garage is now energy-efficient and protected from the elements.

10.1 Verifying the Installation

Inspect the weather stripping for proper adhesion and alignment. Check for any gaps or loose sections. Test the door’s smooth operation by opening and closing it manually. Ensure the stripping creates a tight seal against the door frame and threshold. Verify that all fasteners are securely attached and no damage occurred during installation. This ensures optimal performance and energy efficiency.

10.2 Final Safety and Performance Check

After installation, ensure the door operates smoothly without strain. Check the weather stripping for a tight, weather-tight seal. Test the door’s performance under various conditions to confirm proper function. Verify all safety features are intact, such as proper alignment and no obstructions. This final check ensures both safety and optimal performance of your garage door weather stripping system.

tableau de conservation des aliments sous vide pdf

Sous vide storage is a revolutionary method that removes air from food packaging, preventing oxidation and microbial growth. This technique extends shelf life significantly, making it ideal for home cooks and professionals. The purpose of this article is to guide you through the effective use of sous vide conservation tables, ensuring optimal food storage and freshness.

1.1 What is Sous Vide Storage?

Sous vide storage is a method of preserving food by sealing it in air-tight bags or containers after removing the air. This technique prevents oxidation and microbial growth, significantly extending the food’s freshness. Unlike traditional storage, sous vide creates an oxygen-free environment, which inhibits the growth of bacteria and mold. It is widely used in both professional and home settings to maintain the quality and safety of food. The process involves using specialized equipment to extract air and seal the food, ensuring optimal conditions for long-term conservation. This method is particularly effective for meats, fish, and prepared meals, offering a reliable way to store food while retaining its nutritional value and flavor. Sous vide storage has become a popular choice for those seeking to reduce food waste and enjoy fresh-tasting meals year-round.

1.2 Importance of a Conservation Table

A conservation table is a crucial guide for sous vide storage, providing specific durations for various foods to ensure safety and quality. These tables detail how long different foods can be stored under specific conditions, helping users maintain freshness and prevent spoilage. By referencing a conservation table, individuals can optimize their food storage, reduce waste, and ensure meals remain nutritious and flavorful. Available in PDF formats, these tables are easily accessible, offering clear and concise information for both home cooks and professionals. They play a vital role in organizing and managing food effectively, ensuring a secure and enjoyable culinary experience.

Benefits of Sous Vide Storage

Sous vide storage extends shelf life, preserves nutrients, and prevents oxidation and microbial growth, ensuring food remains fresh and flavorful longer than traditional methods.

2.1 Extended Shelf Life

Sous vide storage significantly prolongs the freshness of food by sealing it in airtight bags, preventing oxidation and microbial growth. This method can extend shelf life up to five times longer than traditional storage. For example, cooked meats can last up to 15 days in the fridge, while raw meats remain fresh for 10-14 days. Vegetables and prepared meals also benefit, staying fresh for 7-10 days. Freezing further extends storage duration, maintaining quality for several months. This method ensures food remains safe and flavorful, making it ideal for meal prep and reducing food waste. Proper sealing and storage conditions are key to achieving these extended durations.

2.2 Nutritional Preservation

Sous vide storage excels at preserving the nutritional value of food by creating an airtight environment that prevents oxidation and microbial growth. This method retains essential vitamins, minerals, and antioxidants that are often lost through traditional cooking or storage methods. The low-oxygen setting minimizes the breakdown of delicate nutrients, ensuring food remains nutritionally intact. For example, water-sensitive vitamins like vitamin C and B vitamins are preserved more effectively. Additionally, sous vide prevents the leaching of nutrients into cooking liquids, maintaining the food’s natural flavor and color. This makes it a superior choice for health-conscious individuals and professionals seeking to serve nutritious meals while extending shelf life.

Factors Affecting Conservation Duration

The conservation duration of sous vide storage depends on the food’s initial freshness, storage conditions, and hygiene practices. These elements ensure optimal preservation and safety. Proper sealing and temperature control are critical.

3.1 Initial Freshness of Food

The initial freshness of food significantly impacts its conservation duration under sous vide. Fresher ingredients inherently contain fewer microorganisms, ensuring better preservation. Proper preparation, such as trimming spoiled areas and pat-drying, enhances storage potential. The quality of raw materials directly affects the final result, as spoiled or contaminated food cannot be salvaged by sous vide. Ensuring food is fresh before sealing prevents early spoilage and maintains flavor. This step is crucial for achieving the maximum conservation benefits of sous vide storage, as outlined in reliable PDF guides and conservation tables.

3.2 Storage Conditions

Storage conditions play a critical role in determining the effectiveness of sous vide conservation. Maintaining consistent refrigeration or freezing temperatures is essential to prevent microbial growth. For refrigeration, keeping foods at 3°C to 5°C ensures optimal preservation, while freezing at -18°C halts degradation entirely. Proper sealing and avoiding contamination are vital to maintain vacuum integrity. The storage environment must be clean, and containers should be labeled with dates to ensure proper rotation. Adhering to these conditions maximizes the benefits of sous vide storage, as outlined in detailed PDF guides and conservation tables available online. These resources provide precise guidelines for various food types.

Common Foods for Sous Vide Storage

Meat, fish, dairy products, and prepared meals are commonly stored sous vide. These categories offer versatility in maintaining freshness and flavor over extended periods, as detailed in PDF guides.

4.1 Meat

Meat is a popular choice for sous vide storage, offering extended freshness and flavor preservation. Beef, poultry, and pork can be stored for several weeks when sealed properly. sous vide prevents oxidation, retaining the meat’s natural juices and texture. Storage durations vary: raw meats typically last 3-5 weeks in the fridge and up to 12 months frozen. Cooked meats, like roasted or grilled varieties, can be stored for 1-2 weeks refrigerated or up to 6 months frozen. This method is ideal for maintaining the quality of delicate cuts and ensuring food safety, making it a favorite among home cooks and professionals alike.

4.2 Fish

Fish is a common choice for sous vide storage, offering excellent preservation of freshness and flavor. Fatty fish, like salmon, typically lasts 5-7 days in the fridge and up to 3 months frozen, while lean fish, such as cod, can be stored for 7-10 days refrigerated and 6-12 months frozen. sous vide prevents oxidation, keeping fish moist and flavorful. Delicate fish varieties benefit significantly from this method, as it maintains their texture and prevents spoilage. Proper sealing and storage conditions are crucial to ensure safety and quality. This makes sous vide ideal for fish, whether for home cooking or professional kitchens, ensuring optimal results every time.

4.3 Dairy Products

Dairy products, such as cheese, yogurt, and milk, benefit significantly from sous vide storage. By removing oxygen, this method prevents spoilage and microbial growth, extending shelf life. Hard cheeses can last up to 6 months when stored properly, while soft cheeses typically last 1-2 months. Yogurt and milk, when sealed sous vide, maintain freshness for 2-4 weeks in the fridge. This technique preserves the creamy texture and flavor of dairy products, making it ideal for both home and professional use. Proper storage conditions and sealing are essential to ensure safety and quality, allowing dairy lovers to enjoy their favorites for longer periods without compromise.

4.4 Prepared Meals

Prepared meals, such as cooked dishes, sauces, and composed meals, benefit greatly from sous vide storage. By sealing meals in airtight bags, oxygen is removed, preventing spoilage and microbial growth. This method is particularly useful for meal prepping, as it allows for easy reheating while maintaining flavor and texture. Sous vide storage extends the shelf life of prepared meals to 5-10 days in the refrigerator and up to 6 months when frozen. This convenience makes it ideal for busy households and professionals, ensuring fresh, nutritious meals are readily available without compromising on taste or safety. Proper sealing and storage conditions are essential for optimal results.

Storage Conditions

Proper storage conditions are crucial for sous vide conservation. Refrigeration at 3°C/-2°C and freezing at -18°C/-2°C ensure optimal preservation, maintaining freshness and preventing bacterial growth effectively.

5.1 Refrigeration

Refrigeration is a cornerstone of sous vide storage, typically maintaining temperatures between 3°C and -2°C. This method effectively slows bacterial growth and oxidation, preserving food quality and nutrients. Sous vide-sealed foods stored in refrigeration retain their freshness significantly longer than unpackaged items. The consistent low temperature prevents microbial spoilage, ensuring safety and extending shelf life. For optimal results, ensure the refrigerator operates within the recommended temperature range. Always refer to specific conservation tables for precise storage durations, as variations exist across food types. Proper refrigeration combined with sous vide packaging offers a reliable solution for maintaining fresh, nutritious meals.

5.2 Freezing

Freezing sous vide-sealed foods at temperatures below -18°C significantly extends shelf life, often up to 5 times longer than refrigeration. The vacuum seal prevents freezer burn and maintains food quality by halting oxidation and microbial growth. This method is ideal for long-term preservation of meats, fish, and prepared meals while retaining their nutritional value and flavor. Specific food types have varying storage durations, so consulting a reliable conservation table is essential for precise guidelines. Freezing, combined with sous vide packaging, ensures a safe and efficient way to maintain food freshness and safety over extended periods.

PDF Resources

Reliable PDF guides provide detailed sous vide conservation tables, offering specific storage durations for various foods. These resources are available on trusted websites and culinary platforms, ensuring accurate information for optimal food preservation and stock management.

6.1 Where to Find Reliable Tables

Reliable sous vide storage tables can be found on official websites of manufacturers like Anova, Nomiku, and FoodSaver. These companies often provide detailed guides for their users, including PDF downloads. Additionally, food safety organizations such as the USDA offer comprehensive storage guidelines. Reputable cooking communities on platforms like Reddit and specialized sous vide blogs also share well-researched tables. For academic insights, scholarly articles on sites like Scholarpedia or Google Scholar may include storage duration data. Prioritizing official and reputable sources ensures accuracy and safety for optimal food preservation.

Safety and Hygiene

Proper hygiene is crucial for sous vide storage to prevent contamination. Always wash hands, sterilize utensils, and ensure food is sealed correctly before storing. Regularly check for spoilage signs, and maintain clean storage environments to ensure food safety and quality.

7.1 Essential Practices

Proper hygiene and food handling are critical for safe sous vide storage. Always wash hands thoroughly before preparing food. Ensure all utensils and surfaces are sterilized to prevent contamination. Food must be sealed in airtight, food-grade bags or containers to maintain vacuum integrity. Regularly inspect sealed items for signs of spoilage, such as swelling or off odors. Store foods at consistent refrigeration or freezing temperatures to inhibit bacterial growth. Follow aseptic techniques during packaging to avoid introducing pathogens. Label and date all packages for easy tracking. Adhere to recommended storage durations from reliable conservation tables to ensure food safety and quality.

Comparison with Other Methods

Sous vide storage excels in preventing oxidation and microbial growth, offering longer shelf life compared to traditional methods. Vacuum sealing inhibits bacteria, preserving freshness and nutrients effectively.

8.1 Traditional Storage

Traditional storage methods expose food to air, leading to oxidation and microbial growth, which reduce shelf life. Unlike sous vide, conventional storage lacks the ability to remove oxygen, resulting in faster spoilage. Foods stored traditionally often require refrigeration or freezing, yet their quality degrades more rapidly. Sous vide storage, by eliminating air, preserves nutrients and flavor longer, making it a superior choice for both home cooks and professionals. This method ensures extended freshness, reducing food waste and maintaining culinary excellence. Traditional storage simply cannot match the efficiency and effectiveness of sous vide in preserving food quality and safety over time.

prestige car remote starter manual

Welcome to the Prestige Car Remote Starter Manual, your guide to operating, installing, and troubleshooting your advanced remote start system. This manual covers key features, installation steps, and troubleshooting tips to ensure a seamless experience with your Prestige remote starter.

Discover how to unlock convenience, security, and ease of use with Prestige’s cutting-edge technology. Learn about keyless entry, panic alarms, and engine start functionality designed for modern vehicles.

This manual provides detailed instructions for installation, programming, and troubleshooting to help you get the most out of your Prestige remote start system.

Overview of Prestige Remote Start System

The Prestige Remote Start System is a cutting-edge automotive solution designed to enhance convenience, security, and comfort for vehicle owners. This advanced system allows users to start their car’s engine remotely, ensuring the vehicle is ready to drive upon entry. It integrates seamlessly with keyless entry, panic alarms, and other premium features, offering a comprehensive security and convenience package.

Compatible with a wide range of vehicles, the Prestige system supports both traditional ignition systems and modern SmartEntry or keyless start vehicles. It also includes optional features like backup camera integration, alloy wheels, and Bluetooth connectivity, making it a versatile choice for drivers seeking advanced vehicle automation.

The system is designed for easy installation and programming, with detailed guides available to ensure a smooth setup process. Whether you’re looking to enhance your driving experience or protect your vehicle, the Prestige Remote Start System delivers reliability and innovation in one package.

Key Features and Benefits

The Prestige Car Remote Starter Manual highlights a range of innovative features designed to enhance your driving experience. Key features include remote engine start, keyless entry, and panic alarm functionality, providing convenience and security. The system also supports advanced customization options, allowing users to tailor settings to their preferences.

With compatibility for both manual and automatic transmissions, the Prestige remote start system ensures versatility across different vehicle types. Additional benefits include smart home integration, vehicle automation, and a user-friendly interface, making it a comprehensive solution for modern drivers.

The system also offers optional features like remote window closure and garage door interface, further enhancing its functionality. These features collectively provide a seamless and secure way to control your vehicle from a distance, ensuring a premium user experience.

Installation and Setup

Installation involves opening the driver’s door, removing the key from the ignition, and starting the programming procedure within 40 seconds for proper system activation and configuration.

Step-by-Step Installation Guide

  1. Open the driver’s door and remove the key from the ignition switch to begin the installation process.
  2. Start the programming procedure within 40 seconds by pressing and releasing the valet pushbutton until the LED turns on.
  3. Insert the key into the ignition switch and turn it to the ON or RUN position without starting the engine.
  4. Press and release the Key/Trunk button two times within 2 seconds to activate the remote start system.
  5. The vehicle will confirm successful installation with two short chirps followed by one long chirp.
  6. Test the system by pressing the remote start button to ensure the engine starts and runs as expected.

Follow these steps carefully to ensure proper installation and functionality of your Prestige car remote starter system.

Vehicles Compatibility and Requirements

The Prestige car remote starter system is designed for compatibility with a wide range of vehicles, including those with traditional ignition locks and modern SmartEntry or keyless start systems.

Ensure your vehicle has a 12V electrical system and meets the basic requirements for remote start installation. Certain features like keyless entry and panic alarms may require additional compatibility checks.

Consult the installation guide to verify compatibility with your specific vehicle make and model before proceeding. Proper installation ensures optimal performance and avoids potential issues.

Programming the Remote Starter

Press and hold the valet button, then turn the ignition key to the on position within 5 seconds. Release the valet button to complete programming.

Basic Programming Instructions

To program your Prestige remote starter, start by entering the vehicle and turning the ignition key to the “ON” position without pressing the brake pedal. Insert the key into the ignition switch and turn it to the “ON” or “RUN” position. Next, locate the valet pushbutton, typically found under the steering wheel or in the glove compartment. Press and hold the valet button until the dashboard LED lights up, indicating the system is in programming mode. Within 5 seconds, press and release the “Key/Trunk” button on your remote transmitter twice in quick succession. The vehicle will respond with a series of chirps or flashes to confirm successful programming. Release the valet button to exit programming mode. This process ensures your remote is synced with the Prestige system for reliable operation.

Advanced Customization Options

Beyond basic programming, the Prestige remote starter offers advanced features to tailor your experience. You can customize run times, enabling the engine to run for 5, 10, or 15 minutes before shutting off automatically. Additionally, timer-based starting allows you to pre-set specific times for the engine to start, ensuring your vehicle is ready when you need it. For enhanced security, the panic alarm can be activated by pressing and holding the “Key/Trunk” button, triggering a loud siren and flashing lights to deter potential threats. Smart home integration is also available, enabling control of your vehicle’s systems through compatible smart devices. These advanced options provide a personalized and secure remote starting experience, tailored to your lifestyle and preferences.

Operating the Remote Starter

The Prestige remote starter offers effortless vehicle control. Press and release the Key/Trunk button twice to start the engine. The system ensures smooth operation and ease of use always.

Starting and Stopping the Engine

To start your vehicle using the Prestige remote starter, press and release the Key/Trunk button two times within two seconds. The vehicle will begin running, and the parking lights will flash to confirm activation. The engine will remain on for a pre-programmed duration, typically between 5 to 15 minutes, depending on your settings. To stop the engine, press and release the Key/Trunk button three times within two seconds, and the engine will shut off. Ensure the vehicle is in Park (automatic) or Neutral with the brake pressed (manual) before starting remotely. The system also includes a safety feature: pressing the brake pedal will immediately terminate the remote start session. Always follow these steps carefully to ensure proper operation and safety.

Using Keyless Entry and Panic Alarm

The Prestige remote starter offers convenient keyless entry functionality. To lock your vehicle, press the Lock button on the transmitter once. The doors will secure, and the parking lights will flash to confirm. To unlock, press the Unlock button once for the driver’s door or twice to unlock all doors. The system ensures smooth operation when used correctly. The Panic Alarm feature enhances security: press and hold the Panic button for three seconds to activate the alarm, which triggers a loud siren and flashes the parking lights for 30 seconds. To deactivate, press the Panic button again or use the key in the ignition. Always use the Panic feature responsibly, avoiding unnecessary activation. These features integrate seamlessly with the remote start system, providing a secure and user-friendly experience for your vehicle.

Troubleshooting Common Issues

If the remote start fails, ensure the brake pedal is not pressed and the ignition key is in the correct position. Resetting the system may resolve issues quickly.

Remote Start Failures and Solutions

Remote start failures can occur due to various reasons. First, ensure the vehicle is in park and the brake pedal is not pressed. Check the ignition key position and verify the system’s readiness. If the vehicle fails to start, the system will flash the parking lights to indicate the issue. Common causes include low battery in the remote, faulty connections, or incorrect programming. To resolve, replace the remote battery, inspect wiring for damage, and ensure proper system synchronization. If issues persist, refer to the troubleshooting guide or consult a professional installer. Regular maintenance and updates can prevent such issues, ensuring reliable performance of your Prestige remote start system.

Resetting the Remote Start System

To reset the Prestige remote start system, follow these steps: Enter the vehicle, ensure the brake pedal is not pressed, and turn the ignition key to the “ON” position. Press and hold the valet pushbutton until the dash-mounted LED turns on. Release the button and exit the vehicle. This process resets the system, resolving issues like interrupted programming or system malfunctions. After resetting, test the remote start function to ensure proper operation. If problems persist, consult the manual or contact a professional installer for further assistance.

Resetting ensures the system recalibrates and functions correctly, addressing common issues like failed remote start attempts or lost synchronization with the vehicle.

By following the outlined steps and understanding key features, you can enjoy seamless engine starting, keyless entry, and panic alarm functionality. Proper installation and regular system updates are crucial for maintaining optimal performance. Should issues arise, refer to the troubleshooting section for quick resolutions.

With the Prestige remote start system, you enhance your driving experience through advanced technology and user-friendly design. Explore its full potential and enjoy the benefits of modern automotive innovation.

watlow f4 controller manual

Welcome to the Watlow F4 Controller Manual‚ your comprehensive guide to understanding and operating the Series F4 temperature/process controllers. This manual covers hardware‚ software‚ setup‚ and advanced features‚ ensuring optimal performance in demanding applications. Designed for both novice and experienced users‚ it provides detailed instructions to configure and utilize the controller effectively.

1.1 Overview of the Watlow F4 Controller

The Watlow F4 is a 1/4 DIN industrial temperature/process controller designed for demanding ramp-and-soak applications. It features a four-line‚ high-resolution LCD display‚ guided setup software‚ and a 16-bit microprocessor for precise control. With 256 possible ramp steps and up to 40 segments‚ it offers advanced customization. The controller is easy to program and operate‚ making it ideal for complex industrial processes. Its robust design ensures reliability in challenging environments.

1.2 Importance of the Manual for Users

This manual is an essential resource for safe and effective use of the Watlow F4 Controller. It provides detailed instructions for installation‚ operation‚ and troubleshooting‚ ensuring users can maximize the controller’s performance. The manual includes critical safety information‚ configuration guidelines‚ and maintenance tips‚ helping users avoid errors and potential hazards. It serves as a comprehensive guide for both novice and experienced operators‚ fostering efficient and reliable operation of the F4 Controller.

Key Features of the Watlow F4 Controller

The Watlow F4 Controller features a high-resolution‚ four-line LCD display‚ guided setup software‚ and a powerful 16-bit microprocessor‚ enabling precise control in demanding industrial applications.

2.1 Hardware and Software Capabilities

The Watlow F4 Controller combines advanced hardware and software capabilities‚ featuring a 16-bit microprocessor‚ high-resolution four-line LCD display‚ and guided setup software. It supports up to 256 ramp steps and 40 profiles‚ offering flexibility for complex process control. The controller’s intuitive interface and context-sensitive information key enhance user experience‚ while its robust design ensures reliable performance in industrial environments. Customization options allow tailored solutions for specific applications.

2.2 Advanced Settings and Customization Options

The Watlow F4 Controller offers extensive advanced settings and customization options‚ enabling precise control over temperature and process parameters. Users can configure multiple ramp steps‚ soak times‚ and profiles to suit specific applications. The guided setup software simplifies customization‚ while the context-sensitive information key provides instant support. Advanced features include PID tuning‚ cascade control‚ and custom alarms‚ allowing for tailored solutions to meet industrial demands effectively.

Installation and Setup Guidelines

Follow safe installation practices‚ ensuring all wires are disconnected before mounting. Refer to step-by-step instructions for proper setup‚ and complete initial configuration to ensure optimal controller performance.

3.1 Step-by-Step Installation Instructions

Begin by disconnecting all wires and carefully mounting the controller. Follow the sequence: install the unit‚ connect inputs/outputs‚ and apply power. Ensure proper grounding for safety. Complete the initial configuration by setting parameters like temperature units and communication settings. Refer to the manual for specific wiring diagrams and safety precautions to avoid damage or malfunction during installation.

3.2 Initial Configuration and Calibration

After installation‚ power on the controller and navigate to the setup menu using the buttons. Configure basic parameters like temperature units‚ PID settings‚ and input types. Use the guided setup software for streamlined configuration. Calibrate the controller by setting the temperature setpoint and adjusting the sensor input. Refer to the manual for detailed calibration steps to ensure accuracy and safety during operation.

Understanding the Controller Interface

The Watlow F4 controller features a user-friendly interface with a four-line LCD display and context-sensitive information key for easy navigation. Buttons provide direct access to settings and menus‚ while the guided setup software simplifies configuration. The interface is designed to streamline operation‚ ensuring intuitive control and monitoring of temperature and process parameters.

4.1 Navigating the LCD Display and Buttons

The Watlow F4 controller’s four-line LCD display provides clear‚ high-resolution information. Users can navigate using the Up/Down arrow buttons to scroll through menus and the Enter button to select options. A Back button allows easy return to previous screens. The display shows current temperature‚ setpoints‚ and status messages. A context-sensitive information key offers on-screen help for menu items‚ simplifying operation. Guided setup software further enhances navigation‚ ensuring intuitive control of all functions.

4.2 Context-Sensitive Information Key

The Watlow F4 controller features a context-sensitive information key that provides real-time assistance. Pressing this key displays definitions and guidance for the currently selected parameter or menu item. This feature simplifies navigation and reduces confusion‚ especially for new users; It offers instant clarification on complex settings‚ ensuring accurate configuration and operation. The context-sensitive key enhances overall user experience by making the controller more intuitive and user-friendly during operation.

Programming and Operation

The Watlow F4 controller offers guided setup and programming software‚ simplifying configuration for ramp-and-soak applications. Its intuitive interface ensures precise control‚ making it ideal for demanding industrial processes.

5.1 Guided Setup and Programming Software

The Watlow F4 controller features intuitive guided setup and programming software‚ simplifying configuration for precise control. The four-line LCD display and context-sensitive information key enhance usability. With advanced capabilities like 256 ramp steps‚ it supports complex ramp-and-soak applications. The software ensures seamless parameter setup‚ while the 16-bit microprocessor delivers reliable performance. These tools make programming straightforward‚ even for intricate industrial processes.

5.2 Ramp-and-Soak Processing Applications

The Watlow F4 controller excels in ramp-and-soak processing‚ offering precise temperature control during both phases. With up to 256 programmable ramp steps‚ it ensures uniformity and accuracy in demanding applications. The guided setup software simplifies creating and editing profiles‚ while the controller’s advanced algorithms maintain stability. This functionality is ideal for complex industrial processes‚ providing reliable performance and consistency in temperature control‚ making it a robust solution for critical applications.

Safety Information and Precautions

Adhere to safety symbols and warnings to prevent hazards. Ensure proper handling to avoid damage. Follow environmental guidelines for installation and operation to maintain performance and longevity.

6.1 Important Safety Symbols and Warnings

The manual uses specific safety symbols and warnings to alert users of potential hazards. These include warning‚ caution‚ and note icons to highlight critical information. Always follow these guidelines to ensure safe operation and prevent damage. High voltages‚ improper grounding‚ and unauthorized modifications can pose risks. Disconnect power before servicing‚ and refer to the manual for detailed safety precautions to maintain operator and equipment safety.

6.2 Handling and Environmental Considerations

Proper handling and environmental precautions are essential for maintaining the Watlow F4 controller’s performance. Avoid exposing the device to extreme temperatures‚ humidity‚ or physical stress. Store and operate the controller within specified ranges to prevent damage. Ensure a stable power supply and avoid unauthorized modifications. Follow recommended installation practices to safeguard against environmental factors that could compromise functionality and longevity of the device.

Troubleshooting and Maintenance

This section provides guidance on identifying and resolving common issues with the Watlow F4 controller. Regular maintenance‚ such as cleaning sensors and updating software‚ ensures optimal performance and longevity.

7.1 Common Issues and Solutions

Common issues with the Watlow F4 controller include display malfunctions‚ temperature inaccuracies‚ and communication errors. To resolve these‚ ensure proper connections‚ recalibrate sensors‚ and update software. For display issues‚ check power supply and wiring. Temperature inaccuracies may require recalibrating the sensor or adjusting PID settings. Communication errors can often be fixed by restarting the controller or verifying network configurations. Always refer to the troubleshooting section for detailed solutions.

7.2 Routine Maintenance and Upkeep

Regular maintenance ensures optimal performance of the Watlow F4 controller. Clean the LCD display with a soft cloth and avoid harsh chemicals. Check all connections for tightness and inspect for wear. Update software periodically to access new features and improvements. Ensure sensors are free from debris and calibrated correctly. Regularly review and back up configurations to prevent data loss. Proper upkeep extends the controller’s lifespan and prevents unexpected downtime.

Technical Specifications and Compatibility

The Watlow F4 controller features a 16-bit microprocessor‚ high-resolution LCD‚ and compatibility with Watlow accessories. It supports multiple communication interfaces and operates in various industrial environments effectively.

8.1 Detailed Hardware and Software Specifications

The Watlow F4 controller features a 16-bit microprocessor‚ a four-line high-resolution LCD display‚ and guided setup software. It supports up to 256 ramp steps and 40 profiles‚ ensuring precise temperature control. The controller is compatible with Watlow accessories and communication interfaces‚ offering flexibility in industrial applications. Software tools include advanced programming and configuration options‚ while hardware specifications ensure robust performance in demanding environments.

8.2 Compatibility with Other Watlow Products

The Watlow F4 controller seamlessly integrates with various Watlow products‚ including sensors‚ heaters‚ and communication modules. It supports Watlow’s Ez Zone configuration and works with the Watlow Support Tools DVD‚ ensuring compatibility across systems. This integration enhances functionality and allows for efficient system upgrades‚ making it a versatile choice for industrial temperature control applications.

Accessories and Support Tools

The Watlow F4 controller is supported by a range of accessories‚ including the Watlow Support Tools DVD‚ which provides user manuals‚ tutorial videos‚ and application guides.

9.1 Watlow Support Tools DVD

The Watlow Support Tools DVD (part number: 0601-0001-0000) is an essential resource for F4 controller users. It includes comprehensive user manuals‚ tutorial videos‚ application notes‚ and detailed guides to help with installation‚ configuration‚ and troubleshooting. This DVD provides everything needed to maximize the controller’s functionality and ensure optimal performance in various applications. It is a valuable tool for both new and experienced users‚ offering in-depth support and guidance;

9.2 Additional Resources and Documentation

Beyond the manual‚ Watlow offers extensive resources to support F4 controller users. These include detailed technical specifications‚ compatibility guides‚ and safety information. Additional documentation provides insights into advanced features‚ troubleshooting‚ and maintenance. Users can also access instructional materials and application notes for specific configurations. These resources ensure comprehensive understanding and optimal use of the F4 controller in various industrial applications.

The Watlow F4 controller manual provides a detailed guide for optimal performance. Its advanced features and user-friendly design make it ideal for demanding industrial applications‚ ensuring precision and reliability.

10.1 Summary of Key Features and Benefits

The Watlow F4 controller offers advanced features like a four-line LCD display‚ guided setup software‚ and a 16-bit microprocessor for precise control. With up to 256 ramp steps‚ it excels in ramp-and-soak applications. The context-sensitive key enhances navigation‚ while the user-friendly interface simplifies programming. Its robust design ensures reliability in demanding environments‚ making it a versatile solution for industrial temperature control needs.

10.2 Future Updates and Enhancements

Watlow continuously innovates to enhance the F4 series. Future updates may include advanced software features‚ improved compatibility‚ and new functionalities. Users can expect regular firmware updates‚ expanded integration options‚ and enhanced security measures. Watlow’s commitment to innovation ensures the F4 remains a cutting-edge solution for temperature control. Stay informed through Watlow’s official channels for the latest improvements and updates tailored to meet evolving industrial needs.

PDF

acls textbook pdf

Advanced Cardiovascular Life Support (ACLS) is a critical set of interventions for managing life-threatening cardiac emergencies‚ emphasizing high-quality CPR and rapid decision-making to improve patient outcomes․

1․1 What is ACLS?

Advanced Cardiovascular Life Support (ACLS) is an evidence-based set of medical interventions for cardiac arrest‚ focusing on high-quality CPR‚ rhythm recognition‚ defibrillation‚ and pharmacological management to restore normal heart function and improve survival rates in critical situations․

1․2 Importance of ACLS Training

ACLS training is crucial for healthcare professionals to master life-saving interventions‚ ensuring timely and effective responses during cardiac emergencies․ It enhances clinical decision-making‚ improves patient outcomes‚ and builds confidence in high-stakes situations‚ emphasizing evidence-based protocols to maximize survival rates and quality of care․

1․3 Who Should Learn ACLS?

ACLS training is essential for healthcare professionals‚ including paramedics‚ nurses‚ physicians‚ and emergency responders‚ who manage cardiac arrest and critical conditions․ It is also beneficial for those working in high-risk environments or requiring advanced cardiac life support skills to ensure optimal patient care and outcomes․

Key Concepts and Foundational Knowledge

This section covers essential topics such as cardiovascular anatomy‚ physiology‚ signs of cardiac arrest‚ and risk factors‚ providing the foundation needed for advanced life support interventions․

2․1 Cardiovascular Anatomy and Physiology

The heart consists of four chambers: the right and left atria‚ and right and left ventricles․ Blood flows through arteries‚ veins‚ and capillaries‚ regulated by the autonomic nervous system; Understanding myocardial oxygen demand‚ coronary circulation‚ and electrical conduction pathways is crucial for ACLS interventions and managing cardiac arrest effectively;

2․2 Signs and Symptoms of Cardiac Arrest

Cardiac arrest often presents with sudden loss of consciousness‚ unresponsiveness‚ and absence of breathing or abnormal gasping․ Other signs include chest pain‚ shortness of breath‚ nausea‚ and palpitations․ Early recognition of these symptoms is critical for timely intervention and improving survival rates through ACLS protocols․

2․3 Risk Factors for Cardiac Arrest

Key risk factors for cardiac arrest include coronary artery disease‚ hypertension‚ diabetes‚ obesity‚ smoking‚ and family history of heart disease․ Additionally‚ electrolyte imbalances‚ arrhythmic conditions like ventricular fibrillation‚ and structural heart defects significantly increase the likelihood of cardiac arrest‚ necessitating early identification and management through ACLS training․

ACLS Algorithms and Protocols

ACLS algorithms provide a systematic approach to managing cardiac arrest‚ emphasizing early CPR‚ defibrillation‚ and medication administration․ These evidence-based protocols are regularly updated to reflect best practices in resuscitation care․

3․1 Adult ACLS Algorithm

The adult ACLS algorithm focuses on rapid assessment and intervention‚ starting with CPR and defibrillation‚ followed by administering epinephrine and amiodarone․ It emphasizes high-quality chest compressions‚ adequate ventilation‚ and prompt rhythm analysis to maximize the chance of successful resuscitation and improved neurological outcomes in cardiac arrest scenarios․

3․2 Pediatric ACLS Algorithm

The pediatric ACLS algorithm is tailored for children‚ focusing on age-specific interventions‚ CPR techniques‚ and defibrillation guidelines․ It emphasizes rapid assessment‚ tailored medication dosages‚ and prioritized care to address unique physiological needs‚ aiming to improve outcomes in pediatric cardiac arrest scenarios effectively․

3․3 Updates and Changes in ACLS Guidelines

Recent ACLS guideline updates emphasize evidence-based practices‚ such as updated CPR compression depths‚ refined epinephrine administration timing‚ and new approaches to cardiac arrest management․ These changes aim to enhance patient outcomes and incorporate the latest medical research and technological advancements in emergency care․

Pharmacology in ACLS

Pharmacology in ACLS involves the use of critical medications like epinephrine‚ amiodarone‚ and lidocaine to restore cardiac function and improve survival rates during emergencies․

4․1 Common Drugs Used in ACLS

In ACLS‚ common drugs include epinephrine‚ which stimulates the heart‚ amiodarone for arrhythmias‚ lidocaine as an antiarrhythmic‚ and atropine for bradycardia․ These medications are crucial for restoring normal heart rhythms and ensuring adequate blood circulation during cardiac emergencies․

4․2 Dosages and Administration

ACLS drugs like epinephrine (1mg IV/IO every 3-5 minutes)‚ amiodarone (300mg IV bolus)‚ and lidocaine (1mg/kg IV) require precise dosing․ Administration routes include IV or IO‚ ensuring rapid absorption․ Correct dosages and timing are critical for maximizing effectiveness during cardiac emergencies․

4․3 Drug Interactions and Side Effects

ACLS medications can cause significant interactions and side effects․ Epinephrine may increase heart rate and blood pressure‚ while amiodarone can lead to bradycardia or hypotension․ Proper monitoring is essential to minimize adverse effects and ensure safe administration during resuscitation efforts․

Case Studies and Practical Applications

Real-life scenarios and hands-on training enhance ACLS skills‚ enabling healthcare providers to apply protocols effectively in critical situations‚ improving clinical decision-making and patient outcomes through practical experience․

5․1 Real-Life Scenarios in ACLS

Real-life scenarios in ACLS‚ such as managing a patient in ventricular fibrillation or a pulseless electrical activity‚ provide practical insights into emergency response․ These cases highlight the importance of rapid decision-making and high-quality CPR to maximize survival rates and neurological outcomes․

5․2 Case Study Analysis and Lessons Learned

Case studies in ACLS provide real-world examples of cardiac arrest management‚ highlighting successful interventions and areas for improvement․ Analyzing these scenarios enhances provider skills in ECG interpretation‚ medication administration‚ and team communication‚ ultimately improving patient outcomes through evidence-based practice․

5․3 Hands-On Training and Simulation

Hands-on training and simulation are essential for mastering ACLS skills‚ allowing participants to practice high-stakes scenarios in a controlled environment․ Simulation-based education improves clinical decision-making‚ reinforces algorithms‚ and enhances teamwork‚ ensuring proficiency in real-life cardiac emergencies․

ACLS vs․ BLS: Key Differences

ACLS and BLS differ in scope and complexity․ BLS focuses on basic life-saving techniques like CPR and AED use‚ while ACLS provides advanced interventions for cardiac arrest‚ including medications and rhythm interpretation․

6․1 Basic Life Support (BLS) Overview

Basic Life Support (BLS) focuses on fundamental life-saving techniques‚ such as CPR‚ AED use‚ and airway management‚ aimed at maintaining circulation and breathing until advanced care arrives․ It is designed for both laypeople and healthcare professionals‚ emphasizing quick action to preserve life and neurological function․

6․2 Advanced Cardiovascular Life Support (ACLS) Overview

Advanced Cardiovascular Life Support (ACLS) builds on Basic Life Support (BLS) by adding advanced techniques like rhythm recognition‚ defibrillation‚ and medication administration․ ACLS is designed to restore normal cardiac function in critical situations‚ focusing on high-quality CPR‚ airway management‚ and pharmacological interventions to improve survival rates and patient outcomes․

6․3 When to Use ACLS vs․ BLS

ACLS is employed in cardiac arrest scenarios requiring advanced interventions‚ such as defibrillation and medication‚ while BLS is for initial response with CPR and AED use․ ACLS is typically used by trained healthcare professionals in settings where advanced life support is necessary beyond basic care․

The Role of Technology in ACLS

Technology enhances ACLS by providing automated external defibrillators (AEDs)‚ advanced monitoring systems‚ and real-time data analysis‚ improving response times and accuracy in critical cardiac arrest scenarios․

7․1 Automated External Defibrillators (AEDs)

Automated External Defibrillators (AEDs) are portable devices that analyze heart rhythms and deliver electrical shocks to restore normal rhythms during cardiac arrest․ They are user-friendly‚ providing voice prompts to guide non-professionals through the process‚ making them indispensable in timely interventions and improving survival rates significantly․

7․2 Advanced Monitoring Equipment

Advanced monitoring equipment in ACLS includes devices like electrocardiograms (ECGs)‚ pulse oximeters‚ and capnography machines․ These tools provide real-time data on heart activity‚ oxygen saturation‚ and carbon dioxide levels‚ enabling healthcare providers to make informed decisions and tailor interventions for optimal patient care during emergencies․

7․3 Impact of Technology on Survival Rates

Technological advancements in ACLS‚ such as automated defibrillators and real-time monitoring‚ improve survival rates by enabling faster‚ more accurate interventions․ These tools enhance early detection of cardiac issues‚ allowing for timely treatment and personalized care‚ ultimately increasing the likelihood of successful resuscitation and better patient outcomes․

Effective Communication in ACLS Teams

Clear communication is vital in ACLS teams‚ ensuring seamless coordination and swift decision-making during emergencies․ Active listening‚ concise language‚ and defined roles enhance teamwork‚ improving patient outcomes and reducing errors․

8․1 Team Dynamics and Leadership

Effective leadership in ACLS teams fosters a collaborative environment‚ ensuring clear direction and accountability․ A strong leader assigns roles‚ maintains focus‚ and facilitates open communication‚ while team members contribute their expertise‚ promoting a cohesive and efficient response to cardiac emergencies․

8․2 Communication Techniques During Emergencies

Clear and concise communication is vital during emergencies․ Techniques include using simple‚ direct language‚ active listening‚ and structured frameworks like SBAR (Situation‚ Background‚ Assessment‚ Recommendation) to ensure clarity and reduce errors‚ enabling efficient decision-making and effective patient care․

8․3 Role of Debriefing and Feedback

Debriefing and feedback are essential for improving team performance and patient outcomes․ They involve reviewing actions‚ discussing successes and errors‚ and identifying areas for improvement․ Constructive feedback enhances learning‚ strengthens communication‚ and fosters a culture of continuous improvement in high-stakes environments like ACLS․

Continuous Education and Skill Retention

Continuous education and skill retention are vital for maintaining ACLS proficiency‚ ensuring healthcare providers stay updated with the latest guidelines and techniques to deliver effective patient care․

9․1 Importance of Recertification

Recertification in ACLS ensures healthcare providers stay updated with the latest guidelines and techniques‚ validating their expertise and ability to deliver evidence-based care․ It reinforces skill retention‚ adaptability to new advancements‚ and proficiency in high-stakes environments‚ ultimately enhancing patient outcomes and safety․

9․2 Keeping Up with the Latest Guidelines

Staying informed about updated ACLS guidelines ensures adherence to evidence-based practices‚ improving patient care․ Regular reviews of new recommendations‚ algorithms‚ and drug protocols are essential for maintaining proficiency and delivering optimal emergency cardiovascular interventions in evolving medical landscapes․

9․3 Skill Decay and Retention Strategies

ACLS skills can diminish over time due to infrequent use‚ highlighting the need for ongoing practice and periodic recertification․ Interactive training sessions‚ simulation-based learning‚ and real-life case studies help reinforce knowledge and maintain clinical competence‚ ensuring providers remain adept in emergency response scenarios․

Resources for Further Learning

ACLS textbooks‚ online courses‚ and PDF guides provide comprehensive training materials․ These resources include step-by-step tutorials‚ real-life case studies‚ and certification programs to enhance learning and skill mastery․

10․1 Recommended ACLS Textbooks and PDFs

Top-rated ACLS textbooks include the AHA ACLS Provider Manual and ACLS Certification Guide‚ offering in-depth insights into advanced cardiovascular care․ PDF versions are widely available for convenient access and self-paced learning‚ ensuring healthcare professionals can master life-saving techniques effectively․

10․2 Online Courses and Tutorials

Popular platforms like Coursera‚ Udemy‚ and the American Heart Association (AHA) offer comprehensive ACLS online courses․ These tutorials provide interactive modules‚ video demonstrations‚ and hands-on simulations to master ACLS protocols‚ making them ideal for healthcare professionals seeking flexible and engaging learning opportunities․

10․3 ACLS Certification and Renewal

ACLS certification is valid for two years‚ requiring renewal through approved courses․ Renewal involves completing updated training‚ often available online‚ to stay current with the latest guidelines‚ hands-on skills‚ and written exams‚ ensuring healthcare providers maintain proficiency in life-saving interventions․

Legal and Ethical Considerations in ACLS

Understanding legal and ethical principles is crucial in ACLS‚ ensuring informed consent‚ patient autonomy‚ and adherence to medical standards‚ while addressing potential legal implications of administering life-saving interventions․

11․1 Legal Implications of ACLS Administration

ACLS administration carries legal implications‚ including potential liability for negligence or failure to follow established protocols․ Proper documentation and adherence to guidelines are essential to mitigate risks‚ ensuring that care provided aligns with medical standards and legal requirements‚ protecting both patients and providers․

11․2 Ethical Dilemmas in Resuscitation

Resuscitation often presents ethical dilemmas‚ such as balancing life-saving interventions with patient autonomy and quality of life․ Providers must navigate advance directives‚ futility of care‚ and family wishes‚ ensuring decisions align with ethical principles and patient rights while maintaining compassion and respect for individual preferences․

11․3 Informed Consent and Patient Rights

Informed consent ensures patients or their surrogates understand and agree to ACLS interventions‚ balancing benefits and risks․ Patient rights include autonomy‚ dignity‚ and confidentiality․ Providers must respect advance directives and legal preferences‚ documenting decisions to uphold ethical standards and patient-centered care in emergencies․

The Future of ACLS Training and Practice

Future ACLS training will integrate AI‚ simulation‚ and personalized learning‚ enhancing skill retention and real-time decision-making‚ ensuring healthcare providers deliver cutting-edge‚ evidence-based care efficiently․

12․1 Emerging Trends in ACLS

Emerging trends in ACLS include the integration of AI and machine learning for real-time decision support‚ enhanced simulation-based training‚ and personalized learning platforms to improve skill retention and adaptability in dynamic clinical scenarios․

12․2 The Role of AI and Machine Learning

AI and machine learning are revolutionizing ACLS by enabling real-time patient data analysis‚ predicting cardiac arrest risks‚ and optimizing treatment protocols․ These technologies enhance decision-making accuracy and streamline training processes‚ ensuring healthcare providers deliver more efficient and personalized care․

12․3 Innovations in Training Methods

Modern ACLS training incorporates interactive simulations and virtual reality (VR) to enhance hands-on practice․ Online platforms now offer personalized learning paths‚ bridging the gap between theoretical knowledge and practical application․ These innovations ensure healthcare professionals can master ACLS skills more effectively and confidently in real-world scenarios․

general electric side by side refrigerator manual

Welcome to the General Electric Side-by-Side Refrigerator Manual‚ your comprehensive guide to understanding and optimizing your appliance․ This manual is essential for proper setup‚ operation‚ and maintenance‚ ensuring efficient performance and longevity․ Designed for both new and experienced users‚ it covers key features‚ troubleshooting‚ and safety tips to enhance your experience․ Reading this manual carefully will help you make the most of your refrigerator’s capabilities and maintain its optimal condition․

1․1 Overview of the Manual

This manual provides a detailed guide for the General Electric Side-by-Side Refrigerator‚ covering installation‚ operation‚ maintenance‚ and troubleshooting․ It includes safety tips‚ energy efficiency features‚ and optimal usage instructions․ Designed to help users understand their appliance fully‚ the manual ensures proper setup and operation‚ maximizing performance and longevity․ Refer to this guide for comprehensive support and to resolve common issues effectively․

1․2 Importance of Reading the Manual

Reading the General Electric Side-by-Side Refrigerator Manual is crucial for understanding safety guidelines‚ proper installation‚ and maintenance tips․ It ensures optimal performance‚ energy efficiency‚ and troubleshooting of common issues․ The manual also provides warranty details and customer support information‚ helping users resolve problems quickly․ By following the instructions‚ you can extend the appliance’s lifespan and enjoy hassle-free operation for years to come․

Safety Instructions and Precautions

Always follow safety guidelines to prevent accidents․ Avoid placing electrical appliances inside compartments unless recommended․ Keep children away from controls and ensure proper ventilation for safe operation․

2․1 General Safety Guidelines

Read all instructions carefully before using your refrigerator․ Use the appliance only for its intended purpose․ Avoid placing electrical devices inside compartments unless explicitly recommended․ Ensure proper ventilation and keep children away from controls․ Never modify the appliance or bypass safety features․ Regularly inspect for damage and maintain cleanliness to prevent hazards․ Follow all warnings and guidelines provided in this manual․

2․2 Electrical Safety Tips

Always use a grounded outlet and avoid extension cords․ Ensure proper power supply and avoid overloading circuits․ After a power failure‚ wait 5 minutes before restarting․ Never use electrical appliances inside compartments unless explicitly recommended․ Keep cords away from water and heat sources․ Regularly inspect cords for damage and replace if necessary․ Follow all electrical safety guidelines provided in the manual to prevent hazards․

2․3 Child Safety Features

Ensure your child’s safety by utilizing the child safety lock to prevent accidental door opening․ Teach children to avoid playing with controls or electrical components․ Secure heavy appliances to prevent tipping․ Always supervise children near the refrigerator and educate them on proper usage․ These features help create a safer environment for your family while maintaining appliance functionality․

Installation and Setup

Proper installation ensures optimal performance and longevity of your refrigerator․ Begin by unpacking carefully‚ placing the appliance on a level surface‚ and connecting water lines if applicable․ Ensure proper ventilation and follow manual instructions for precise setup to avoid damage or operational issues․

3․1 Unpacking and Placement

Welcome your new General Electric Side-by-Side Refrigerator! Carefully unpack the appliance‚ ensuring all components are intact․ Inspect for damage before proceeding․ Place the refrigerator on a level‚ stable surface‚ away from direct sunlight and heat sources․ Allow at least 1 inch of space around the unit for proper ventilation․ Keep the area clean to ensure optimal performance and safety․ Proceed to the next steps for final placement․

3․2 Leveling the Refrigerator

Proper leveling ensures your refrigerator operates efficiently and prevents door misalignment․ Locate the adjustable legs or feet at the base of the appliance․ Use a spirit level to check balance‚ then tighten or loosen the legs as needed․ Ensure the refrigerator is stable and evenly balanced․ Refer to your owner’s manual for specific leveling instructions․ Avoid using makeshift materials that could damage the appliance or flooring․

3․3 Connecting Water Lines

Properly connecting water lines is essential for ice and water dispensers to function․ Locate the water inlet valve‚ typically behind the refrigerator․ Use a wrench to tighten the copper or plastic tubing to the valve․ Ensure the water supply is turned off before connecting․ Turn the supply on slowly and check for leaks․ Run a few gallons through the dispenser to clear air and debris․

Operating the Refrigerator

Operating the refrigerator involves setting temperature controls‚ organizing compartments‚ and using the ice and water dispenser․ Adjust settings for optimal performance and efficiency․

4․1 Temperature Controls and Settings

Adjust the temperature controls to maintain optimal cooling levels․ Set the refrigerator between 37°F and 41°F and the freezer between 0°F and 5°F for ideal food preservation․ Use the external controls to regulate temperatures effortlessly․ Ensure settings align with the SmartWater filtration system for enhanced water quality․ Regular adjustments can improve energy efficiency and appliance performance․

4․2 Understanding the Freezer and Refrigerator Compartments

The freezer compartment maintains temperatures between 0°F and 5°F‚ ideal for preserving frozen foods․ The refrigerator compartment operates between 37°F and 41°F‚ keeping items fresh without freezing․ Both compartments are designed for efficient storage and organization‚ with features like adjustable shelving to maximize space․ Proper temperature settings ensure optimal performance and food safety․

4․3 Using the Ice and Water Dispenser

The ice and water dispenser offers convenience and accessibility․ Ensure the water supply is connected and the ice maker is activated․ Use the control panel to select ice or water․ Regularly clean the dispenser and replace the water filter every 6 months for optimal performance․ Refer to the manual for troubleshooting dispenser issues‚ such as low water flow or ice blockages․

Features and Functions

The GE Side-by-Side Refrigerator features advanced components like the SmartWater Filtration System‚ energy-efficient designs‚ and adjustable shelving for customizable storage․ These innovations enhance performance and convenience‚ ensuring optimal functionality for daily use while maintaining user-friendly operation and modern design․

5․1 SmartWater Filtration System

The SmartWater Filtration System in your GE Side-by-Side Refrigerator ensures clean and fresh water by reducing impurities and contaminants․ Designed for optimal performance‚ it enhances the taste and odor of dispensed water and ice․ Regular filter replacements‚ recommended every six months‚ maintain its efficiency․ This feature not only improves water quality but also contributes to the overall energy efficiency of the appliance‚ making it a key component for both convenience and sustainability․

5․2 Energy Efficiency Features

The GE Side-by-Side Refrigerator incorporates advanced energy efficiency technologies‚ such as ENERGY STAR certification‚ to reduce power consumption․ Features like smart sensors‚ adaptive defrost systems‚ and high-efficiency compressors optimize cooling while minimizing energy use․ These innovations not only lower your energy bills but also promote eco-friendly operation‚ aligning with sustainable living practices․ Proper maintenance further enhances its energy-saving performance․

5․3 Adjustable Shelving and Storage Options

The GE Side-by-Side Refrigerator offers adjustable shelving and storage solutions for customizable organization․ Spill-proof glass shelves‚ crisper drawers‚ and door bins provide ample space for groceries․ The flexible design allows you to rearrange compartments to suit your needs‚ ensuring efficient use of space while keeping items easily accessible․ This feature enhances storage capacity and maintains freshness for optimal food management․

Maintenance and Cleaning

Regular cleaning and maintenance ensure optimal performance and longevity․ Clean shelves‚ replace water filters‚ and defrost the freezer periodically․ Proper care extends efficiency and freshness retention․

6;1 Regular Cleaning Tips

Regular cleaning is essential for maintaining your GE side-by-side refrigerator’s performance․ Wipe shelves and walls with mild soap and warm water․ Clean door seals to ensure proper closure․ Check and replace worn-out gaskets․ Avoid harsh chemicals that may damage surfaces․ For tough stains‚ mix baking soda and water for a gentle scrub․ Clean the exterior with a damp cloth to maintain its appearance․

6․2 Replacing the Water Filter

To maintain water quality‚ replace the SmartWater filtration system every 6 months or as indicated․ Locate the filter in the top-right corner of the refrigerator compartment․ Turn it counterclockwise to remove‚ then insert the new filter and turn clockwise until secure․ Flush the system by running 2 gallons of water through the dispenser to ensure optimal performance and taste․

6․3 Defrosting the Freezer Compartment

Periodically defrost the freezer to maintain efficiency․ Unplug the refrigerator and remove all contents․ Place items in a cooler with ice packs․ Remove shelves and drawers for access․ Cover the floor with towels or a plastic sheet․ Use a plastic scraper or soft cloth to gently remove ice buildup․ After defrosting‚ clean the compartment with mild soap and warm water‚ rinse‚ and dry thoroughly before reconnecting power․ Ensure the drain is clear to prevent water accumulation․

Troubleshooting Common Issues

This section helps identify and resolve common problems with your refrigerator‚ such as temperature fluctuations‚ ice maker malfunctions‚ and unusual noises․ Consult the manual for solutions or contact GE support if issues persist․

7․1 Diagnosing Temperature Fluctuations

Temperature fluctuations may occur due to improper settings‚ defrost cycles‚ or blocked air vents․ Check the temperature settings‚ ensure proper door sealing‚ and verify if the defrost mode is functioning․ Allow the refrigerator to stabilize after adjustments․ If issues persist‚ consult the manual or contact GE support for professional assistance․

7․2 Resolving Ice Maker Issues

If your ice maker isn’t producing ice‚ check if the ice maker switch is turned on and ensure the water supply is connected․ Allow up to 24 hours for a new installation to begin ice production․ Verify the freezer temperature is set correctly (around 0°F)․ If issues persist‚ consult the manual or contact GE support for further troubleshooting or professional assistance․

7․3 Addressing Noise Problems

Unusual noises from your refrigerator can often be resolved by checking its level and ensuring proper installation․ Verify that all shelves and drawers are securely aligned․ If rattling persists‚ inspect for loose parts or debris․ Clean the condenser coils regularly to prevent operational noise․ Consult the manual for specific troubleshooting steps or contact GE customer support for professional assistance if issues continue․

Energy Efficiency and Usage Tips

Optimize your refrigerator’s energy efficiency by ensuring proper loading‚ maintaining consistent temperatures‚ and using features like the SmartWater filtration system․ Regularly clean condenser coils and check door seals for tight closure to minimize energy consumption․ Refer to the ENERGY STAR rating for guidance on eco-friendly usage and energy-saving practices․

8․1 Optimizing Energy Consumption

Optimize energy use by maintaining proper refrigerator and freezer temperatures․ Keep the appliance evenly loaded to ensure efficient cooling․ Use the SmartWater filtration system to reduce water waste and avoid unnecessary ice maker cycles․ Regularly clean condenser coils and ensure door seals are tight to prevent energy loss․ Avoid frequent door openings to maintain internal temperatures and reduce consumption․

8․2 Proper Loading of the Refrigerator

Proper loading ensures efficient performance and maintains food quality․ Organize items to maximize space‚ avoiding overcrowding․ Use adjustable shelving and compartments to store items by type and size․ Keep frequently used items in easy-to-reach locations․ Avoid blocking air vents to ensure proper air circulation․ Store raw meats and dairy separately to prevent cross-contamination․ This setup helps maintain consistent temperatures and reduces energy use․

8․3 Understanding Energy Star Ratings

Energy Star ratings indicate energy efficiency‚ helping reduce utility bills and environmental impact․ GE side-by-side refrigerators meeting Energy Star standards use less energy than non-certified models․ These ratings are determined by the U․S․ EPA‚ ensuring products meet energy efficiency guidelines․ Look for the Energy Star label to confirm your refrigerator’s eco-friendly performance and cost-saving benefits․

Warranty and Customer Support

This section outlines the warranty coverage for your GE side-by-side refrigerator‚ including registration processes and customer support resources․ Register your appliance online for extended benefits and access helpful websites and phone numbers listed in the Consumer Support section of this manual․

9․1 Understanding the Warranty Coverage

General Electric provides comprehensive warranty coverage for your side-by-side refrigerator‚ ensuring protection against defects in materials and workmanship․ The warranty period varies depending on the model and components‚ with details outlined in the manual․ Registration is crucial for activating warranty benefits‚ and the manual includes contact information for customer support to address any warranty-related inquiries or claims․

9․2 Contacting General Electric Support

For assistance‚ contact General Electric support through the phone numbers or websites provided in the manual․ The Consumer Support section offers detailed contact information and resources for troubleshooting‚ repairs‚ and warranty inquiries․ Online registration and support portals are also available for convenient access to help and guidance tailored to your side-by-side refrigerator needs․

9․3 Registering Your Appliance

Register your General Electric side-by-side refrigerator online to activate warranty benefits and receive exclusive support․ Visit the GE website‚ enter your appliance’s model number‚ and follow the registration steps․ This ensures seamless access to customer service‚ maintenance reminders‚ and personalized assistance․ Your model number can be found on the label inside the refrigerator compartment for easy reference during registration․

This manual provides essential guidance for optimal use of your General Electric side-by-side refrigerator․ By following its instructions‚ you’ll ensure efficient performance‚ longevity‚ and safety․ Refer to it regularly for maintenance and troubleshooting tips to keep your appliance running smoothly․

10․1 Summary of Key Points

This manual provides a comprehensive guide for your General Electric side-by-side refrigerator‚ covering installation‚ operation‚ maintenance‚ and troubleshooting․ It emphasizes energy efficiency‚ proper loading‚ and safety precautions․ Key features like the SmartWater filtration system and adjustable shelving are highlighted to ensure optimal performance․ Regular maintenance‚ such as filter replacement and defrosting‚ is essential for longevity․ Refer to this manual for future reference to address any issues and maintain your appliance effectively․

10․2 Final Tips for Optimal Performance

For optimal performance‚ ensure regular cleaning of condenser coils and check door seals for tightness․ Maintain proper airflow by avoiding overcrowding and using adjustable shelving wisely․ Run cleaning cycles periodically and monitor temperature settings․ Replace water filters as recommended and defrost the freezer compartment when ice builds up․ Proper maintenance ensures energy efficiency‚ consistent cooling‚ and longevity of your refrigerator․

the walkers guide to outdoor clues and signs

Discover the natural world through The Walker’s Guide to Outdoor Clues and Signs, an essential resource for enhancing navigation and transforming every walk into a detective adventure.

Understanding the Importance of Natural Navigation

Natural navigation is a vital skill that enhances self-reliance and deepens one’s connection with the environment. By observing elements like the sun, moon, stars, and natural landmarks, individuals can navigate without modern technology. This skill fosters a greater appreciation for nature and can be crucial in survival situations. It also encourages mindfulness and engagement with surroundings, making outdoor experiences more enriching and safer by predicting weather changes and locating essential resources.

How to Develop a Deeper Connection with Nature

Developing a deeper connection with nature involves fostering awareness and appreciation through active engagement with the environment. By observing natural elements like the sun, moon, stars, and animal behaviors, individuals can decipher the hidden language of nature, enhancing their understanding and connection. Each walk becomes an interactive adventure, where every clue and sign tells a story, promoting mindfulness and a sense of wonder. This mindful interaction not only enriches outdoor experiences but also builds self-reliance and a profound appreciation for the natural world, making every journey a meaningful adventure.

Natural Navigation Techniques

Natural navigation techniques involve using the sun, moon, stars, and natural elements to find direction and understand surroundings, enhancing outdoor awareness and navigation skills effectively always.

Using the Sun, Moon, and Stars for Direction

Mastering celestial navigation with the sun, moon, and stars is a cornerstone of outdoor navigation. The sun’s position reveals direction, while shadows indicate time. Moon phases and constellations, like the North Star, provide reliable guidance. Tristan Gooley’s guide offers practical tips on using these celestial cues, enabling walkers to navigate confidently, even in unfamiliar terrain. By understanding the movements and patterns of the sun, moon, and stars, walkers can enhance their outdoor adventures and deepen their connection with nature, turning every walk into a rewarding journey of discovery and skill-building.

How to Read Landscapes and Landmarks

Understanding how to interpret landscapes and landmarks is a vital skill for outdoor navigation. By observing natural features like hills, valleys, and ridges, walkers can identify directions and locate essential resources. The guide reveals how landmarks such as unusual rock formations, tree alignments, and water sources can serve as navigational aids. Additionally, it teaches how to recognize patterns in terrain that indicate human or animal activity, providing practical insights to enhance navigation and exploration. This skill transforms every walk into an opportunity to connect with and understand the environment more deeply.

Identifying Natural Indicators of Time and Date

Learn to identify natural indicators that reveal the time of day and season. The position of the sun, moon, and stars offers precise cues, while tree growth and flower blooms signal seasonal changes. Animal behavior, such as bird songs or insect activity, also provides clues about the time. By mastering these natural signs, walkers can determine the date and time without modern tools, fostering a deeper connection with the natural world and enhancing navigation skills in any environment. This knowledge turns every walk into a fascinating exploration of nature’s rhythms.

Weather Forecasting in the Outdoors

Master the art of predicting weather changes using clouds, sky colors, and wind patterns. Observe animal behavior and natural signs to forecast conditions accurately and stay prepared. Always.

Predicting Weather Changes Through Cloud Observations

Clouds are nature’s weather messengers. Learn to identify cumulus, stratus, and cirrus formations to forecast changes. Tristan Gooley’s guide reveals how cloud shapes, heights, and movements signal approaching storms or fair skies. By observing cloud layers and textures, walkers can predict rain, wind, or temperature shifts. This skill enhances safety and enjoyment outdoors, turning every walk into a weather detective adventure. Mastering cloud observations is a key part of the guide’s comprehensive approach to outdoor awareness.

Interpreting Wind Direction and Sky Colors

Wind direction and sky colors offer vital clues about weather and time. Learn to read gusts, breezes, and color shifts to predict conditions. Tristan Gooley’s guide explains how wind patterns reveal pressure changes, while sky hues, from sunrise pinks to sunset oranges, indicate time and weather shifts. By interpreting these natural signals, walkers can anticipate changes, navigate more effectively, and deepen their connection to the environment. This skill, outlined in the guide, transforms every walk into an opportunity to engage with nature’s subtle cues.

Using Animal Behavior as a Weather Indicator

Animal behavior serves as a reliable indicator of weather changes. Birds flying low or ants scurrying for shelter often signal approaching storms. Squirrels storing food or birds singing less frequently may hint at colder days. Even subtle changes, like cows lying down or bees returning to hives, can predict shifts in weather. By observing these patterns, walkers can gain insights into impending conditions, enhancing their awareness and preparedness. Tristan Gooley’s guide highlights how animal actions offer clues, making every walk a chance to connect with nature’s rhythms.

Tracking and Animal Signs

Identify animal tracks, scat, and feeding patterns to uncover hidden wildlife behaviors. These signs reveal habitats, feeding habits, and seasonal movements, offering insights into nature’s intricate dynamics.

Identifying Animal Tracks and Scat

Recognizing animal tracks and scat is a key skill for outdoor enthusiasts. Each species leaves unique signs, from the shape and size of tracks to the texture and composition of scat. These clues not only help identify the animal but also reveal its behavior, diet, and habitat. By studying these signs, walkers can gain insights into the wildlife around them. The guide provides detailed descriptions of various tracks and scat, enabling readers to decipher the natural world with confidence and precision, enhancing their connection to the environment.

Understanding Animal Feeding Patterns and Habitats

Animal feeding patterns and habitats offer vital clues about wildlife behavior and ecosystem health. By observing grazing areas, bird feeding spots, or insect activity, walkers can identify species and their roles in the environment. Habitats reveal where animals live, feed, and breed, while feeding patterns expose their diets and survival strategies. This knowledge enhances nature connection and navigation skills, allowing walkers to predict animal movements and better appreciate the interconnectedness of the natural world. The guide provides insights into these patterns, empowering walkers to interpret and understand the wildlife around them effectively.

How to Follow Animal Paths for Navigation

Animal paths are natural navigation aids, offering insights into the landscape and potential routes. By identifying well-worn trails, walkers can follow logical pathways through diverse terrains. Animals often take the easiest or most efficient routes, which may lead to water sources, clearings, or safe passages. Observing the direction and frequency of tracks can help walkers navigate unfamiliar areas. These paths also reveal habitat preferences, aiding in understanding local wildlife. Using animal trails enhances navigation skills and fosters a deeper connection with nature, making every walk more intuitive and enjoyable.

Walking in Different Environments

Explore diverse settings with The Walker’s Guide, mastering urban, coastal, and night walks. Discover how to apply outdoor clues in every environment, enhancing navigation and connection with nature.

Navigating City Walks Using Urban Clues

Transform city walks by decoding urban clues. Use building shadows, road layouts, and street signs to navigate. Learn how traffic patterns and architectural features reveal direction and location, enhancing your urban exploration with practical skills from The Walker’s Guide.

Coastal Walks: Signs and Clues by the Sea

Decode nature’s signals by the sea. Coastal walks reveal unique signs like tidal patterns, wave direction, and beach formations. Learn to use the sun, moon, and stars for direction, while observing shore features to predict weather changes. The guide offers over 850 clues, including how seaweed growth and sand textures indicate time and location. These insights enrich your coastal experience, turning every beachcombing adventure into a journey of discovery and connection with nature.

Night Walks: Using the Night Sky for Guidance

Night walks offer a unique opportunity to harness the night sky for navigation. By identifying constellations, moon phases, and star patterns, walkers can determine direction and time. The guide reveals how celestial cues, like the North Star or the Milky Way, provide reliable orientation. Moonlight also aids in tracking time, while shadow directions can indicate compass points. These nocturnal signs enhance safety and awareness, transforming night walks into enlightening adventures. The guide’s insights empower walkers to navigate confidently under the stars, deepening their connection with the natural world.

Practical Applications of Outdoor Clues

Outdoor clues enhance walking experiences by improving safety, navigation, and awareness. Over 850 signs help predict weather, track animals, and navigate diverse environments, making every walk engaging and enlightening.

Enhancing Walking Experiences Through Observation

Observing outdoor clues transforms walks into engaging adventures, revealing nature’s hidden patterns. By noting the sun’s position, tree growth, and animal tracks, walkers gain insights into their surroundings, enhancing safety and awareness. This skill turns every path into a detective game, fostering a deeper connection with nature and making walks more rewarding and educational. Over 850 clues, from cloud formations to plant behaviors, empower walkers to navigate confidently and appreciate the natural world’s intricate details, enriching their outdoor experiences.

Using Outdoor Clues for Safety and Awareness

Outdoor clues are invaluable for enhancing safety and awareness during walks. By observing cloud patterns, wind shifts, and animal behavior, walkers can predict weather changes and potential hazards. Recognizing signs like uneven terrain, water flows, or unusual vegetation helps avoid risks. These skills empower walkers to navigate safely, especially in remote areas, ensuring a more secure and enjoyable outdoor experience. Awareness of natural indicators prevents accidents, making every walk safer and more informed. This knowledge is crucial for all walkers, fostering confidence in diverse environments.

Turning Every Walk into a Game of Detection

The Walker’s Guide to Outdoor Clues and Signs transforms every walk into a captivating game of detection. With over 850 clues, walkers can uncover hidden patterns in nature, from the position of the sun and stars to the behavior of animals and plants. This guide encourages observation, deduction, and curiosity, making walks more engaging and fun. By decoding these natural signs, anyone can turn their outdoor adventures into rewarding challenges, fostering a deeper connection with the environment and unlocking the secrets of the natural world, no matter the location or experience level; This unique approach ensures every walk is educational, exciting, and unforgettable, offering a fresh perspective on the outdoors for walkers of all ages and backgrounds.

Mastering outdoor clues unlocks nature’s secrets, transforming every walk into an adventure. The Walker’s Guide is a comprehensive, accessible resource, inspiring lifelong curiosity and connection with the natural world.

Final Thoughts on Mastering Outdoor Clues

Mastery of outdoor clues is a lifelong journey, offering endless opportunities to deepen your connection with nature. The Walker’s Guide provides a comprehensive toolkit, enabling walkers of all levels to navigate, predict, and appreciate their surroundings. With over 850 clues, it transforms every walk into a detective game, fostering curiosity and awareness. This guide is not just a resource but a companion, inspiring walkers to explore, learn, and cherish the natural world with renewed enthusiasm and skill.

Encouragement to Explore and Learn More

Embrace the adventure and dive into the world of outdoor clues with The Walker’s Guide. This comprehensive resource invites you to explore nature’s secrets, turning every walk into a game of detection. Whether you’re a seasoned hiker or a curious beginner, the guide’s 850+ clues will inspire you to venture further, observe more closely, and connect deeply with the environment. Let the land, sky, and wildlife be your teachers, and let every step uncover a new story. The outdoors awaits—start your journey today!

gilmour sprinkler instructions

Welcome to the comprehensive guide on Gilmour sprinkler instructions! This guide will help you understand how to set up, adjust, and maintain your Gilmour sprinkler system effectively․

1․1 Overview of Gilmour Sprinkler Systems

Gilmour sprinkler systems are designed for efficient lawn hydration, offering durability and customizable settings․ With features like adjustable rotation, spray distance, and coverage area, they cater to various lawn sizes and shapes․ Metal construction ensures stability and longevity, while user-friendly controls simplify adjustments․ These systems are ideal for both small and large areas, providing consistent water distribution․

1․2 Importance of Proper Setup and Adjustment

Proper setup and adjustment of your Gilmour sprinkler system ensure optimal water distribution, preventing overwatering and underwatering․ Correct installation and customization of spray patterns and pressure settings help maintain lawn health and conserve water․ Regular adjustments also extend the system’s lifespan and improve efficiency, making it essential for achieving the best results for your lawn care needs․

Preparing for Installation

Before installing your Gilmour sprinkler, ensure the area is clear and choose a flat, open space․ Gather necessary tools and materials for a smooth setup process․

2․1 Choosing the Right Location for Your Sprinkler

Select a flat, open area for your Gilmour sprinkler to ensure even water distribution․ Avoid placing it near obstacles or areas you don’t want watered․ Position it centrally to maximize coverage and minimize overspray․ Ensure the sprinkler is level to maintain proper function and adjust its height if necessary for optimal performance․

2․2 Tools and Materials Needed

To install your Gilmour sprinkler, gather essential tools: a screwdriver, pliers, and a wrench․ Ensure you have a compatible hose, connectors, and any additional nozzles or adapters․ Check for level tools to ensure proper placement․ Having a soft brush or cloth for cleaning is also recommended to maintain the sprinkler’s performance and longevity․

Setting Up the Gilmour Sprinkler

Place the sprinkler on a flat, open grass area․ Ensure the hose is securely connected․ Turn on the water supply and adjust as needed for even coverage․

3․1 Placing the Sprinkler on a Flat Surface

Position the Gilmour sprinkler on a flat, open area of grass․ Ensure the surface is even to prevent uneven water distribution․ Clear the area of obstacles to avoid accidental watering and ensure optimal coverage․ This setup ensures the sprinkler operates efficiently and covers the desired lawn area effectively․ Proper placement is key for uniform hydration․

3․2 Connecting the Hose

Attach the hose to the Gilmour sprinkler by securely threading it into the designated connector․ Ensure a tight fit to prevent leaks․ Turn on the water supply slowly to test the connection․ Check for any leaks around the hose-sprinkler junction․ A secure connection ensures proper water flow and optimal sprinkler performance․ Always use a compatible hose size for the best results․

3․4 Initial Watering Test

After connecting the hose, perform an initial watering test to ensure the sprinkler operates correctly․ Turn on the water supply and observe the spray pattern․ Check coverage and adjust as needed․ Ensure even watering across the designated area․ This test helps identify any issues with the sprinkler or hose connection before full operation․ Adjustments can be made to optimize performance․

Adjusting the Sprinkler Settings

Adjusting your Gilmour sprinkler settings ensures optimal water coverage․ Customize rotation, spray distance, and water pressure to suit your lawn’s needs․ Proper adjustments enhance efficiency․

4․1 Adjusting Rotation and Coverage Area

To adjust rotation and coverage, pull up on the sprinkler’s top for 360-degree coverage or set it to a partial circle․ Use the adjustable collar to customize the spray pattern for full or partial coverage․ This feature allows you to tailor watering to your lawn’s shape and size, ensuring efficient and targeted irrigation․

4․2 Customizing Spray Distance

Adjust the spray distance by moving the adjustment arm forward or backward․ This allows you to customize water reach, ensuring optimal coverage without overwatering․ The arm’s position controls the spray distance, making it easy to adapt to different lawn sizes and shapes for efficient watering․

4․3 Fine-Tuning Water Pressure

Fine-tune water pressure by adjusting the flow control valve located on the sprinkler․ This ensures even distribution and prevents overwatering․ Lower pressure reduces spray distance, while higher pressure increases coverage․ Monitor water flow during tests to achieve the perfect balance for your lawn’s needs․ Proper pressure adjustment enhances performance and water efficiency․

Operating the Sprinkler

Learn how to turn the sprinkler on and off, monitor water coverage, and move it for full lawn coverage․ Ensure optimal watering efficiency and results․

5․1 Turning On and Off

Operating your Gilmour sprinkler is straightforward․ Locate the on/off switch, typically found on the sprinkler head․ Turn it clockwise to activate and counterclockwise to deactivate․ Always ensure the area is clear before turning on․ After watering, turn off and move the sprinkler as needed for complete lawn coverage․ This ensures efficient and even watering every time․

5․2 Monitoring Water Coverage

After turning on the sprinkler, monitor its water coverage to ensure even distribution․ Check if the spray pattern is consistent and reaching the desired areas․ Adjust the sprinkler’s rotation or spray distance if necessary․ Regularly inspect for any unevenness or dry spots․ Proper monitoring ensures your lawn receives adequate hydration without overwatering․ This step helps maintain a healthy, lush lawn․

5․3 Moving the Sprinkler for Full Lawn Coverage

To achieve full lawn coverage, turn off the hose and carefully move the sprinkler to the next area․ Ensure the spray pattern aligns with the previously watered section for even hydration․ Repeat this process until all areas are covered․ This method ensures efficient watering without missing any spots, adapting to your lawn’s shape and size․

Troubleshooting Common Issues

Identify common issues like low water pressure or uneven spray patterns․ Adjust spray distance, clean clogged nozzles, or check water pressure to resolve problems․ Regular checks ensure smooth operation․

6․1 Low Water Pressure

Low water pressure can reduce the sprinkler’s effectiveness․ Check the water source and ensure the hose is fully opened; Clean or replace clogged nozzles, as debris often restricts flow․ If issues persist, consider upgrading to a higher pressure hose or adjusting the system to match your water supply capacity for optimal performance․ Regular maintenance helps maintain proper pressure levels․

6․2 Uneven Spray Patterns

Uneven spray patterns can occur due to misaligned spray arms or debris blockages․ Inspect and adjust the arms to ensure proper alignment․ Clean nozzles regularly to remove dirt or mineral buildup that may disrupt water flow․ Check for obstructions in the sprinkler head and ensure all parts are securely fitted․ Proper alignment and maintenance will restore even water distribution across your lawn․

6․3 Clogged Nozzles

Clogged nozzles can disrupt water flow and reduce sprinkler efficiency․ To fix this, turn off the water supply and remove the nozzles․ Soak them in a mixture of water and vinegar to dissolve mineral buildup․ Use a soft brush to gently scrub away debris․ Rinse thoroughly and reinstall․ Regular cleaning ensures optimal performance and prevents future clogs․

Maintenance and Care

Regular maintenance ensures your Gilmour sprinkler operates efficiently․ Clean nozzles, check for blockages, and winterize the system to prevent damage․ Store properly when not in use․

7․1 Cleaning the Sprinkler

Cleaning your Gilmour sprinkler is essential for optimal performance․ Use a soft brush or cloth to remove dirt and debris․ For tougher buildup, soak the nozzles in a water and vinegar solution to dissolve minerals․ Regular cleaning prevents clogs and ensures consistent water coverage for your lawn․

7․2 Winterizing the System

Winterizing your Gilmour sprinkler is crucial to prevent damage from freezing temperatures․ Disconnect hoses, drain all water from the system, and store the sprinkler in a dry, protected area․ For in-ground systems, blow out remaining water using compressed air to avoid ice formation․ Proper winterization ensures your sprinkler remains functional and ready for the next watering season․

7․3 Storing the Sprinkler

Proper storage of your Gilmour sprinkler ensures longevity and functionality․ After cleaning and drying, store it in a cool, dry place away from direct sunlight․ For winter storage, disconnect hoses and drain all water; Use a soft brush or cloth to remove dirt and debris․ Store in a protective box or bag to prevent damage and rust, ensuring it remains ready for next season․

Advanced Features of Gilmour Sprinklers

Gilmour sprinklers offer advanced features like adjustable circular coverage, customizable spray patterns, and durable metal construction for efficient watering․ These features ensure optimal performance and water conservation, making them ideal for various lawn sizes and shapes․

8․1 Adjustable Circular Sprinkler

The Gilmour Adjustable Circular Sprinkler allows for customizable spray distance and yard coverage, making it ideal for large round-shaped lawns․ Its easy setup and adjustment features ensure efficient watering tailored to your lawn’s specific needs, providing consistent performance and water conservation․

8․2 Pattern Master Impact Sprinkler

The Gilmour Pattern Master Impact Sprinkler offers a durable metal head and customizable spray patterns, allowing precise control over watering areas․ It covers up to 5,800 square feet and features adjustable rotation and spray distance settings․ Users appreciate its easy setup and ability to tailor coverage, though some note minor issues with long-term durability under heavy use․

Environmental Considerations

Environmental considerations emphasize water conservation and eco-friendly practices․ Optimize watering schedules, use rain sensors, and adjust sprinkler settings to prevent overwatering, ensuring efficient resource use․

9․1 Water Conservation Tips

Conserve water by using Gilmour sprinklers with adjustable settings to avoid overwatering․ Install rain sensors to prevent unnecessary watering during rainfall․ Optimize sprinkler schedules based on weather conditions and soil moisture․ Regularly inspect and maintain sprinkler systems to prevent leaks and ensure efficient water distribution․ Use drought-resistant plants to reduce watering needs, promoting sustainable landscaping practices․

9;2 Eco-Friendly Sprinkler Practices

Promote eco-friendly watering with Gilmour sprinklers by using rain sensors to prevent overwatering․ Optimize sprinkler schedules based on weather forecasts to minimize water waste․ Choose the correct nozzle sizes for your lawn to ensure even coverage and reduce runoff․ Regularly maintain sprinkler systems to prevent leaks and ensure efficient water distribution, supporting sustainable watering practices for a greener environment․

Customer Support and Resources

Contact Gilmour support via phone or website for parts or questions․ Access online manuals and guides for detailed setup, troubleshooting, and maintenance instructions․

10․1 Contacting Gilmour Support

For assistance with your Gilmour sprinkler, contact their support team at (800) 852-2723 or visit their website․ They provide replacement parts, troubleshooting help, and answers to any questions you may have․ Their customer service is dedicated to ensuring your sprinkler system works efficiently and effectively․

10․2 Online Manuals and Guides

Access comprehensive online manuals and guides for Gilmour sprinklers on their official website․ These resources include setup instructions, troubleshooting tips, and detailed product specifications․ They are designed to help you optimize your sprinkler’s performance and address any issues efficiently․ Visit www․gilmour․com for all supporting documents and tutorials․

Safety Precautions

Always follow safety precautions when using Gilmour sprinklers․ Ensure the area is clear of tripping hazards and keep children away․ Avoid electrical exposure and turn off the hose before adjustments․

11․1 Avoiding Accidents

To ensure safe operation, always place the Gilmour sprinkler on a stable, flat surface․ Keep children and pets away while it’s running․ Avoid overwatering, which can cause slippery surfaces․ Regularly inspect hoses for leaks or damage to prevent accidents․ Never leave the sprinkler unattended or operating near electrical outlets․ Ensure the area is clear of obstacles before use to avoid tripping hazards or unintended water spray․

11․2 Electrical Safety

When using Gilmour sprinklers with timers or controllers, ensure all electrical components are kept dry․ Avoid submerging electrical parts in water․ Do not use damaged cords or plugs, as they can cause shocks․ Keep electrical connections away from water sources to prevent hazards․ Always follow the manufacturer’s guidelines for safe installation and operation of any electrical accessories with your sprinkler system․

Best Practices for Optimal Use

Adopt a regular watering schedule to ensure efficient hydration․ Avoid overwatering, as it can harm plants․ Position sprinklers to cover areas evenly, reducing waste and promoting healthy grass growth․

12․1 Scheduling Watering Sessions

Schedule watering sessions during early morning or late evening to minimize evaporation․ Set a consistent routine based on weather conditions and soil moisture levels․ This ensures your lawn receives adequate hydration without overwatering․ Adjust the sprinkler timer according to seasonal changes to optimize water usage and maintain healthy grass growth throughout the year․

12․2 Avoiding Overwatering

Check soil moisture regularly using a meter or the finger test to determine if watering is needed․ Adjust the sprinkler’s schedule according to weather forecasts to skip watering after rain․ Use the sprinkler’s adjustable features to customize spray distance and coverage, ensuring even distribution․ Ensure proper drainage by checking the lawn’s slope and soil composition to prevent water from pooling, which can lead to overwatering and shallow root growth․ This approach helps maintain a healthy lawn while conserving water․