Archive: May 23, 2025

PDF

tactical barbell green protocol pdf

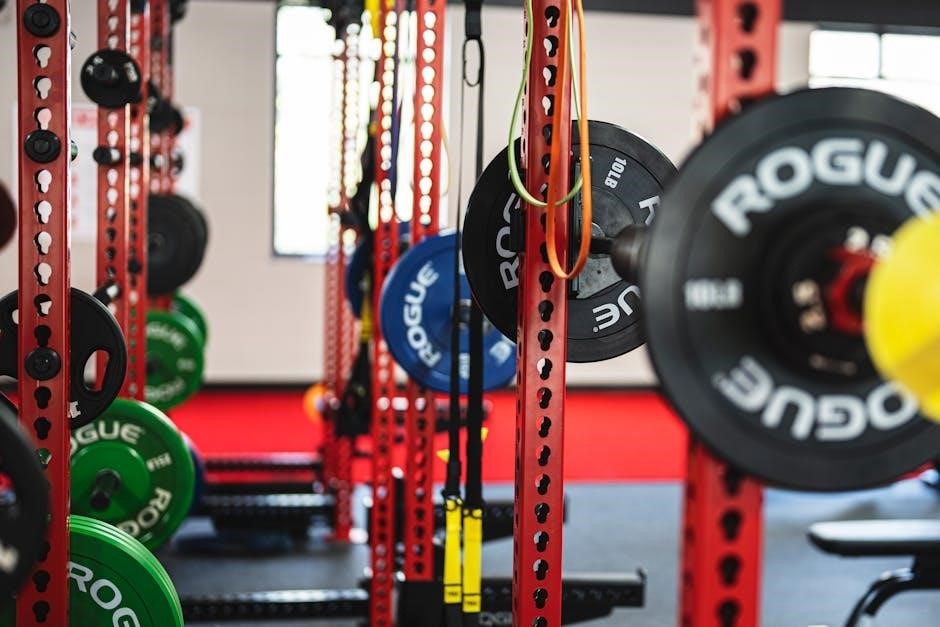
The Tactical Barbell Green Protocol, part of Tactical Barbell II by K. Black, is a comprehensive strength and conditioning system for tactical athletes. Designed for military personnel, law enforcement, and martial artists, it focuses on building functional strength and endurance through barbell training. The protocol emphasizes concurrent periodization, blending strength and conditioning into a single program. It is structured to meet the unique demands of operational roles, offering a modular system for long-term development. This approach ensures athletes achieve both strength and aerobic capacity, making it a cornerstone for tactical fitness.

Overview of the Green Protocol

The Green Protocol is a hybrid strength and conditioning system within Tactical Barbell II, designed for tactical athletes. It combines barbell training with concurrent periodization, blending strength and endurance. Structured into phases like Foundation Capacity and Performance, it builds functional strength and aerobic capacity. The protocol is tailored for combat arms soldiers, law enforcement, and martial artists, offering modular templates for customization. This approach ensures athletes meet operational demands while enhancing overall fitness, making it versatile for various goals.

Key Features and Benefits

The Green Protocol offers a structured, evidence-based approach to strength and conditioning. Its key features include concurrent periodization, blending strength and endurance seamlessly. The program provides adaptable templates and progression models, ensuring customization for individual goals. Benefits encompass enhanced functional strength, improved aerobic capacity, and long-term durability. Designed for tactical roles, it prepares athletes for real-world demands, offering a balanced yet intensive training system. This method ensures sustainable progress and operational readiness, making it a valuable resource for tactical athletes.

Different Protocols Within Tactical Barbell II

Tactical Barbell II includes Base Building, Black, and Green Protocols. Base Building establishes foundational strength, Black focuses on strength for specific roles, and Green emphasizes endurance.

Understanding Base Building, Black, and Green Protocols

The Tactical Barbell II system offers three distinct protocols: Base Building, Black, and Green. Base Building focuses on foundational strength and endurance, serving as a starting point for all athletes. The Black Protocol is designed for high-intensity, short-duration efforts, emphasizing maximum strength and power. In contrast, the Green Protocol is a hybrid model that balances strength with aerobic capacity, making it ideal for roles requiring sustained endurance. Each protocol is tailored to specific operational demands, ensuring athletes can adapt their training to meet their mission requirements effectively.

Why the Green Protocol is Unique

The Green Protocol stands out for its balanced approach to strength and conditioning, making it unique among Tactical Barbell II programs. It integrates concurrent periodization, allowing athletes to develop strength and endurance simultaneously. This method is particularly beneficial for tactical roles requiring both physical resilience and sustained energy. The protocol’s modular design enables customization, ensuring it meets diverse operational needs. Its focus on functional exercises and long-term planning makes it a versatile choice for military personnel, law enforcement, and martial artists seeking a well-rounded fitness regimen.

Training Methodology and Structure

The Tactical Barbell Green Protocol offers a structured training system designed for military and tactical athletes, integrating strength and conditioning exercises to meet operational demands effectively;

Concurrent Periodization Explained

Concurrent periodization in the Tactical Barbell Green Protocol combines strength and conditioning training simultaneously, avoiding the traditional separation of phases. This method ensures continuous progress in both areas, optimizing time for tactical athletes. It integrates barbell exercises with aerobic and anaerobic conditioning, maintaining a balanced approach. The protocol avoids extreme specialization, focusing instead on building a well-rounded athlete capable of meeting diverse operational demands. This structure is ideal for those requiring both strength and endurance, ensuring adaptability and resilience in high-stress environments.

Sample 10-Week Training Plan

The Tactical Barbell Green Protocol includes a structured 10-week training plan designed to build strength and endurance. It is divided into phases, starting with foundation capacity, followed by strength development, and ending with conditioning. Each week focuses on specific exercises like squats, bench presses, and pull-ups, paired with conditioning sessions such as fast runs and rucks. The plan is adaptable, allowing athletes to customize based on their goals and current fitness levels. This approach ensures progressive overload and balanced development, preparing tactical athletes for operational demands effectively.

Target Audience and Applications

The Tactical Barbell Green Protocol is designed for military applicants, soldiers, and tactical athletes requiring endurance and strength. It’s ideal for those needing a structured, hybrid approach to build both aerobic capacity and muscular endurance for operational demands.

Military Personnel and Law Enforcement

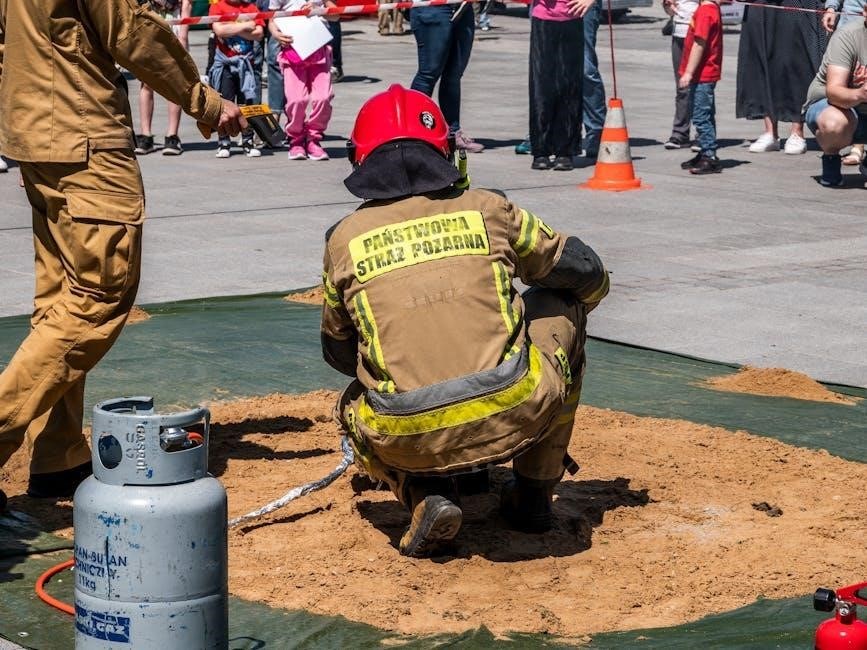
The Green Protocol is tailored for military personnel and law enforcement, focusing on building functional strength and endurance. It integrates concurrent periodization, blending strength and conditioning for operational demands. Designed to enhance aerobic capacity and muscular endurance, it supports long-term planning for selection courses and job-specific tasks. The program’s modular system allows customization, making it adaptable for diverse roles within military and law enforcement sectors. This structured approach ensures athletes meet the physical demands of their roles effectively.

Martial Artists and Tactical Athletes

The Green Protocol is ideal for martial artists and tactical athletes needing a blend of strength, endurance, and aerobic capacity. Its structured approach enhances performance in high-intensity, long-duration scenarios. By integrating barbell training with conditioning, it builds functional strength and durability. The program’s modular design allows customization for specific martial arts or tactical goals. This makes it a valuable resource for athletes seeking to optimize their physical preparedness for competitions, operations, or self-defense. The focus on concurrent periodization ensures balanced development across all fitness domains.

Progression and Customization

The Green Protocol offers a modular system, allowing customization to meet individual goals. It includes adjustable weights, exercises, and periodization to ensure tailored progression for each athlete.

Modular System for Individual Goals

The Tactical Barbell Green Protocol features a modular system designed to adapt to individual goals and needs. Athletes can customize their training by adjusting weights, rep ranges, and intensity levels to suit their objectives. The program allows for tailored progression, whether focusing on endurance, strength, or a combination of both. This flexibility ensures the protocol remains effective for various roles, from military personnel to martial artists. The modular approach also supports long-term planning, enabling athletes to peak for specific events or selections while maintaining overall fitness.

Adjusting Weights and Exercises

The Tactical Barbell Green Protocol allows for tailored adjustments in weights and exercises to suit individual fitness levels and objectives. Athletes can modify training max, rep ranges, and intensity levels to align with their goals. This customization ensures progressive overload and prevents plateaus. The protocol provides structured guidelines for adjusting exercises based on available equipment and specific needs, such as dumbbells or barbells. This adaptability makes the program versatile for different environments and training scenarios, ensuring effective progression regardless of circumstances.

Nutrition and Recovery Guidelines

The Tactical Barbell Green Protocol emphasizes tailored nutrition and recovery strategies to optimize strength and endurance. Proper fueling and rest are critical for peak performance and durability.

Dietary Recommendations

The Tactical Barbell Green Protocol emphasizes a balanced diet rich in protein, carbohydrates, and healthy fats to support strength and endurance. Proper hydration and meal timing are stressed to optimize performance and recovery. The program recommends tailoring nutrition to individual goals, ensuring adequate caloric intake for energy demands. Supplements like protein powder and creatine may be suggested to enhance results. The focus is on fueling the body for both strength training and aerobic capacity, aligning with the protocol’s hybrid approach to fitness.

Importance of Recovery

Recovery is a cornerstone of the Tactical Barbell Green Protocol, ensuring athletes can handle the demands of strength and conditioning training. Adequate rest, sleep, and nutrition are emphasized to prevent overtraining and enhance performance. Techniques like stretching, foam rolling, and active recovery are recommended to maintain mobility and reduce muscle soreness. Proper recovery allows the body to adapt and improve, making it essential for achieving the protocol’s goals of strength and endurance.

Success Stories and Testimonials

The Tactical Barbell Green Protocol has transformed many athletes, with users reporting significant gains in strength and endurance. Its structured approach has earned widespread praise for delivering results.

Case Studies and User Experiences

Many users of the Tactical Barbell Green Protocol have reported significant improvements in strength and endurance. One user, a military applicant, shared how the program helped him prepare for a marathon while maintaining strength gains. Another, a martial artist, noted enhanced performance in matches due to increased aerobic capacity. A law enforcement officer highlighted the protocol’s versatility, adapting it to fit his duty requirements. These real-world applications demonstrate the protocol’s effectiveness in bridging strength and conditioning for operational athletes.

Accessing the Tactical Barbell Green Protocol PDF

The Tactical Barbell Green Protocol PDF is available for purchase on platforms like Amazon and Scribd. It is compatible with all major devices, including Kindle, Android, and iOS.

Where to Download

The Tactical Barbell Green Protocol PDF is available for purchase on platforms like Amazon Kindle, Scribd, and Z-Library. It can also be downloaded from Archive.org and OceanofPDF.com. The PDF is compatible with all major devices, including Kindle, Android, iOS, Windows, and MAC. Users can purchase it directly from the author’s official website or through online retailers. Once purchased, the PDF can be downloaded immediately, ensuring easy access for reading and training on the go. This accessibility makes it convenient for tactical athletes worldwide to adopt the program.

Device Compatibility and Usage

The Tactical Barbell Green Protocol PDF is universally compatible, accessible on Kindle, NOOK, Android, iOS, Windows, and MAC devices. Its high-quality format ensures clarity and readability across screens. Users can easily navigate the document, making it ideal for both on-the-go and at-home planning. The PDF is also printable, allowing athletes to create physical copies for training reference. This versatility ensures that tactical athletes can utilize the program seamlessly, regardless of their preferred device or training environment.

canon 7d mark ii owners manual

The Canon EOS 7D Mark II, released in 2014, is a powerful APS-C DSLR designed for wildlife and sports photography. Its robust features and manual guide ensure photographers master its capabilities, making it a trusted choice for capturing high-quality images and videos efficiently.

1.1 Overview of the Camera and Its Importance

The Canon EOS 7D Mark II is a high-performance APS-C DSLR camera designed for wildlife, sports, and action photography. Released in 2014, it became a favorite among professionals and enthusiasts due to its robust build, fast autofocus, and advanced features. The camera’s manual serves as a comprehensive guide, helping users unlock its full potential and optimize settings for exceptional image and video quality, ensuring it remains a trusted tool in photography.

1.2 History and Evolution of the Canon EOS 7D Series

The Canon EOS 7D Mark II is the successor to the original EOS 7D, launched in 2009. The series was developed to cater to professional photographers needing high-speed performance and precision. Over the years, the camera evolved with advancements in autofocus technology, ISO sensitivity, and video capabilities, solidifying its reputation as a reliable choice for capturing dynamic subjects and delivering exceptional results in challenging environments.

Key Features of the Canon EOS 7D Mark II

The Canon EOS 7D Mark II boasts an advanced autofocus system, high ISO sensitivity, and fast burst mode shooting, making it ideal for wildlife and sports photography.

2.1 Technical Specifications and Hardware Overview

The Canon EOS 7D Mark II features a 20.2MP APS-C CMOS sensor, Dual DIGIC 6 image processors, and a weather-sealed magnesium alloy body. It offers 10fps continuous shooting, a 65-point AF system, and ISO range of 100-16000 (expandable to 51200). The camera supports dual SD/SDHC/SDXC card slots and 1080p Full HD video recording at 60fps, ensuring versatility for both stills and video capture.

2.2 Unique Selling Points for Wildlife and Sports Photography

The EOS 7D Mark II excels in wildlife and sports photography with its rapid 10fps burst mode and 65-point all-cross-type AF system, ensuring precise tracking of fast-moving subjects. Its robust weather-sealing and ergonomic design enhance durability and comfort during extended shoots. The camera’s advanced AI Servo AF III and customizable controls allow photographers to capture sharp images in dynamic environments, making it a top choice for action photography.

Camera Layout and Controls

The EOS 7D Mark II features an ergonomic design with intuitive button placement, ensuring easy access to controls for enhanced usability during photography sessions.

3.1 Exterior Button and Dial Layout

The Canon EOS 7D Mark II boasts a well-organized exterior design with strategically placed buttons and dials. The top plate features a mode dial, ISO button, and a multi-function button for quick adjustments. On the rear, photographers will find buttons for playback, menu navigation, and autofocus controls. The multi-controller allows for intuitive AF point selection. The front includes a shutter button and a customizable front dial, enabling seamless control during shoots. This ergonomic layout ensures efficient operation, catering to both professionals and enthusiasts, while allowing for customization to suit individual shooting styles.

3.2 Understanding the Mode Dial and Shooting Modes

The Canon EOS 7D Mark II’s Mode Dial offers various shooting modes to cater to different photography needs. Auto mode provides point-and-shoot simplicity, while P (Program) mode offers automatic settings with user adjustments. Tv (Time Value) mode allows control over shutter speed, ideal for capturing motion or freezing action. Av (Aperture Value) mode lets you set the aperture for depth-of-field control, perfect for portraits or landscapes. M (Manual) mode grants full control over both aperture and shutter speed for creative exposure management. Additional options include Creative Filters for artistic effects. Mastering these modes enhances your photography skills and allows for tailored shooting experiences.

Autofocus System

The Canon EOS 7D Mark II features a robust 65-point all-cross-type AF system, offering precise subject tracking and enhanced accuracy. Advanced modes like AI Servo AF III ensure superior performance for dynamic subjects, while customizable AF settings allow photographers to tailor the system to their specific needs for optimal results in various shooting scenarios.

4.1 Advanced Autofocus Features and Settings

The Canon EOS 7D Mark II boasts a sophisticated 65-point all-cross-type AF system, offering exceptional precision and versatility. Advanced features include AI Servo AF III for predictive tracking, AF Area Selection modes like Single Point, Zone AF, and Large Zone AF, and customizable AF settings such as AF Sensitivity and Acceleration/Deceleration. Users can also adjust AF point selection and utilize the AF Configuration Tool for tailored performance, ensuring optimal focus in dynamic shooting environments.

4.2 Customizing Autofocus for Different Shooting Scenarios

The Canon EOS 7D Mark II allows users to tailor autofocus settings for specific scenarios. Options include AF Point Selection, AF Mode (One-Shot, AI Focus, AI Servo), and AF CASE settings for dynamic situations like wildlife or sports. Customizable AF Sensitivity and Acceleration/Deceleration settings further refine performance, enabling precise control over focus acquisition and tracking, ensuring sharp results in diverse shooting conditions by adapting to the unique demands of each scene.

Image Quality and Settings

The Canon EOS 7D Mark II delivers exceptional image quality with its 20.2MP APS-C sensor. It offers a wide ISO range (100-16000) and customizable white balance for precise color control, ensuring optimal results in various lighting conditions while supporting RAW and JPEG file formats for flexibility in post-processing and sharing, tailored to professional and enthusiast photographers alike.

5.1 ISO Sensitivity and Noise Performance

The EOS 7D Mark II features an ISO range of 100 to 16000 (expandable to 51200) providing versatility in low-light conditions. Its advanced sensor and noise reduction technology minimize grain, ensuring crisp images even at higher sensitivities. Photographers can confidently shoot in challenging environments, delivering clear results without compromising quality, making it ideal for sports and wildlife photography where lighting conditions are unpredictable and fast action demands quick adjustments for optimal image capture every time.

5.2 White Balance and Color Accuracy

The EOS 7D Mark II offers precise white balance control, ensuring accurate color representation in various lighting conditions. It features multiple presets, including Auto, Daylight, Shade, Tungsten, and Fluorescent, as well as custom settings for fine-tuning. The camera’s advanced color processing enhances skin tones and natural hues, delivering vibrant and lifelike images. This makes it ideal for capturing scenes with complex lighting, providing photographers with reliable tools for maintaining color fidelity and visual consistency in their work.

5.3 File Formats and Image Size Options

The EOS 7D Mark II supports various file formats, including JPEG, RAW (CR2), and RAW+JPEG. RAW files capture maximum image data for post-processing flexibility, while JPEGs are ideal for direct use. The camera offers multiple image size options, ranging from 5472×3648 pixels (Large) to 720×480 pixels (Small). These options allow photographers to balance file size and resolution based on their needs, ensuring efficient storage and optimal image quality for different shooting scenarios.

Customizing the Camera

The EOS 7D Mark II allows photographers to tailor settings to their preferences. Custom shooting modes (C1, C2, C3) and My Menu enable personalized workflows for efficiency and creativity.

6.1 Creating Custom Shooting Modes (C1, C2, C3)

The Canon EOS 7D Mark II allows users to save custom settings as C1, C2, or C3 modes. These modes enable quick access to frequently used settings, streamlining workflows. By registering settings like ISO, autofocus, and white balance, photographers can tailor modes for specific scenarios. Accessing these modes is simple via the mode dial, ensuring efficiency during shoots. This feature is particularly useful for adapting to changing conditions in wildlife or sports photography, where time is critical. The manual provides detailed steps for creating and managing these custom modes, enhancing personalization and productivity.

6.2 Personalizing the Camera with My Menu

The Canon EOS 7D Mark II’s My Menu feature allows photographers to customize their shooting experience by registering frequently used settings. Users can organize up to six personalized menu items for quick access, ensuring efficiency during shoots. This feature is particularly useful for streamlining workflows and saving time. The manual provides detailed guidance on how to set up and manage My Menu, enabling photographers to tailor the camera to their specific needs and preferences effectively.

Memory and Storage

The Canon EOS 7D Mark II supports CF and SD memory cards, ensuring compatibility for high-speed data transfer. Proper storage management is essential for efficient file organization.

7.1 Compatible Memory Card Types and Recommendations

The Canon EOS 7D Mark II supports CF (CompactFlash) and SD (Secure Digital) memory cards. For optimal performance, use CF UDMA Mode 7 cards for faster data transfer speeds. SD, SDHC, and SDXC cards are also compatible, with UHS-I support for improved write speeds. Choose high-speed memory cards for burst mode and video recording. Ensure storage capacity matches your shooting needs, selecting larger cards for RAW or high-resolution images. Always opt for reputable brands to avoid data loss or corruption.

7.2 Managing and Organizing Files

Organizing files on your Canon EOS 7D Mark II is essential for efficient workflow. Use the camera’s folder creation feature to categorize images by date or event. When transferring files to a computer, use software like Canon’s Image Transfer Utility to automatically sort and rename images. Regularly back up files to an external drive or cloud storage to prevent data loss. Maintain a consistent naming convention for easy retrieval and organization of your photos and videos.

Shooting Modes and Techniques

The Canon EOS 7D Mark II offers various shooting modes, including Auto, Program, Shutter Priority, Aperture Priority, and Manual, providing flexibility for different photography scenarios. Mastering these modes enhances creative control and image quality.

8.1 Understanding Auto, P, Tv, Av, and M Modes

The Canon EOS 7D Mark II offers multiple shooting modes to suit various photography needs. Auto mode simplifies shooting, while P (Program) mode allows basic adjustments. Tv (Shutter Priority) controls shutter speed, ideal for freezing or blurring motion. Av (Aperture Priority) adjusts aperture for depth of field, and M (Manual) mode offers full creative control. Understanding these modes enables photographers to capture images with precision and artistic intent, as detailed in the manual.

8.2 Tips for Shooting in Manual Mode

Mastering Manual (M) mode on the Canon EOS 7D Mark II requires balancing aperture, shutter speed, and ISO. Use the exposure compensation button to fine-tune settings and ensure proper lighting. Regularly review histograms to avoid overexposure. Utilize the rear dial for aperture adjustments and the main dial for shutter speed. Customizing buttons can streamline your workflow, allowing quick access to essential settings during shoots, as outlined in the manual for optimal control and creativity.

Video Capabilities

The Canon EOS 7D Mark II supports 1080p video at 60fps, enabling smooth motion capture. Manual controls allow precise adjustments for exposure and audio, ensuring high-quality recordings.

9.1 Video Recording Settings and Frame Rates

The Canon EOS 7D Mark II offers versatile video recording options, including 1080p at 60fps for smooth motion. It also supports 24p and 30p frame rates, catering to cinematic and broadcast needs. Users can choose between ALL-I and IPB compression methods for balance between file size and quality. Manual controls allow adjustments to exposure, ISO, and audio levels during recording, ensuring precise control over video output.

9.2 Best Practices for Capturing High-Quality Video

For high-quality video, use a tripod or handheld stabilizer to minimize camera shake. Utilize prime lenses for better low-light performance and shallower depth of field. Enable manual focus to avoid autofocus noise during recording. Ensure proper lighting to reduce noise and optimize color accuracy. Record in Manual mode for full control over exposure, ISO, and shutter speed. Use an external microphone for clearer audio. Refer to the manual for personalized settings to achieve the best results.

Maintenance and Troubleshooting

Regularly clean the sensor with a swab, avoid liquid contact, and use a brush for dust. Refer to the manual for detailed guidelines to ensure optimal performance and prevent damage.

10.1 Cleaning the Camera Sensor and Lens

Regular maintenance is crucial for optimal performance. To clean the sensor, use a dry swab or brush, avoiding liquid contact. Gently wipe the lens with a microfiber cloth. For detailed cleaning, refer to the Canon EOS 7D Mark II manual, which provides step-by-step guidelines to ensure safe and effective maintenance, preventing damage and maintaining image quality.

10.2 Updating Firmware and Software

Keeping your Canon EOS 7D Mark II up to date ensures optimal performance. Download the latest firmware and software from Canon’s official website. Select your camera model, follow on-screen instructions, and install updates carefully; Avoid interrupting the process to prevent potential issues. Regular updates enhance functionality, security, and compatibility, ensuring your camera operates at its best. Refer to the manual for detailed steps and troubleshooting tips to maintain peak performance.

10.3 Common Issues and Solutions

Common issues with the Canon EOS 7D Mark II include buffer capacity limitations during burst shooting and occasional focus accuracy concerns in low-light conditions. Overexposed images may occur if metering settings are not adjusted properly. To resolve these, ensure proper card formatting, reset camera settings, and update firmware regularly. For persistent issues, refer to Canon’s troubleshooting resources or contact support for professional assistance to maintain optimal camera performance.

Resources and Support

Canon offers comprehensive support, including downloadable manuals, software, and firmware updates for the EOS 7D Mark II. Visit their official website for troubleshooting and online community forums.

11.1 Accessing the Official Canon EOS 7D Mark II Manual

The official Canon EOS 7D Mark II manual is available as a downloadable PDF from Canon’s website. It provides detailed instructions on camera settings, features, and troubleshooting. Users can easily navigate through the manual using Adobe Reader 6.0 or later. The guide covers technical specifications, autofocus systems, and shooting modes, ensuring photographers can fully utilize their camera’s capabilities. Regular updates are also available to keep the manual current.

11.2 Online Communities and Forums for Support

Online communities and forums are invaluable resources for Canon EOS 7D Mark II users. Platforms like Canon forums, social media groups, and photography websites offer spaces to share experiences, ask questions, and learn from experts. These communities provide tips, troubleshooting advice, and insights into optimizing camera settings. Engaging with fellow photographers fosters learning and helps users unlock the full potential of their camera, ensuring they stay updated on best practices and techniques.

dtf transfer instructions

Discover the essentials of DTF transfer instructions, a popular method for creating custom apparel. Learn how to achieve vibrant, durable designs with easy-to-follow steps and expert tips.

Overview of DTF Transfers

DTF (Direct-to-Film) transfers are a modern method for creating custom designs on fabrics. They allow for vibrant, full-color prints on various materials, including cotton, polyester, and blends, without pre-treatment. The process involves printing designs onto a special film, applying adhesive powder, and transferring the design to the garment using heat and pressure. DTF transfers are known for their durability, wash resistance, and soft finish, making them ideal for custom apparel, promotional products, and creative projects. Unlike traditional screen printing, DTF transfers require minimal setup and are suitable for small to medium-sized orders. This method is gaining popularity due to its efficiency and cost-effectiveness. With the right tools, such as a heat press and DTF film, anyone can achieve professional-looking results. The process is versatile, allowing for intricate designs and photorealistic images, making it a favorite in the custom printing industry.

Preparing the Workspace and Garment

A clean, flat workspace and properly prepared garment are crucial for a smooth DTF transfer process. Ensure the garment is wrinkle-free and dry for optimal results and professional finish.

Step 1: Clean and Prepare the Garment

Cleaning and preparing the garment is the first crucial step in the DTF transfer process. Start by washing and drying the garment to remove any dirt, oils, or finishes that might interfere with the transfer. Ensure the fabric is completely dry and free of wrinkles. For best results, use a lint roller to remove any loose fibers or debris from the surface of the garment. This step ensures a smooth, even application of the DTF transfer, promoting durability and a professional finish. Proper preparation also helps prevent issues like peeling or uneven adhesion, making it essential for achieving long-lasting, high-quality designs.

Step 2: Preheat the Heat Press

Preheating the heat press is a critical step in the DTF transfer process. Begin by turning on the heat press and setting the temperature according to the manufacturer’s guidelines, typically between 110°C and 160°C, depending on the fabric type. Allow the press to reach the desired temperature, ensuring it is evenly heated. This step ensures the heat press is ready to apply consistent pressure and heat, which are essential for a successful transfer. Proper preheating also helps prevent issues like uneven adhesion or incomplete curing of the design. Once the press is preheated, place the prepared garment on the press, smoothing out any wrinkles to create a flat surface. This ensures optimal contact between the garment and the DTF transfer, leading to a professional and long-lasting result.

The DTF Transfer Process

The DTF transfer process involves printing designs on special film, applying adhesive powder, curing the design, and transferring it to fabric using heat and pressure for a durable finish.

Step 1: Print Your Design on DTF Film

Start by printing your design on DTF (Direct-to-Film) transfer film using a compatible printer. Ensure high-resolution settings for vibrant colors and crisp details. Use sublimation or eco-solvent inks, depending on your printer type. Mirror the design if required, as it will be reversed when transferred. Print on the coated side of the film to ensure proper ink adhesion. Check the film’s specifications for optimal printing temperature and ink settings. Allow the ink to dry completely before proceeding to the next step. Proper printing is crucial for a successful transfer, so double-check alignment and color accuracy before moving forward. This step sets the foundation for a professional-looking finish, so attention to detail is key. Once printed, your design is ready for the next stage in the DTF process.

Step 2: Apply Hot Melt Adhesive Powder

After printing your design on the DTF film, the next step is to apply hot melt adhesive powder. This step is crucial for ensuring the design adheres properly to the fabric during the transfer process. Once the ink is completely dry, evenly spread the hot melt adhesive powder over the printed design using a brush or a squeegee. Ensure full coverage without overloading the film. The powder should only adhere to the printed areas, creating a strong bond between the film and the fabric. Cure the powder by placing the film under a heat press set to the recommended temperature, typically between 300°F and 320°F (150°C to 160°C), for about 10 to 15 seconds. This step activates the adhesive properties of the powder. Proper curing ensures the design will transfer smoothly and last longer on the garment. Avoid overheating, as it may damage the film or affect the design quality. Once cured, the film is ready for the transfer process.

Step 3: Cure the Design

Curing the design is a critical step in the DTF transfer process. Once the hot melt adhesive powder is applied, place the DTF film under a heat press or in a curing oven. Set the temperature between 300°F and 320°F (150°C to 160°C) and the timer for 10 to 15 seconds. This process activates the adhesive properties of the powder, ensuring a strong bond between the film and the fabric. Light pressure is recommended during curing to prevent air bubbles or uneven adhesion. After curing, allow the film to cool slightly before proceeding. Proper curing ensures the design transfers smoothly and adheres durably to the garment. Avoid overheating, as it may damage the film or cause the powder to become brittle. Once cured, the design is ready for the final transfer step.

Step 4: Transfer the Design to Fabric

Transfer the cured DTF design to the prepared fabric using a heat press. Place the garment on the press, ensuring the fabric is smooth and wrinkle-free. Position the DTF film with the design face down on the garment, aligning it as desired; Cover the film with a protective sheet to prevent direct contact with the press. Set the heat press to 300°F to 320°F (150°C to 160°C) with medium to high pressure. Press for 10 to 15 seconds, depending on the fabric type and design complexity. After pressing, allow the garment to cool slightly before peeling the carrier sheet. Peel slowly and carefully to ensure the design transfers completely. If any part of the design lifts with the carrier, reapply heat and pressure for a few seconds. Once peeled, inspect the transfer for clarity and adhesion, ensuring a professional finish.

Pressing Instructions for DTF Transfers

Master the pressing process for DTF transfers with detailed steps, ensuring optimal temperature, pressure, and timing for a flawless finish on various fabrics and designs.

Step 1: Position the Transfer on the Garment

Accurate positioning is crucial for a professional finish. Place the garment on a heat press and align the DTF transfer with the desired area, ensuring it is centered and smooth. Use thermal tape to secure the transfer, preventing movement during pressing. Pre-press the garment to remove wrinkles, creating a flat surface for optimal adhesion. Double-check the placement before proceeding to avoid misalignment. Proper alignment ensures the design looks sharp and professional, making this step essential for achieving high-quality results.

Step 2: Apply Heat and Pressure

Once the transfer is positioned, place a cover sheet over it to protect the garment and ensure even heat distribution. Set the heat press to the recommended temperature (typically between 160°F and 320°F, depending on the fabric type) and apply medium to high pressure. Press for 10-15 seconds, depending on the material and design complexity. Proper heat and pressure are critical for transferring the design effectively. Ensure the heat press is preheated and the garment is wrinkle-free for optimal results.

If using an iron, place it on a medium to high setting and apply steady pressure for 10-15 seconds. Avoid moving the iron during the process to prevent smudging. The heat and pressure will activate the adhesive, bonding the design to the fabric. This step is essential for achieving a durable and long-lasting transfer.

Step 3: Peel the Carrier Sheet

After applying heat and pressure, allow the transfer to cool slightly before peeling the carrier sheet. This step is crucial for ensuring the design adheres properly to the fabric. Gently lift one corner of the carrier sheet and peel it off in a smooth, steady motion. For best results, peel in one direction, either hot or cold, depending on the transfer type. If peeling hot, do so immediately after pressing; for cold peeling, wait 10-15 seconds. Be careful not to pull too quickly, as this could stretch or distort the design. If any part of the transfer lifts with the carrier sheet, reapply heat and pressure, then try peeling again. Proper peeling ensures a sharp, vibrant design that lasts. Patience and gentle handling are key to achieving professional-looking results. This step finalizes the transfer process, leaving your design securely on the garment.

Post-Application Care

Allow the transfer to cool completely before handling. Wash garments inside out using mild detergent and cold water. Avoid bleach or direct ironing on the design for longevity.

Step 1: Allow the Transfer to Cool

Allowing the transfer to cool is a critical step in ensuring the longevity and durability of your DTF design. After pressing, the adhesive and ink need time to fully cure and bond with the fabric. Let the garment cool completely to room temperature before handling or washing. This step prevents the transfer from peeling or cracking due to premature stretching or movement; The cooling process typically takes about 10-15 minutes, depending on the thickness of the fabric and the ambient temperature. During this time, avoid touching or bending the garment, as this could disrupt the adhesive’s setting process. Once cooled, the transfer will be soft to the touch and securely adhered to the fabric. Proper cooling ensures a professional finish and maintains the vibrant colors of your design.

By following this step, you ensure the transfer adheres properly and lasts through multiple washes. Neglecting this step could lead to poor adhesion and a shorter lifespan for the design.

Step 2: Wash and Dry Instructions

To maintain the quality and longevity of your DTF transfer, proper washing and drying techniques are essential. Turn the garment inside out before washing to protect the design from friction. Use cold water and a mild detergent to avoid damaging the adhesive or fading the colors. Avoid using fabric softeners or bleach, as they can weaken the bond between the transfer and the fabric. Gently wash the garment by hand or use a delicate cycle in a washing machine.


When drying, air-dry the garment or use a low heat setting in a dryer. High heat can cause the transfer to peel or crack. Ironing is not recommended, but if necessary, cover the design with a parchment paper and use a low heat setting. By following these care instructions, your DTF transfer will remain vibrant and intact for a long time.

PDF

printable the love dare list 1-40 pdf

The Love Dare is a transformative 40-day challenge designed to strengthen marriages through intentional acts of love and kindness. Based on the bestselling book by Stephen and Alex Kendrick, this practical guide provides daily dares to help couples demonstrate love, patience, and forgiveness, fostering deeper connections and reigniting passion. Each day offers a specific action or reflection, rooted in biblical principles, to help spouses grow closer to God and each other. The Love Dare has become a powerful tool for couples seeking to revitalize their relationship and build a stronger, more loving foundation.

Overview of the 40-Day Challenge

The Love Dare is a structured 40-day journey designed to help couples strengthen their marriage through daily acts of love, kindness, and sacrifice. Each day presents a specific challenge, guiding participants to demonstrate love practically. The dares are grounded in biblical principles, encouraging couples to reflect on their actions and attitudes. From patience and forgiveness to humility and prayer, the challenges gradually deepen emotional and spiritual connections. The printable PDF format makes it easy to follow along, with each day’s dare offering clear, actionable steps. This intentional approach fosters lasting change, helping couples build a stronger, more loving relationship.

Importance of Printable PDF Format

Importance of Printable PDF Format

The printable PDF format of the Love Dare list is essential for its accessibility and convenience. It allows couples to easily access and follow the 40-day challenge without relying on digital devices, making it ideal for daily reflection and planning. The PDF preserves the structured layout of the dares, ensuring clarity and readability. By printing it, couples can mark progress, jot down thoughts, and keep the list handy for quick reference. This format also eliminates potential printing errors, providing a consistent and reliable resource for embarking on the transformative journey of the Love Dare challenge.

How to Download the Love Dare List 1-40 PDF

Visit the official website to download the Love Dare List 1-40 PDF. This printable format ensures easy access and readability for the 40-day daily challenge.

Step-by-Step Guide to Accessing the PDF

Accessing the Love Dare List 1-40 PDF is straightforward. Visit the official website or trusted sources online. Use search engines to find reliable links. Download the PDF directly from the site or through platforms offering free resources; Ensure the source is verified to avoid unauthorized content. Once downloaded, save it to your device for easy access. Print the PDF to use as a daily guide for the 40-day challenge. This format allows you to follow each dare effortlessly, making it a convenient tool for strengthening your relationship. The printable version ensures clarity and portability, helping you stay committed to the journey.

Benefits of Using a Printable Version

A printable Love Dare List 1-40 PDF offers numerous advantages for couples embarking on the challenge. The portability of a printed copy allows you to carry it anywhere, ensuring you never miss a day. Writing down reflections and notes directly on the pages enhances engagement and personalization. A physical copy also eliminates distractions from digital devices, helping you focus on the content. Additionally, sharing the printed version with your spouse fosters collaboration and mutual accountability. The clarity of a printed format makes it easier to track progress and stay committed to the 40-day journey, fostering meaningful change in your relationship.

Understanding the Structure of the Love Dare

The Love Dare is structured as a daily guide with 40 specific challenges, each accompanied by Bible verses and practical actions to apply love intentionally in marriage.

Daily Challenges and Their Significance

Each day of the Love Dare presents a unique challenge designed to foster personal growth and strengthen relationships. These challenges encourage couples to demonstrate love through patience, kindness, and selflessness. For instance, Day 1 focuses on patience, urging couples to avoid negative words and actions. Other days address forgiveness, prayer, and serving one another. Completing these challenges helps couples break harmful patterns and build a stronger, more loving connection. By following the daily dares, couples can experience a deeper understanding of biblical love and its transformative power in their marriage.

Key Bible Verses and Their Role

The Love Dare is deeply rooted in biblical principles, with each challenge supported by key Bible verses. Verses like 1 Corinthians 13:4-7, which defines love as patient, kind, and selfless, serve as the foundation for the daily dares. These scriptures guide couples in understanding and demonstrating God’s love in their relationship. By meditating on these verses, couples can align their actions with God’s definition of love, fostering a deeper spiritual connection. The inclusion of Bible verses in the Love Dare PDF emphasizes the importance of prayer and reflection in transforming marriages, making it a powerful tool for spiritual and relational growth.

Practical Benefits of the Love Dare

The Love Dare offers practical tools to strengthen relationships through intentional actions, fostering improved communication, empathy, and understanding. By focusing on daily, actionable steps, couples can build a stronger, more loving connection, enhancing their marital bond and deepening their commitment to one another.

Strengthening Marriage Through Intentional Actions

The Love Dare challenges couples to take intentional steps toward demonstrating love and patience. Each day focuses on actions like showing kindness, forgiving, or practicing humility. By committing to these practices, couples can break negative patterns and foster a deeper emotional connection. The daily dares encourage spouses to prioritize their relationship, leading to improved communication and conflict resolution. This structured approach helps couples move beyond mere feelings to intentional, God-honoring actions, creating a stronger, more resilient marriage. The printable PDF format makes it easy to follow and apply these principles consistently, ensuring lasting positive changes in the relationship.

Reigniting Passion and Deepening Connection

The Love Dare helps couples reconnect emotionally and spiritually, reigniting passion through intentional acts of love. Daily challenges encourage meaningful interactions, such as writing love notes, surprise gifts, and heartfelt conversations. These actions foster intimacy and create opportunities to express affection, helping couples move beyond routine. By focusing on each other’s needs and desires, spouses can rebuild emotional closeness and deepen their connection. The printable PDF format ensures accessibility, making it easy to follow the 40-day journey. Through these efforts, couples can rekindle the spark in their relationship, leading to a more fulfilling and passionate marriage.

Success Stories and Testimonials

Couples worldwide share inspiring stories of transformed marriages through the Love Dare. Many credit the challenge with saving their relationships, reigniting passion, and fostering deeper emotional bonds.

Testimonials highlight how the daily dares helped spouses reconnect, forgive, and grow closer to God and each other, creating lasting positive changes in their marriages and families.

Real-Life Examples of Transformation

Couples have shared incredible stories of how the Love Dare transformed their marriages. Soldiers returning from war used the challenge to rebuild their relationships, while empty nesters reignited passion and connection. Many testified to the program’s ability to foster forgiveness, deepen emotional bonds, and strengthen communication. One couple credited the dare with saving their marriage from divorce, while others highlighted how it brought them closer to God and each other. These real-life examples demonstrate the profound impact of the Love Dare in creating lasting, positive changes in relationships, proving it to be a powerful tool for marital renewal and growth.

Impact on Couples and Relationships

The Love Dare has profoundly impacted countless couples, fostering a culture of patience, kindness, and forgiveness in their relationships. By addressing communication issues and reigniting passion, it helps couples move from conflict to connection. Soldiers returning from war and empty nesters alike have credited the dare with revitalizing their marriages. The daily challenges encourage intentional acts of love, creating a ripple effect of positive change. This 40-day journey not only strengthens marital bonds but also deepens spiritual connections, proving its effectiveness in transforming relationships and fostering lasting love and understanding between partners.

The Love Dare is a life-changing 40-day journey that transforms relationships through intentional acts of love and kindness, reigniting passion and fostering deeper connections. By embracing its challenges, couples can build a stronger, more loving foundation, experiencing lasting impact long after the dare concludes. It’s a powerful reminder that love requires effort and dedication, offering hope and renewal to marriages seeking transformation.

Encouragement for Embarking on the Challenge

Embarking on the Love Dare is a courageous step toward strengthening your marriage. This 40-day journey is designed to help couples reconnect and deepen their relationship through intentional acts of love. Each day presents a new opportunity to demonstrate patience, kindness, and understanding, fostering a stronger bond. The printable PDF format makes it easy to follow and share, ensuring you stay committed to the challenge. Remember, every effort you make is an investment in your relationship, leading to a more fulfilling and loving partnership. Take the first step today and watch your marriage transform.

Long-Term Effects of Completing the Dare

Completing the Love Dare fosters lasting changes in relationships, cultivating a deeper emotional connection and stronger bond between couples. The daily challenges encourage consistent acts of love, leading to long-term improvements in communication and mutual understanding. Many couples report sustained growth in patience, kindness, and forgiveness, creating a more loving and supportive environment. The practical steps taken during the dare often become ingrained habits, promoting a healthier marriage. By focusing on biblical principles, couples not only strengthen their relationship with each other but also deepen their connection with God, leading to a more resilient and fulfilling partnership.

shop vac owner’s manual

Welcome to the Shop Vac Owner’s Manual, your guide to understanding and operating your wet/dry vacuum effectively. This manual provides essential information on safety, usage, and maintenance to ensure optimal performance and longevity of your appliance. Designed for both novice and experienced users, it covers everything from basic operation to troubleshooting common issues; By following the instructions and guidelines outlined here, you’ll be able to use your Shop Vac confidently and safely for all your cleaning needs.

1.1 Overview of the Shop Vac and Its Purpose

The Shop Vac is a versatile wet/dry vacuum designed for efficient cleanup in various settings, from workshops to homes. It excels at handling debris, liquids, and dust, making it ideal for both small and large-scale cleaning tasks. With multiple models available, it offers tailored solutions for different user needs. Equipped with essential accessories like wands and hoses, the Shop Vac ensures comprehensive cleaning capabilities. This manual provides the necessary guidance to optimize its performance and adapt it to diverse cleaning scenarios effectively.

1.2 Importance of Reading the Manual

Reading the Shop Vac Owner’s Manual is essential for safe and effective use of your wet/dry vacuum; It provides critical safety precautions, operation guidelines, and maintenance tips to prevent accidents and ensure longevity. The manual also helps users understand the appliance’s features, troubleshooting common issues, and optimizing performance. By following the instructions, you can avoid potential hazards and make the most of your Shop Vac’s capabilities. It is a vital resource for both novice and experienced users to ensure reliable and efficient cleaning results.

1.3 Scope of the Manual

This manual provides comprehensive guidance for the safe and effective use of your Shop Vac wet/dry vacuum. It covers essential topics such as safety precautions, assembly, operation, maintenance, and troubleshooting. Additionally, it includes details on using attachments, emptying the tank, and replacing filters; The manual also offers resources for further support, ensuring you have everything needed to maximize your Shop Vac’s performance. By following the instructions, you can enjoy efficient and reliable cleaning results while maintaining the appliance’s longevity.

Safety Precautions and Warnings

Always follow safety guidelines to avoid accidents. Read all instructions before use, ensure proper ventilation, and avoid hazardous materials. Save these instructions for future reference and contact customer service if issues arise.

2.1 General Safety Guidelines

Always read and understand all safety instructions before using your Shop Vac. Ensure proper ventilation when operating in enclosed spaces to avoid inhaling dust or fumes. Avoid using damaged cords or exposing the vacuum to water. Never use the vacuum near open flames or sparks, and keep it out of reach of children. Wear safety goggles and gloves when operating. Regularly inspect the vacuum for damage and ensure all parts are securely attached before use. Follow these guidelines to ensure safe and effective operation.

2.2 Specific Warnings for Wet/Dry Vacuum Use

When using the Shop Vac for wet or dry cleanup, avoid handling hazardous materials like lead paint or asbestos. Never submerge the motor in water or use the vacuum near open flames. Ensure the tank is empty and dry before storing. Avoid using damaged hoses or filters, as they may cause electrical issues. Always disconnect the power cord when emptying the tank or performing maintenance. Follow these precautions to prevent accidents and ensure safe operation of your wet/dry vacuum.

2.3 Emergency Procedures

In case of an emergency, immediately turn off and unplug the Shop Vac. If the power cord is damaged, avoid using the vacuum until it’s repaired. For spills or leaks, contain the area and clean carefully. Never attempt to repair the vacuum while it’s in operation. If the motor overheats, allow it to cool before restarting. In case of serious damage or malfunction, contact Shop-Vac customer service for professional assistance. Always prioritize safety and follow proper procedures to prevent accidents;

Understanding the Shop Vac Owners Manual

This manual is designed to guide users through safe and effective operation of their Shop Vac. It covers safety, usage, and maintenance, ensuring optimal performance and longevity. Organized for easy navigation, it includes detailed instructions for assembly, operation, and troubleshooting, making it an essential resource for both new and experienced users to get the most out of their wet/dry vacuum.

3.1 Structure and Content of the Manual

The Shop Vac Owner’s Manual is divided into clear sections for easy navigation. It begins with an introduction, followed by safety precautions, understanding the manual, assembly, operation, maintenance, troubleshooting, and additional resources. Each chapter is designed to address specific aspects of the vacuum’s use and care, ensuring users can quickly find the information they need. The manual includes detailed instructions, diagrams, and troubleshooting guides, making it a comprehensive resource for both novice and experienced users to optimize their Shop Vac experience.

3.2 How to Interpret Symbols and Terminology

The manual uses specific symbols and terminology to convey important information. Symbols like warning signs or assembly instructions are clearly defined to ensure safe and proper use. Terms such as “wet pickup” or “dry pickup” are explained to help users understand their functions. The manual also includes a glossary of technical terms to aid comprehension. Familiarizing yourself with these symbols and definitions will enhance your understanding and ensure safe, effective operation of your Shop Vac wet/dry vacuum cleaner.

Assembly and Installation

Begin by unpacking and inventorying all parts. Follow the step-by-step assembly instructions provided in the manual. Ensure all components are securely connected for proper function and safety.

4.1 Unpacking and Inventory of Parts

Begin by carefully unpacking your Shop Vac and verifying all components against the parts list in the manual. Ensure the vacuum, hose, wands, filters, and accessories are included. Inspect each part for damage or defects. If any items are missing or damaged, contact Shop Vac Customer Service immediately. Organize the parts to ensure a smooth assembly process. Refer to the manual for a detailed inventory checklist to confirm everything is accounted for before proceeding with assembly.

4.2 Step-by-Step Assembly Instructions

Start by attaching the hose to the vacuum’s intake port, ensuring a secure connection. Next, connect the wand to the hose, tightening firmly. If your model includes extensions, attach them to the wand. Important: Ensure all connections are tight to maintain proper suction. Now, install the filter according to the manual’s instructions. Finally, place the dust bag or drum in position and confirm all parts are correctly aligned. Refer to the manual’s diagrams for specific assembly details and torque specifications. Double-check all connections before powering on the unit.

4.3 Initial Setup and Configuration

After assembling your Shop Vac, ensure all components are properly aligned and secure. Begin by checking for any missing or damaged parts, referencing the parts list in the manual. Place the vacuum on a level surface and attach the power cord securely. Select the appropriate filter based on whether you’re handling dry or wet debris, as specified in the manual. Finally, plug in the unit and test it at a low setting to ensure proper function. This initial setup ensures safe and effective operation.

Operating the Shop Vac

Discover how to operate your Shop Vac for both wet and dry cleanup jobs. Learn about basic controls, attachment usage, and safety tips for effective cleaning.

5.1 Basic Operation for Dry Pickup

For dry pickup, ensure the vacuum is set to “dry” mode. Plug in the unit, attach the dry pickup wand, and adjust suction settings as needed. Always use the correct attachments for dry debris to maintain efficiency. Keep the wand moving to prevent clogging and empty the tank when it reaches half capacity. Regularly inspect and clean filters to ensure optimal performance. Follow safety guidelines to avoid overloading the machine and maintain a clean working environment.

5.2 Wet Pickup Operation and Precautions

For wet pickup, switch the vacuum to “wet” mode and ensure the tank is empty of dry debris. Attach the wet pickup nozzle and begin vacuuming slowly to avoid splashing. Always unplug the unit before emptying the tank to prevent electrical hazards. Avoid vacuuming corrosive or flammable liquids. Regularly inspect the tank and hose for blockages. After use, rinse the tank thoroughly and dry it to prevent mold growth. Follow these precautions to ensure safe and effective wet cleanup operations.

5.3 Using Attachments and Accessories

Your Shop Vac comes with a variety of attachments designed for specific cleaning tasks. Use the crevice tool for tight spaces, the brush nozzle for delicate surfaces, and the wet pickup nozzle for liquid spills. Always ensure attachments are securely connected to maintain suction power. For heavy-duty jobs, consider additional accessories like extension wands or foam filters. Store accessories in a dry place to prevent damage. Regularly inspect and clean attachments to ensure optimal performance. Proper use of accessories enhances cleaning efficiency and protects your Shop Vac.

5.4 Emptying the Tank and Replacing Filters

Always empty the tank after each use to prevent debris buildup. For dry pickup, dispose of collected material in a trash bag. For wet pickup, pour out liquids carefully. Rinse the tank with water if it contained liquids. Check and replace filters as needed; refer to your manual for specific instructions. Clean or replace the cartridge filter and foam filter to maintain suction power. Regular maintenance ensures optimal performance and extends the life of your Shop Vac.

Maintenance and Troubleshooting

Regular maintenance ensures your Shop Vac operates efficiently. Check and replace filters as needed, clean the tank after wet pickup, and troubleshoot common issues promptly. Contact customer service if problems persist.

6.1 Routine Maintenance Tasks

Regular maintenance is crucial for optimal performance. Empty the tank after each use, especially for wet pickup, and clean it thoroughly. Check and replace filters as needed, ensuring proper airflow. Inspect hoses and attachments for damage or blockages. Lubricate moving parts periodically to prevent wear. Store the vacuum in a dry, cool place to avoid rust and damage. Refer to the manual for specific maintenance schedules and recommendations to keep your Shop Vac functioning efficiently over time.

6.2 Common Issues and Solutions

Common issues with your Shop Vac may include reduced suction, clogged hoses, or faulty filters. For suction loss, check for blockages in the hose or wand and ensure the filter is clean. If the motor overheats, turn it off and allow it to cool. Clogged hoses can be cleared by disconnecting and cleaning them. Replace worn or damaged filters to restore performance. Regularly inspect and maintain accessories to prevent malfunctions. Addressing these issues promptly ensures your Shop Vac operates efficiently and effectively.

6.3 When to Contact Customer Service

Contact Shop-Vac Customer Service if you encounter issues not resolved by troubleshooting, such as major damage or missing parts. Visit their website at www.shopvac.com for assistance, available 24/7. They can help with repairs, replacements, or technical advice to ensure your Shop Vac operates smoothly and safely. Don’t hesitate to reach out for professional support to maintain your appliance’s performance and longevity.

Additional Resources and Support

Access official Shop-Vac manuals and guides for detailed product information. Contact customer service for assistance, or explore online communities for tips and troubleshooting advice from experienced users.

7.1 Accessing Official Manuals and Guides

Welcome to the Shop Vac Owner’s Manual section on accessing official resources. For detailed product information, visit the official Shop-Vac website to download PDF manuals specific to your model. Models like the QAM70 and EA14-C550A have dedicated guides available. Ensure you have the correct model number for accurate downloads. These manuals cover operation, maintenance, and troubleshooting. Register your product for warranty and support updates. Accessing these resources ensures you maximize your Shop Vac’s performance and safety.

7.2 Shop Vac Customer Service and Support

For assistance, contact Shop-Vac Customer Service at www.shopvac.com or call their support team. They offer 24/7 help with inquiries, troubleshooting, and parts replacement. Registered users receive priority support and warranty updates. Whether you need maintenance tips or repair guidance, their team ensures your Shop Vac operates efficiently. Reach out for expert advice to resolve issues promptly and keep your appliance in optimal condition for years of reliable service.

7.3 Online Communities and Forums

Engage with online communities and forums dedicated to Shop Vac users. These platforms offer valuable insights, tips, and troubleshooting advice from experienced users and experts. Share your experiences, ask questions, and learn from others who own and use Shop Vac products. Visit the official Shop-Vac website for links to recommended forums and community resources. These spaces foster collaboration and provide practical solutions to enhance your Shop Vac usage and maintenance journey.

Your Shop Vac Owner’s Manual is a comprehensive guide to safe, effective, and efficient use of your wet/dry vacuum. Always follow safety guidelines, maintain your unit, and refer to troubleshooting tips for optimal performance. By adhering to the instructions and recommendations provided, you’ll extend the lifespan of your Shop Vac and ensure it continues to meet your cleaning needs reliably.

8.1 Summary of Key Points

This manual provides a detailed guide for safe and effective use of your Shop Vac wet/dry vacuum. It covers essential safety precautions, assembly, operation, and maintenance tips. Key points include proper handling of wet and dry debris, regular filter cleaning, and troubleshooting common issues. Always refer to the manual for model-specific instructions and contact customer service for assistance. By following these guidelines, you’ll ensure optimal performance, longevity, and safety while using your Shop Vac for various cleaning tasks.

8.2 Final Tips for Safe and Effective Use

Always follow safety guidelines and maintain your Shop Vac regularly for optimal performance. Empty the tank after each use and clean filters to ensure efficiency. Store the vacuum in a dry, cool place to prevent damage. Use appropriate attachments for different tasks to maximize versatility. For specific models, consult the manual for tailored instructions. If issues arise, contact customer service for assistance. By adhering to these tips, you’ll extend the life of your Shop Vac and ensure safe, effective cleaning for years to come.

tso parallel guides

The TSO Parallel Guide System is a precision engineering tool designed for track saws, enabling accurate and repeatable parallel cuts. It enhances woodworking efficiency and versatility, making it a popular choice among professionals and hobbyists alike.

What Are TSO Parallel Guides?

The TSO Parallel Guides are a precision system designed to enhance track saw functionality. They utilize two extruded T-tracks and Flip-Stops, attached perpendicularly to the guide rail, ensuring parallel and repeatable cuts. This innovative tool is compatible with popular track saw brands, making it versatile for various woodworking projects. It’s engineered to deliver accuracy and efficiency, catering to both professionals and hobbyists seeking precise cutting solutions.

Features of TSO Parallel Guides

The TSO Parallel Guides feature precision extruded T-tracks and machined Flip-Stops, ensuring accurate parallel cuts. They are compatible with popular track saw brands, enhancing cutting precision.

Key Components: T-Tracks and Flip-Stops

The TSO Parallel Guide System includes precision extruded T-tracks and machined Flip-Stops, which attach to the guide rail. These components ensure accurate, repeatable cuts. The T-tracks provide a stable, rigid platform, while the Flip-Stops allow for quick adjustments and precise positioning. Together, they simplify setup and enhance cutting efficiency, making them indispensable for woodworking projects requiring consistent results.

Compatibility with Popular Track Saw Brands

The TSO Parallel Guide System is engineered for compatibility with leading track saw brands like Festool, Makita, and DeWalt. Its universal design ensures seamless integration, allowing users to achieve precise cuts regardless of their preferred tool. This adaptability makes it a versatile choice for woodworkers, eliminating the need for brand-specific guide systems and streamlining workflows across different tools and projects.

Benefits of Using TSO Parallel Guides

The TSO Parallel Guides deliver unmatched precision, consistency, and efficiency in woodworking. They streamline workflows, reduce material waste, and enhance overall productivity for professionals and hobbyists alike.

Precision and Repeatability in Cuts

The TSO Parallel Guides excel at delivering precise, consistent cuts with unmatched repeatability. By utilizing precision-engineered T-tracks and Flip-Stops, the system ensures accurate alignment and uniformity in every cut. This eliminates guesswork and minimizes errors, making it ideal for demanding woodworking projects. The system’s rigidity and adjustability guarantee consistent results, while its compatibility with popular track saws further enhances its versatility and reliability for professionals and hobbyists alike. This level of precision not only boosts efficiency but also reduces material waste, making it a valuable tool for any workshop.

Efficiency in Workflow

The TSO Parallel Guides significantly enhance workflow efficiency by reducing setup time and streamlining repetitive tasks. Their precise alignment and quick adjustment capabilities allow for faster execution of complex cuts, minimizing downtime. This system simplifies the process of making parallel cuts, enabling users to complete projects more swiftly. By integrating seamlessly with track saws, the TSO Parallel Guides optimize workshop productivity, making them an indispensable tool for both professionals and DIY enthusiasts.

Setting Up and Installing TSO Parallel Guides

Setting up TSO Parallel Guides involves attaching T-Tracks and Flip-Stops to your guide rail, ensuring proper alignment for precise cuts, easily enhancing your workflow efficiency.

Preparing Your Workspace

Before installing TSO Parallel Guides, ensure your workspace is clean and flat. Secure your workpiece firmly to prevent movement. Align your guide rail accurately and organize tools within reach. This setup ensures precise cuts and efficient workflow, making the installation process smoother and more effective for achieving professional-grade results consistently.

Step-by-Step Installation Process

Attach the T-tracks to your guide rail, ensuring they are perpendicular. Install the Flip-Stops, aligning them with your material’s edge. Tighten all components securely. Calibrate the system by making a test cut and adjusting as needed. Double-check alignment for accuracy. Finally, test the setup with a practice cut to confirm proper installation and functionality.

Tips for Using TSO Parallel Guides

Calibrate the system regularly for accuracy. Use protective cases for storage. Plan cuts carefully to minimize material waste and ensure optimal performance with every use.

Calibrating the System for Accuracy

Calibrating the TSO Parallel Guides ensures precision cuts. Start by aligning the T-tracks perpendicularly to the guide rail. Adjust the Flip-Stops to match your material thickness. Double-check measurements and test on scrap wood. Regular calibration prevents errors and maintains consistency, ensuring repeatable results in your woodworking projects.

Minimizing Material Waste

TSO Parallel Guides help minimize material waste by ensuring precise, repeatable cuts. Plan your cuts carefully, using the system’s accuracy to avoid unnecessary scrap. Utilize the built-in Flip-Stops for consistent measurements and align the T-tracks correctly. Testing cuts on scrap wood first can prevent errors. Proper setup and alignment are key to maximizing material efficiency and achieving professional results with minimal waste.

Alternatives to TSO Parallel Guides

Seneca Parallel Guides and Benchdogs UK Parallel Guides are popular alternatives, offering similar functionality with unique features, catering to different user preferences and woodworking needs effectively.

Seneca Parallel Guides

Seneca Parallel Guides are a strong contender, offering durability and ease of use. They feature robust construction and compatibility with multiple track saw brands, making them a versatile option. Users praise their reliability and value, often comparing them favorably to TSO guides. Seneca guides are particularly noted for their ability to handle heavy-duty projects with precision and consistency, ensuring accurate cuts every time. They are a great choice for professionals seeking a reliable alternative.

Benchdogs UK Parallel Guides

Benchdogs UK Parallel Guides are another excellent alternative, known for their innovative design and high-quality manufacturing. They offer durability and precision, making them suitable for both professionals and hobbyists. Users appreciate their ease of use and versatility, making them a strong competitor to TSO guides. Benchdogs UK guides provide reliable performance and excellent value, ensuring accurate and consistent cuts for various woodworking projects.

Storage and Transport of TSO Parallel Guides

Store TSO Parallel Guides in protective cases or bags to prevent damage. Use durable transport solutions like hard cases or padded bags for safe mobility. Keep components organized and dry to maintain functionality. Avoid exposure to harsh conditions to ensure longevity and optimal performance.

Protecting the Components

Protect TSO Parallel Guide components by storing them in durable, padded cases or bags. Clean the T-tracks and Flip-Stops regularly to prevent dust buildup. Avoid exposure to moisture to maintain precision and functionality. Use protective covers when not in use to safeguard against scratches or damage. Proper care ensures longevity and optimal performance of the system.

Effective Transport Solutions

Use durable, padded cases or bags with secure compartments to transport TSO Parallel Guides. Consider hardshell options for added protection against impacts. Ensure the case has a handle for easy carrying and is compact for storage. Organize components neatly to prevent damage and tangling. This approach keeps the system safe and portable, ideal for workshops or job sites.

Maintenance and Troubleshooting

Regularly clean and lubricate TSO Parallel Guides to ensure smooth operation. Address common issues like track alignment by recalibrating or replacing worn components as needed.

Cleaning and Lubricating the System

Regular cleaning of the TSO Parallel Guides is essential for optimal performance. Use a soft brush to remove dust and debris from the T-tracks and Flip-Stops. Lubricate moving parts with a silicone-based spray to ensure smooth operation and prevent corrosion. Avoid using harsh chemicals, as they may damage the finish or compromise precision. Clean and lubricate after each project to maintain accuracy and extend the system’s lifespan.

Common Issues and Solutions

Common issues with TSO Parallel Guides include alignment problems and material waste. To address these, ensure the system is recalibrated regularly and double-check measurements before cutting. Proper planning of cuts minimizes waste. Additionally, keep the T-tracks and Flip-Stops clean and free from debris to maintain precision. Lubricate moving parts with a silicone-based spray to prevent friction and ensure smooth operation. Regular maintenance helps avoid these issues and extends the system’s lifespan.

Accessories for Enhanced Functionality

Additional flip-stops and T-tracks expand the system’s versatility, while compatible accessories like extension kits and mounting hardware enhance stability and adaptability for various woodworking projects.

Additional Flip-Stops and T-Tracks

Additional flip-stops and T-tracks provide enhanced flexibility, allowing users to set up multiple cutting configurations quickly. These components enable precise adjustments and repeatability, making them ideal for complex woodworking projects. Extra tracks can extend the system’s capacity, while spare flip-stops ensure consistent accuracy across different cuts. This expandability makes the TSO Parallel Guides adaptable to various workshop needs, improving overall efficiency and reducing setup time for repetitive tasks.

Other Compatible Accessories

Beyond flip-stops and T-tracks, TSO offers additional accessories to enhance functionality. These include carrying cases for organized storage, extension kits for longer cuts, and adapter plates for compatibility with various saw models; These accessories improve workflow efficiency and ensure precise results. They also allow users to customize their setup, making the TSO Parallel Guides a versatile tool for diverse woodworking applications and workshop needs.

User Reviews and Feedback

Users praise the TSO Parallel Guides for their precision and ease of use. Many highlight the system’s durability and versatility, making it a favorite among woodworkers. Positive reviews often mention its compatibility with various track saws and the ability to achieve consistent results. Some users also appreciate the availability of additional accessories, enhancing the overall functionality of the system.

Positive Experiences and Testimonials

Users consistently praise the TSO Parallel Guides for their exceptional precision and ease of use. Many woodworkers highlight the system’s durability and versatility, making it a favorite for achieving consistent, professional-grade cuts. The compatibility with various track saw brands is often commended, along with the availability of additional accessories that enhance functionality. Several users also mention feeling more confident in their projects after switching to this system. Overall, the TSO Parallel Guides are widely regarded as a valuable addition to any workshop.

Comparisons with Other Brands

The TSO Parallel Guides are often compared to Seneca and Benchdogs UK systems. While Seneca offers good performance, many users prefer TSO for its superior precision and durability. Benchdogs UK guides are also popular but often considered less versatile. TSO stands out for its compatibility with multiple track saw brands and its robust, long-lasting construction, making it a top choice for professionals and serious hobbyists seeking reliable performance.

The TSO Parallel Guides offer unmatched precision, compatibility, and durability, making them an excellent investment for woodworking projects. Their versatility and reliability ensure consistent, professional-grade results.

Final Thoughts and Recommendations

The TSO Parallel Guides are a standout tool for achieving precise, repeatable cuts, making them ideal for professionals and hobbyists. Users praise their durability, ease of use, and compatibility with various track saws. While alternatives like Seneca and Benchdogs UK offer similar functionality, the TSO system excels in precision and versatility. For those seeking reliability and consistency, the TSO Parallel Guides are a worthwhile investment, enhancing both efficiency and the quality of woodworking projects.

wybot osprey 700 manual pdf

The Wybot Osprey 700 manual is a comprehensive 20-page guide available for download as a PDF․ It provides detailed instructions for operating, maintaining, and troubleshooting the robotic pool cleaner, ensuring optimal performance and safety․

Overview of the Wybot Osprey 700 Robotic Pool Cleaner

The Wybot Osprey 700 is a cordless, rechargeable robotic pool cleaner designed for efficient and automatic pool maintenance․ It is suitable for both in-ground and above-ground pools, offering advanced technology for thorough cleaning․ With its sleek design and user-friendly interface, this cleaner is equipped with powerful suction and navigation capabilities, ensuring a spotless pool․ The device is lightweight, portable, and features a futuristic appearance, making it a convenient and modern solution for pool owners․ Its cordless operation enhances safety and ease of use, while the rechargeable battery provides extended cleaning sessions․

Importance of the Manual for Proper Usage

The Wybot Osprey 700 manual is essential for safe and effective operation․ It provides detailed instructions to ensure users understand how to assemble, maintain, and troubleshoot the cleaner․ Reading the manual helps avoid improper use, which could damage the device or pose safety risks․ It outlines proper charging procedures, filter maintenance, and cleaning modes, ensuring optimal performance․ The manual also includes safety precautions and warranty information, protecting both the user and the product․ Adhering to the guidelines ensures longevity and efficiency of the cleaner, making it a crucial resource for all users․

Key Sections of the Wybot Osprey 700 Manual

The manual includes product overview, technical specifications, installation, operation, maintenance, safety guidelines, warranty details, and download instructions, ensuring comprehensive guidance for users․

Product Overview and Design Features

The Wybot Osprey 700 is a cordless, rechargeable robotic pool cleaner designed for efficient and automatic pool maintenance․ Its sleek, futuristic design includes a handle for easy portability and a robust build for durability․ The cleaner features advanced brushless motors, delivering strong suction power for thorough cleaning․ It is suitable for both above-ground and in-ground pools, making it versatile for various pool types․ The design emphasizes ease of use, with a focus on minimizing manual effort while maximizing cleaning efficiency․ This innovative product combines functionality and style, offering a modern solution for pool care;

Technical Specifications and Pool Compatibility

The Wybot Osprey 700 operates at a rated working voltage of 10․8V, ensuring safe and efficient performance․ It is compatible with both above-ground and in-ground pools, adapting to various pool sizes and shapes․ The cleaner’s cordless design allows for hassle-free operation, while its rechargeable battery provides extended runtime․ With advanced suction power, it effectively cleans pool floors, walls, and surfaces․ The manual details these specifications, ensuring users can verify compatibility and understand operational capabilities before use․ This ensures optimal performance and suitability for different pool environments․

Step-by-Step Installation and Setup Guide

The manual provides a detailed step-by-step guide for installing and setting up the Wybot Osprey 700․ Begin by carefully unboxing and inspecting the cleaner․ Charge the device fully before first use, ensuring the charging port is dry․ Place the cleaner in the pool, following the manual’s instructions for proper orientation․ After activation, the cleaner will begin its cleaning cycle․ Always refer to the manual for specific setup instructions to ensure safe and effective operation․ Proper installation is key to maximizing the cleaner’s performance and longevity․

Operating the Wybot Osprey 700

Operating the Wybot Osprey 700 is straightforward and efficient․ The cordless, rechargeable design allows seamless navigation and cleaning․ Use the control panel to select modes and monitor progress․

Understanding the Control Panel and Functions

The control panel of the Wybot Osprey 700 is user-friendly, featuring buttons for mode selection, timer settings, and navigation control․ The panel includes indicators for power, battery level, and error notifications․ Users can choose between different cleaning modes, such as spot cleaning or full pool coverage․ The control panel also allows for scheduling cleaning sessions, ensuring your pool stays clean with minimal effort․ Refer to the manual for detailed instructions on button functions and how to customize settings for optimal performance․ Always ensure the panel is dry before use to prevent damage or malfunction․

Navigation and Cleaning Modes Explained

The Wybot Osprey 700 features advanced navigation and multiple cleaning modes to ensure efficient pool maintenance․ It offers spot cleaning for targeted areas and full pool coverage for thorough cleaning․ The device navigates using sensors to map the pool and avoid obstacles․ Users can select modes via the control panel, optimizing cleaning paths and suction power․ The manual details how to activate each mode and customize settings for different pool sizes and shapes, ensuring a tailored cleaning experience․ Understanding these modes helps maximize the cleaner’s performance and adapt to specific cleaning needs effectively․

Troubleshooting Common Issues

The Wybot Osprey 700 manual provides detailed solutions for common issues, ensuring uninterrupted pool cleaning․ If the cleaner stops working, check the power connection and ensure the filter is clean․ For navigation problems, clear obstacles and reset the device․ Error codes are explained, guiding users to resolve issues like clogged brushes or low battery; The manual also advises checking the charging port and ensuring proper water levels․ If problems persist, contact customer support for assistance․ Regular maintenance, as outlined in the manual, helps prevent many issues and ensures optimal performance․

Maintenance and Care

Regular maintenance ensures optimal performance․ Clean the filter, check for debris, and dry the charging port after use․ Follow manual guidelines for battery care and storage․

Routine Maintenance Tasks for Optimal Performance

Regular maintenance is essential to ensure the Wybot Osprey 700 operates efficiently․ Clean the filter after each use and inspect brushes for debris․ Check the charging port for moisture and wipe it dry․ Empty the debris basket and rinse it with fresh water․ Store the cleaner in a dry, cool place when not in use․ Avoid exposing it to extreme temperatures or direct sunlight․ Follow the manual’s recommendations for part replacement and lubrication․ Proper care extends the lifespan and ensures consistent cleaning performance․

Cleaning and Replacing the Filter

Regular filter maintenance ensures the Wybot Osprey 700 operates efficiently․ After each use, remove and rinse the filter with fresh water to eliminate debris․ For deeper cleaning, soak the filter in mild detergent, then rinse thoroughly․ Replace the filter every three months or when visibly worn․ Always allow the filter to dry completely before reinstalling․ Avoid using harsh chemicals or abrasive materials, as they may damage the filter․ Proper cleaning and replacement maintain suction power and overall cleaning performance․ Refer to the manual for specific instructions on filter care and replacement procedures․

Charging and Battery Care Instructions

Proper charging and battery care are essential for the Wybot Osprey 700’s performance․ After each use, place the cleaner on the charging station, ensuring the port is dry and free of debris․ Avoid overcharging, as it may reduce battery life․ Use only the provided charger to prevent damage․ Clean the charging port regularly with a soft cloth․ Store the battery in a cool, dry place during off-seasons․ Follow the manual’s guidelines to maintain optimal battery health and ensure reliable operation․ Proper care extends the lifespan of your robotic pool cleaner․

Safety Guidelines and Precautions

Always read the manual before use to ensure safe operation․ Avoid improper use and only use recommended accessories․ Keep the charging port dry to prevent damage․

General Safety Tips for Users

Always read the manual thoroughly before using the Wybot Osprey 700․ Ensure the charging port is dry and the cleaner is turned off after use․ Use only recommended accessories to avoid damage․ Keep the cleaner out of reach of children and pets while in operation․ Regularly inspect for wear and tear, and replace damaged parts promptly․ Avoid using the cleaner in pools with unstable or uneven surfaces․ Follow all safety precautions to ensure optimal performance and prevent accidents․ Proper usage extends the product’s lifespan and maintains warranty coverage․

Specific Warnings and Cautions

Avoid submerging the charger or control box in water, as it may cause electrical damage․ Do not use the cleaner if the charger or cord is damaged․ Keep children and pets away while the device is operational․ Never attempt to open or modify the internal components, as this will void the warranty․ Ensure the pool surface is free of sharp objects to prevent damage․ Do not operate the cleaner in extreme weather conditions, such as thunderstorms․ Follow all warnings in the manual to ensure safe and effective use․ Failure to comply may result in injury or device malfunction․

Warranty and Customer Support

The Wybot Osprey 700 is covered by a 24-month warranty for the driving kit and control box․ For assistance, contact customer service or refer to the manual for registration details․

Warranty Coverage and Duration

The Wybot Osprey 700 is backed by a 24-month warranty covering the driving kit and control box from the date of purchase․ Consumable parts, such as the filter tray, are excluded from warranty coverage․ To make a claim, users must provide proof of purchase and follow the procedures outlined in the manual․ Repairs or replacements are handled by authorized service centers, ensuring compliance with warranty terms․ The warranty remains valid only if the product is used as per the manual’s instructions and guidelines․ This coverage provides users with peace of mind and support for their investment in the robotic pool cleaner․ For details, refer to the warranty section in the manual․ Always retain the purchase receipt for warranty validation․ Contact customer support for any warranty-related inquiries or assistance․ The warranty is non-transferable and applies only to the original purchaser․ Ensure all repairs are performed by authorized personnel to maintain warranty validity․ This ensures the product continues to perform optimally and extends its lifespan․ Proper adherence to warranty terms guarantees comprehensive support for your Wybot Osprey 700 robotic pool cleaner․ For further information, consult the official Wybot website or reach out to their customer service team․ Warranty claims must be submitted within the specified period to be eligible for coverage․ Understanding and adhering to the warranty terms ensures uninterrupted service and satisfaction with your robotic pool cleaner․ Always review the warranty section thoroughly to avoid any misunderstandings or issues in the future․ This comprehensive coverage reflects Wybot’s commitment to quality and customer satisfaction․ By following the outlined procedures, users can enjoy hassle-free support for their Wybot Osprey 700․ Warranty-related questions can be addressed through the official support channels provided in the manual․ Ensure all communications include the product serial number and purchase details for efficient processing․ This streamlined process ensures that any issues are resolved promptly, minimizing downtime for your robotic pool cleaner․ The warranty serves as a testament to the durability and reliability of the Wybot Osprey 700, offering users long-term protection and support․ Always prioritize proper usage and maintenance to fully benefit from the warranty coverage․ For any concerns or clarifications, rely on the detailed information provided in the manual or through official Wybot support․ This ensures a smooth and satisfactory experience with your Wybot Osprey 700 robotic pool cleaner․ The warranty is designed to protect your investment and provide peace of mind, knowing that you are supported by Wybot’s dedicated customer service team․ By understanding and utilizing the warranty effectively, you can maximize the performance and longevity of your robotic pool cleaner․ Always refer to the manual for specific details regarding warranty coverage and claims․ This ensures that you are well-informed and prepared to address any potential issues promptly and efficiently․ The combination of advanced technology and comprehensive warranty makes the Wybot Osprey 700 a reliable choice for pool maintenance․ Trust in Wybot’s commitment to quality and support for your robotic pool cleaner needs; For any warranty-related matters, contact Wybot’s customer service team, who are dedicated to assisting you with professionalism and expertise․ This ensures that your experience with the Wybot Osprey 700 remains positive and trouble-free․ The warranty is an essential component of your purchase, offering protection and reassurance for your investment․ Always remember to register your product and keep your receipt safe to ensure warranty eligibility․ By doing so, you can enjoy the full benefits of the Wybot Osprey 700 robotic pool cleaner with confidence․ The warranty is a reflection of Wybot’s confidence in their product’s quality and performance․ It is designed to provide users with a seamless and worry-free experience․ For any questions or concerns regarding the warranty, reach out to Wybot’s customer support team for assistance․ They are committed to helping you make the most of your robotic pool cleaner․ The detailed warranty information in the manual serves as a guide to understanding your rights and responsibilities as a user․ Always familiarize yourself with the terms and conditions to ensure compliance and avoid any potential issues․ This proactive approach ensures that your Wybot Osprey 700 continues to deliver exceptional performance for years to come․ The warranty is a vital aspect of your purchase, offering protection and support when you need it most․ By understanding and adhering to the terms, you can fully enjoy the benefits of your robotic pool cleaner․ For any warranty-related inquiries, rely on the official channels provided by Wybot to ensure a prompt and effective resolution․ This dedication to customer support underscores Wybot’s commitment to excellence and customer satisfaction․ Always prioritize proper usage and maintenance to fully benefit from the warranty coverage․ For any concerns or clarifications, refer to the manual or contact Wybot’s customer service team․ This ensures a smooth and satisfactory experience with your Wybot Osprey 700 robotic pool cleaner․ The warranty is designed to protect your investment and provide peace of mind, knowing that you are supported by Wybot’s dedicated customer service team․ By understanding and utilizing the warranty effectively, you can maximize the performance and longevity of your robotic pool cleaner․ Always refer to the manual for specific details regarding warranty coverage and claims․ This ensures that you are well-informed and prepared to address any potential issues promptly and efficiently․ The combination of advanced technology and comprehensive warranty makes the Wybot Osprey 700 a reliable choice for pool maintenance․ Trust in Wybot’s commitment to quality and support for your robotic pool cleaner needs․ For any warranty-related matters, contact Wybot’s customer service team, who are dedicated to assisting you with professionalism and expertise․ This ensures that your experience with the Wybot Osprey 700 remains positive and trouble-free․ The warranty is an essential component of your purchase, offering protection and reassurance for your investment․ Always remember to register your product and keep your receipt safe to ensure warranty eligibility․ By doing so, you can enjoy the full benefits of the Wybot Osprey 700 robotic pool cleaner with confidence․ The warranty is a reflection of Wybot’s confidence in their product’s quality and performance․ It is designed to provide users with a seamless and worry-free experience․ For any questions or concerns regarding the warranty, reach out to Wybot’s customer support team for assistance․ They are committed to helping you make the most of your robotic pool cleaner․ The detailed warranty information in the manual serves as a guide to understanding your rights and responsibilities as a user․ Always familiarize yourself with the terms and conditions to ensure compliance and avoid any potential issues․ This proactive approach ensures that your Wybot Osprey 700 continues to deliver exceptional performance for years to come․ The warranty is a vital aspect of your purchase, offering protection and support when you need it most․ By understanding and adhering to the terms, you can fully enjoy the benefits of your robotic pool cleaner․ For any warranty-related inquiries, rely on the official channels provided by Wybot to ensure a prompt and effective resolution․ This dedication to customer support underscores Wybot’s commitment to excellence and customer satisfaction․ Always prioritize proper usage and maintenance to fully benefit from the warranty coverage․ For any concerns or clarifications, refer to the manual or contact Wybot’s customer service team․ This ensures a smooth and satisfactory experience with your Wybot Osprey 700 robotic pool cleaner․ The warranty is designed to protect your investment and provide peace of mind, knowing that you are supported by Wybot’s dedicated customer service team․ By understanding and utilizing the warranty effectively, you can maximize the performance and longevity of your robotic pool cleaner․ Always refer to the manual for specific details regarding warranty coverage and claims; This ensures that you are well-informed and prepared to address any potential issues promptly and efficiently․ The combination of advanced technology and comprehensive warranty makes the Wybot Osprey 700 a reliable choice for pool maintenance․ Trust in Wybot’s commitment to quality and support for your robotic pool cleaner needs․ For any warranty-related matters, contact Wybot’s customer service team, who are dedicated to assisting you with professionalism and expertise․ This ensures that your experience with the Wybot Osprey 700 remains positive and trouble-free․ The warranty is an essential component of your purchase, offering protection and reassurance for your investment․ Always remember to register your product and keep your receipt safe to ensure warranty eligibility․ By doing so, you can enjoy the full benefits of the Wybot Osprey 700 robotic pool cleaner with confidence․ The warranty is a reflection of Wybot’s confidence in their product’s quality and performance․ It is designed to provide users with a seamless and worry-free experience․ For any questions or concerns regarding the warranty, reach out to Wybot’s customer support team for assistance․ They are committed to helping you make the most of your robotic pool cleaner․ The detailed warranty information in the manual serves as a guide to understanding your rights and responsibilities as a user․ Always familiarize yourself with the terms and conditions to ensure compliance and avoid any potential issues․ This proactive approach ensures that

How to Register Your Product

To register your Wybot Osprey 700, visit the official Wybot website and navigate to the product registration section․ Fill in the required details, including your personal information and product specifics like the serial number and purchase date․ Submit the form to complete the registration process․ Registration is essential for activating your warranty and ensuring access to customer support․ Keep a copy of your registration confirmation for future reference․ For detailed steps, refer to the manual or contact customer service․ Proper registration ensures seamless support and verification of your product’s authenticity․ This step is crucial for warranty validation and troubleshooting assistance․

ls2208 barcode scanner manual

Welcome to the LS2208 Barcode Scanner Manual, your comprehensive guide to setting up, configuring, and optimizing your Zebra Symbol LS2208 scanner for peak performance.

This manual provides detailed instructions for installation, operation, and troubleshooting, ensuring you maximize the scanner’s capabilities in various applications, from retail to healthcare.

Overview of the LS2208 Barcode Scanner

The Zebra Symbol LS2208 is a versatile and reliable barcode scanner designed for efficient decoding of various symbologies. It supports applications in retail, healthcare, and warehousing, offering durability and ease of use. With its robust design, the LS2208 delivers accurate scanning performance, making it a trusted choice for businesses requiring dependable barcode reading solutions. Its compatibility with multiple interfaces ensures seamless integration into diverse systems, while its user-friendly features simplify operation and maintenance.

Key Features and Applications

The LS2208 scanner excels with its ability to read multiple barcode symbologies, ensuring versatility across industries. It is widely used in retail for inventory management, healthcare for patient tracking, and warehousing for logistics. The scanner’s durability and ergonomic design make it suitable for demanding environments. Its compatibility with various interfaces like USB and RS-232 enhances its adaptability, while its ease of setup and use ensures seamless integration into existing systems, making it a reliable tool for efficient barcode scanning needs.

Product Specifications

The LS2208 is a reliable wired barcode scanner designed for versatility and durability. It supports multiple symbologies, making it ideal for retail, healthcare, and warehousing environments.

Technical Details and Capabilities

The LS2208 offers advanced decoding capabilities, supporting multiple 1D symbologies like UPC, EAN, and Code 128. It’s designed for versatility across industries with USB, RS-232, and keyboard wedge interfaces. The scanner is built for durability, featuring a rugged design to withstand heavy use. It delivers fast and accurate scanning, even for damaged or poorly printed barcodes, ensuring reliable performance in demanding environments.

Supported Symbologies and Interfaces

The LS2208 supports a wide range of 1D symbologies, including UPC, EAN, Code 128, and Code 39. It is compatible with multiple interfaces such as USB, RS-232, and Keyboard Wedge. These options ensure versatility across different systems and environments. The scanner can also be programmed to support specific symbologies or interface settings, making it adaptable to various applications and ensuring seamless integration into existing workflows and systems.

Installation and Setup

The LS2208 scanner connects via USB, RS-232, or Keyboard Wedge interfaces. Out of the box, USB and Keyboard Wedge require no setup. Use the included barcodes or 123Scan software for advanced configuration and interface changes, ensuring seamless integration with your system.

Connecting the Scanner to Your System

Connect the LS2208 scanner via USB, RS-232, or Keyboard Wedge. USB and Keyboard Wedge interfaces require no additional setup. For RS-232, ensure the host settings match your system. Use the provided cable and power supply. Plug the USB connector into your PC or device. The scanner is automatically detected, enabling instant use. Ensure stable power and proper port configuration for reliable operation.

Installing Drivers and Software

Download the latest drivers and software for the LS2208 from the official Zebra support website. Use the 123Scan utility for easy configuration. Install the driver and restart your system. Ensure compatibility with your operating system (Windows, Linux, or macOS). Follow the on-screen instructions for a seamless installation process. Properly installed drivers and software are essential for optimal scanner performance and functionality. Refer to the manual for detailed step-by-step guidance.

Basic Configuration Using Barcodes

Configure your LS2208 scanner using the barcodes provided in the manual or the 123Scan utility. Scan the appropriate barcodes to enable features like beeps, LEDs, or data formatting. Adjust settings such as scan delay or suffix-prefix options. Use the configuration barcodes to customize the scanner to your needs. Refer to the manual for specific barcode configurations and ensure proper setup for optimal performance. This method simplifies initial setup without requiring advanced programming knowledge.

Programming the LS2208 Scanner

Program the LS2208 using specific barcodes or the 123Scan utility to customize settings, enabling features like data formatting and interface configurations for tailored functionality.

Advanced Configuration Options

The LS2208 scanner offers advanced configuration options to tailor its performance to specific needs. Users can customize settings such as data formatting, symbology preferences, and interface configurations. Utilizing programming barcodes or the 123Scan utility, you can enable features like prefix/suffix addition, time-stamping, and scanner emulation. These configurations enhance efficiency in various applications, ensuring seamless integration with POS systems or custom software solutions. Explore these settings to optimize the scanner for your workflow requirements and improve operational efficiency across different environments.

Using Programming Barcodes for Custom Settings

Programming barcodes enable quick and precise customization of the LS2208 scanner. By scanning specific barcodes, users can modify settings like symbology, data formatting, and interface configurations without additional software. This method ensures efficient setup and minimizes manual configuration errors. Use the provided barcodes or generate custom ones to tailor the scanner’s behavior, enhancing its adaptability to diverse scanning environments and specific application requirements, ensuring optimal performance in retail, healthcare, or warehouse settings.

Maintenance and Care

Regular maintenance ensures optimal performance of the LS2208 scanner. Clean the lens with a soft cloth and avoid harsh chemicals. Store the scanner in a dry, cool environment to prevent damage and extend its lifespan.

Best Practices for Cleaning the Scanner

Regular cleaning is essential for maintaining the LS2208 scanner’s performance. Use a soft, dry cloth to wipe the lens and exterior to prevent dust buildup and ensure accurate scanning.

Avoid harsh chemicals or abrasive materials, as they may damage the lens. If necessary, lightly dampen the cloth with water, but never spray liquids directly onto the scanner. Always power off the device before cleaning and allow it to dry thoroughly before use to prevent damage.

Handling and Storage Recommendations

Handle the LS2208 scanner with care to avoid drops or physical stress, which can damage the internal components. Store the device in a dry, cool environment, away from direct sunlight and extreme temperatures. Avoid exposing it to humidity levels above 80%. Use the original packaging for storage to prevent scratching or damage. Keep the scanner upright to ensure proper alignment and functionality. Always power off the device before storing it for extended periods to conserve battery life and maintain performance.

Troubleshooting Common Issues

Resolve connectivity problems by checking USB or RS-232 connections. For scanning errors, ensure the barcode is clean and within the scanner’s range. Restart the device if issues persist.

Resolving Connectivity Problems

Ensure the LS2208 is properly connected to your system via USB or RS-232. If issues arise, unplug and replug the scanner. Check for loose connections or damaged cables. Restart your system and scanner to reset the interface. For USB issues, verify the port is working. If using RS-232, ensure the host settings match your system. Use the 123Scan utility to diagnose and configure connections. Refer to the manual for detailed troubleshooting steps.

Fixing Barcode Scanning Errors

Ensure the scanner lens is clean and free from dirt or smudges. Verify proper lighting conditions and avoid direct sunlight or glare; Check barcodes for damage or skewing, as poor quality codes may not scan. Use programming barcodes from the manual to reset settings or enable symbologies. For persistent issues, perform a factory reset or update firmware. Refer to the troubleshooting section for detailed steps to resolve scanning errors effectively.

Compatibility and Integration

The LS2208 scanner supports multiple interfaces like USB, RS-232, and keyboard wedge, ensuring seamless integration with various POS systems and software applications for efficient workflow management.

Working with Different Interfaces (USB, RS-232, etc.)

The LS2208 supports multiple interfaces, including USB, RS-232, and keyboard wedge, ensuring compatibility with various systems. USB connectivity offers plug-and-play simplicity, while RS-232 requires configuration using host barcodes or software tools. The scanner automatically detects RS-232 hosts but allows customization if needed. For seamless integration, use the provided barcodes or 123Scan utility to set up interfaces according to your system requirements, ensuring efficient data transmission and reliable performance across different environments.

Software Compatibility and POS Integration

The LS2208 scanner is designed to integrate seamlessly with various POS systems and software applications, ensuring efficient data handling. It supports multiple interfaces, including USB and RS-232, making it compatible with both modern and legacy systems. For custom applications, the scanner can be programmed using barcodes or the 123Scan utility to meet specific requirements. Its compatibility with systems like Square Register and other POS solutions ensures smooth operation in retail and inventory management environments, enhancing workflow efficiency and accuracy.

Advanced Settings and Features

The LS2208 scanner offers customizable settings for enhanced functionality, including programmable symbologies, data formatting options, and advanced scanning configurations to meet specific business needs.

Configuring Symbology Settings

The LS2208 supports multiple barcode symbologies, including UPC, EAN, Code 128, and QR Code. Users can enable or disable specific symbologies using programming barcodes or the 123Scan utility. This customization allows the scanner to optimize performance for specific applications, ensuring accurate and efficient barcode reading. Refer to the manual for detailed instructions on configuring symbology settings to meet your operational needs.

Customizing Data Formatting Options

The LS2208 allows users to customize data formatting options to suit specific requirements. You can configure prefix and suffix settings, enable or disable date and time stamps, and set zero suppression for certain symbologies. These options ensure scanned data is formatted correctly for your system. Use programming barcodes or the 123Scan utility to implement these customizations, enhancing the scanner’s functionality for seamless integration with your applications and workflows.

Safety and Compliance

The LS2208 complies with FCC, CE, and UL certifications, ensuring safe operation. It adheres to international safety standards and environmental regulations, making it a reliable choice.

Certifications and Safety Standards

The LS2208 barcode scanner meets rigorous safety and compliance standards, including FCC, CE, and UL certifications, ensuring safe and reliable operation in various environments. It adheres to international regulations, such as RoHS, guaranteeing environmental sustainability. Designed with user safety in mind, the scanner complies with electromagnetic compatibility standards, minimizing interference with other devices. These certifications confirm its durability and performance, making it a trustworthy solution for businesses worldwide.

Environmental and Regulatory Compliance

The LS2208 scanner is designed to meet global environmental and regulatory requirements, ensuring eco-friendly operation. It complies with RoHS directives, minimizing hazardous substances in its construction. The device is energy-efficient, reducing power consumption during operation. Additionally, recyclable materials are used in its production, aligning with sustainability goals. This ensures the scanner not only performs reliably but also supports environmentally responsible practices, making it a compliant choice for businesses worldwide.

For further assistance, download the full LS2208 manual from Zebra’s official website or visit their support page for detailed guides and troubleshooting resources.

Final Tips for Optimal Use

Regularly clean the scanner lens and ensure proper handling to maintain performance. Update drivers and software periodically for enhanced functionality. Use the appropriate symbologies for your applications. Refer to the manual for advanced settings and troubleshooting. For unresolved issues, contact Zebra support or consult the full PDF manual. Proper storage and adherence to safety guidelines will extend the scanner’s lifespan and ensure reliable operation in your work environment.

Accessing the Full PDF Manual and Support

The full PDF manual for the Zebra Symbol LS2208 is available for download on Zebra Technologies’ official website. Visit the support section, navigate to the LS2208 product page, and download the manual for detailed instructions. Additionally, Zebra offers technical support through their website, including troubleshooting guides and software updates. For further assistance, use the 123Scan configuration utility or contact Zebra’s customer support team directly for professional help. Ensure you always use official resources for reliable information.

metrix battery instructions

The Metrix 650mAh VV 510 Thread CE3 Battery offers reliability and versatility for vaping needs. With variable voltage, a 12-second preheat feature, and USB-C charging, it ensures efficient performance. Always follow proper instructions for optimal and safe use.

Overview of the Metrix Battery

The Metrix 650mAh VV 510 Thread CE3 Battery is a versatile vaping device designed for efficiency and portability. It features variable voltage settings, a 650mAh battery capacity, and a USB-C charging port for quick power-ups. The battery also includes a 12-second preheat function for enhanced performance. Its ergonomic design and durable construction make it ideal for daily use, ensuring a seamless vaping experience with long-lasting power and reliable operation.

Importance of Following Proper Instructions

Adhering to the Metrix battery instructions ensures optimal performance, safety, and longevity. Proper charging, voltage adjustment, and maintenance prevent damage and potential hazards. Following guidelines helps maintain warranty validity and enhances user experience, ensuring reliable operation and extending the battery’s lifespan for consistent vaping satisfaction and safety.

Understanding the Metrix Battery Features

The Metrix Battery boasts variable voltage settings, a 650mAh capacity, and a USB-C charging port for efficient use. These features ensure customizable performance and long-lasting operation, tailored to meet diverse vaping preferences effectively.

Variable Voltage Settings

The Metrix Battery features adjustable voltage settings, allowing users to customize their vaping experience. This versatility accommodates various cartridge resistances and preferences, ensuring optimal flavor and vapor production. The voltage control wheel on the base provides easy and precise adjustments, enhancing user control over their sessions. With this feature, users can tailor their experience to suit different vaping styles and cartridge types effectively.

650mAh Battery Capacity

The Metrix Battery boasts a robust 650mAh capacity, ensuring extended use on a single charge. This high-capacity battery supports all-day vaping, making it ideal for heavy users. Its long-lasting performance minimizes the need for frequent recharging, offering convenience and reliability. The battery’s efficiency is further enhanced by its advanced power management system, providing consistent power delivery throughout the day.

USB-C Charging Port

The Metrix Battery features a convenient USB-C charging port, enabling fast and efficient recharging. This modern connectivity option ensures quick power-ups, reducing downtime. The USB-C port supports adaptive charging, preserving battery health and extending lifespan. With universal compatibility, it simplifies charging on-the-go, making it a practical choice for users seeking hassle-free maintenance and reliable performance.

Basic Operation of the Metrix Battery

The Metrix Battery operates with five quick clicks to turn on/off. Adjust voltage using the base wheel and utilize the 12-second preheat for consistent performance.

Turning the Battery On and Off

To activate the Metrix Battery, press the power button five times rapidly. The battery will turn on, indicated by a light or vibration. Repeat the same process to turn it off. This five-click system ensures safe and easy operation, preventing accidental activation. Always remember to turn off the battery when not in use to conserve power and maintain optimal performance.

Adjusting the Voltage

The Metrix Battery allows easy voltage adjustment using the wheel located at the base. Rotate the wheel to select your desired voltage setting for optimal performance. The variable voltage feature ensures compatibility with various cartridges and tanks, enhancing your vaping experience. Always start with a lower setting and gradually increase as needed to achieve your preferred vapor production and flavor profile.

Using the Preheat Function

The Metrix Battery features a 12-second preheat function, activated by pressing the power button twice. This ensures consistent vapor production, especially with thicker oils. Use this feature for a smoother experience. Always start with lower settings to avoid overheating and adjust as needed for optimal results.

Safety Guidelines for Metrix Battery Use

Always use the original charger and avoid overcharging. Store the battery in a cool, dry place away from metal objects. Prevent overheating and ensure proper ventilation. Never use damaged accessories or expose the battery to extreme temperatures. Dispose of the battery responsibly and follow all safety precautions to avoid potential hazards.

Proper Charging Techniques

Use the original USB-C charger to ensure safe and efficient charging. Place the battery on a stable, heat-resistant surface. Avoid overcharging by unplugging once fully charged. Keep the device away from flammable materials and monitor temperature during charging. Never charge a damaged battery or near water. Follow these steps to maintain battery health and prevent potential hazards.

Battery Storage Tips

Store the Metrix battery in a cool, dry place away from direct sunlight. Avoid extreme temperatures and moisture. Use a protective case to prevent physical damage. Keep the battery away from metal objects to prevent accidental activation. Partially charge the battery before long-term storage to maintain its health. Clean terminals regularly to ensure optimal performance and longevity. Proper storage extends the battery’s lifespan and ensures reliability when in use.

Avoiding Common Safety Hazards

Avoid overcharging the Metrix battery, as it can cause overheating and damage. Never use damaged chargers or cables, as they may lead to electrical issues. Keep the battery away from flammable materials and avoid extreme temperatures. Do not expose the battery to water or moisture. Always use compatible accessories to prevent safety risks. Following these guidelines ensures safe and reliable operation of your Metrix battery.

Troubleshooting Common Issues

If the battery doesn’t turn on, check the power button and connections. Charging issues may require using the correct USB-C charger. For voltage problems, reset or adjust settings as needed. Consult the manual or contact support for unresolved issues.

Why the Battery Might Not Turn On

The battery might not turn on due to a drained charge, faulty charger, or power button issues. Ensure the battery is fully charged and the charging port is clean. If the problem persists, check for loose connections or a faulty power button. In some cases, the battery may have a safety feature that prevents it from turning on if it detects a short circuit or over-discharge. Always use the recommended charger and follow proper charging procedures to avoid such issues. If the problem continues, consult the user manual or contact customer support for assistance.

Fixing Charging Problems

If the battery isn’t charging, ensure the USB-C port is clean and free of debris. Use the original charger and verify it’s functioning properly. Check if the charging cable is damaged or loose. If the issue persists, restart the battery by pressing the power button five times. Ensure the battery has enough charge to activate. If problems continue, consult the user manual or contact customer support for further assistance.

Resolving Voltage Adjustment Issues

If the voltage adjustment wheel isn’t responding, ensure the battery is turned on and fully charged. Clean the wheel and surrounding area to remove any debris. Press the power button five times to restart the device. If the issue persists, check the voltage range and ensure it’s set correctly. For further assistance, refer to the user manual or contact customer support.

Accessories and Compatible Products

Enhance your Metrix Battery experience with compatible cartridges, tanks, and USB-C chargers. Explore essential accessories like grinders and glass pipes for a seamless vaping setup and performance.

Recommended Cartridges and Tanks

For optimal performance, use the Metrix Battery with compatible 510-thread cartridges and tanks. These ensure seamless connectivity and vapor quality. Choose high-quality options designed for variable voltage settings to maximize efficiency and flavor. Always check compatibility before use to avoid any issues. Ensure cartridges are properly primed and tanks are clean for the best experience. Refer to the user manual or manufacturer guidelines for the best recommendations.

Compatible Chargers

Use the Metrix Battery with its USB-C charging port for efficient charging. Always use the original charger provided or a high-quality, compatible USB-C charger. Avoid using incompatible chargers to prevent damage. Ensure the charger is certified (e.g., CE or FCC) for safety and performance. Charging with an unauthorized charger may void the warranty or cause malfunction. Refer to the user manual for recommended charging options and guidelines.

Other Essential Accessories

Elevate your vaping experience with compatible cartridges, tanks, and cleaning supplies. A carrying case ensures portability and protection. Use a dab tool for handling concentrates. Regularly clean the battery and connections with a cotton swab or alcohol wipe. For optimal performance, pair with a high-quality glass water pipe or banger. Always refer to the user manual for accessory recommendations tailored to your Metrix Battery.

Advanced Features and Customization

Experience enhanced vaping with the 12-second preheat feature and customizable voltage levels. Tailor your sessions to preference and maximize battery life with precise control over settings.

Using the 12-Second Preheat Feature

The 12-second preheat feature ensures consistent vaporization by heating the coil evenly. Activate it by pressing the power button twice. This feature enhances flavor and prevents cold hits, improving your vaping experience. Use it wisely to maintain optimal coil performance and longevity. Regular preheating can also help avoid dry hits, ensuring smooth sessions every time. Always monitor temperature settings for best results.

Customizing Voltage Levels

Customizing voltage levels on the Metrix battery is straightforward using the adjustable wheel at the base. Rotate the wheel to select your preferred voltage setting, enhancing flavor and vapor production. Start with lower voltages and gradually increase to find your ideal setting. This feature allows personalized vaping experiences, ensuring optimal coil performance. Always monitor the device’s response to voltage changes for safe and efficient use.

Maximizing Battery Life

To extend the lifespan of your Metrix battery, ensure proper charging and storage. Avoid overcharging by stopping once the indicator shows full. Store the battery in a cool, dry place, away from metal objects. Clean the terminals regularly to maintain connectivity. Avoid extreme temperatures and drain the battery completely before long-term storage. Following these tips will help preserve battery health and performance over time.

Warranty and Support Information

The Metrix battery comes with a one-year warranty covering manufacturing defects. Register your product for extended support. Contact customer service for repair or replacement options. Proper use ensures warranty validity.

Understanding the Warranty Policy

The Metrix battery warranty covers manufacturing defects for one year from purchase. Registration is required for warranty activation. Damages from misuse or improper charging are excluded. Contact customer support for claims or inquiries. Proper use ensures warranty validity, providing peace of mind for your investment. Refer to the user manual for detailed terms and conditions.

Contacting Customer Support

Metrix offers dedicated customer support for any inquiries or issues. Reach out via email at support@metrix.com or call (555) 123-4567 for assistance. Visit their official website and use the contact form for prompt responses. The support team is available Monday-Friday, 9 AM-5 PM EST, to address your concerns and provide solutions. For warranty claims or troubleshooting, ensure to have your purchase details ready for efficient service.

Repair and Replacement Options

Metrix offers repair or replacement options under warranty for defective batteries. Visit their official website and navigate to the support page to submit a service request. For non-warranty issues, contact customer support for guidance. A valid proof of purchase is required for warranty claims. Repairs typically take 7-10 business days, and replacements are shipped promptly upon approval.

Best Practices for Long-Term Use

Regularly clean the battery contacts, avoid extreme temperatures, and use the original charger. Store the battery in a cool, dry place and avoid overcharging for optimal longevity.

Proper Maintenance Routine

A proper maintenance routine for the Metrix battery involves cleaning the contacts with a soft cloth to prevent residue buildup. Regularly inspect the USB-C port for debris and ensure it’s free from obstructions. Store the battery in a cool, dry place away from direct sunlight. Avoid extreme temperatures and never submerge the battery in water. Always use the original charger to maintain optimal performance and longevity.

Optimizing Battery Performance

To optimize the Metrix battery’s performance, ensure it’s fully charged before first use. Avoid letting the battery completely drain to prolong its lifespan. Use the variable voltage feature wisely, as higher settings may reduce battery life. Keep the device away from extreme temperatures and avoid overcharging. Regularly cleaning the contacts and using the original charger will also help maintain consistent performance and overall efficiency.

When to Replace the Battery

Replace the Metrix battery when its capacity drops significantly or it no longer holds a full charge. If it takes longer to charge or drains quickly, it’s time to consider a replacement. Visible wear, such as corrosion or swelling, also indicates the need for a new battery. Typically, batteries last 6-12 months with regular use. Always follow the manufacturer’s guidelines for replacement to ensure optimal performance and safety.

frigidaire grsc2352af manual

The Frigidaire GRSC2352AF manual is a comprehensive guide designed to help users understand and maintain their refrigerator. It includes installation, controls, storage, and troubleshooting tips, ensuring optimal performance and longevity. Rated highly for clarity, this manual is a go-to resource for troubleshooting common issues like ice maker malfunctions. Available as a free PDF download, it provides detailed instructions for setup, maintenance, and warranty information, making it an essential tool for owners.

1.1 Purpose of the Manual

The purpose of the Frigidaire GRSC2352AF manual is to provide users with a comprehensive guide for understanding, installing, and maintaining their refrigerator. It covers essential topics like controls, storage features, and troubleshooting to ensure optimal performance. The manual also includes safety precautions, warranty details, and maintenance tips, helping users get the most out of their appliance. Available as a free PDF download, it serves as a valuable resource for both new and experienced users, promoting efficient and safe operation of the refrigerator.

1.2 Key Features of the Frigidaire GRSC2352AF Refrigerator

The Frigidaire GRSC2352AF refrigerator features advanced storage solutions, including adjustable shelving, CrispSeal Plus Crisper drawers, and door storage options for optimal organization. It offers a side-by-side design with a smudge-proof stainless steel finish. The refrigerator includes an automatic ice and water dispenser, LED interior lighting, and a water filter for clean hydration. Energy-efficient design and quiet operation enhance user experience. With a 22.3 cu. ft. capacity, it provides ample space for groceries while maintaining fresh produce quality and efficient cooling performance.

Installation and Setup

Proper installation ensures optimal performance. Install the door handle, connect the water supply, and level the refrigerator for stability. Refer to the Product Installation Guide on Frigidaire’s website for detailed instructions. Ensure clearance and alignment meet specifications for smooth operation. Follow the manual’s guidelines to avoid service issues and maintain warranty validity. Correct installation is key to longevity and efficiency of the appliance, ensuring all features function as intended and minimizing potential problems. Always follow safety precautions outlined in the manual during setup.

2.1 Door Handle Installation

Install the door handle by aligning it with the pre-drilled holes on the refrigerator door. Secure it using the provided screws, ensuring tightness without over-tightening. Proper alignment is crucial for smooth operation. If misaligned, adjust the screws slightly and recheck. Refer to the manual for specific torque recommendations. Handle installation should be done carefully to avoid damage. Once installed, test the handle by opening and closing the door to ensure it functions smoothly and evenly. Proper installation ensures durability and prevents potential issues with door operation over time.

2.2 Water Supply Connection

To connect the water supply, locate the shut-off valve near the refrigerator. Attach the provided water supply line to the valve and the refrigerator’s inlet. Use a wrench to tighten the connections firmly. Ensure the water supply is turned off before starting. Once connected, turn the water supply back on and check for leaks by inspecting the connections. Proper installation ensures the ice and water dispenser function correctly. Follow the manual’s guidelines for recommended tubing materials to prevent contamination and leaks.

2.3 Leveling and Alignment

Proper leveling ensures the refrigerator operates efficiently and prevents vibration. Use a level tool to check the unit’s balance. Adjust the adjustable legs at the base by turning them clockwise or counterclockwise until the refrigerator is evenly balanced. Ensure the unit is plumb to avoid door misalignment. Once leveled, tighten the legs securely to maintain stability. Proper alignment ensures smooth door operation and prevents unnecessary wear on components. Follow the manual’s specific instructions for accurate leveling to guarantee optimal performance and longevity of your Frigidaire GRSC2352AF refrigerator.

Controls and Settings

The Frigidaire GRSC2352AF manual details an intuitive control panel for managing temperature, ice, and water settings. The display provides clear monitoring, while buttons offer easy adjustments for optimal performance.

3.1 Display Overview

The Frigidaire GRSC2352AF features a user-friendly display that shows temperature settings, ice maker status, and error codes. The screen is easy to read and navigate, providing real-time updates. It allows users to adjust settings with a few button presses, ensuring convenience and efficiency. The display also lights up when interacted with, enhancing accessibility. This feature helps maintain optimal refrigerator performance and simplifies troubleshooting by clearly indicating system status and potential issues. Regular updates ensure accurate information is always available.

3.2 Adjusting Temperature Settings

The Frigidaire GRSC2352AF allows precise temperature control for optimal food storage. To adjust settings, press the temperature control buttons on the display panel. The refrigerator section can be set between 34°F and 45°F, while the freezer ranges from -14°F to 5°F. Use the up and down arrows to select your desired temperatures. Press and hold the buttons to quickly adjust. The display will show the new settings once confirmed. Ensure temperatures are set correctly to maintain food freshness and prevent freezing issues. Refer to the manual for additional tips on energy efficiency and optimal temperature ranges.

3.3 Using the Automatic Ice and Water Dispenser

To use the automatic ice and water dispenser, ensure the water supply is connected and the ice maker is activated. Select your preferred option (ice or water) using the control panel. Place a glass under the dispenser and press the glass against the paddle or button to dispense. For troubleshooting, check if the water filter is clogged or if the ice maker switch is off. Regularly cleaning the dispenser and replacing the water filter ensures optimal performance and fresh tasting water and ice.

Storage Features

The Frigidaire GRSC2352AF offers adjustable shelving, CrispSeal Plus crisper drawers for fresh produce, and door storage options, providing flexible and organized food storage solutions.

4.1 Adjustable Shelving and Bins

The Frigidaire GRSC2352AF features adjustable shelving and bins, allowing users to customize storage spaces according to their needs. The shelves, made of durable glass, can be rearranged to accommodate items of various sizes, ensuring efficient use of interior space. Additionally, the adjustable 2-liter door bins provide convenient storage for beverages and condiments, keeping them within easy reach. This flexibility enhances organization and accessibility, making it easier to manage groceries and household items effectively.

4;2 CrispSeal Plus Crisper Drawer

The CrispSeal Plus Crisper Drawer is designed to maintain optimal humidity levels, keeping fruits and vegetables fresh for a longer period. This advanced feature ensures produce stays crisp and retains its natural flavor. The drawer’s leak-proof design prevents moisture loss, while its adjustable settings allow customization for different types of food. Regular cleaning of the drawer is recommended to maintain hygiene and performance, ensuring your groceries remain fresh and healthy.

4.3 Door Storage Options

The Frigidaire GRSC2352AF features versatile door storage solutions, including adjustable bins and fixed compartments; The adjustable 2-liter door bins provide customizable space for bottles and beverages, while the fixed condiment bins offer convenient storage for smaller items. These options maximize door space, ensuring efficient organization of food and drinks. The bins are easy to adjust and clean, making it simple to tailor the storage to your needs. This design enhances accessibility and keeps essentials within easy reach, optimizing kitchen workflow.

Maintenance and Care

Regular maintenance ensures optimal performance. Replace water filters every 6 months and clean the interior with mild soap. Wipe the exterior with stainless steel cleaner to maintain appearance.

5.1 Filter Replacement

Regular filter replacement is crucial for clean water and ice. The water filter should be replaced every 6 months or when the “Replace Water Filter” indicator lights up. To replace, locate the filter in the top right corner of the refrigerator, turn it counterclockwise, and remove. Install the new filter by aligning it, turning it clockwise until it clicks, and flushing it by running 2-3 gallons of water through the dispenser to ensure purity and taste.

5.2 Cleaning the Interior and Exterior

Regular cleaning ensures optimal performance and hygiene. For the interior, wipe shelves and drawers with a mild detergent and warm water. Remove all contents and shelves before cleaning. The exterior can be cleaned with a soft cloth and gentle detergent to avoid scratches. Avoid using abrasive cleaners or bleach. Dry all surfaces thoroughly after cleaning to prevent water spots. Clean the door seals regularly to maintain a tight seal and energy efficiency. This maintenance routine keeps your refrigerator looking new and functioning smoothly.

Troubleshooting Common Issues

Identify common problems like ice maker malfunctions or error codes. Check the manual for solutions or reset procedures. Contact customer support if issues persist for expert assistance.

6.1 Ice Maker Not Producing Ice

The ice maker may stop producing ice due to issues like a blocked water supply, incorrect temperature settings, or clogged ice dispenser. Ensure the water supply line is connected and not kinked. Check the freezer temperature is set between 0-5°F for optimal ice production. If the issue persists, consult the troubleshooting section in the manual or contact Frigidaire customer support for further assistance and possible service scheduling.

6.2 Error Codes and Solutions

Error codes on the Frigidaire GRSC2352AF indicate specific issues. For example, “E1” or “E2” may signal sensor malfunctions, while “S1” could indicate a short in the ice maker. Refer to the manual for a full list of codes. Solutions often involve resetting the appliance, checking wiring connections, or replacing faulty sensors. If errors persist, consult the troubleshooting guide or contact Frigidaire customer support for professional assistance. Regular maintenance and timely repairs can prevent recurring issues.

Product Specifications

The Frigidaire GRSC2352AF is a 22.3 cu. ft. side-by-side refrigerator with advanced features like CrispSeal Plus Crisper and adjustable shelving. Its dimensions and energy efficiency make it a practical choice for modern kitchens.

7.1 Refrigerator Capacity and Dimensions

The Frigidaire GRSC2352AF has a 22.3 cu. ft. capacity, offering ample space for fresh and frozen items. Its dimensions are 36 inches in width, 69 inches in height (including hinges), and 33.75 inches in depth (without doors). This size ensures a perfect fit for standard kitchens while providing efficient storage solutions. The side-by-side design maximizes space, making it ideal for modern households seeking both functionality and convenience.

7.2 Energy Efficiency and Ratings

The Frigidaire GRSC2352AF is ENERGY STAR® certified, ensuring energy efficiency and lower utility bills. With advanced insulation and an eco-friendly compressor, it meets strict energy consumption standards. The refrigerator features an Energy Guide label, highlighting its energy-saving capabilities. Its efficient design not only reduces environmental impact but also provides reliable performance. This model is designed to meet modern energy standards while maintaining superior cooling and storage capabilities for fresh and frozen foods.

Downloading the Manual

The Frigidaire GRSC2352AF manual is available for free download in PDF format from Frigidaire.com and other trusted sources like ManualsLib. Access it easily online today.

8.1 PDF Download Options

The Frigidaire GRSC2352AF manual is available for free download as a PDF from Frigidaire’s official website and trusted platforms like ManualsLib. Users can access it in English, Spanish, or French. The PDF format ensures easy viewing on any device. Simply visit the official Frigidaire website, navigate to the support section, and search for the GRSC2352AF model to download the manual instantly. No registration is required, making it a convenient resource for setup, maintenance, and troubleshooting.

8.2 Language Availability

The Frigidaire GRSC2352AF manual is available in multiple languages to cater to a diverse user base. English, Spanish, and French versions can be downloaded for free from Frigidaire’s official website and other trusted platforms. This ensures that users from different regions can easily access and understand the guide. Language options are clearly listed on the download page, making it simple to select the preferred version for convenient reading and reference.

Additional Resources

Frigidaire offers extensive support through their official website, including customer service contacts and downloadable resources. The manual is also available online for easy access and reference.

9.1 Customer Support Contact Information

Frigidaire provides dedicated customer support to address any queries or concerns. For assistance in the United States, call 1-800-374-4432. Canadian customers can reach support at 1-800-265-8352. Additionally, the official Frigidaire website offers live chat options, allowing users to quickly resolve issues. Visit Frigidaire.com or Frigidaire.ca for more details and to access support resources. This ensures comprehensive assistance for all product-related needs, enhancing user experience and satisfaction.

9.2 Warranty and Service Information

The Frigidaire GRSC2352AF is backed by a comprehensive warranty program. For detailed warranty terms, visit Frigidaire’s official website or refer to the manual. The warranty covers parts and labor for defective components, ensuring reliable performance. To maximize coverage, register your product online. For service inquiries, contact customer support at 1-800-374-4432 (U.S.) or 1-800-265-8352 (Canada). Additional resources, such as performance data sheets, are available on Frigidaire.com.