Archive: August 27, 2025

brother ls 2125 sewing machine manual

The Brother LS-2125 sewing machine is a versatile‚ user-friendly device designed for both beginners and experienced sewists. It features 14 built-in stitches‚ including straight‚ zigzag‚ and stretch stitches‚ making it ideal for various sewing projects. With its compact design and easy-to-use interface‚ this machine is perfect for home use‚ offering reliability and consistency in stitching. The included manual provides comprehensive guidance‚ ensuring users can maximize its potential and maintain optimal performance.

1.1 Overview of the Machine

The Brother LS-2125 sewing machine is a reliable‚ electro-mechanical device designed for versatile sewing tasks. It features 14 built-in stitches‚ including straight‚ zigzag‚ and stretch stitches‚ catering to various fabric types. The machine operates at a speed of 400 stitches per minute‚ ensuring efficiency. It includes a horizontal bobbin system for smooth stitching and comes with essential accessories like a pedal‚ needle‚ and instruction manual. Its compact design and user-friendly interface make it ideal for both beginners and experienced sewists‚ offering consistent performance for home-based sewing projects;

1.2 Importance of the Manual

The manual is essential for understanding the Brother LS-2125’s features‚ setup‚ and maintenance. It provides detailed instructions for threading‚ bobbin winding‚ and troubleshooting common issues. The guide also explains stitch selection and tension adjustment‚ ensuring optimal sewing performance. Additionally‚ it covers safety precautions and error codes‚ helping users avoid potential hazards and resolve problems efficiently; As a comprehensive resource‚ the manual is indispensable for both beginners and experienced users‚ enabling them to maximize the machine’s capabilities and prolong its lifespan through proper care and operation.

Installation and Setup

Unpack the machine carefully‚ ensuring all accessories are included. Plug in the power cord and refer to the manual for initial setup instructions and configuration guidance.

2.1 Unpacking the Machine

When unpacking the Brother LS-2125 sewing machine‚ carefully remove it from the box along with the included accessories. These typically include the sewing machine‚ a pedal‚ an instruction manual‚ and additional sewing notions. Inspect the machine for any visible damage or defects. Ensure all components are accounted for by cross-referencing with the manual’s packaging list. Gently wipe down the machine with a soft cloth to remove any dust from shipping. Before powering on‚ familiarize yourself with the manual to understand proper setup and operation procedures. This step ensures a smooth and safe initial setup process.

2.2 Initial Setup and Configuration

After unpacking‚ place the machine on a stable‚ flat surface. Plug in the power cord and ensure all accessories‚ like the pedal and presser feet‚ are securely attached. Follow the manual’s guidance to configure the machine for first-time use. Test the machine by sewing a few stitches on scrap fabric to ensure proper function. Adjust the stitch length and width as needed using the control dials. Familiarize yourself with the needle position and tension settings for optimal performance. Proper setup ensures smooth operation and prevents potential issues during sewing projects.

2.3 Software and Driver Installation

Installing the software and drivers for the Brother LS-2125 ensures optimal performance and connectivity. Visit the official Brother website to download the latest drivers and software compatible with your operating system. Run the installer and follow the on-screen prompts to complete the setup. Restart your sewing machine and computer after installation to ensure proper recognition. For compatibility‚ check the manual for supported OS versions. Drivers are typically included in the software package or available separately online. Refer to the manual for troubleshooting tips if connectivity issues arise during installation.

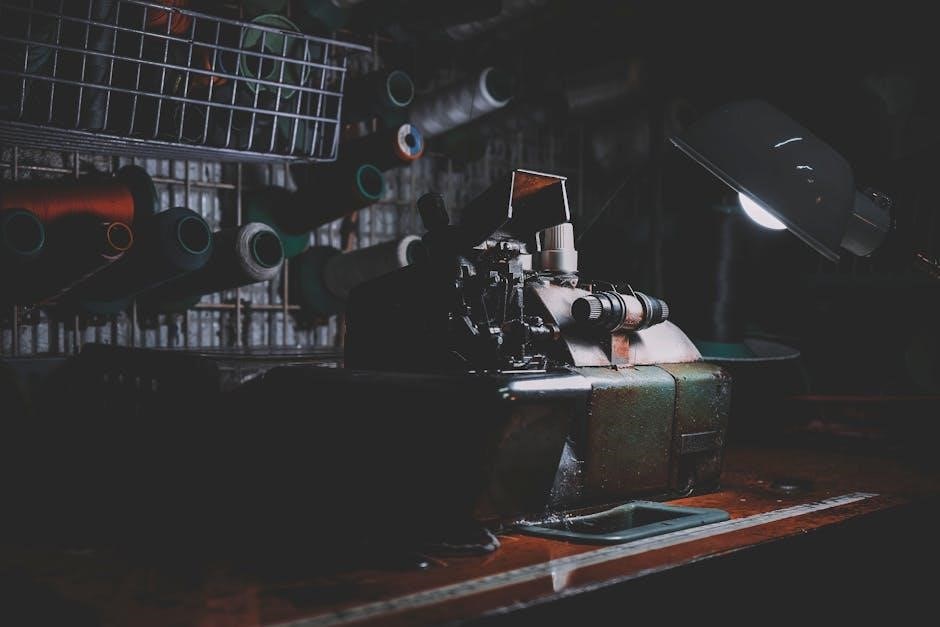
Understanding the Machine Components

The Brother LS-2125 features a pedal‚ control panel‚ and spool pins. Interior components include the bobbin case and shuttle hook‚ ensuring smooth stitching operations.

3.1 Exterior Parts Identification

The Brother LS-2125 sewing machine features a compact and user-friendly design. Key exterior components include the pedal‚ control panel with stitch selection buttons‚ spool pins for thread placement‚ and a bobbin compartment. The machine also has a built-in carry handle for portability. The stitch selector dial and tension knobs are conveniently located for easy access. The exterior is durable‚ with a metal framework that ensures stability during operation. Understanding these parts is essential for proper setup and use‚ as outlined in the manual.

3.2 Interior Components Explanation

The Brother LS-2125’s interior houses essential components like the gear system‚ bobbin mechanism‚ and tension discs. The gear system ensures smooth stitch selection and operation‚ while the bobbin mechanism manages thread delivery. Tension discs regulate thread tightness‚ preventing uneven stitching. These parts work harmoniously to deliver consistent results. Regular maintenance‚ as outlined in the manual‚ is crucial for longevity and performance. Understanding these components helps users troubleshoot and maintain the machine effectively‚ ensuring optimal sewing experiences.

Basic Operations

Mastering basic operations ensures smooth sewing. Proper threading‚ bobbin winding‚ and fabric handling are essential for consistent stitching. Follow manual guidelines for optimal results and efficiency.

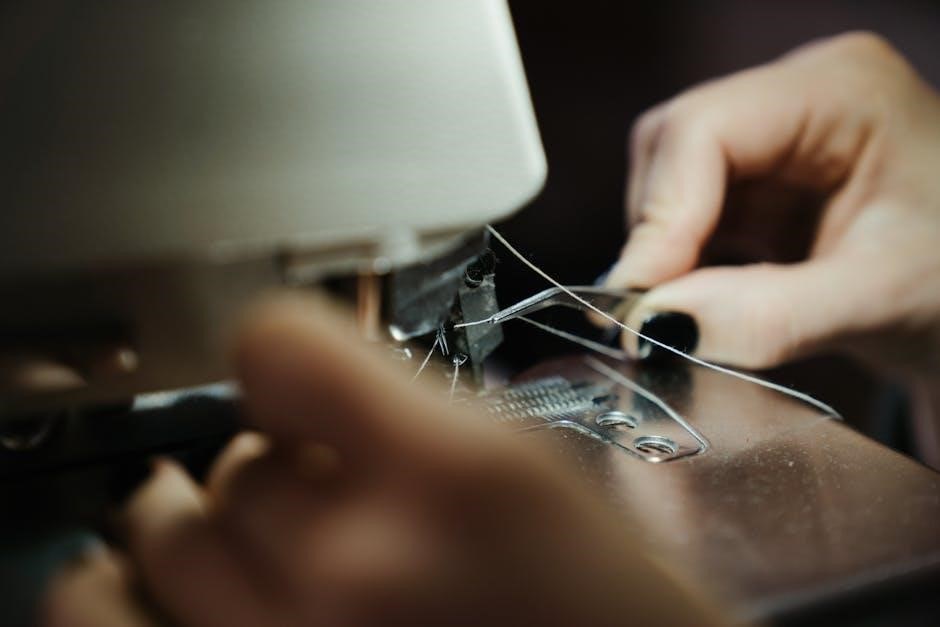
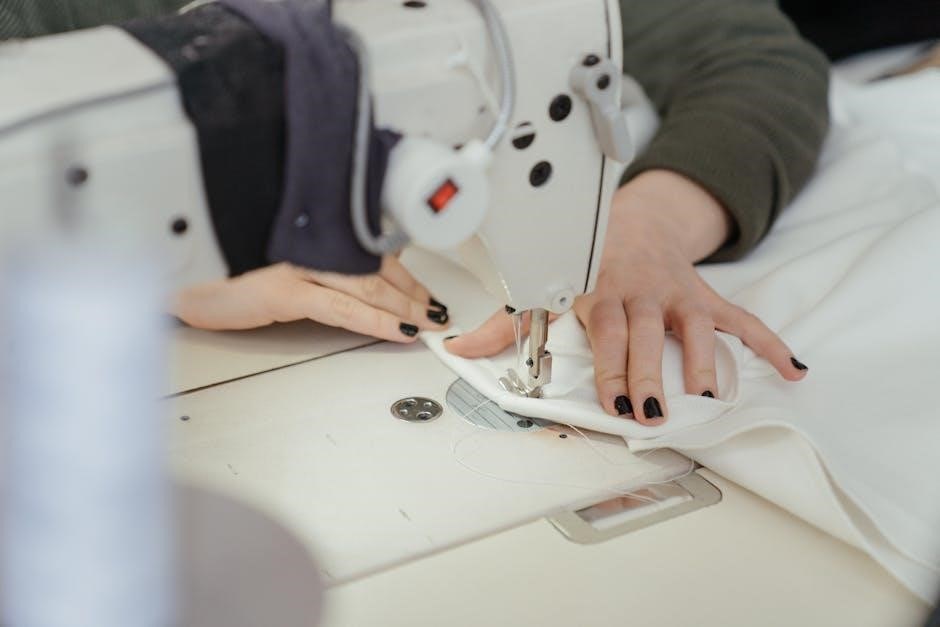
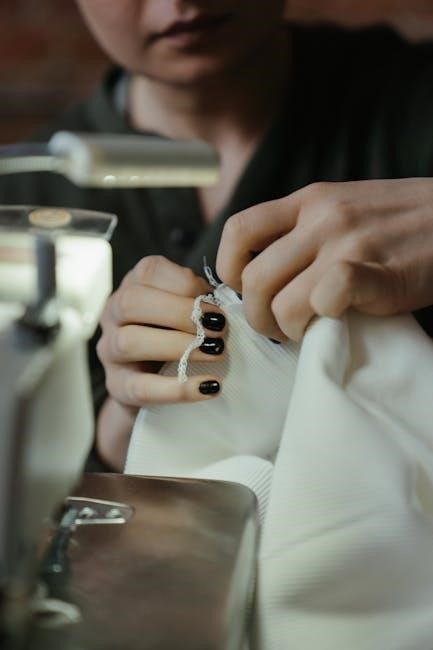
4.1 Threading the Machine

Threading the Brother LS-2125 sewing machine is a straightforward process when done correctly. Start by raising the presser foot and locating the spool pin. Gently pull the thread from the spool and guide it through the tension discs‚ ensuring it clicks into place. Follow the diagram on the machine or in the manual for the correct path. Pull the thread gently to remove any slack and ensure it is seated properly in the tension spring. Finally‚ insert the thread through the needle from front to back. Always test the thread tension on a scrap fabric before sewing to ensure smooth operation.

4.2 Winding the Bobbin

Properly winding the bobbin is essential for smooth stitching. Start by placing the bobbin on the designated spindle and thread the end through the bobbin’s hole. Gently wind the thread around the bobbin‚ ensuring even tension. Avoid overfilling‚ as this can cause jamming. Once full‚ cut the thread and trim any excess. Use the machine’s built-in cutter or scissors for precise trimming. Always use a bobbin designed for the Brother LS-2125 to maintain compatibility and prevent stitching issues. Proper winding ensures consistent stitch quality and avoids machine malfunction.

Types of Stitches

The Brother LS-2125 features 14 built-in stitches‚ including straight‚ zigzag‚ and stretch stitches‚ designed for versatility in sewing projects‚ from basic repairs to intricate designs.

5.1 Straight Stitch

The straight stitch is the most basic and commonly used stitch on the Brother LS-2125 sewing machine. It is ideal for sewing straight lines‚ repairing seams‚ and working with lightweight fabrics. To select the straight stitch‚ simply choose the appropriate stitch option using the stitch selector. This stitch is perfect for beginners and experienced sewists alike‚ offering a clean and consistent result. It is recommended for general sewing tasks and is a great starting point for exploring the machine’s capabilities.

5.2 Zigzag Stitch

The zigzag stitch on the Brother LS-2125 is ideal for sewing stretchy fabrics‚ finishing seams‚ and creating decorative edges. It is also useful for preventing fraying by enclosing raw edges. To use this stitch‚ select the zigzag pattern on the machine and adjust the stitch width and length according to your fabric type. Using the appropriate presser foot‚ such as the zigzag foot‚ ensures even stitching. This versatile stitch is perfect for both functional and creative projects‚ offering a professional finish to your work. Always refer to the manual for specific settings and guidelines.

5.3 Stretch Stitch

The stretch stitch on the Brother LS-2125 is designed for sewing elastic or stretchy fabrics‚ ensuring flexibility without breaking stitches. It is particularly useful for garments like knits‚ swimwear‚ or activewear. To use this stitch‚ select the appropriate stitch number from the manual‚ typically marked for stretch fabrics. The machine adjusts the stitch length and width to accommodate fabric movement. For optimal results‚ use a stretch needle and a walking foot if available. Always test the stitch on scrap fabric to ensure the desired elasticity and quality of the seam.

Maintenance and Troubleshooting

Regular cleaning and oiling are essential to maintain the Brother LS-2125’s performance. Proper tension adjustment prevents fabric bunching. Addressing common issues promptly ensures smooth operation and longevity.

6.1 Cleaning the Machine

Regular cleaning is essential to maintain the Brother LS-2125 sewing machine’s performance. Turn off and unplug the machine before cleaning. Use a soft-bristled brush or a small vacuum cleaner to remove lint and debris from the bobbin area‚ hook race‚ and stitch plate. Avoid using liquids or harsh chemicals‚ as they may damage the machine’s components. Gently wipe the exterior with a dry cloth to prevent dust buildup. Cleaning should be done after each project to ensure smooth operation and prevent thread jams. Regular maintenance helps extend the machine’s lifespan and ensures consistent stitching quality.

6.2 Oiling the Machine

Regular oiling is essential to maintain the Brother LS-2125’s performance and extend its lifespan. Turn off and unplug the machine before oiling. Use only the sewing machine oil provided or recommended in the manual. Apply a few drops to the hook race area and other moving parts as indicated in the manual. Allow the machine to sit for a few minutes to let the oil distribute evenly. Proper lubrication ensures smooth operation‚ prevents friction‚ and reduces the risk of mechanical issues. Always refer to the manual for specific oiling instructions and recommendations.

6.3 Tension Adjustment

To ensure proper stitching‚ regular tension adjustment is essential for the Brother LS-2125. Begin by checking the bobbin and thread alignment. Locate the tension dials‚ usually found near the bobbin case or on the machine’s front. Turn the dials gently to balance the upper and lower thread tensions. Test the stitches on a scrap fabric after each adjustment. Proper tension prevents loose stitches or fabric bunching. Refer to the manual for specific dial locations and adjustment guidelines to maintain optimal sewing performance and extend the machine’s lifespan.

6.4 Common Issues and Solutions

Common issues with the Brother LS-2125 include thread bunching‚ bobbin jams‚ and uneven stitching. To resolve these‚ ensure proper threading‚ clean the machine regularly‚ and check bobbin alignment. Tension adjustment may be needed for balanced stitches. If the machine stops operating‚ inspect for lint buildup or damaged parts. Always use recommended accessories to prevent errors. For error codes‚ refer to the manual for specific solutions. Regular maintenance‚ like oiling and dusting‚ helps maintain performance and extends machine lifespan. Addressing issues promptly ensures smooth sewing experiences.

6.5 Error Codes and Their Meanings

The Brother LS-2125 sewing machine displays error codes to indicate specific issues. Common codes include E1 (needle problem)‚ E2 (thread jam)‚ and E3 (bobbin error). These codes guide users to resolve issues quickly. For example‚ E1 may mean the needle is bent or incorrectly inserted‚ while E2 suggests thread tangles or improper tension. Refer to the manual for detailed solutions‚ as some errors require adjusting settings or cleaning the machine. Understanding these codes ensures optimal performance and extends the machine’s lifespan. Always consult the manual for accurate troubleshooting.

Tips for Efficient Use

For efficient use‚ choose fabrics matching stitch types‚ use appropriate needles‚ maintain tension‚ clean regularly‚ and use compatible accessories. Practice on scrap fabric first.

7.1 Choosing the Right Fabric

Selecting the appropriate fabric is crucial for achieving optimal results with the Brother LS-2125 sewing machine. Cotton‚ polyester‚ and blends are ideal for everyday projects‚ while heavier fabrics like denim or canvas may require a heavier-duty needle. Avoid delicate materials like silk or lace without proper stabilization. Always pre-wash and dry fabric to ensure proper fit and prevent shrinkage after sewing. Testing fabric compatibility with machine settings beforehand ensures smooth operation and professional-looking results.

  • Cotton and polyester blends are versatile choices.
  • Heavier fabrics may need a specialized needle.
  • Pre-washing fabric prevents post-sewing shrinkage.

7.2 Selecting the Appropriate Needle

Selecting the right needle for your Brother LS-2125 is crucial for optimal performance. Use universal needles for general sewing‚ sharp needles for woven fabrics‚ and heavy-duty needles for thick materials. Always choose needles compatible with the machine’s specifications to ensure smooth operation. Refer to the manual for recommended needle types and sizes. Regularly inspect and replace dull or damaged needles to prevent fabric damage and maintain stitch quality. Proper needle selection enhances sewing efficiency and prevents potential issues during use.

7.3 Optimizing Stitch Quality

To achieve the best results with your Brother LS-2125‚ ensure proper threading and tension adjustment. Use the correct needle type for your fabric to prevent breakage and uneven stitches. Regularly clean and oil the machine to maintain smooth operation. Select the appropriate stitch length and width for your project‚ and always use high-quality thread. Test stitches on scrap fabric before sewing your final piece. Proper presser foot pressure and consistent fabric feeding also enhance stitch quality. Refer to the manual for specific settings and adjustments tailored to your sewing needs.

Accessories and Compatibility

The Brother LS-2125 includes a pedal and instruction manual. Additional compatible presser feet are available‚ ensuring versatility. Use only manufacturer-recommended accessories for optimal performance.

8.1 Recommended Accessories

For optimal performance‚ use Brother-approved accessories like compatible bobbins‚ needles‚ and presser feet. A walking foot or zipper foot enhances stitching on thick fabrics. Extra spool pins and a seam ripper are handy. Ensure all parts align with the machine’s specifications to maintain warranty and functionality. Using genuine accessories prevents damage and ensures consistent stitch quality. Refer to the manual for a full list of compatible items tailored for the Brother LS-2125.

8.2 Compatible Presser Feet

The Brother LS-2125 sewing machine comes with a standard presser foot‚ ideal for general sewing tasks. Optional presser feet‚ such as the zigzag foot‚ buttonhole foot‚ and blind hem foot‚ are available to enhance functionality. The zigzag foot is perfect for sewing through thick or layered fabrics‚ while the buttonhole foot simplifies creating custom buttonholes. The blind hem foot is designed for invisible hems on pants and curtains. Always use Brother-approved presser feet to ensure compatibility and maintain optimal machine performance. These accessories are specifically designed to work seamlessly with the LS-2125‚ ensuring precise results for various sewing projects.

Safety Precautions

Always use recommended accessories to avoid damage. Never operate the machine with a damaged cord or plug. Keep children away during operation. Ensure regular maintenance for safe functionality and performance.

9.1 General Safety Guidelines

Always read the manual thoroughly before using the Brother LS-2125 sewing machine. Ensure the machine is placed on a stable‚ flat surface and keep children away while operating. Use only accessories recommended by the manufacturer to avoid damage. Never operate the machine with a damaged cord or plug. Keep loose clothing and long hair tied back to prevent accidents. Avoid touching sharp parts like the needle or presser foot. Use the correct needle type for your fabric to maintain safety and performance. Keep the work area clean and well-lit. Unplug the machine when not in use or during maintenance.

9.2 Electrical Safety

Ensure the sewing machine is used in a dry environment‚ away from water to prevent electrical hazards. Avoid damaged cords or plugs‚ as they pose a risk of electric shock. Always unplug the machine when not in use or during maintenance. Use only the power source specified in the manual to prevent overload. Never operate the machine near flammable materials or in areas with extreme temperatures. Keep children away from electrical components. Regularly inspect the power cord for wear and tear‚ replacing it if necessary. Follow these guidelines to maintain a safe sewing environment.

User Manual Specifics

The Brother LS-2125 user manual is a comprehensive guide available in PDF format (1.4MB). It provides detailed instructions for setup‚ operation‚ and troubleshooting‚ ensuring optimal use of the machine.

10.1 Navigating the Manual

The Brother LS-2125 sewing machine manual is designed to be user-friendly‚ with clear sections and detailed instructions. It begins with an overview of the machine’s features and safety precautions‚ followed by installation and setup guides. The manual includes step-by-step instructions for basic operations like threading and bobbin winding‚ as well as troubleshooting tips. A detailed stitch guide and maintenance section ensure users can optimize performance. The document is organized logically‚ making it easy to locate specific information quickly. Use the table of contents or index to navigate efficiently and access the guidance you need for seamless operation.

10.2 Understanding Symbols and Terminology

The manual uses specific symbols and terminology to guide users effectively. Symbols like checkmarks and X marks indicate correct and incorrect practices. Terms such as “tension‚” “bobbin‚” and “presser foot” are defined to ensure clarity. The manual also explains technical terms like “stitch length” and “width” to help users customize their sewing. Abbreviations and icons are clearly defined‚ making it easier to follow instructions. This section ensures users understand the machine’s components‚ settings‚ and operations‚ enabling them to use the Brother LS-2125 sewing machine confidently and efficiently.

Frequently Asked Questions (FAQ)

  • Q: How do I thread the machine properly? A: Follow the manual’s step-by-step guide for threading to ensure correct tension and alignment.
  • Q: Why does the thread keep breaking? A: Check for incorrect tension‚ blunt needles‚ or improper fabric handling.
  • Q: Where can I find the user manual? A: The manual is available for free download on the official Brother website or authorized retailers.

11.1 Common Queries

Users often inquire about threading the machine correctly‚ troubleshooting tension issues‚ and understanding error codes. Many ask about compatible accessories and presser feet. Others seek advice on maintaining stitch quality and resolving common operational problems. Queries also include questions about bobbin winding‚ selecting the right needles‚ and optimizing fabric choices. Additionally‚ users frequently ask about software updates‚ oiling procedures‚ and the meaning of specific symbols in the manual. These questions highlight the most common challenges users face when operating the Brother LS-2125 sewing machine.

11.2 Solutions to Frequently Encountered Problems

  • Thread breaking: Check for loose tensions or incorrect needle size; Use high-quality thread suitable for your fabric.
  • Bobbin not moving: Ensure proper bobbin installation and threading. Clean lint from the bobbin area regularly.
  • Uneven stitches: Adjust the tension settings or replace the needle if it’s dull or bent.
  • Machine noise: Lubricate internal parts and ensure all components are aligned properly.
  • Fabric not feeding: Verify presser foot is lowered and fabric is placed correctly.

These solutions address common issues effectively‚ ensuring smooth operation of your Brother LS-2125 sewing machine.

The Brother LS-2125 sewing machine is a reliable and versatile tool for sewing enthusiasts‚ offering 14 essential stitches and a user-friendly design. Its robust construction and ease of operation make it suitable for both beginners and experienced sewists. The comprehensive manual provides detailed guidance‚ ensuring optimal performance and longevity. Regular maintenance‚ proper threading‚ and adherence to safety guidelines are key to maximizing its potential. With its affordability and durability‚ the Brother LS-2125 remains a top choice for crafting and home sewing projects. Keep the manual handy for future reference and enjoy seamless sewing experiences.

nhs phonak hearing aid instructions

The NHS provides Phonak hearing aids to improve hearing clarity and comfort. These devices feature manual volume control‚ multiple programs‚ and Bluetooth connectivity for enhanced functionality. Proper usage ensures optimal performance and benefit.

Overview of Phonak Hearing Aids

Phonak hearing aids‚ provided by the NHS‚ are designed to enhance hearing clarity and comfort. Models like Phonak Auto UP and Nathos Nova offer manual volume control and programmable settings for various environments. They support Bluetooth connectivity‚ enabling pairing with smartphones and the myPhonak app for personalized settings. These devices use size 675 batteries‚ ensuring reliability and longevity. Phonak hearing aids are known for their portability and suitability for both home and professional healthcare settings. Proper usage and maintenance are crucial for optimal performance. Users are encouraged to refer to the provided user guides for detailed instructions on setup‚ operation‚ and care to maximize their benefits and ensure longevity.

Importance of Following Instructions

Adhering to the provided instructions ensures optimal functionality and longevity of Phonak hearing aids. Proper setup‚ battery management‚ and care routines are essential to maintain sound quality and device performance. Misuse can lead to connectivity issues‚ reduced battery life‚ or even device damage. Following guidelines helps users navigate features like volume control‚ program switching‚ and Bluetooth pairing effectively. It also prevents potential hazards‚ such as using the devices in explosive environments. Regular maintenance and correct handling ensure the hearing aids continue to meet individual needs‚ providing clear and reliable sound. By following the instructions‚ users can fully benefit from their Phonak hearing aids and maintain their effectiveness over time. Proper care also ensures compliance with safety standards and NHS guidelines for hearing aid use.

Key Features of Phonak NHS Hearing Aids

Phonak NHS hearing aids are designed with advanced features to enhance hearing clarity and user convenience. They include manual volume control‚ multiple programs for different listening environments‚ and Bluetooth connectivity for seamless pairing with phones and the myPhonak app. The devices are equipped with rechargeable or disposable batteries‚ offering flexibility and reliability. Their compact and lightweight design ensures comfort and discretion. Additionally‚ Phonak hearing aids support remote adjustments and custom settings‚ allowing personalized sound experiences. These features make them suitable for various lifestyles and hearing needs‚ providing users with improved communication and confidence in diverse settings. Regular updates and compatibility with assistive devices further enhance their functionality and user satisfaction.

Setting Up and Initial Configuration

Turn on the hearing aids‚ insert batteries‚ and switch programs as needed. Follow the provided instructions for pairing and initial setup to ensure proper functionality and ease of use.

Unboxing and Identifying Parts of the Hearing Aid

When unboxing your Phonak NHS hearing aid‚ carefully inspect the contents. Typically included are the hearing aid(s)‚ batteries‚ an earmold‚ and a user manual. Identify key components like the battery compartment‚ program button‚ and volume control. The hearing aid may have markings (L/R) to distinguish left and right devices. Familiarize yourself with the parts to ensure proper handling and maintenance. Refer to the provided diagrams or user guide for detailed descriptions. Understanding each part’s function is essential for effective use and troubleshooting. Take your time to examine and identify all components before proceeding to setup and configuration.

Inserting and Wearing the Hearing Aid Correctly

Refer to your user manual or guide for specific instructions tailored to your Phonak NHS hearing aid model. Hold the hearing aid by the battery compartment or earmold‚ depending on the style. For behind-the-ear models‚ gently place the earmold into the ear canal‚ ensuring a secure fit. For in-the-ear models‚ insert the device into the ear‚ aligning it with the natural shape of your ear. Use the retention clip or design to keep it in place. Check for comfort and proper positioning. Adjust as needed for a snug fit. If using an earmold‚ ensure it is correctly seated in the ear canal. For optimal sound quality‚ avoid inserting the hearing aid too deeply or at an angle. Consult your hearing care professional if you experience discomfort or difficulty with insertion.

Turning the Hearing Aid On and Off

To turn the Phonak hearing aid on‚ open the battery compartment or flip the on/off switch‚ depending on your model. For models with a battery drawer‚ open it to activate the device. Ensure the battery is properly seated for optimal performance. When not in use‚ close the battery compartment or switch off to conserve power. Some models may have a toggle switch; refer to your user manual for specifics. Allow a few seconds for the hearing aid to power up or down. If using rechargeable batteries‚ place the hearing aids in their charging case to turn them off. Always follow the manufacturer’s guidelines for your particular Phonak NHS hearing aid model to ensure proper functionality and battery management.

Using Phonak Hearing Aids

Using Phonak hearing aids involves easily adjusting volumes‚ switching between tailored programs‚ and utilizing the program button for customized listening settings and enhanced sound quality.

Adjusting Volume Manually

Adjusting the volume manually on Phonak NHS hearing aids is straightforward. Users can utilize the rocker switch to increase or decrease the volume‚ ensuring optimal sound levels. This feature allows personalization to suit various environments‚ providing clarity and comfort. Proper adjustment ensures clear communication without distortion. Regular volume checks are recommended to maintain desired settings. Always refer to the user guide for specific instructions tailored to your model. Manual volume control offers simplicity and direct access‚ enabling users to manage their hearing experience effectively. This feature is essential for maximizing the benefits of Phonak hearing aids in daily life.

Switching Between Programs for Different Environments

Phonak NHS hearing aids offer multiple programs tailored for various environments‚ enhancing listening comfort. To switch programs‚ press the program button until the desired setting is activated. Common programs include settings for quiet environments‚ noisy settings‚ and phone use. This feature allows users to adapt to different acoustic situations seamlessly. For optimal performance‚ test the programs in real-life scenarios to ensure they meet your needs. Refer to the user guide for specific instructions on program selection and customization. Regularly using the correct program for your environment can significantly improve sound clarity and overall satisfaction with your hearing aids.

Using the Program Button for Custom Settings

The program button on Phonak NHS hearing aids allows users to access custom settings tailored to their preferences. Pressing the button cycles through predefined programs‚ such as noise reduction or phone mode. For models like the Phonak Auto UP‚ pressing and holding the button switches between manual and automatic settings. This feature ensures personalized listening experiences in various environments. Users can also utilize the myPhonak app to fine-tune settings or create custom programs. Regular use of the program button enhances adaptability to different acoustic situations‚ ensuring optimal sound quality and comfort. Always refer to the user guide for detailed instructions on customizing settings for your specific hearing aid model.

Battery Management

Phonak hearing aids use size 675 batteries. Proper handling ensures longevity. Avoid exposure to moisture and extreme temperatures. Turn off devices when not in use to conserve power.

Understanding Battery Types and Sizes

Phonak NHS hearing aids typically use size 675 zinc-air batteries‚ designed for reliable performance. These batteries are widely available and standardized for consistency. Proper handling is crucial; avoid exposure to moisture‚ extreme temperatures‚ and direct sunlight to maintain longevity. Always store batteries in a cool‚ dry place away from metal objects to prevent discharge. Use the correct polarity when inserting batteries to ensure proper function. Battery life varies depending on usage and settings‚ with average longevity ranging from 7-14 days. Regularly check battery levels and replace them when performance diminishes. Refer to your user manual for specific guidelines tailored to your Phonak model.

Replacing Batteries Correctly

To replace batteries in your Phonak NHS hearing aid‚ open the battery compartment by sliding it open or lifting the designated flap. Remove the old battery and discard it responsibly. Insert the new size 675 battery‚ ensuring the positive (flat) side faces upwards and aligns with the compartment’s markings. Gently close the compartment until it clicks securely. Avoid touching battery terminals to prevent oil or moisture transfer‚ which can reduce performance. Properly aligned batteries ensure optimal functionality and prevent device malfunction. Always use fresh batteries from a sealed pack to maintain reliability and sound quality. Regular replacement helps sustain clear audio and consistent operation of your hearing aid.

Conserving Battery Life

To maximize battery life for your Phonak NHS hearing aid‚ ensure the device is turned off when not in use. This can be done by opening the battery compartment or removing the batteries. Store batteries in a cool‚ dry place‚ away from metal objects‚ to prevent premature discharge. Avoid exposing the hearing aid to extreme temperatures‚ as this can drain battery power. Use a drying kit or dehumidifier to remove moisture‚ which can reduce battery efficiency. Replace batteries as soon as performance declines. Turn off Bluetooth connectivity when not needed‚ as it consumes additional power. Regularly cleaning the battery contacts and compartment can also enhance battery longevity. Always use fresh batteries from a sealed pack for optimal performance.

Connecting Phonak Hearing Aids to Bluetooth Devices

Enable Bluetooth on your device‚ then turn your Phonak hearing aids off and on to enter pairing mode. Select your hearing aids from the available devices list to pair them. Use the myPhonak app for additional settings and management.

Pairing Hearing Aids with a Bluetooth-Enabled Phone

To pair your Phonak hearing aids with a Bluetooth-enabled phone‚ start by enabling Bluetooth on your device. Next‚ turn your hearing aids off and then back on to enter pairing mode. After a few seconds‚ your hearing aids’ name will appear in the available devices list. Select the name to initiate pairing. A confirmation beep will indicate successful pairing. Ensure your phone’s Bluetooth settings are visible and accessible during this process. For further customization‚ use the myPhonak app to manage settings and enhance your listening experience. Proper pairing ensures seamless connectivity for calls‚ music‚ and other audio content. Follow the steps carefully to avoid connectivity issues.

Connecting to the myPhonak App

Connecting your Phonak hearing aids to the myPhonak app allows for personalized control and enhanced functionality. Ensure your hearing aids are paired with your smartphone via Bluetooth. Open the myPhonak app‚ create an account‚ and follow the in-app instructions to link your hearing aids. The app offers features like volume adjustment‚ program selection‚ and custom settings. You can also access remote support and track battery life. For troubleshooting‚ refer to the app’s guidance or reset your hearing aids by turning them off and on again. Regular updates ensure optimal performance and new features. The app is available for both iOS and Android devices‚ providing a user-friendly interface to manage your hearing experience effectively.

Troubleshooting Bluetooth Connectivity Issues

If experiencing Bluetooth connectivity issues with your Phonak hearing aids‚ restart both the hearing aids and your device. Ensure Bluetooth is enabled on your device and that the hearing aids are in pairing mode. Check the device’s Bluetooth settings and confirm the hearing aids are selected. If issues persist‚ reset your hearing aids by turning them off and on. For further assistance‚ refer to the myPhonak app or contact NHS Audiology Services. Regularly updating your hearing aids and device software can prevent connectivity problems. Always ensure your hearing aids are fully charged and within range of your Bluetooth device for a stable connection. If problems continue‚ consult the user manual or seek professional support.

Maintenance and Care

Regularly clean your Phonak hearing aids with a soft cloth and store them in a protective case to prevent damage. Avoid exposure to moisture and extreme temperatures. Schedule routine check-ups with your audiologist to ensure optimal performance and longevity of your devices.

Cleaning the Hearing Aid Regularly

Cleaning your Phonak hearing aids is essential for maintaining their performance and longevity. Use a soft‚ dry cloth to gently wipe down the exterior‚ paying attention to the microphone and speaker areas. Avoid using water‚ alcohol‚ or harsh chemicals‚ as these can damage the components. For earpieces‚ remove and clean them separately with a mild soap solution‚ ensuring they are completely dry before reattaching. Regular cleaning prevents wax buildup and reduces the risk of bacterial growth‚ ensuring clear sound quality. Always refer to the user manual for specific cleaning instructions tailored to your model.

Storing the Hearing Aid Properly

Proper storage of your Phonak hearing aids is crucial to maintain their functionality and longevity. Store them in a cool‚ dry place‚ away from direct sunlight and moisture. Use a protective case or storage box to prevent damage from dust or accidental drops. Avoid exposing the hearing aids to extreme temperatures or humid environments‚ such as bathrooms or kitchens. When not in use‚ remove the batteries to prevent corrosion and battery drain. Ensure the hearing aids are turned off and stored separately from other electronic devices to avoid interference. Regularly inspect the storage area for dust or dirt and clean it as needed. By following these guidelines‚ you can ensure your hearing aids remain in optimal condition and continue to perform effectively.

Regular Checks and Servicing

Regular checks and servicing are essential to maintain the performance and longevity of your Phonak hearing aids. Schedule routine appointments with your NHS audiology department to ensure your devices are functioning optimally. During these check-ups‚ professionals will clean the hearing aids‚ inspect for wear and tear‚ and adjust settings as needed. Additionally‚ regular software updates may be required to enhance functionality and compatibility with other devices. Users should also perform daily checks‚ such as inspecting for dirt or blockages and ensuring batteries are functioning properly. By combining professional servicing with consistent personal care‚ you can maximize the effectiveness of your hearing aids and address any issues before they become significant problems.

Troubleshooting Common Issues

Common issues with Phonak hearing aids include feedback‚ distortion‚ and connectivity problems. Address these by checking battery connections‚ ensuring proper fit‚ and restarting devices. Consult guides for solutions.

Addressing Feedback or Distortion

Feedback or distortion in Phonak hearing aids can be resolved by ensuring proper fit and checking for blockages. Clean the hearing aid and earmold regularly to remove wax or debris. If feedback occurs‚ adjust the placement or consult the myPhonak app for settings. Distortion may indicate battery issues; replace batteries if necessary. For persistent problems‚ restart the hearing aid or refer to the user manual for troubleshooting steps. If issues persist‚ contact NHS Audiology Services or Phonak support for assistance. Regular maintenance and professional checks can prevent such problems‚ ensuring optimal performance and sound quality.

Resolving Connectivity Problems

If your Phonak hearing aids experience connectivity issues‚ restart both the hearing aids and your Bluetooth device. Ensure Bluetooth is enabled on your phone and that the hearing aids are in pairing mode. Check for interference from other devices and move to a quiet environment. If issues persist‚ reset the hearing aids by turning them off and on again. For further assistance‚ refer to the myPhonak app or the user manual. Contact NHS Audiology Services or Phonak support for professional help. Regular software updates and proper device pairing can prevent connectivity problems‚ ensuring seamless integration with Bluetooth devices.

Fixing Volume or Sound Quality Issues

If experiencing low volume or poor sound quality‚ adjust the volume using the rocker switch on your Phonak hearing aid. Ensure batteries are not low‚ as this can affect performance. Check for earwax buildup and clean the hearing aid thoroughly. Verify that the correct program is selected for your environment. If issues persist‚ reset the hearing aids by turning them off and on. Use the myPhonak app to customize settings or address specific sound quality concerns. For severe problems‚ contact NHS Audiology Services or Phonak support for professional assistance. Regular maintenance and proper care can help prevent volume and sound quality issues‚ ensuring optimal hearing aid functionality.

Additional Resources

Access user manuals and guides for Phonak hearing aids online. Contact NHS Audiology Services for support and inquiries. Manufacturer resources‚ including warranty details‚ are available for assistance and repairs.

Accessing User Manuals and Guides

Phonak NHS hearing aid user manuals and guides are readily available online in PDF format. These resources provide detailed instructions on setup‚ features‚ and maintenance. Models such as the Phonak Auto UP and Nathos Nova have specific quick-start guides. Additionally‚ troubleshooting sections address common issues like connectivity and sound quality. The manuals are designed to help users maximize their hearing aid’s potential. They cover topics like battery management‚ program switching‚ and Bluetooth pairing; Users can download these guides from official NHS or Phonak websites. Reading these materials ensures proper usage and care‚ enhancing the overall hearing experience. Regularly updated versions are available to reflect the latest advancements and user needs.

Contacting NHS Audiology Services

For assistance with Phonak hearing aids‚ contact NHS Audiology Services directly. They provide support for troubleshooting‚ maintenance‚ and usage queries. You can reach them via phone at 0300 131 4500 or through their official website. The service is available to address concerns related to device functionality‚ battery issues‚ or connectivity problems. Additionally‚ they offer guidance on accessing user manuals and scheduling servicing appointments. Regular communication with NHS Audiology ensures your hearing aids continue to meet your needs effectively. They also provide updates on new features and manufacturer recommendations. Reaching out to these professionals is crucial for resolving any issues promptly and ensuring optimal performance of your Phonak hearing aids.

Manufacturer Support and Warranty Information

Phonak offers comprehensive manufacturer support and warranty services for NHS hearing aids. Users can access user manuals and guides through the official Phonak website or the myPhonak app. The warranty typically covers repairs and replacements for defective devices within the specified period. For inquiries‚ contact Phonak’s customer service or authorized representatives. They provide assistance with troubleshooting‚ maintenance‚ and feature updates. Additionally‚ Phonak ensures regular software updates to enhance device performance. This support system‚ combined with NHS services‚ guarantees a seamless experience for hearing aid users‚ addressing all technical and operational needs promptly and efficiently.

kool king portable ac manual

Welcome to the Kool King Portable AC Manual! This guide provides essential information to help you understand‚ install‚ and maintain your portable air conditioner effectively.

By following the instructions‚ you can ensure safe operation‚ optimal performance‚ and extend the lifespan of your unit. Let’s get started!

Overview of the Kool King Portable AC

The Kool King Portable AC is a compact‚ self-contained cooling solution designed for efficient air conditioning in various spaces. It offers portability‚ ease of use‚ and energy efficiency‚ making it ideal for rooms without central AC systems.

With a robust cooling capacity and advanced features‚ this unit provides consistent temperature control. Its sleek design and lightweight construction allow for easy relocation‚ ensuring comfort in any setting. Perfect for home‚ office‚ or garage use‚ the Kool King Portable AC is a versatile and practical cooling option.

Importance of Reading the Manual

Reading the Kool King Portable AC manual is crucial for safe and efficient operation. It provides essential safety precautions‚ installation steps‚ and maintenance tips to ensure optimal performance. Understanding the manual helps you avoid potential hazards‚ such as electrical issues or improper ventilation. It also guides you in troubleshooting common problems and maintaining the unit’s efficiency. By following the manual‚ you can extend the lifespan of your portable AC and enjoy reliable cooling. Always refer to it before installing or servicing the unit to ensure everything works smoothly.

Key Features of the Kool King Portable AC

The Kool King Portable AC boasts a sleek‚ compact design‚ making it ideal for small spaces. It features a powerful cooling capacity‚ multiple fan speeds‚ and a user-friendly control panel. The unit includes a window vent kit for easy installation and an exhaust hose for efficient heat removal. Additional features include a remote control for convenience‚ a built-in drainage system‚ and an energy-saving timer function. These features ensure efficient cooling‚ ease of use‚ and energy efficiency‚ making it a great choice for home or office use.

Safety Precautions and Guidelines

Ensure a safe environment by following electrical precautions‚ proper ventilation‚ and avoiding obstructions. Regularly inspect the unit and exhaust hose for damage or blockages before use.

General Safety Tips for Portable AC Units

Always place the unit on a stable‚ flat surface to prevent tipping. Ensure the area around the AC is clear of flammable materials. Avoid exposing the unit to direct sunlight or moisture. Never use damaged power cords or plugs‚ as this can cause electrical hazards. Keep children and pets away from the unit to avoid accidental injury. Properly vent the exhaust hose outside to prevent carbon monoxide buildup indoors. Regularly inspect and maintain the unit to ensure safe operation; Follow all manufacturer guidelines for installation and usage.

Electrical Safety Considerations

Always use a properly grounded electrical outlet rated for the unit’s power requirements. Avoid using extension cords or adapters‚ as they may cause overheating or electrical hazards. Ensure the circuit is dedicated and can handle the maximum current specified in the manual. Never plug the unit into an outlet with other high-power devices. Keep the power cord away from water and heat sources. If the cord is damaged‚ stop using the unit immediately and contact a professional. Always unplug the AC before servicing or moving it to prevent electrical shock or damage.

Proper Ventilation Requirements

Proper ventilation is crucial for efficient cooling and safety. Ensure the exhaust hose is securely connected to the unit and properly vented outside through a window or sliding door using the provided window vent kit. Keep the hose free from kinks or blockages to allow smooth airflow. Direct the exhaust away from neighboring windows to avoid recirculation of hot air; Regularly inspect the venting system to ensure it remains intact and functional. Proper ventilation not only enhances cooling performance but also prevents potential safety hazards. Always follow the manual’s guidelines for venting to ensure safe and effective operation.

Installation and Setup Instructions

Welcome to the installation section! This guide covers essential steps for setting up your Kool King Portable AC‚ including vent kit installation and proper electrical connections.

Unpacking and Preparing the Unit

Begin by carefully unpacking the Kool King Portable AC from its box‚ ensuring all components are included and undamaged.

Inspect the unit‚ window vent kit‚ and exhaust hose for any signs of damage or blockages. Place the unit on a flat‚ stable surface with adequate ventilation.

Ensure the area around the AC has sufficient airflow. Check the electrical outlet compatibility with the unit’s power requirements.

Gently remove any protective packaging and clean the exterior with a soft cloth. Avoid using harsh chemicals to maintain the unit’s finish.

Before first use‚ verify that all parts are securely connected and the exhaust hose is kink-free. This preparation ensures safe and efficient operation.

Installing the Window Vent Kit

Begin by removing the window vent kit from the box and attaching the vent hose to the portable AC unit. Place the vent adapter into the window opening‚ ensuring it fits securely. Adjust the adapter to match your window size for a snug fit. Secure the adapter with the provided screws or clips. Connect the exhaust hose to the vent adapter‚ ensuring a tight seal to prevent air leaks. Finally‚ close the window to hold the adapter in place‚ allowing the hot air to exhaust outside efficiently. Proper installation ensures optimal cooling performance. Always follow the manufacturer’s guidelines for safe and correct setup.

Connecting the Exhaust Hose

Connecting the exhaust hose is crucial for proper ventilation. First‚ align the hose with the unit’s vent outlet. Secure it using the provided locking ring to ensure a tight seal. Extend the hose fully‚ avoiding kinks or bends that could restrict airflow. Ensure the exhaust hose is directed outside through a window or vent kit to expel hot air effectively. Always check for obstructions and ensure the hose is free from damage before use. Proper connection ensures efficient cooling and prevents internal damage to the unit.

Positioning the Unit for Optimal Performance

Proper positioning is crucial for maximizing the efficiency of your Kool King Portable AC. Place the unit near a window to ensure the exhaust hose can vent heat outside effectively. Avoid direct sunlight‚ as it can reduce cooling performance. Position the unit on a level‚ stable surface to prevent vibrations and ensure proper airflow. Keep the unit at least 6 inches away from walls or obstructions to allow unimpeded air circulation. Correct placement will enhance cooling performance‚ reduce noise‚ and prolong the unit’s lifespan.

Operating the Kool King Portable AC

Operating the Kool King Portable AC is straightforward. Use the control panel or remote to adjust settings‚ monitor drainage‚ and ensure efficient cooling performance.

Understanding the Control Panel

The control panel is the central interface for operating your Kool King Portable AC. It features buttons for adjusting temperature‚ fan speed‚ and mode selection.

The LED display shows the current temperature and settings. Use the buttons to switch between cooling‚ fan‚ and dehumidify modes for customized comfort.

The remote control mirrors these functions‚ allowing you to adjust settings from across the room. Familiarize yourself with the panel to optimize your cooling experience effortlessly.

Setting the Temperature and Modes

Use the control panel or remote to adjust the temperature and select operation modes. Choose from Cool‚ Fan‚ or Dry modes. Set your desired temperature between 60°F-90°F using the up/down arrows. The unit will automatically adjust to maintain the set temperature. For energy efficiency‚ keep the temperature near room temperature. Use the timer to schedule operations. Ensure proper ventilation for optimal cooling performance. Always refer to the manual for specific mode descriptions and temperature settings to customize your comfort experience effectively.

Using the Remote Control

The remote control allows you to conveniently adjust settings without moving from your spot. It includes buttons for turning the unit on/off‚ adjusting temperature‚ switching modes‚ and setting the timer.

  • Point the remote directly at the unit for optimal signal reception.
  • Ensure the remote has batteries and they are properly inserted.
  • Use the navigation buttons to scroll through options on the control panel.
  • The remote is a handy tool for controlling your Kool King Portable AC efficiently.

Regularly check the remote’s battery life to maintain smooth operation.

Drainage Management

Proper drainage is crucial for maintaining your Kool King Portable AC’s efficiency. Regularly check the water tank and drain it when full to prevent overflow. Use the provided drain hose to direct water to a suitable location. For continuous drainage‚ ensure the hose is securely connected to the unit and positioned correctly. Always turn off the AC before draining to avoid any mishaps. Refer to the manual for specific instructions on drainage setups and maintenance to keep your unit functioning smoothly and prolong its lifespan.

Maintenance and Cleaning

Regularly clean the air filter and drain condensate water to ensure efficiency. Clean the exterior and interior for optimal performance. Schedule maintenance to extend lifespan.

Cleaning the Air Filter

Cleaning the air filter is essential for maintaining your Kool King Portable AC’s efficiency and air quality. Turn off the unit and unplug it for safety. Remove the filter‚ typically located at the back or bottom‚ and gently vacuum it with a soft brush attachment. For deeper cleaning‚ rinse with warm water and let it dry completely before reinstalling. Regular cleaning every 1-2 months ensures optimal performance and reduces allergens. Always follow the manual’s specific instructions for your model.

Draining Condensate Water

Draining condensate water is crucial for maintaining your Kool King Portable AC. Locate the drain plug at the bottom or back of the unit. Attach the provided drain hose to direct water flow into a bucket or drain. Regularly check and empty the water collection tray to prevent overflow. For heavy use‚ consider using the continuous drain option if available. Always turn off the unit before draining to avoid electrical hazards. Proper drainage ensures efficient operation and prevents mold growth. Follow these steps to keep your AC running smoothly and effectively.

Cleaning the Exterior and Interior

Regular cleaning is crucial for maintaining your Kool King Portable AC’s efficiency and longevity. Turn off and unplug the unit before cleaning. Use a soft‚ dry cloth to wipe the exterior‚ removing dust and dirt. For tougher spots‚ dampen the cloth slightly but avoid harsh chemicals. Inside‚ gently clean vents and surfaces with a soft brush or vacuum. Avoid moisture buildup to prevent mold. For deep cleaning‚ use a mild detergent on durable parts only. Always dry the unit thoroughly after cleaning to ensure proper function and prevent damage.

Scheduling Regular Maintenance

Regular maintenance is crucial for ensuring your Kool King Portable AC operates efficiently and effectively. Create a maintenance schedule to clean the air filter every 1-2 months and inspect the drain hose and vent kit for blockages. Deep clean the unit before storing it for the off-season. Additionally‚ schedule professional servicing annually to check refrigerant levels and internal components. Consistent upkeep prevents breakdowns‚ improves cooling performance‚ and extends the unit’s lifespan. Stay proactive to enjoy reliable cooling year-round!

Troubleshooting Common Issues

This section helps identify and resolve common issues with your Kool King Portable AC‚ such as leaks‚ noise‚ or cooling problems‚ ensuring optimal performance and longevity easily.

Identifying and Resolving Leaks

Leakage in the Kool King Portable AC often occurs due to improper installation or blockages. Inspect the exhaust hose and window vent kit for cracks or obstructions. Ensure all connections are secure and properly sealed. If water leakage is detected‚ check the drainage system for blockages. Regularly cleaning the condensate system can prevent such issues. For persistent leaks‚ consult the manual or contact customer support for assistance. Always unplug the unit before attempting any repairs to ensure safety.

Addressing Noise or Vibrations

If your Kool King Portable AC is producing excessive noise or vibrations‚ ensure it is placed on a level‚ stable surface. Check for loose screws or components and tighten them if necessary. Verify that the exhaust hose is securely connected and free from kinks‚ as this can cause vibrations. If the issue persists‚ consult the troubleshooting section or contact customer support for assistance. Proper installation and maintenance can significantly reduce noise and ensure smooth operation.

Fixing Issues with Cooling Performance

If your Kool King Portable AC isn’t cooling properly‚ ensure the exhaust hose is free of obstructions and securely connected. Check that the window vent kit is properly installed to avoid recirculating hot air. Verify that the air filter is clean and free from blockages. Drain any accumulated condensate water‚ as it can restrict airflow. Ensure the unit is placed on a level surface and the exhaust hose is as short as possible. If issues persist‚ reset the unit or consult the troubleshooting section for further guidance.

Resetting the Unit

To reset the Kool King Portable AC‚ unplug it from the power source and wait for 30 seconds. This allows the system to clear any temporary glitches.

Plug the unit back in and press the “Reset” button‚ usually located near the control panel‚ for 3-5 seconds until the display lights up again.

After resetting‚ the unit will revert to default settings. Ensure all settings are reconfigured to your preferences for optimal performance.

If issues persist‚ refer to the troubleshooting section or contact customer support for further assistance.

Energy Efficiency and Tips

Optimize energy consumption by adjusting settings based on room size and cooling needs. Using the timer function can help reduce unnecessary energy use.

Regular maintenance‚ like cleaning filters‚ ensures efficient operation. Proper insulation and sealing can enhance cooling performance and lower energy costs.

Understanding Energy Consumption

Understanding energy consumption is crucial for optimizing your Kool King Portable AC’s performance and reducing utility bills. The unit’s energy efficiency is measured by its Energy Efficiency Ratio (EER)‚ which indicates how effectively it converts electricity into cooling power. Higher EER ratings mean better efficiency. Factors like temperature settings‚ usage duration‚ and room size significantly impact energy use. Regular maintenance‚ such as cleaning filters‚ also plays a role in maintaining efficiency. By monitoring these aspects‚ you can ensure the unit operates cost-effectively while keeping your space comfortable.

Optimizing Energy Efficiency

To optimize energy efficiency with your Kool King Portable AC‚ adjust the temperature settings wisely and use the timer function to limit operation hours. Ensure the unit is properly installed with a well-sealed window kit to prevent air leaks. Regularly clean the air filter to maintain airflow and check for blockages in the exhaust hose. Place the unit away from direct sunlight or heat sources to reduce cooling demand. Using the eco-mode‚ if available‚ can also help lower energy consumption. These practices not only save energy but also extend the unit’s lifespan. Proper maintenance ensures efficient performance and lower utility bills.

Using the Timer Function

The timer function on your Kool King Portable AC allows you to set specific on/off times‚ optimizing energy use and comfort. To use it‚ press the Timer button on the remote or control panel. Select your desired start and stop times using the navigation buttons. This feature ensures your space stays cool without unnecessary energy consumption. For detailed instructions‚ refer to the remote control section in this manual. Proper use enhances efficiency and convenience.

Technical Specifications

The Kool King Portable AC features compact dimensions‚ lightweight design‚ high cooling capacity‚ efficient airflow‚ and compatible power requirements for seamless operation in various spaces.

Dimensions and Weight

The Kool King Portable AC is designed to be compact and lightweight‚ making it easy to move around your space. Its dimensions are approximately 30 inches in height‚ 18 inches in width‚ and 15 inches in depth. The unit weighs around 65 pounds‚ ensuring it is portable without compromising on cooling power. These measurements allow for seamless placement in most rooms‚ and its weight is manageable for relocation when needed. Always consider the space where the unit will be placed to ensure proper airflow and ventilation.

Cooling Capacity and Air Flow

The Kool King Portable AC offers a robust cooling capacity‚ delivering efficient temperature control for spaces up to 400 square feet. With a cooling capacity of 10‚000 BTUs‚ it ensures rapid cooling even in warm environments. The unit features a high airflow rate of 300 CFM‚ circulating cool air evenly throughout the room. This combination of power and airflow makes it ideal for maintaining a comfortable climate in various settings. The dual-speed fan further enhances airflow customization‚ allowing users to adjust based on their needs for optimal cooling performance.

Power Requirements

The Kool King Portable AC operates on standard household voltage‚ typically requiring a 120V electrical outlet. It consumes between 800 to 1000 watts of power‚ depending on the cooling mode. Ensure the unit is plugged directly into a dedicated circuit to avoid overloading. Avoid using extension cords‚ as they may cause electrical issues. Always verify the unit’s power requirements match your electrical setup to ensure safe and efficient operation. Proper power management is crucial for optimal performance and longevity of the appliance.

Warranty and Support

The Kool King Portable AC comes with a comprehensive warranty program. For inquiries or assistance‚ contact our dedicated customer support team via phone‚ email‚ or live chat‚ available 24/7.

Understanding the Warranty Terms

The Kool King Portable AC is backed by a comprehensive warranty program designed to protect your investment. The standard warranty typically covers parts and labor for one year from the date of purchase. To ensure coverage‚ register your unit within 30 days of purchase. The warranty may be void if the unit is misused‚ tampered with‚ or not maintained properly. Review the terms carefully to understand what is covered and any conditions that may apply. Proper installation and adherence to guidelines are essential to maintain warranty validity.

Contacting Customer Support

For any questions‚ concerns‚ or assistance with your Kool King Portable AC‚ contact our dedicated customer support team. You can reach us via phone at 1-800-KOOL-KING or email at support@koolking.com. Additionally‚ visit our official website at www.koolking.com/support for troubleshooting guides‚ FAQs‚ and live chat options. Always have your unit’s model and serial number ready for faster assistance. Our team is here to ensure your experience with the Kool King Portable AC is smooth and satisfactory.

Final Thoughts on the Kool King Portable AC

The Kool King Portable AC is a practical solution for efficient cooling‚ offering ease of use and portability. Its design ensures effective temperature control and energy efficiency‚ making it ideal for various spaces. By following the manual‚ users can maximize performance and longevity. This unit is a great investment for comfort during warm months‚ providing reliable cooling with minimal effort.

Encouragement to Follow the Manual

Adhering to the Kool King Portable AC Manual ensures safe and efficient operation of your unit. Proper installation‚ maintenance‚ and troubleshooting guidance will help you enjoy optimal cooling performance. By following the manual‚ you can prevent potential issues‚ reduce energy consumption‚ and extend the lifespan of your portable AC. Take the time to review each section carefully‚ and don’t hesitate to refer back to it when needed. Your diligence will pay off in comfort‚ reliability‚ and long-term satisfaction with your Kool King Portable AC.

jonesboro tv guide

Jonesboro, a vibrant city in Arkansas, offers a diverse range of TV channels and programming for residents and visitors alike․

From local news to entertainment, the Jonesboro TV Guide provides essential information for viewers to stay updated on their favorite shows and events․

Discover the best of broadcast, cable, and satellite TV listings tailored to Jonesboro’s community, ensuring endless entertainment options for all audiences․

1․1 Overview of Jonesboro, Arkansas

Jonesboro, located on Crowley’s Ridge in northeastern Arkansas, is a city rich in history and culture․ With a population of over 70,000, it serves as a county seat and a hub for education, commerce, and entertainment․

Home to Arkansas State University, the city boasts a vibrant atmosphere with cultural attractions like the ASU Museum and the Forum Theater․ Known for its friendly community, Jonesboro offers a mix of small-town charm and modern amenities․

Residents and visitors enjoy a variety of activities, from exploring local art scenes to attending annual festivals․ Jonesboro’s unique blend of heritage and progress makes it a standout city in the region․

1․2 Importance of TV Listings in Jonesboro

TV listings play a crucial role in keeping Jonesboro residents informed and entertained․ They provide timely updates on local news, weather, and community events, ensuring viewers stay connected to what matters most․

With a diverse range of channels, from major networks to cable and satellite options, TV listings help residents plan their viewing schedules efficiently․ Whether it’s catching up on primetime shows or staying informed through local programming, TV guides are an essential resource․

They also highlight special events, sports, and cultural activities, making them indispensable for anyone looking to engage with the community or enjoy quality entertainment from the comfort of home․

TV Listings for Jonesboro, Arkansas

Jonesboro offers a variety of TV listings, including broadcast, cable, satellite, and over-the-air options, providing residents with diverse entertainment and information choices․

2․1 Broadcast TV Listings

Broadcast TV listings in Jonesboro offer a wide range of free over-the-air channels, including major networks like ABC, CBS, NBC, and FOX․

Key channels include KAIT-TV (ABC affiliate), KJNB-TV (MyNetwork/MeTV affiliate), and Weather Nation HD, providing local news, weather, and entertainment․

Viewers can access these channels with an antenna, ensuring free access to popular shows, sports, and community updates․

Check TitanTV․com for detailed broadcast schedules, making it easy to plan your viewing experience in Jonesboro․

2․2 Cable TV Listings

Cable TV listings in Jonesboro provide a diverse selection of channels, offering entertainment, sports, and news for all audiences․

Service providers like Right Fiber TV and Atlantic Broadband deliver extensive channel lineups, including popular networks such as Comedy Central, FX, and HGTV․

Viewers can enjoy a wide range of programming, from movies to live events, with options for HD channels and on-demand content․

Check local cable TV guides for detailed schedules and channel listings tailored to Jonesboro’s cable subscribers․

2․3 Satellite TV Listings

Satellite TV listings in Jonesboro offer a wide range of channels, including popular networks like KAIT-ABC and Weather Nation HD․

Providers such as Dish and DirecTV provide access to sports, movies, and live events, ensuring diverse entertainment options․

With HD channel availability, viewers can enjoy crystal-clear programming tailored to their preferences․

Check satellite TV guides for detailed schedules and channel lineups specific to Jonesboro’s satellite subscribers․

2․4 Over-the-Air TV Listings

Over-the-air TV listings in Jonesboro provide free access to local channels, including KAIT-ABC and KJNB-TV, using an antenna․

Viewers can enjoy live sports, news, and network shows without subscription fees․

Channels like Weather Nation HD and MeTV offer diverse programming, making OTA a cost-effective option․

Check OTA listings for Jonesboro to stay updated on broadcast schedules and available channels․

Popular TV Channels in Jonesboro

Jonesboro viewers enjoy access to major networks like ABC, CBS, NBC, and FOX, along with popular cable channels such as Comedy Central, FX, and HGTV․

3․1 Major Networks (ABC, CBS, NBC, FOX)

The major networks in Jonesboro include ABC, CBS, NBC, and FOX, providing a wide array of programming such as news, dramas, comedies, and live events․ These networks are accessible through various service providers, ensuring that viewers can enjoy their favorite shows․ With a strong focus on local content, these channels also broadcast regional news, sports, and community events tailored to Jonesboro’s audience․ Whether it’s primetime series or breaking news, these networks remain essential for entertainment and information in the area․

3․2 Cable Channels (Comedy Central, FX, HGTV)

Cable channels like Comedy Central, FX, and HGTV bring diverse entertainment to Jonesboro viewers․ Comedy Central offers hilarious shows like The Daily Show and South Park, while FX features critically acclaimed series such as American Horror Story and The Walking Dead; HGTV caters to lifestyle enthusiasts with programs like Fixer Upper and House Hunters․ These channels provide a mix of humor, drama, and reality TV, appealing to a wide range of audiences․ With their engaging content, they enhance the viewing experience for residents and visitors alike in Jonesboro․

3․3 Sports Channels

Sports enthusiasts in Jonesboro can enjoy a variety of channels dedicated to live games, highlights, and analysis․ ESPN, Fox Sports, and NBC Sports are popular choices, offering coverage of football, basketball, and baseball․ Additionally, channels like MLB Network and NFL Network provide in-depth coverage of specific sports leagues․ These channels ensure that viewers never miss out on exciting matchups or breaking sports news․ With a focus on both local and national events, sports channels in Jonesboro cater to fans of all interests, making them a must-have for any sports lover’s TV lineup․

3․4 News Channels

Jonesboro residents can stay informed with a range of news channels offering local, national, and international coverage․ KAIT-TV provides local news and weather updates, while major networks like CNN, Fox News, and MSNBC deliver real-time updates on global events․ These channels ensure viewers are well-informed about current affairs, making them essential for staying connected to the world․

Local Programming in Jonesboro

Jonesboro’s local programming features community-focused shows, including news, weather, and cultural highlights, ensuring residents stay connected to local events and stories․

4․1 KAIT-TV (ABC Affiliate)

KAIT-TV, an ABC affiliate, serves Jonesboro with high-quality programming, including local news, weather updates, and beloved ABC shows like “Grey’s Anatomy” and “Jimmy Kimmel Live!”

As a trusted source, KAIT-TV provides in-depth coverage of regional events, ensuring viewers stay informed about what matters most in their community and beyond․

With a focus on local storytelling, KAIT-TV enhances the viewing experience, making it a cornerstone of Jonesboro’s television landscape for both entertainment and information․

4․2 KJNB-TV (MyNetwork/MeTV Affiliate)

KJNB-TV, a MyNetwork/MeTV affiliate, offers a unique blend of programming tailored for diverse audiences in Jonesboro․

Viewers can enjoy a mix of retro series, classic movies, and timeless entertainment, making it a go-to for those who appreciate throwback content․

With its dedication to nostalgia and variety, KJNB-TV adds a distinctive flavor to Jonesboro’s television offerings, catering to fans of vintage and retro programming․

4․3 Weather Nation HD

Weather Nation HD is a trusted source for 24/7 weather coverage in Jonesboro, providing critical updates and forecasts․

With its high-definition format, viewers receive clear and detailed weather information, helping them stay prepared for any conditions․

From severe storm alerts to daily forecasts, Weather Nation HD is essential for residents and visitors needing reliable weather insights in the region․

4․4 Local News and Events

Jonesboro’s local news and events are vibrant, offering a mix of cultural, educational, and entertainment opportunities for the community․

From annual festivals and live concerts at the ASU Convocation Center to sporting events at local venues, there’s always something happening in Jonesboro․

Local TV stations like KAIT-TV provide extensive coverage of these events, ensuring residents stay informed and engaged with their community․

Whether it’s a performance at the historic Forum Theater or a seasonal celebration downtown, Jonesboro’s events reflect its rich heritage and dynamic spirit․

Stay updated with local news and events through dedicated TV segments and listings, keeping you connected to what matters most in Jonesboro․

TV Schedule Highlights

Jonesboro’s TV schedule showcases a mix of popular series, live events, and local programming, ensuring diverse entertainment options for viewers of all interests and preferences․

5․1 Daytime TV Shows

Jonesboro’s daytime TV lineup features a variety of engaging programs tailored to diverse audiences․ Popular shows like The View and General Hospital air on KAIT-TV, offering entertainment and drama․

Talk shows, such as Dr․ Phil and The Ellen DeGeneres Show, provide insightful discussions and light-hearted fun, while channels like KJNB-TV host MyNetwork series․

Local programming, including weather updates from Weather Nation HD, keeps viewers informed about regional conditions and community events․

With a mix of national and local content, daytime TV in Jonesboro ensures there’s something for everyone to enjoy․

5․2 Primetime TV Shows

Primetime TV in Jonesboro offers a diverse lineup of popular shows, ensuring entertainment for all audiences․ Major networks like ABC, CBS, NBC, and FOX feature hit series such as The Voice, NCIS, and The Bachelor․

Local channels, including KAIT-TV, broadcast these shows, while cable networks like FX and Comedy Central add original programming to the primetime schedule․

Viewers in Jonesboro can enjoy a mix of dramas, comedies, and reality TV, with options available through both cable and satellite services․

5․3 Weekend Specials

Weekend specials in Jonesboro bring a variety of exciting programming for viewers to enjoy․ From live sports events to movie marathons, there’s something for everyone․

Local channels like KAIT-TV often feature special segments, while cable networks showcase popular series and films․ Families can tune into kid-friendly shows, and sports fans can catch live games․

Check the Jonesboro TV Guide for highlights, including special event coverage and themed programming, making weekends a great time to relax and unwind with favorite shows․

5․4 Movie Listings

Jonesboro’s TV Guide offers an extensive selection of movie listings for viewers․ From classic films to the latest releases, movie enthusiasts can find something to enjoy․

Channels like FX, Comedy Central, and HGTV often feature movie marathons, while premium networks showcase blockbuster hits․ Local listings provide details on showtimes and channels․

Residents can check TitanTV․com or their cable provider’s schedule for a full list of movies airing in Jonesboro․ Whether it’s action, drama, or comedy, the TV Guide ensures a cinematic experience for all․

TV Service Providers in Jonesboro

Jonesboro offers multiple TV service providers, including Right Fiber TV, Atlantic Broadband, and satellite options like Dish and DirecTV, catering to diverse viewer preferences․

6․1 Right Fiber TV

Right Fiber TV is a leading provider in Jonesboro, offering high-speed internet and television services․ With a focus on reliability and clarity, it provides a wide range of HD channels, including popular networks and local programming․ Subscribers can enjoy seamless entertainment with features like DVR and on-demand content․ Right Fiber TV caters to diverse viewer preferences, ensuring access to sports, movies, and family-friendly shows․ Its customer-centric approach and competitive pricing make it a preferred choice for residents seeking quality TV services in Jonesboro․ The service is known for its robust signal strength and excellent customer support, enhancing the overall viewing experience for users․

6․2 Atlantic Broadband

Atlantic Broadband is a trusted TV service provider in Jonesboro, delivering a comprehensive channel lineup with HD options․ It offers a variety of packages, including premium channels and exclusive sports networks․ Viewers can enjoy on-demand content, DVR capabilities, and seamless streaming options․ Atlantic Broadband’s user-friendly interface and reliable service make it a top choice for entertainment enthusiasts․ Its commitment to quality and customer satisfaction ensures that subscribers in Jonesboro have access to the latest shows, movies, and live events․ With flexible plans designed to meet different viewer needs, Atlantic Broadband stands out as a premier cable TV provider in the region․

6․3 Satellite Providers (Dish, DirecTV)

Satellite TV providers like Dish and DirecTV offer comprehensive coverage in Jonesboro, ensuring access to a wide range of channels․ Both services provide HD programming, exclusive sports packages, and premium networks․ With advanced DVR technology, viewers can record and watch shows at their convenience․ These providers cater to diverse preferences, offering customizable plans and add-ons․ Their reliability and extensive channel lineups make them popular choices for those seeking entertainment without cable constraints․ Satellite TV remains a viable option for Jonesboro residents, delivering high-quality programming to every household․

How to Access Jonesboro TV Listings

Access Jonesboro TV listings online through TitanTV․com or mobile apps, offering schedules for cable, satellite, and antenna channels tailored to local viewers․

7․1 Online TV Guides

Online TV guides are a convenient way to explore Jonesboro’s TV listings․ Websites like TitanTV․com offer detailed schedules for cable, satellite, and antenna channels․ Residents can easily check what’s airing today or tonight․ These guides provide filters to sort by time, channel, or genre, making it simple to find favorite shows․ Additionally, many TV service providers in Jonesboro, such as Right Fiber TV and Atlantic Broadband, offer their own online channel lineups․ This ensures viewers can plan their viewing experience efficiently․ With just a few clicks, users can access real-time updates and never miss their preferred programs․

7․2 Mobile Apps for TV Listings

Mobile apps provide an accessible way to view Jonesboro TV listings on the go․ Apps like TitanTV and TV Guide offer real-time schedules for local channels, allowing users to browse shows by time or genre․ These apps often include features like personalized watchlists and reminders for upcoming episodes․ Additionally, many TV service providers in Jonesboro have their own apps, such as Right Fiber TV and Atlantic Broadband, which offer tailored channel lineups and exclusive content․ With these apps, viewers can seamlessly navigate their viewing options, ensuring they never miss their favorite programs, whether at home or on the move․

7․3 Print TV Guides

Print TV guides remain a reliable source for viewers in Jonesboro, offering a tangible way to plan their viewing schedule․ Local newspapers and community publications often include detailed TV listings, organized by time and channel․ These guides typically cover broadcast, cable, and satellite channels, providing a comprehensive overview of available programming․ Many residents appreciate the convenience of having a physical copy, which can be referenced throughout the day without needing digital devices․ Additionally, print guides often include bonus content like crossword puzzles and articles about upcoming shows․ While digital options are popular, print TV guides continue to be a trusted resource for many in Jonesboro․

Special Events and Festivals in Jonesboro

Jonesboro hosts a variety of vibrant events, including annual festivals, live concerts, and sporting events, offering entertainment for all interests and ages in the community․

8․1 Annual Festivals

Jonesboro hosts a variety of annual festivals that showcase its vibrant culture and community spirit․ From seasonal celebrations like harvest festivals to cultural events highlighting local traditions, there’s always something to enjoy․ The city’s downtown area transforms into a lively hub during these events, featuring live music, food vendors, and family-friendly activities․ One of the most anticipated festivals is held in October, offering a blend of entertainment, local crafts, and delicious cuisine․ These festivals not only bring the community together but also attract visitors from across the region, making Jonesboro a great destination for event-goers year-round․

8․2 Live Concerts and Performances

Jonesboro is a hotspot for live concerts and performances, catering to diverse musical tastes․ The city’s largest stadium regularly hosts top-tier artists and bands, drawing audiences from across the region․ Additionally, historic theaters in Jonesboro feature intimate settings for classical performances, plays, and musicals․ Local talent also shines through smaller venues, offering a platform for emerging artists․ Whether it’s rock, jazz, or country, there’s always a live show to enjoy․ These events are often highlighted in local TV listings, ensuring residents and visitors never miss out on the excitement․

8․3 Sporting Events

Jonesboro is a vibrant hub for sports enthusiasts, hosting a variety of events that cater to all interests․ From college football to basketball and baseball, the city’s largest stadium attracts fans from across the region․ Local high school sports also gain significant attention, showcasing emerging talent․ Additionally, community-driven events like charity games and marathons foster a sense of unity and competition; These sporting events are often broadcast on local TV channels, allowing residents to stay connected to the action․ Whether you’re a die-hard fan or a casual viewer, Jonesboro’s sporting scene offers something for everyone to enjoy․

A Viewer’s Guide to Jonesboro TV

Navigate Jonesboro’s diverse TV offerings with this guide, helping you make informed decisions on services and enhancing your viewing experience with local programming and events․

9․1 How to Choose the Best TV Service

Choosing the best TV service in Jonesboro involves evaluating your viewing habits and budget․ Consider the channel lineup, including local networks like KAIT-TV and sports or news channels․ Assess service providers such as Right Fiber TV, Atlantic Broadband, or satellite options like Dish and DirecTV․ Check for features like HD quality, DVR capabilities, and on-demand content․ Compare pricing plans and any promotional offers to find the best value․ Read reviews and ask for recommendations to ensure reliability and customer satisfaction․ Ultimately, select a service that balances your entertainment needs with affordability and convenience for an optimal viewing experience tailored to your lifestyle․

9․2 Tips for Maximizing Your TV Experience

To maximize your TV experience in Jonesboro, ensure your setup is optimized․ Adjust your TV settings for the best picture quality, and explore features like 4K resolution or HDR if available․ Use parental controls to tailor content for family viewing․ Organize your channel lineup or favorites list for easy access to preferred networks․ Take advantage of DVR capabilities to record shows and watch them later․ Explore additional features like voice control or app integration for a seamless experience․ Stay updated on new channels or services offered by providers like Right Fiber TV or Atlantic Broadband․ These tips help you get the most out of your TV service and enjoy a superior viewing experience in Jonesboro․

9․3 How to Set Up Your TV for Optimal Viewing

Setting up your TV for optimal viewing in Jonesboro involves several key steps․ First, ensure your TV is placed in a location with minimal glare and at eye level to enhance visibility․ Connect devices using HDMI cables for the best video quality․ Adjust picture settings like brightness, contrast, and color balance to suit your room’s lighting․ Calibrate sound settings or connect a soundbar for improved audio; Organize your channel lineup and favorites for easy access․ Utilize features like voice control or mobile apps for convenience․ Finally, ensure your TV is stable and secure to prevent movement during use․ These steps will help you achieve the best viewing experience possible in Jonesboro․

Jonesboro TV Guide offers a comprehensive viewing experience with diverse channels and listings, ensuring entertainment for all․ Stay updated and enjoy seamless TV experiences in Jonesboro․

10․1 Final Thoughts on Jonesboro TV Guide

The Jonesboro TV Guide is an essential resource for viewers, offering a comprehensive overview of local and national programming․ With detailed listings for broadcast, cable, and satellite channels, it ensures that residents and visitors can easily find their favorite shows and stay informed about local events․ The guide’s user-friendly format makes it accessible to everyone, providing a seamless viewing experience․ Whether you’re interested in sports, news, or entertainment, the Jonesboro TV Guide has something for everyone, making it an indispensable tool for maximizing your television experience in the region․

10․2 Stay Tuned for Updates

Stay tuned for the latest updates on Jonesboro’s TV listings, as schedules and channel lineups are subject to change․ Regular updates ensure viewers stay informed about new shows, special events, and any changes in programming․ With technological advancements and evolving viewer preferences, the Jonesboro TV Guide remains a reliable source for up-to-date information․ Check back frequently to catch the newest additions to your favorite channels and discover fresh content tailored to your interests․ By staying connected, you’ll never miss out on the best entertainment options available in Jonesboro․