
Ear gauge systems are a method of body modification where earlobes are stretched to wear larger jewelry, emphasizing safety and proper technique for a seamless result. Using high-quality materials and following aftercare guidelines is crucial for successful stretching and maintaining healthy ears.
Understanding Gauge Measurements
Ear gauge measurements are crucial for safe and effective stretching. The gauge system works inversely, meaning smaller numbers represent thicker jewelry, while larger numbers indicate thinner pieces. Common gauges range from 20g (thickest) to 00g (thinnest), with sizes increasing as numbers decrease. Understanding this system helps in selecting appropriate jewelry sizes and ensures gradual, safe stretching to avoid complications. Proper measurement is key to achieving desired results without causing damage to the earlobes.
Importance of Gauge Systems in Ear Stretching
Understanding gauge systems is vital for safe ear stretching. Gauges ensure gradual, controlled enlargement, preventing damage like tears or thinning. Starting with smaller gauges allows proper healing before progressing. Using the right tools and materials, like tapers or plugs, helps maintain ear health. Proper gauge measurement prevents over-stretching, safeguarding the integrity of the earlobe. This system promotes a structured approach, making the process safer and more manageable for individuals aiming for larger sizes.
Ear Gauge Size Chart
A handy tool for tracking progress, the ear gauge size chart provides clear conversions between gauges and millimeters, ensuring safe and gradual stretching practices. Use it to plan your journey effectively and avoid over-stretching.
Standard Gauge Sizes for Ear Stretching
Standard ear gauge sizes range from 20g (0.812mm) to 0g (8.128mm), with larger gauges having smaller diameters. Common sizes for stretching include 18g, 16g, 14g, 12g, 10g, 8g, 6g, 4g, 2g, and 0g. These gauges are universally recognized, allowing for gradual progression. Starting from smaller gauges like 18g or 16g, individuals can safely increase to larger sizes over time. Always use high-quality materials and follow proper techniques to ensure healthy stretching and avoid complications.
Conversion Guide for Gauge to Millimeter
Converting gauge to millimeter helps in understanding the physical size of the jewelry. A 16g is approximately 1.291mm, 14g is 1.628mm, 12g is 2.053mm, 10g is 2.588mm, 8g is 3.264mm, 6g is 4.115mm, 4g is 5.189mm, 2g is 6.533mm, and 0g is 8.128mm. This guide ensures accurate sizing for jewelry selection and compatibility with your stretched ears. Always refer to this chart for precise measurements.

The Ear Stretching Process
The ear stretching process involves gradually enlarging pierced lobes using tapers or the taping method, starting from 16g upwards, ensuring safety and patience for optimal results.
Step-by-Step Guide to Safe Stretching
Start with a fully healed piercing at 16g or 18g. Use a taper to gradually increase size, one gauge at a time; Massage with oil to enhance elasticity. Allow 6-12 months of healing before resizing. Avoid rushing to prevent tears or thinning. Use high-quality materials and follow proper aftercare to ensure healthy, sustainable stretching results.
Recommended Tools and Techniques
Essential tools for safe stretching include high-quality tapers, plugs, and lubricating oils. Use a taper to gradually increase size, starting with smaller gauges. Massage your lobes with jojoba or vitamin E oil to enhance elasticity. Avoid using weights or improper methods that can cause damage. Opt for materials like stainless steel, glass, or wood for comfort and hygiene. Always sanitize tools and follow proper aftercare routines to ensure healthy stretching.
- Use tapers for gradual sizing.
- Choose hypoallergenic materials.
- Massage regularly for elasticity.
Aftercare and Healing
Proper aftercare is crucial for healing. Keep the area clean with saline solution, avoid harsh chemicals, and allow time for lobes to fully heal between stretches.
Best Practices for Ear Aftercare
Proper hygiene is essential for healing. Clean your ears with saline solution daily and avoid harsh chemicals. Always handle jewelry gently to prevent irritation. Keep the area dry and avoid submerging in water until fully healed. Avoid tight clothing that may rub against your ears. Use high-quality, non-irritating materials for jewelry. Patience is key—allow your ears to heal completely between stretches to prevent complications. Regular aftercare ensures healthy, successful results.
Healing Time and Stages
Healing times vary depending on the individual and the size of the stretch. Initial stages involve inflammation, typically lasting a few weeks to months. The first stage is critical, as the piercing begins to close if not properly maintained. Over time, the tissue relaxes, and the ear becomes more stable. Proper aftercare and patience are essential to ensure a smooth healing process and prevent complications. Healing stages must be respected to achieve optimal results.
Common Mistakes to Avoid
Rushing the process, using improper tools, and neglecting aftercare are common errors that can lead to complications like tears or infections. Patience and proper technique are vital.
Pitfalls in the Stretching Process
Rushing the process, using improper tools, and neglecting aftercare can lead to complications like infections, tears, or uneven stretching. Over-stretching or using low-quality materials can cause permanent damage. Ignoring healing times or signs of irritation can result in setbacks or prolonged recovery. It’s crucial to avoid these common pitfalls to ensure a safe and successful stretching journey.
How to Prevent Complications
To prevent complications, prioritize proper aftercare, use sanitized tools, and avoid rushing the stretching process. Ensure ears are fully healed between stretches and use high-quality, appropriate materials. Avoid harsh chemicals and over-stretching, as this can lead to tears or infections. Patience and adherence to safety guidelines are essential for a smooth and complication-free stretching experience.
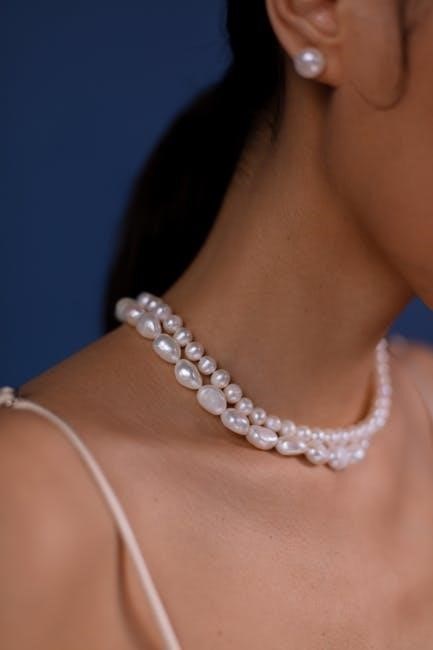
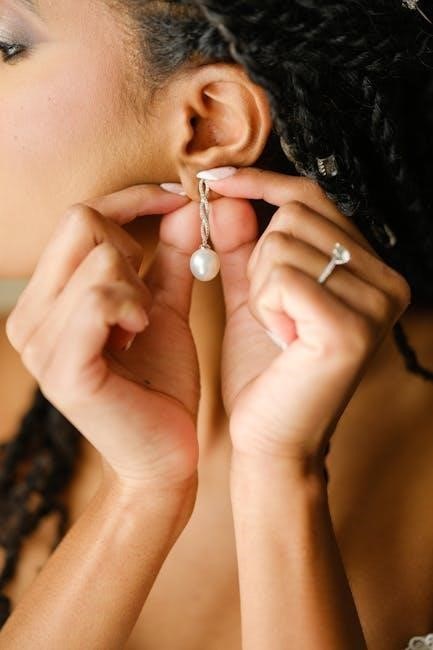
Jewelry for Stretched Ears
Jewelry for stretched ears includes plugs, tunnels, and rings made from materials like glass, wood, or stainless steel. Choosing the right size ensures comfort and style.
Types of Jewelry Materials
Jewelry for stretched ears is crafted from various materials, each offering unique benefits. Glass and acrylic are smooth and comfortable, while wood and stone provide organic aesthetics. Stainless steel and titanium are durable and hypoallergenic, ideal for sensitive skin. Silicone jewelry is flexible and suitable for healing. Precious metals like gold and silver add luxury, while bamboo and organic materials offer an eco-friendly option.
Choosing the Right Jewelry Style
Selecting the right jewelry style for your stretched ears involves considering personal aesthetics, lifestyle, and comfort. Plugs are sleek and simple, while tunnels add an edgy look. Hangers and orbitals offer unique designs for a bold statement. Consider the size, material, and ease of wear when making your choice. Proper fit is essential to avoid discomfort and ensure the jewelry stays securely in place, enhancing your overall style.

Determining Maximum Safe Size
Ear elasticity, skin thickness, and personal goals influence maximum safe size. Most professionals recommend not exceeding 0 or 2 gauge to allow potential shrinkage back to standard size.
Factors Influencing Maximum Gauge Size
Ear elasticity, skin thickness, and personal goals significantly impact maximum gauge size. Individual elasticity varies, affecting how far ears can stretch without damage; Age and aftercare practices also play a role, as younger skin tends to be more resilient. Professionals often advise stopping at 0 or 2 gauge to allow potential shrinkage back to standard size if desired. Proper healing and avoiding over-stretching are crucial.
Professional Recommendations
Professionals recommend starting with smaller gauges and gradually increasing size to avoid damage. Avoiding excessive stretching beyond 0 or 2 gauge is advised for potential reversal. Proper aftercare, high-quality materials, and gradual progression are crucial. Consulting an experienced piercer ensures personalized guidance and safety. They can assess elasticity and provide tailored advice, minimizing risks and promoting healthy stretching outcomes.
Healing Time Between Stretches
Healing time between stretches varies, typically ranging from a few weeks to several months. Smaller gauges may heal faster, while larger sizes require more time. Always wait until the area is fully healed before proceeding to the next size to ensure proper tissue health and prevent complications.
Time Intervals for Safe Stretching
Allowing proper healing time is crucial for safe stretching. Smaller gauges (e.g., 16g to 12g) typically require 2-3 months of healing, while larger sizes (e.g., 0g and beyond) may need 6-12 months. Always wait until the tissue feels normal and is fully healed before moving to the next size. Rushing can lead to complications, so patience is key for a healthy and successful stretching journey.
Signs of Readiness for Next Stretch
Your ears are ready for the next stretch when the lobes feel soft and flexible, with no pain or inflammation. The jewelry should move freely without resistance, and the area should appear fully healed. Waiting for these signs ensures a safe and successful progression to the next gauge size, minimizing the risk of complications or setbacks.
Signs to Stop Stretching
If you experience persistent pain, swelling, or torn skin, stop stretching immediately. Additionally, if your ears cannot shrink back or show signs of permanent damage, consult a professional.
Recognizing Limitations
Recognizing your body’s limits is crucial in ear stretching. Persistent pain, swelling, or visible tears indicate you should stop. Everyone’s elasticity differs, and some may find their ears cannot shrink back. Professionals often advise against exceeding a 0 gauge if you hope for your ears to return to a standard size. Always listen to your body and seek expert advice if complications arise.
When to Consult a Professional
If you experience severe pain, swelling, or notice tears or blowouts, consult a professional immediately. They can assess damage and provide repair options. Experts are also essential for determining the safest maximum size and addressing concerns about elasticity or shrinkage. Don’t hesitate to seek guidance if unsure about stretching techniques or materials, as professionals ensure safe and successful ear gauge outcomes.
Choosing the Right Jewelry Size
Selecting the right jewelry size ensures comfort and style. Measure your ear gauge accurately and opt for materials like acrylic, wood, or stainless steel for durability and personal preference.
Measuring for Proper Fit
Measuring your ear gauge accurately is essential for a proper fit. Use a caliper or sizing chart to determine your current gauge size. Consider your ear’s elasticity and desired jewelry style. Proper fit ensures comfort and prevents complications. Always measure carefully to avoid sizing errors, as incorrect fit can cause discomfort or healing issues. Use high-quality tools for precise measurements to achieve the best results for your ear gauge journey.
Considering Personal Style Preferences
Personal style plays a significant role in choosing ear gauge jewelry. Consider materials like wood, metal, or glass to match your aesthetic. Sleeve length and plug designs can enhance your look, from minimalistic to bold statements. Think about your lifestyle and comfort needs when selecting jewelry. Ensure your choices align with your personal style to achieve a look that reflects your identity and preferences for a satisfying outcome.
Final Thoughts and Comprehensive Guide
Ear gauging is a personal journey requiring patience, proper techniques, and dedication. Embrace your unique style, prioritize safety, and enjoy the rewarding process of creating your desired look.
Ear gauging involves gradually stretching earlobes to accommodate larger jewelry, emphasizing safety and proper technique. Understand gauge measurements, start with smaller sizes, and use recommended tools like tapers. Prioritize aftercare to prevent complications, choose suitable jewelry materials, and allow adequate healing time between stretches. Recognize signs of discomfort and consult professionals when needed for a successful, personalized journey.
Encouragement for Safe Practices
Embrace your ear gauging journey with confidence and patience. Prioritize your health by following proper techniques and using quality tools. Allow ample healing time between stretches and maintain consistent aftercare. Seek professional guidance when unsure. Your dedication to safety ensures a positive experience and beautiful results. Remember, every step is a commitment to self-expression and personal growth. Stay informed, stay safe, and enjoy your unique style!