coffee shop equipment list pdf

PDF

coffee shop equipment list pdf

Opening a coffee shop requires careful planning and the right tools. Quality equipment ensures delicious beverages and operational efficiency. A detailed coffee shop equipment list PDF is essential for preparation and consistency.

Why the Right Equipment Matters for Your Coffee Shop

The right equipment is crucial for delivering high-quality beverages‚ ensuring efficiency‚ and creating a positive customer experience. Quality machinery directly impacts the taste of coffee‚ tea‚ and other drinks‚ setting your shop apart from competitors. Proper tools also streamline operations‚ reducing wait times and staff stress during peak hours. Additionally‚ investing in durable‚ commercial-grade equipment lowers long-term costs by minimizing repairs and replacements. Water filtration systems‚ for instance‚ improve beverage flavor while protecting equipment from damage. A well-equipped coffee shop not only meets customer expectations but also builds loyalty and drives success in a competitive market. Ensuring every piece of equipment aligns with your shop’s needs is vital for consistency‚ profitability‚ and growth.

Essential Coffee Shop Equipment List

A well-equipped coffee shop requires espresso machines‚ grinders‚ brewers‚ pour-over tools‚ milk frothers‚ water systems‚ tea brewers‚ disposables‚ cleaning supplies‚ and a reliable POS system for smooth operations.
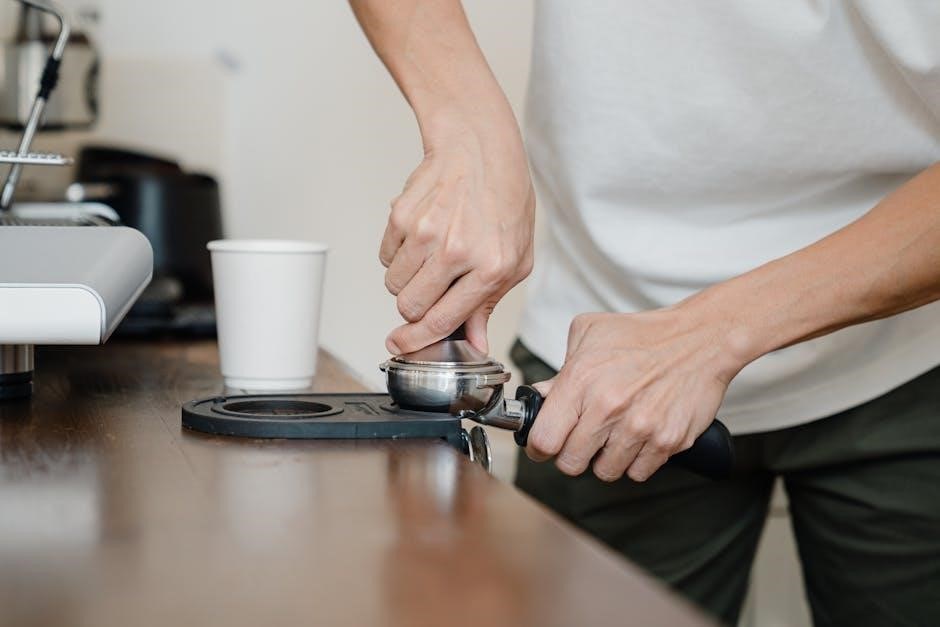
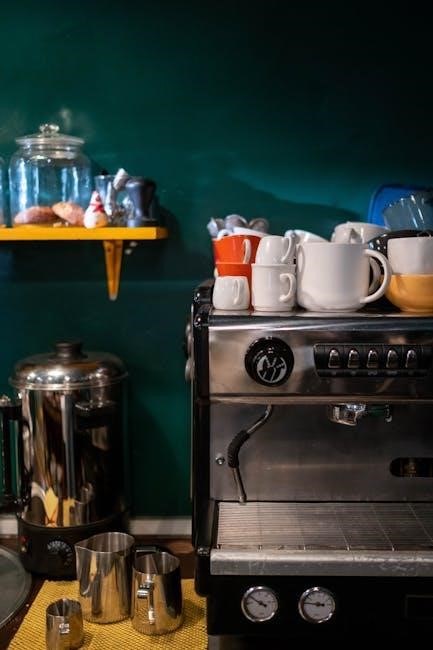
Espresso Machines

An espresso machine is the heart of any coffee shop‚ enabling the creation of high-quality espresso shots. Commercial-grade machines are essential for consistent flavor and durability‚ as they handle high volumes of drinks. Automatic‚ semi-automatic‚ and super-automatic models cater to different skill levels and business needs. Choose a machine that fits your shop’s size and expected customer demand. Consider features like multiple group heads for faster service and built-in grinders for convenience. Proper maintenance and regular cleaning are crucial to extend the machine’s lifespan. Investing in a reliable espresso machine ensures superior taste and customer satisfaction‚ making it a cornerstone of your coffee shop equipment list.

Coffee Grinders

Coffee grinders are indispensable for freshly grinding beans‚ ensuring optimal flavor and aroma in every cup. Blade and burr grinders are the two main types‚ with burr grinders offering superior consistency and heat control. Choose a grinder that matches your coffee shop’s volume needs‚ considering features like adjustable grind settings and easy cleaning. Burr grinders are recommended for commercial use due to their precision and durability. Pairing the grinder with your espresso machine ensures compatibility and seamless operation. Regular maintenance‚ such as cleaning burrs and checking for wear‚ is crucial to maintain performance. A high-quality grinder elevates the taste of your coffee and enhances customer satisfaction‚ making it a vital addition to your coffee shop equipment list.

Drip Coffee Brewers

Drip coffee brewers are a staple in most coffee shops‚ offering a convenient and efficient way to serve high-quality brewed coffee. These machines are popular for their ability to brew large quantities quickly‚ making them ideal for busy environments. When selecting a drip coffee brewer‚ consider features like thermal carafes to keep coffee warm without burning‚ programmable timers for consistent brewing‚ and adjustable settings to customize flavor. The size and capacity of the brewer should match your shop’s demand‚ ensuring you can meet customer needs without excess waste. Look for models with easy-to-use interfaces and simple cleaning processes to save time. Drip brewers are versatile and cater to a wide range of coffee preferences‚ making them a must-have in your coffee shop equipment list for reliable and delicious brewed coffee.

Pour-Over and Manual Brewing Equipment

Pour-over and manual brewing equipment are essential for coffee shops catering to specialty coffee enthusiasts. These tools allow baristas to craft unique‚ high-quality brews with precision and creativity. Popular options include pour-over cones‚ French presses‚ and Chemex brewers‚ each offering distinct flavor profiles. Manual brewing equipment emphasizes the artistry of coffee preparation‚ enabling baristas to control factors like water temperature‚ coffee-to-water ratios‚ and steeping times. Accessories like kettles‚ scales‚ and filters are also necessary for optimal results. When choosing manual brewing equipment‚ consider durability‚ ease of use‚ and the ability to scale for different serving sizes. These tools not only enhance the coffee experience but also provide an engaging‚ hands-on process for customers seeking a more personalized drink. Including these in your coffee shop equipment list ensures versatility and meets the growing demand for artisanal coffee.

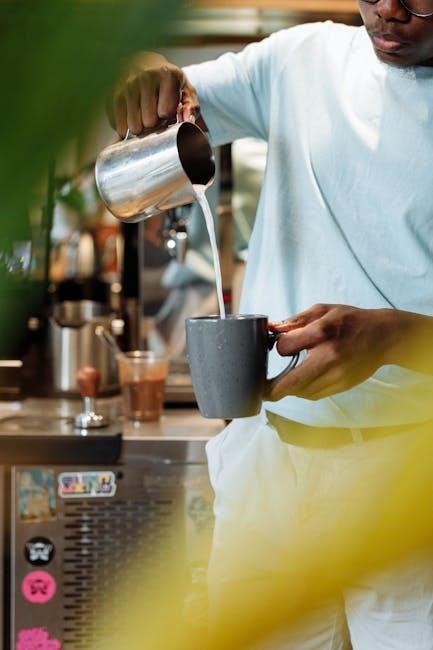
Milk Frothing and Steaming Equipment

Milk frothing and steaming equipment are crucial for creating specialty coffee drinks like lattes and cappuccinos. Essential tools include steam wands on espresso machines‚ milk frothing pitchers‚ and automatic frothers. These devices allow baristas to heat and texture milk to the perfect consistency. High-quality steam wands ensure precise temperature control‚ while automatic frothers simplify the process for consistent results. Cleaning supplies‚ such as steam wand cleaners‚ are also necessary to maintain hygiene and prevent milk residue buildup. When selecting milk frothing equipment‚ consider factors like durability‚ ease of use‚ and compatibility with your espresso machine. Investing in reliable tools ensures creamy‚ velvety textures that elevate your coffee creations. Proper maintenance and regular cleaning of these tools are vital for longevity and optimal performance. Including these in your coffee shop equipment list guarantees the ability to craft a wide variety of milk-based beverages with ease.

Coffee Shop Water Filtration Systems

A commercial water filtration system is vital for maintaining water quality in your coffee shop. It ensures that water used in brewing coffee and other beverages is free from impurities‚ improving taste and preventing equipment damage. Hard water minerals can leave scaling buildup in espresso machines and brewers‚ reducing their efficiency and lifespan. A good filtration system removes sediment‚ chlorine‚ and other contaminants‚ safeguarding your equipment and enhancing flavor. Regular maintenance of the filtration system is essential to prevent clogs and bacterial growth. Investing in a high-quality system tailored to your water supply will protect your investment in coffee equipment and ensure consistently great-tasting drinks. Including a water filtration system in your coffee shop equipment list is a proactive step toward long-term success and customer satisfaction.

Tea Brewing Equipment

While coffee is the star‚ offering high-quality tea enhances your menu appeal. Essential tea brewing equipment includes teapots‚ steeping bags‚ and tea infusers. For loose-leaf tea‚ consider electric or manual tea brewers. Teapots with built-in infusers provide precise steeping control. Tea balls and reusable filters are eco-friendly and convenient. Optional items like maté brewers cater to diverse customer preferences. Including these in your coffee shop equipment list ensures versatility. Tea equipment should be durable‚ easy to clean‚ and suitable for various tea types. This expands your beverage offerings and attracts tea enthusiasts‚ making your shop a one-stop destination for both coffee and tea lovers. Proper tea preparation boosts customer satisfaction and loyalty.

Disposable Supplies

Disposable supplies are essential for both convenience and hygiene in your coffee shop. Key items include paper hot cups‚ lids‚ and sleeves to protect customers’ hands from heat.
Plastic cold cups and lids are necessary for iced beverages. Stir sticks‚ straws‚ and cutlery (if serving food) should also be stocked. Disposable napkins and paper towels are practical for cleanup.
Custom coffee sleeves with your shop’s branding can enhance customer experience and promote your business.
Additionally‚ consider eco-friendly options like biodegradable cups and compostable utensils to appeal to environmentally conscious customers.
Having ample disposable supplies ensures smooth service during peak hours and maintains cleanliness.
Include these in your coffee shop equipment list to cover all customer needs and preferences. Proper disposable supplies contribute to a positive and convenient experience for your patrons. They are a small but vital part of your overall operations and success.

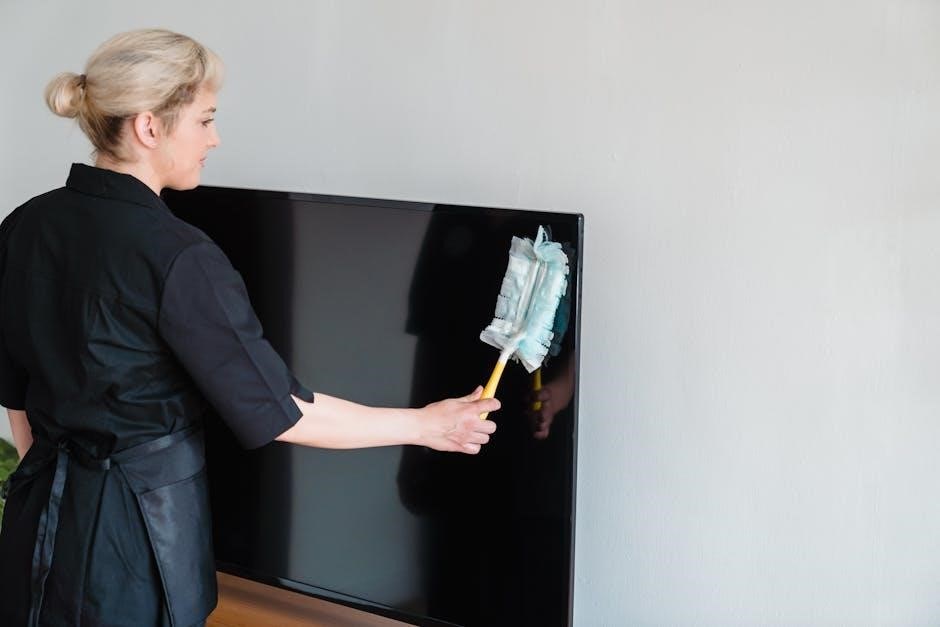
Cleaning and Maintenance Tools

Cleaning and maintenance tools are crucial for maintaining hygiene and extending the life of your coffee shop equipment. Essential items include dishcloths‚ scrub brushes‚ and detergent specifically designed for cleaning coffee equipment.
A squeegee or steam wand cleaner is necessary for daily maintenance of espresso machines. Mops and buckets are needed for cleaning floors‚ while a vacuum cleaner helps keep the premises tidy.
Microfiber cloths are ideal for wiping down surfaces‚ and trash bags are essential for waste management.
A dishwashing station with a sink‚ dish racks‚ and cleaning supplies is vital for sanitizing utensils and cups.
Regular cleaning prevents contamination and ensures equipment functions optimally. Including these tools in your coffee shop equipment list guarantees a clean and efficient workspace.
Investing in quality cleaning supplies is a small cost compared to the long-term benefits of maintaining a hygienic environment for your customers and staff.

Point of Sale (POS) Systems

A reliable Point of Sale (POS) system is essential for managing transactions efficiently in your coffee shop. It streamlines payments‚ tracks sales‚ and integrates with inventory management.
Modern POS systems offer features like mobile ordering‚ digital receipts‚ and loyalty program integration‚ enhancing customer experience.
Cloud-based systems provide real-time data access‚ enabling better business decisions.
When choosing a POS‚ consider ease of use‚ scalability‚ and compatibility with other equipment.
Ensure it supports multiple payment methods and has robust reporting tools.
A user-friendly POS system not only speeds up transactions but also improves accuracy.
Investing in a high-quality POS system is vital for seamless operations.
Include it in your coffee shop equipment list to ensure smooth customer interactions and effective business management.

Additional Considerations

Evaluate your space‚ budget‚ and operational needs carefully. Ensure all equipment fits seamlessly and aligns with your business goals. A detailed coffee shop equipment list PDF can streamline your setup process.

Choosing the Right Equipment for Your Space

Selecting the right equipment for your coffee shop involves assessing your space‚ capacity‚ and operational needs. Consider the size and layout of your shop to ensure equipment fits seamlessly. For example‚ a compact espresso machine may be ideal for small spaces‚ while a large drip brewer suits high-volume locations. Additionally‚ think about the flow of your workspace—placing grinders near espresso machines and brewers near serving areas can enhance efficiency. Ensure all equipment is NSF-certified to meet health and safety standards. Lastly‚ download a coffee shop equipment list PDF to cross-reference your needs and ensure no essential items are overlooked. Properly chosen equipment will streamline operations‚ improve customer satisfaction‚ and set your business up for long-term success.

Budgeting for Equipment

Budgeting for coffee shop equipment is crucial to ensure financial stability while setting up your business. Research and allocate funds based on the essential items in your coffee shop equipment list PDF. High-quality espresso machines and grinders are significant investments‚ with prices ranging from $5‚000 to $20‚000. Drip brewers and pour-over equipment are more affordable‚ typically costing between $200 and $1‚000. Water filtration systems and POS systems also require substantial funding‚ ranging from $500 to $2‚000. Disposable supplies and cleaning tools are lower-cost items but still necessary. Consider leasing options or purchasing refurbished equipment to reduce initial expenses. A detailed budget will help prioritize needs and avoid overspending‚ ensuring your coffee shop starts on a solid financial foundation. Download a coffee shop equipment list PDF to plan effectively and make informed purchasing decisions.

Downloading a Coffee Shop Equipment Checklist PDF

Downloading a coffee shop equipment checklist PDF is a practical step to ensure you have everything needed for a successful launch. This comprehensive guide outlines essential items‚ from espresso machines to disposable supplies‚ helping you stay organized. A detailed checklist prevents oversights and streamlines the purchasing process. Many resources offer free‚ downloadable PDFs tailored to different coffee shop sizes and concepts. These checklists often include budgeting tips and space planning advice. By referencing a coffee shop equipment list PDF‚ you can prioritize investments and avoid unnecessary expenses. Ensure the checklist is specific to your needs‚ whether for a small café or a large espresso bar. Downloading this tool is a smart way to prepare and set your coffee shop up for long-term success.

Setting up a successful coffee shop requires careful planning and the right equipment. From espresso machines to water filtration systems‚ each piece plays a vital role in delivering high-quality beverages. A detailed coffee shop equipment list PDF is indispensable‚ ensuring you cover all essentials and avoid costly oversights. By investing in durable‚ commercial-grade equipment‚ you can enhance efficiency‚ consistency‚ and customer satisfaction. Additionally‚ budgeting wisely and optimizing your space will help create a thriving environment. Whether you’re opening a small café or a bustling espresso bar‚ a well-prepared equipment checklist is your roadmap to success. Download a comprehensive coffee shop equipment list PDF to streamline your preparation and set your business up for long-term growth and profitability in the competitive coffee industry.

PDF

talking with your toddler pdf

Effective communication with your toddler fosters their language development and strengthens your bond․ Early conversations, responsive talking, and play-based interactions lay the foundation for their future social and cognitive growth․

Importance of Early Conversations

Early conversations with your toddler are foundational for their language development and future communication skills․ Talking openly and consistently helps build their vocabulary, understanding, and ability to express thoughts․ Research shows that children who engage in early verbal interactions tend to have stronger social and cognitive abilities․ These conversations also foster trust and emotional connection, creating a supportive environment for learning․ By speaking slowly, using real words, and encouraging responses, parents model effective communication․ Delayed or limited early conversations may hinder language milestones, potentially leading to speech delays․ Prioritizing these interactions ensures your child develops the tools needed for clear expression and comprehension, setting them up for lifelong success in personal and academic relationships․

Developmental Milestones in Toddler Language

Tracking your toddler’s language milestones is crucial for understanding their progress․ By 12 months, most babies babble and say a few words․ Around 18 months, they often have a vocabulary of and start combining two words․ By 24 months, they typically use and form simple sentences․ Two-year-olds may experience a language explosion, while three-year-olds refine their communication with clearer sentences and better grammar․ Monitoring these milestones helps identify delays early․ If your child has fewer than by age two or no two-word phrases, consulting a speech therapist is recommended․ Recognizing these signs ensures timely support for their language development․

Role of Parents as Language Models

Parents play a vital role in shaping their toddler’s language skills by serving as consistent and supportive models․ Speaking slowly, using clear and simple sentences, and incorporating real-world vocabulary helps toddlers grasp language structure․ Engaging in responsive conversations, where you listen and reply to your child’s coos, babble, or words, fosters a nurturing environment for language growth․ Reading books together and discussing daily activities provide rich opportunities for learning․ By being attentive and encouraging, parents can help their child develop confidence in communicating․ Consistently modeling proper speech and engaging in meaningful interactions are key to fostering strong language development in toddlers․

Strategies for Effective Communication

Engage in responsive conversations, use play to spark interest, and read interactively․ Speak clearly, encourage gestures, and create a nurturing environment for language exploration and confidence․

Responsive Talking: Engaging in Two-Way Conversations

Responsive talking involves actively engaging with your toddler in meaningful exchanges, creating a dialogue rather than a monologue․ This strategy encourages your child to participate, fostering their language skills and confidence․ By speaking slowly, making eye contact, and using simple, clear sentences, you model effective communication․ Encourage your toddler to respond by asking open-ended questions or waiting for their reactions․ Incorporate their interests and name into conversations to personalize the interaction․ This approach builds trust, strengthens your bond, and helps your child develop essential social and emotional skills․ Consistent practice of responsive talking nurtures a supportive environment where your toddler feels heard and valued, promoting their overall development․ Regular engagement in these conversations lays a strong foundation for future communication abilities․

Using Play to Enhance Language Skills

Play is a natural and effective way to enhance your toddler’s language skills․ Engaging in play allows children to explore and express themselves creatively, fostering vocabulary growth and communication․ Use toys and games to encourage talking, such as naming objects or describing actions․ For example, during pretend play, act out scenarios like feeding a doll or driving a toy car, using language to narrate the activities․ Follow your child’s lead to embed communication goals into play, making it more meaningful and engaging․ Describing what your child is doing during play builds their understanding and encourages them to imitate and expand on your words․ This interactive approach strengthens their language abilities while creating a fun and supportive learning environment․

Interactive Reading and Book Sharing

Interactive reading and book sharing are powerful tools for enhancing your toddler’s language skills․ Sharing books creates a nurturing environment where your child can listen, understand, and imitate language․ Choose books with simple, engaging text and vibrant images to capture their interest․ As you read, point to and name objects, encouraging your child to do the same․ Pause to ask questions or invite your child to predict what might happen next, fostering active participation․ Books with flaps, textures, or interactive elements can further stimulate curiosity and vocabulary growth․ This shared experience not only builds language abilities but also strengthens your bond and fosters a lifelong love for reading and learning․

Overcoming Challenges in Toddler Communication

Identifying speech delays early and using responsive talking can help address communication challenges․ Managing frustration through patience and consistent interaction supports healthy language development in toddlers․

Identifying and Addressing Speech Delays

Identifying speech delays early is crucial for supporting your toddler’s language development․ Signs include difficulty producing speech sounds, stuttering, or limited vocabulary․ By 18 months, most children say a few words, and by 2 years, they should have around ․ If your child struggles to meet these milestones, consult a speech therapist․ Responsive talking, such as speaking slowly and using short sentences, can help․ Encourage communication by following their interests and embedding language into play․ Early intervention significantly improves outcomes․ Stay patient and consistent, as every child develops at their own pace․ Professional guidance can provide tailored strategies to address specific needs․

Supporting Language Development in Bilingual Homes

Raising a bilingual toddler offers unique opportunities for language development․ Consistency is key; assign specific languages to different contexts or family members․ Engage in interactive activities like singing, storytelling, and play to expose your child to both languages․ Encourage communication by responding to their efforts, even if they mix languages․ Celebrate cultural traditions and use bilingual books to reinforce vocabulary․ Avoid mixing languages in the same sentence to prevent confusion․ Provide opportunities for immersion, such as speaking with native speakers or using media in both languages․ Be patient and supportive, as bilingual children may develop language skills at their own pace․ Seek guidance from bilingual resources or professionals to ensure balanced growth․

Managing Frustration and Tantrums Related to Communication

Toddlers often experience frustration when they cannot express their thoughts or needs effectively․ This can lead to tantrums, which are common during language development․ To manage these situations, stay calm and patient, offering reassurance without dismissing their feelings․ Speak slowly and clearly, using simple language to help them understand․ Encourage gestures or pointing to bridge communication gaps․ Provide choices, like “Do you want a banana or an apple?” to give them a sense of control․ Model how to express emotions with words, such as saying, “You seem upset․ What do you need?” Consistency and positive reinforcement can help reduce frustration and foster healthier communication habits over time․

Activities to Promote Language Development

Engage your toddler with songs, nursery rhymes, and interactive play․ Use gestures and technology to effectively enhance learning․ These activities foster vocabulary, listening, and communication skills naturally․

Singing Songs and Reciting Nursery Rhymes

Singing songs and reciting nursery rhymes are powerful tools for language development․ These activities expose toddlers to rhythm, rhyme, and phonological awareness, laying the groundwork for reading skills․ Interactive songs encourage toddlers to clap, dance, and mimic sounds, fostering creativity and motor skills․ Rhymes introduce new vocabulary and sentence structures, helping children understand how language works․ Parents can create a fun, engaging environment by incorporating daily sing-alongs or recitation sessions․ Encourage participation by pausing for your child to fill in missing words or sounds․ This not only strengthens memory but also builds confidence in communication․ Make it a routine to sing during car rides, bath time, or before bed for consistent learning opportunities․

Encouraging Gestures and Non-Verbal Communication

Encouraging gestures and non-verbal communication is a powerful way to support your toddler’s language development․ Gestures like waving goodbye, pointing to objects, or clapping hands can help your child express needs and emotions before they can speak․ Respond to these cues by acknowledging and labeling them, such as saying, “You’re waving bye-bye!” This reinforces their understanding and encourages further communication․ Imitation is key—mimic your child’s gestures and introduce new ones, like nodding for “yes” or shaking the head for “no․” Using visual aids like pictures or objects can also enhance non-verbal exchanges․ By fostering these early communication strategies, you help build confidence and bridge the gap between thoughts and words, laying a strong foundation for future language skills․

The Role of Technology in Language Learning

Technology can be a valuable tool in supporting your toddler’s language development when used thoughtfully․ Educational apps and interactive platforms designed for young children often feature rhymes, quizzes, and engaging visuals that make learning fun․ For instance, apps like Talk To Your Child In English offer structured activities to introduce new vocabulary and phrases․ Additionally, digital tools can provide opportunities for repetition and practice, which are essential for language acquisition․ However, it’s important to balance screen time with hands-on, human interaction․ Parents should guide their child’s use of technology, ensuring it complements rather than replaces face-to-face conversations․ By leveraging technology wisely, you can enhance your toddler’s language skills while fostering a love for learning․

cub cadet service manual free download

Cub Cadet service manuals are official guides providing detailed repair‚ maintenance‚ and troubleshooting instructions for Cub Cadet equipment‚ ensuring optimal performance and safety for technicians and owners․

Overview of the Importance of Service Manuals

Service manuals are essential for maintaining and repairing Cub Cadet equipment‚ offering detailed instructions for optimal performance and safety․ They provide step-by-step guides for troubleshooting and fixing issues‚ ensuring repairs are done correctly․ These manuals also outline safety precautions to prevent accidents and explain proper maintenance schedules to extend equipment lifespan․ By following the guidelines‚ users can avoid costly damages and ensure their Cub Cadet machinery operates efficiently․ Additionally‚ service manuals are indispensable for DIY enthusiasts and professional technicians‚ providing model-specific information that guarantees accurate repairs․ Accessing these resources helps users maximize their investment and keep their equipment in prime condition for years․

Benefits of Using Official Cub Cadet Service Manuals

Official Cub Cadet service manuals provide precise instructions tailored to specific models‚ ensuring accurate repairs and maintenance․ They offer detailed diagrams and troubleshooting guides‚ enhancing understanding and efficiency․ These manuals are authored by Cub Cadet experts‚ guaranteeing reliability and compliance with manufacturer standards․ Users benefit from model-specific information‚ reducing errors and saving time․ Official manuals also promote safety by highlighting critical precautions‚ protecting both the user and the equipment․ They are a valuable resource for both professionals and DIYers‚ fostering confidence in performing complex tasks․ By adhering to these guidelines‚ users can maintain their Cub Cadet equipment effectively‚ preserving its performance and longevity․

Types of Cub Cadet Service Manuals

Cub Cadet offers various service manuals‚ including tractor‚ lawn tractor‚ zero-turn mower‚ and snow blower manuals‚ each tailored to specific models and equipment needs․

Cub Cadet Tractor Service Manuals

Cub Cadet tractor service manuals provide detailed instructions for repairing‚ maintaining‚ and troubleshooting specific tractor models․ These manuals are designed for both professional technicians and DIY enthusiasts‚ ensuring optimal performance and safety․ They cover a wide range of models‚ including the Cub Cadet 1000 and 1500 series‚ and are available for free download online․ The manuals include step-by-step guides‚ diagrams‚ and parts lists‚ making it easier to diagnose and fix issues․ Topics range from routine maintenance‚ such as oil changes and blade sharpening‚ to complex repairs like engine overhauls․ By following the guidelines in these manuals‚ users can extend the lifespan of their equipment and ensure reliable operation․ Always refer to the correct model-specific manual for accuracy․

Cub Cadet Lawn Tractor Service Manuals

Cub Cadet lawn tractor service manuals are essential resources for owners seeking to maintain or repair their equipment․ These manuals‚ available for free download‚ cover models like the 2000 series GT2100 and GTX2100․ They provide detailed instructions on deck leveling‚ engine service‚ and troubleshooting common issues․ With step-by-step guides and diagrams‚ users can perform routine maintenance and complex repairs confidently․ The manuals emphasize safety precautions‚ such as avoiding loose clothing and proper handling of moving parts․ They also include parts lists and specifications‚ ensuring accurate repairs․ Whether addressing blade issues or transmission problems‚ these manuals empower users to keep their lawn tractors in optimal condition‚ extending their lifespan and performance․ Always verify the model-specific manual for precise information․

Cub Cadet Zero-Turn Mower Service Manuals

Cub Cadet zero-turn mower service manuals are comprehensive guides designed to help users maintain‚ troubleshoot‚ and repair their zero-turn mowers effectively․ These manuals‚ available for free download‚ cover popular models like the Ultima Series ZT1 60‚ providing detailed instructions on engine service‚ deck adjustments‚ and hydraulic system maintenance․ They include step-by-step repair procedures‚ diagnostic tips‚ and safety guidelines to ensure safe and efficient operation․ With exploded parts diagrams and specifications‚ users can identify and replace components accurately․ Whether addressing blade issues or optimizing mower performance‚ these manuals are indispensable for both professionals and DIY enthusiasts․ They emphasize routine maintenance to prevent wear and extend equipment lifespan‚ making them a valuable resource for Cub Cadet zero-turn mower owners․ Always consult model-specific manuals for precise instructions․

Free Download Options for Cub Cadet Service Manuals

Cub Cadet service manuals are available for free download from the official website and third-party sources‚ offering model-specific guides for tractors‚ lawn mowers‚ and zero-turn mowers in PDF format․

Official Cub Cadet Website Resources

The official Cub Cadet website provides a wealth of resources for downloading service manuals free of charge․ Users can easily search for manuals by model number‚ ensuring they access the correct guide for their specific equipment․ These manuals are authored by Cub Cadet themselves‚ guaranteeing accuracy and relevance․ They cover a wide range of topics‚ including maintenance schedules‚ troubleshooting‚ and detailed repair instructions․ Additionally‚ the website offers operator manuals and parts catalogs‚ making it a one-stop solution for owners seeking to maintain or repair their Cub Cadet machinery․ The PDF formats allow for easy downloading and printing‚ ensuring users have quick access to essential information whenever needed․

Third-Party Websites Offering Free Downloads

Several third-party websites provide free downloads of Cub Cadet service manuals‚ offering convenient access to essential repair and maintenance information․ These platforms often host a wide range of manuals‚ including those for tractors‚ lawn mowers‚ and zero-turn models․ Users can typically search by model number or equipment type to find the specific manual they need․ While these resources can be helpful‚ it’s important to ensure the credibility of the source to avoid downloading incorrect or outdated information․ Many of these manuals are available in PDF format‚ making them easy to download and print for reference․ Additionally‚ some sites may offer parts catalogs and troubleshooting guides‚ further enhancing their utility for DIY enthusiasts and professionals alike․

Model-Specific Manual Availability

Model-specific Cub Cadet service manuals are widely available‚ catering to various equipment types and series․ These manuals are tailored to individual models‚ ensuring precise instructions for repairs and maintenance․ For instance‚ manuals for the Cub Cadet 1000 and 1500 series detail procedures for riding tractors‚ while those for the Ultima Series ZT1 focus on zero-turn mowers․ Users can typically find these manuals by entering their model number on official or third-party websites․ This specificity ensures that owners and technicians access accurate information‚ enhancing efficiency and safety during servicing․ The availability of model-specific guides underscores Cub Cadet’s commitment to supporting their products throughout their lifecycle‚ making DIY repairs more accessible and reliable․

Safety and Maintenance Tips from the Manuals

Essential safety precautions include avoiding loose clothing and jewelry near moving parts․ Regular maintenance‚ like lubricating pivot points and checking tire pressure‚ ensures optimal performance and longevity of equipment․

Essential Safety Precautions for Repair Work

When performing repairs‚ always wear protective gear like gloves and safety glasses․ Ensure loose clothing and jewelry are secured to avoid entanglement in moving parts․ Operate machinery only when wearing sturdy footwear‚ never barefoot or in sandals․ Keep children and pets away from the work area․ Disconnect the battery and ensure all power sources are turned off before starting repairs․ Use proper tools to avoid damaging components or causing accidents․ Follow the manual’s instructions carefully to prevent errors․ Maintain a clean‚ well-lit workspace to reduce hazards․ Never bypass safety features or ignore warnings in the manual․ Regularly inspect tools and equipment for wear or damage․ Always refer to the official Cub Cadet service manual for specific safety guidelines tailored to your model․

Regular Maintenance Schedule Recommendations

Regular maintenance is crucial for extending the lifespan and performance of Cub Cadet equipment․ The service manual recommends checking engine oil levels before each use and changing the oil every 50 hours of operation․ Air filters should be inspected and cleaned or replaced monthly‚ while fuel filters should be replaced annually or as needed․ Sharpen mower blades regularly to ensure clean cuts and proper grass health․ Tire pressure should be checked weekly and maintained at the recommended levels․ Deck leveling and belt tension should be inspected every 25 hours to prevent uneven cutting or premature wear․ Refer to the official Cub Cadet service manual for model-specific schedules and guidelines to ensure optimal performance and safety․

Common Repairs and Troubleshooting Guides

Cub Cadet manuals provide detailed guides for common repairs‚ such as deck leveling‚ blade replacement‚ and engine troubleshooting‚ ensuring effective solutions for equipment issues․

Deck Leveling and Adjustment Instructions

Deck leveling is crucial for maintaining even cutting performance on your Cub Cadet equipment․ According to service manuals‚ adjustments are made by loosening or tightening the deck pitch bolts located at the front and rear of the mower deck․ Ensure the tractor is on a level surface and the mower deck is fully engaged before starting․ Use a wrench to adjust the bolts‚ checking the deck’s pitch to ensure proper alignment․ Regular deck leveling prevents uneven grass cutting and extends blade life․ Refer to the specific manual for model-based instructions‚ as bolt locations and adjustment procedures may vary slightly between Cub Cadet tractor and zero-turn mower models․

Engine Service and Repair Guidelines

Proper engine service is essential for maintaining the performance and longevity of your Cub Cadet equipment․ Official service manuals provide detailed instructions for routine maintenance‚ such as oil changes‚ air filter replacements‚ and spark plug inspections․ For models like the Cub Cadet 1882‚ specific guidelines are outlined for servicing Kohler engines‚ including cylinder barrel repairs․ Always refer to the appropriate manual for your model‚ as procedures may vary․ Regular maintenance ensures efficient operation and prevents costly repairs․ For advanced issues‚ such as engine overhauls‚ step-by-step repair instructions are included‚ complete with diagrams to guide technicians and DIY enthusiasts․ Properly following these guidelines ensures your Cub Cadet equipment runs at peak efficiency for years to come․

Cub Cadet service manuals are invaluable resources for maintaining and repairing your equipment․ They provide comprehensive guidance‚ ensuring optimal performance‚ safety‚ and longevity․ By following the instructions and recommendations outlined in these manuals‚ users can address common issues‚ perform routine maintenance‚ and troubleshoot problems effectively․ Accessing these manuals for free online offers a cost-efficient solution for DIY enthusiasts and professionals alike․ Whether you’re servicing an engine‚ adjusting a mower deck‚ or addressing complex repairs‚ Cub Cadet service manuals empower you with the knowledge and confidence to keep your equipment running smoothly․ Utilize these resources to maximize efficiency and extend the lifespan of your Cub Cadet machinery․

PDF

6 week shred diet plan pdf

The 6-Week Shred Diet Plan is a structured program designed for rapid fat loss while preserving muscle. It focuses on macronutrient balance‚ meal timing‚ and sustainable practices.

1.1 What is the 6-Week Shred Diet Plan?

The 6-Week Shred Diet Plan is a structured‚ scientifically-designed program aimed at rapid fat loss while maintaining muscle mass. It combines precise macronutrient balancing‚ strategic meal timing‚ and evidence-based eating strategies to optimize results. The plan emphasizes whole foods‚ low-GI carbohydrates‚ lean proteins‚ and healthy fats‚ with optional meal replacements for convenience. It’s tailored for individuals seeking a disciplined approach to achieve a lean‚ shredded physique efficiently.

1;2 Benefits of a Structured Diet Plan for Fat Loss

A structured diet plan provides clarity‚ accountability‚ and consistency‚ which are crucial for fat loss. It ensures a balanced intake of macronutrients‚ promoting muscle preservation and metabolism. By following a well-designed plan‚ individuals avoid guesswork‚ reduce cravings‚ and maintain discipline. This approach also prevents plateaus and ensures steady progress‚ making it easier to achieve and sustain fat loss goals effectively.

Understanding the Structure of the 6-Week Plan

The 6-Week Shred Diet Plan is divided into weekly phases with progressive adjustments. Each week focuses on specific meal planning and timing strategies to optimize fat loss and muscle retention.

2.1 Weekly Breakdown and Progression

The 6-Week Shred Diet Plan progresses systematically‚ with each week building on the last. It starts with foundational meal planning‚ then introduces calorie adjustments and macronutrient tweaks. Weeks 1-2 focus on adapting to meal frequency and portion sizes‚ while Weeks 3-4 intensify fat loss with stricter carb cycling. Weeks 5-6 refine the plan for final results‚ ensuring sustained energy and muscle retention.

2.2 Importance of Meal Planning and Timing

Meal planning and timing are crucial for maximizing fat loss and maintaining energy levels. Eating every 3-4 hours stabilizes metabolism and prevents cravings. Structured meal timing ensures consistent nutrient delivery‚ supporting muscle preservation and fat oxidation. Proper planning also reduces dietary slip-ups‚ keeping the body in a fat-burning state throughout the day. This strategy is vital for achieving the plan’s goals effectively.

Macronutrient Breakdown for Optimal Fat Loss

Balanced macronutrient intake is key for fat loss‚ with protein preserving muscle‚ carbs providing energy‚ and fats supporting hormones. This ratio optimizes metabolism and sustains results.

3.1 Ideal Protein Intake for Muscle Preservation

Adequate protein intake is crucial for muscle preservation during fat loss. The plan recommends 1.6-2.2 grams of protein per kilogram of body weight daily‚ ensuring muscle tissue remains intact while shedding fat. This supports recovery and maintains metabolism‚ preventing muscle breakdown and keeping you lean and strong throughout the shredding phase.

3.2 Role of Carbohydrates in Energy and Fat Loss

Carbohydrates are essential for energy production and support fat loss by fueling workouts and maintaining metabolic function. The plan emphasizes low-GI carbs‚ such as whole grains and vegetables‚ to provide sustained energy and minimize fat storage. Proper timing of carb intake around workouts optimizes performance and fat oxidation‚ while avoiding high-sugar foods prevents energy crashes and promotes a leaner physique.

3.3 Healthy Fat Consumption for Hormone Balance

Healthy fats are crucial for hormone production and overall health. The plan incorporates sources like avocados‚ nuts‚ and olive oil‚ which support testosterone and leptin levels. These fats enhance nutrient absorption and satiety‚ aiding in fat loss without compromising hormonal function. Balancing fat intake ensures sustained energy and metabolic efficiency during the shredding phase.

Meal Frequency and Timing Strategies

Eating every 3-4 hours helps maintain metabolism and energy levels. Strategic meal timing supports fat loss and muscle retention‚ optimizing the body’s natural rhythms.

4.1 Eating Every 3-4 Hours to Boost Metabolism

Eating every 3-4 hours keeps your metabolism active‚ preventing metabolic slowdown. Consistent meals maintain energy levels‚ reduce hunger‚ and promote fat oxidation. This strategy ensures your body stays in an anabolic state‚ preserving muscle while burning fat efficiently. Regular feeding intervals also support overall metabolic health and enhance weight loss efforts. It’s a key component of the Shred Diet plan.

4.2 Incorporating Meal Replacements for Convenience

Meal replacements‚ such as protein shakes or bars‚ offer a practical solution for busy schedules. They provide balanced nutrition‚ ensuring adherence to the Shred Diet’s macronutrient goals. These options are ideal for maintaining consistency‚ especially when preparing full meals isn’t feasible. They support fat loss and muscle retention while fitting seamlessly into the plan’s structured approach.

Foods to Include in the Shred Diet

The Shred Diet emphasizes whole‚ nutrient-dense foods like lean proteins‚ low-GI carbohydrates‚ and healthy fats. These choices support muscle growth‚ sustained energy‚ and a balanced approach to fat loss.

5.1 Lean Protein Sources for Muscle Growth

Lean proteins like chicken‚ turkey‚ fish‚ eggs‚ and plant-based options are essential for muscle growth and repair. They provide high-quality amino acids‚ supporting muscle preservation during fat loss; Lean proteins keep you full‚ maintain muscle mass‚ and ensure optimal recovery. Incorporating these sources helps sustain energy levels and supports the overall goals of the Shred Diet plan effectively.

5.2 Low-GI Carbohydrates for Sustained Energy

Low-GI carbs‚ such as whole grains‚ vegetables‚ and legumes‚ provide steady energy levels without causing insulin spikes. These sources are rich in fiber‚ promoting satiety and digestion. Incorporating low-GI carbohydrates supports fat loss while maintaining energy for workouts and daily activities‚ making them a crucial component of the Shred Diet plan for sustained performance and health.

5.3 Healthy Fats for Overall Health

Healthy fats‚ including avocados‚ nuts‚ and olive oil‚ are essential for hormone balance and nutrient absorption. They support heart health and provide sustained energy‚ aiding in fat loss without compromising overall well-being. These fats are vital for maintaining metabolic health and ensuring the body functions optimally during the Shred Diet program.

Foods to Avoid During the Shred Diet

Eliminate high-sugar‚ high-fat processed foods‚ sugary drinks‚ and empty calories. These hinder fat loss and disrupt metabolic balance‚ slowing progress toward a shredded physique.

6.1 High-Sugar and High-Fat Processed Foods

High-sugar and high-fat processed foods are detrimental to fat loss. They cause energy spikes‚ cravings‚ and hinder metabolism. Avoid items like sugary snacks‚ fried foods‚ and sweetened beverages. These foods are calorie-dense but nutrient-poor‚ leading to overconsumption and stalled progress. Opting for whole‚ nutrient-rich foods instead supports sustainable fat loss and overall health during the shred diet.

6.2 Avoiding Empty Calories and Alcohol

Empty calories from sugary drinks and alcohol offer no nutritional value‚ hindering fat loss. Alcohol inhibits metabolism and increases cravings‚ while sugary beverages spike insulin levels; Both can lead to overeating and metabolic slowdowns. Eliminating these from your diet ensures calories are used efficiently‚ promoting a leaner physique and faster progress toward your shred goals.

Workout and Training Plan to Complement the Diet

A well-structured workout plan enhances fat loss and muscle retention. Combining resistance training with cardio accelerates results‚ ensuring a lean and toned physique by the end of the program.

7.1 Importance of Resistance Training for Muscle Retention

Resistance training is crucial for preserving muscle mass during fat loss. It stimulates protein synthesis‚ maintaining lean tissue while burning fat. Incorporating exercises like weights or bodyweight routines ensures muscle retention‚ enhancing metabolism and overall physique. Consistency in resistance training complements the diet‚ promoting a balanced transformation and long-term muscle health.

7.2 Incorporating Cardio for Enhanced Fat Loss

Cardio is essential for accelerating fat loss by increasing caloric expenditure and enhancing metabolic rate. Activities like jogging‚ cycling‚ or swimming can be incorporated 3-4 times weekly. Combining cardio with resistance training maximizes results‚ ensuring fat loss while preserving muscle. Aim for 20-30 minutes per session to optimize benefits without overtraining. Consistency is key for sustained progress.

Supplements to Enhance Results

Supplements play a crucial role in supporting fat loss and muscle retention. They enhance metabolic function‚ boost energy‚ and aid recovery‚ optimizing overall results.

8.1 Protein Powders for Convenience and Recovery

Protein powders are essential for convenience‚ providing a quick source of high-quality protein. They aid in muscle recovery‚ preserve lean muscle mass‚ and reduce hunger. Opting for whey or plant-based options supports muscle synthesis and recovery‚ making them a key component of the Shred Diet Plan for optimal results and convenience.

8.2 Fat Burners and Thermogenics

Fat burners and thermogenics can enhance fat loss by boosting metabolism and suppressing appetite. These supplements often contain caffeine‚ green tea extract‚ or other natural ingredients. However‚ they should complement a disciplined diet and training plan. Always consult a healthcare professional before adding them to your regimen to ensure safety and effectiveness.

Tracking Progress and Adjustments

Tracking progress involves monitoring weight‚ body measurements‚ and progress photos. Adjustments are made based on these observations to optimize fat loss and maintain muscle mass.

9.1 Weekly Weigh-Ins and Body Measurements

Regular weigh-ins and body measurements are crucial for monitoring progress. They provide clear metrics to assess fat loss and muscle retention. Consistency is key to accurate tracking‚ helping identify adjustments needed in the diet or training plan to stay on course. These metrics also serve as motivation‚ showing tangible results over time.

9.2 Adjusting Caloric Intake for Plateaus

Plateaus during the Shred Diet Plan can be overcome by recalibrating caloric intake. Reducing daily calories by 100-250 or adjusting macronutrient ratios helps restart fat loss. Monitoring progress ensures adjustments are timely‚ preventing stagnation and maintaining momentum toward goals. This flexible approach keeps metabolism responsive‚ ensuring continued progress throughout the program.

Mental and Emotional Preparation

Mental and emotional preparation is crucial for adhering to the 6-week Shred Diet. Staying motivated‚ managing cravings‚ and maintaining discipline are essential for achieving successful fat loss.

10.1 Staying Motivated During the Diet

Staying motivated during the 6-week shred diet requires setting clear goals‚ tracking progress‚ and celebrating small victories. Surround yourself with supportive individuals and remind yourself of the benefits‚ like improved health and confidence. Consistency is key‚ and maintaining a positive mindset will help you stay committed to your fat loss journey and achieve lasting results.

10.2 Overcoming Cravings and Challenges

Overcoming cravings and challenges involves identifying triggers and developing strategies to manage them. Stay hydrated‚ opt for healthy snacks‚ and engage in physical activity to distract yourself. Mindful eating and setting realistic expectations can also help. Building a support system and tracking progress reinforces commitment‚ ensuring you stay on track with your fat loss goals.

Safety and Side Effects

The 6-Week Shred Diet Plan is generally safe but may cause side effects like dehydration or fatigue. Consult a healthcare professional if issues persist.

11.1 Potential Side Effects of Rapid Fat Loss

Rapid fat loss may lead to dehydration‚ fatigue‚ or electrolyte imbalances. Some individuals might experience cravings or temporary muscle loss due to aggressive caloric deficits. Monitoring and adjusting the plan can mitigate these effects.

11.2 Consulting a Healthcare Professional

Consulting a healthcare professional is crucial before starting any fat loss program. They can assess your health status‚ provide personalized advice‚ and ensure the plan is safe for you. This step is especially important for those with pre-existing medical conditions or concerns. Professional guidance helps minimize risks and maximizes results.

The 6-Week Shred Diet Plan helps achieve fat loss and muscle preservation‚ with a focus on sustainable habits for long-term health and wellness.

12.1 Maintaining Results After the 6-Week Plan

After completing the 6-week plan‚ focus on adopting a balanced diet with mindful portion control. Continue tracking macros and maintaining regular physical activity. Stay hydrated‚ prioritize sleep‚ and monitor progress. Gradual adjustments to calorie intake ensure sustainability. Avoid extreme restrictions to prevent relapse. A long-term mindset‚ not a quick fix‚ is key to maintaining your shred results effectively. Consult a professional for personalized advice.

12.2 Transitioning to a Balanced Lifestyle

Transitioning to a balanced lifestyle involves gradually introducing variety into your diet while maintaining healthy habits. Incorporate a wide range of whole foods‚ including fruits‚ vegetables‚ and whole grains‚ while allowing occasional treats. Focus on mindful eating and portion control. Prioritize mental well-being and regular physical activity to sustain long-term health. Adjust your routine to include new recipes and activities for lasting success.

whirlpool cabrio washer user manual

Welcome to the Whirlpool Cabrio Washer User Manual! This guide provides essential information to help you operate, maintain, and troubleshoot your washer effectively. Discover safety tips, control panel features, cycle options, and maintenance procedures to ensure optimal performance and longevity of your appliance.

1.1 Overview of the Whirlpool Cabrio Washer

The Whirlpool Cabrio Washer is a top-loading, high-efficiency appliance designed for superior cleaning performance. Featuring a large capacity tub and advanced wash system, it offers efficient energy and water usage. With smart connectivity options and a user-friendly interface, it simplifies laundry tasks. Its robust design and innovative features ensure long-lasting durability and reliable operation, making it a versatile choice for modern households.

1.2 Importance of Reading the User Manual

Reading the Whirlpool Cabrio Washer user manual is crucial for understanding its features, operation, and maintenance. It provides essential safety precautions, cycle guides, and troubleshooting tips to ensure optimal performance. By following the manual, you can avoid potential issues and extend the appliance’s lifespan. Downloadable in various formats, it serves as a comprehensive guide for users to get the most out of their washer.

Safety Precautions and Warnings

The manual highlights critical safety warnings, including California Proposition 65 notices about cancer-causing chemicals and reproductive harm. Always follow guidelines to avoid injuries and ensure safe operation.

2.1 General Safety Guidelines

Adhere to safety guidelines to prevent accidents and ensure safe operation of your Whirlpool Cabrio Washer. Avoid hot surfaces, keep children away, and ensure proper installation. Grounding is essential for electrical safety. Follow all warnings, including California Proposition 65 notices, to minimize risks of injury or damage. Always read instructions before use and maintain a safe environment for operation.

2.2 California Proposition 65 Warnings

The Whirlpool Cabrio Washer includes warnings under California Proposition 65, which flags products containing chemicals known to cause cancer, birth defects, or reproductive harm. WARNING: This product contains chemicals known to the State of California to cause cancer and/or reproductive harm. Ensure compliance with safety guidelines to minimize exposure and risks associated with these substances.

Control Panel and Features

Explore the intuitive control panel, featuring a user-friendly interface, key features, and advanced options to optimize your washing experience. Designed for efficiency and ease of use.

3.1 Understanding the Control Panel Layout

The Whirlpool Cabrio Washer features an intuitive control panel designed for easy navigation. Key components include a central cycle knob, option buttons for selecting wash settings, and an LED display showing cycle status. Additional controls allow you to start, pause, or cancel cycles. Indicators provide feedback on cycle progress and error codes. This layout ensures a seamless and efficient washing experience.

3.2 Key Features of the Whirlpool Cabrio Washer

The Whirlpool Cabrio Washer offers advanced features like a high-efficiency design, large capacity, and smart integration. Multiple wash cycles cater to various fabric types, while options like steam cleaning and sanitize settings enhance cleaning performance. Eco-friendly modes and noise reduction ensure energy efficiency and quiet operation. These features make it a versatile and convenient choice for modern laundry needs.

Cycle Guide

The Whirlpool Cabrio Washer offers a variety of pre-programmed cycles for different fabric types and soil levels. Customize your wash with options like spin speed and temperature.

4.1 Selecting the Right Cycle for Your Load

The Whirlpool Cabrio Washer offers a variety of cycles tailored to different fabric types and soil levels. Use the “What to Wash, How to Wash” layout in the manual to guide your selection. Choose from options like Normal, Heavy Duty, or Delicate cycles. Adjust spin speed and temperature settings based on load requirements. Always consult the cycle guide chart in the manual for optimal fabric care and cleaning results.

4.2 What to Wash and How to Wash Layout

The Whirlpool Cabrio Washer features a “What to Wash, How to Wash” layout to simplify your laundry process. This guide helps match fabric types with appropriate cycles and settings. Fabric care symbols and soil level indicators provide clear instructions. Use the cycle guide chart in the manual to determine the best settings for delicate, normal, or heavily soiled loads. This ensures optimal cleaning while protecting your fabrics. Always refer to the manual for detailed instructions.

Using Your Whirlpool Cabrio Washer

Operating your Whirlpool Cabrio Washer is straightforward. Load clothes, select the appropriate cycle, add detergent, and start the washer. Ensure proper installation and follow guidelines for optimal performance and safety.

5.1 Starting Your Washer

To start your Whirlpool Cabrio Washer, ensure the washer is properly installed and connected to power. Load clothes, add detergent to the dispenser, and select the desired cycle using the control panel. Close the lid, press the Start button, and the washer will begin operation. Always follow safety instructions and refer to the manual for specific cycle options and customization.

5.2 Using Laundry Product Dispensers

Your Whirlpool Cabrio Washer features laundry product dispensers for detergent and fabric softener. To use them, fill the detergent dispenser with the recommended amount of detergent before starting the cycle. The fabric softener dispenser, if available, should be filled according to the product instructions. Ensure not to overfill, as this may affect wash performance. Always refer to the manual for specific guidelines on product usage and dispenser maintenance.

Washer Maintenance

Regular maintenance ensures your Whirlpool Cabrio Washer operates efficiently. Clean the gasket, check and clean filters, and run cleaning cycles to prevent odor buildup and extend lifespan.

6.1 Cleaning and Care Tips

Regularly clean the washer’s gasket and dispenser to prevent mold growth and odors. Run a cleaning cycle with a washer cleaner or hot water every 1-2 months. Wipe down the exterior with a damp cloth and avoid harsh chemicals. Proper care ensures optimal performance and extends the lifespan of your Whirlpool Cabrio Washer.

6.2 Regular Maintenance Procedures

For optimal performance, check and clean the drain pump filter regularly. Ensure proper drainage by verifying the washer is level and the drain hose is securely connected. Inspect hoses for signs of wear and replace them if necessary. Leave the washer lid open after use to dry the interior. Regularly update the washer’s software for improved functionality and efficiency.

Troubleshooting Common Issues

Troubleshoot common issues like the washer not starting or improper loading. Check power supply, reset the washer, and refer to error codes for solutions. Regular maintenance helps prevent issues and ensures smooth operation of your Whirlpool Cabrio Washer. Always follow the manual’s guidelines for resolving problems effectively. Proper care extends the appliance’s lifespan and performance.

7.1 Identifying and Solving Common Problems

Common issues with the Whirlpool Cabrio Washer include the washer not starting, excessive noise, or improper water levels. Check the power supply, ensure the lid is closed properly, and verify that the water supply hoses are turned on. For error codes, refer to the manual for specific solutions. Regular maintenance, such as cleaning the filter and checking for blockages, can prevent many issues. If problems persist, consult the troubleshooting section or contact a professional for assistance. Always follow safety guidelines when addressing malfunctions to avoid further damage or injury.

7.2 Resetting the Washer

To reset your Whirlpool Cabrio Washer, press and hold the Pause/Cancel button for 5 seconds or press the Power button once. This action will cancel the current cycle and reset the washer to its default settings. Resetting can resolve issues like error codes or mid-cycle stops. After resetting, restart the washer and select your desired cycle. Ensure the washer is empty before resetting to avoid any interruptions.

Downloading the User Manual

Visit the official Whirlpool website to download the Cabrio Washer User Manual. Search by model number, select your preferred format (e.g., PDF), and follow the download instructions. The manual is free and available in multiple languages.

8.1 How to Download the Manual

To download the Whirlpool Cabrio Washer User Manual, visit the official Whirlpool website. Navigate to the support section, enter your washer’s model number, and select the manual. Choose your preferred language and format, such as PDF; Follow the on-screen instructions to complete the download. This ensures you have access to all the necessary information for your appliance.

8.2 Available Formats and Sources

The Whirlpool Cabrio Washer User Manual is available in PDF format for easy downloading and viewing. You can find it on the official Whirlpool website, as well as on trusted platforms like ManualsLib, ManualsOnline, and other reputable appliance manual repositories. The manual is also available in multiple languages, ensuring accessibility for a broad range of users worldwide.

Advanced Features and Connectivity

Experience smart laundry with the Whirlpool Cabrio Washer, offering advanced features like app integration, voice control, customizable cycles, and energy monitoring for enhanced convenience and operational efficiency.

9.1 Smart Features and App Integration

The Whirlpool Cabrio Washer integrates seamlessly with smart technology, allowing users to control and monitor their laundry via the Whirlpool app. Key features include remote start/stop, custom cycle selection, and real-time notifications. Additionally, voice control through smart assistants like Alexa or Google Assistant enhances convenience. This advanced connectivity ensures efficient laundry management and personalized washing experiences.

9.2 Setting Up Connectivity

To set up connectivity for your Whirlpool Cabrio Washer, download the Whirlpool app on your smartphone or tablet. Follow in-app instructions to connect your washer to your home Wi-Fi network. Once connected, you can remotely monitor and control cycles, receive notifications, and access advanced features. Ensure your washer is compatible and properly configured for a seamless smart experience.

Installation and Setup

Proper installation is crucial for optimal performance. Ensure the washer is leveled, water supply lines are securely connected, and electrical connections are correct. Follow the setup guide carefully.

10.1 Proper Installation Guidelines

Ensure the washer is installed on a level, stable surface to prevent vibration and noise. Connect water supply lines securely to avoid leaks. Check that electrical connections meet local codes. Leave adequate space around the unit for ventilation. Refer to the manual for specific dimensions and requirements to ensure a safe and proper setup.

10.2 Initial Setup and Configuration

After installation, plug in the washer and ensure the power button is accessible. Set the language and preferences using the control panel. Pair with the Whirlpool app for smart features. Check wifi connectivity for remote operation. Run a test cycle to ensure all functions work correctly. Consult the manual for customization options to tailor settings to your needs.

Common Issues and FAQs

This section addresses common concerns and provides quick solutions to issues like error codes, unbalanced loads, and connectivity problems. Frequently asked questions are answered to ensure smooth operation and troubleshooting of your Whirlpool Cabrio Washer.

11.1 Frequently Asked Questions

Discover answers to common questions about your Whirlpool Cabrio Washer, such as error code meanings, connectivity issues, and proper detergent usage. Frequently asked questions cover topics like unbalanced loads, noise during operation, and fabric softener dispenser maintenance. This section ensures you can quickly resolve minor issues and optimize your washing experience. Refer to the manual for detailed solutions and troubleshooting tips.

11.2 Addressing Common Concerns

Addressing common concerns with your Whirlpool Cabrio Washer, such as error codes, noise issues, or connectivity problems, is straightforward with the manual. Resolve issues like unbalanced loads, detergent dispenser clogs, or smart app connectivity. Refer to troubleshooting guides for solutions. Regular maintenance and proper usage can prevent many issues. Follow the manual’s advice to ensure optimal performance and extend your washer’s lifespan.

This concludes the Whirlpool Cabrio Washer User Manual. For further assistance, visit www.whirlpool.com or contact customer support. Refer to the official website for additional resources and updates.

12.1 Summary of Key Points

The Whirlpool Cabrio Washer User Manual provides essential guidance for safe and effective use. It covers safety precautions, control panel features, cycle selection, and maintenance tips. Proper installation, regular cleaning, and troubleshooting are emphasized to ensure optimal performance. Refer to the manual for detailed instructions and visit www.whirlpool.com for additional resources and support.

12.2 Where to Find Additional Support

For further assistance, visit www.whirlpool.com to access manuals, FAQs, and troubleshooting guides. Contact Whirlpool customer service at 1-800-253-1301 (US) or 1-800-807-6777 (Canada). Additional support is available through the Whirlpool app, community forums, and authorized service centers. Whirlpool ensures comprehensive resources to help you maintain and troubleshoot your washer effectively.

white rodgers thermostat manual

White Rodgers thermostats are reliable, programmable devices designed for efficient temperature control. They offer user-friendly interfaces, smart features, and energy-saving modes, making them ideal for modern home comfort. The manual provides essential guidance for installation, programming, and troubleshooting, ensuring optimal performance and personalized climate control.

Overview of White Rodgers Thermostats

White Rodgers thermostats are renowned for their reliability and versatility, offering a wide range of models to suit different HVAC systems and user preferences. From non-programmable to advanced smart thermostats, they provide precise temperature control and energy efficiency. These devices are designed to be user-friendly, with intuitive interfaces for easy operation. Many models feature programmable scheduling, allowing users to customize their comfort settings throughout the day. Additionally, White Rodgers thermostats are compatible with various smart home systems, enabling remote control and seamless integration. Their durability and innovative features make them a popular choice for both residential and commercial applications. The thermostat manual offers detailed guidance to help users maximize their device’s potential and troubleshoot common issues effectively.

Importance of Understanding the Manual

Understanding the White Rodgers thermostat manual is crucial for optimal functionality and personalized comfort. It provides detailed instructions for installation, wiring, and programming, ensuring safe and efficient operation. The manual helps users troubleshoot common issues, such as incorrect temperature readings or wiring problems, without needing professional assistance. By familiarizing yourself with the manual, you can unlock advanced features like smart home integration and energy-saving modes. Proper understanding also prevents misuse, which could lead to system damage or increased energy bills. Referencing the manual ensures you maximize your thermostat’s potential, customize settings, and maintain consistent comfort in your home. It serves as a comprehensive guide to address any challenges and enhance your overall experience with the device;

Installation and Wiring

Proper installation and wiring of your White Rodgers thermostat ensure safe and efficient operation. Always turn off power before starting, and refer to the wiring diagram for precise connections. Use a multimeter to verify 24V at the R terminal and ensure all wires are securely connected. Incorrect wiring can cause malfunctions or safety hazards. Follow the manual’s step-by-step guide to avoid errors and ensure compatibility with your HVAC system. Testing each component after installation helps confirm everything works correctly. Correct wiring ensures accurate temperature control, optimal performance, and prevents potential damage to the thermostat or heating/cooling system.

Step-by-Step Installation Guide

Start by turning off the power to your HVAC system at the circuit breaker. Remove the old thermostat and take note of the existing wiring configuration. Prepare the wall by cleaning and smoothing the area where the new thermostat will be mounted. Mount the new White Rodgers thermostat base plate, ensuring it is level and securely fastened. Carefully connect the wires to the appropriate terminals, referring to the wiring diagram in the manual for accurate connections.Restore power and test the thermostat by adjusting the temperature to ensure it activates your heating or cooling system. Use a multimeter to verify 24V at the R terminal if necessary; Follow these steps carefully to ensure safe and proper installation.

Understanding Thermostat Wiring Diagrams

Thermostat wiring diagrams provide a visual guide to connecting your White Rodgers thermostat. These diagrams detail the terminals (R, W, Y, G, C, etc.) and their functions. The R terminal is typically the 24V power source, while W controls heating and Y controls cooling. G operates the fan, and C is the common wire. Ensure all wires match the diagram to avoid system malfunctions. Always turn off power before working on wiring. Use a multimeter to verify voltage at the R terminal. If unsure, consult the manual or a professional. Proper wiring ensures safe and efficient operation of your HVAC system. Label wires before disconnecting the old thermostat to simplify the process. Refer to the manual for model-specific wiring requirements.

Programming Your White Rodgers Thermostat

Programming your White Rodgers thermostat allows you to customize temperature settings and schedules. Set daily routines, adjust temperatures, and utilize energy-saving modes for optimal comfort and efficiency.

Setting Up Daily Schedules

Setting up daily schedules on your White Rodgers thermostat allows you to customize temperature settings for different times of the day. Access the menu, select the day(s) you wish to program, and choose the desired temperature for each period. Most models let you set schedules for wake, leave, return, and sleep times. Use the touchscreen or buttons to navigate and confirm your settings. Ensure the thermostat is in the correct mode (heat or cool) before programming. Some models also offer a “hold” feature to override schedules temporarily. After setting, review and save your schedule to ensure it runs automatically. This feature helps maintain consistent comfort while optimizing energy usage.

Adjusting Temperature Settings

Adjusting temperature settings on your White Rodgers thermostat is straightforward. Use the up and down arrows to increase or decrease the desired temperature. Ensure the thermostat is in the correct mode (heat or cool) before making adjustments. For temporary changes, press and hold the “Hold” button to override the current setting without affecting the programmed schedule. To resume the schedule, press “Run” or wait for the next programmed period. The thermostat also allows you to set temperature limits to prevent extreme settings. For energy efficiency, adjust temperatures by 1-2 degrees to minimize energy usage. Refer to the manual for specific instructions tailored to your model. Properly adjusting settings ensures comfort and energy savings throughout the day.

Maintenance and Troubleshooting

Regularly clean the thermostat and check battery levels. Verify wiring connections and ensure proper voltage. Reset the thermostat if issues arise, following manual instructions for resolution.

Common Issues and Solutions

Common issues with White Rodgers thermostats include incorrect temperature display, unresponsive screens, or system malfunctions. Solution: Reset the thermostat by pressing and holding the “Up” and “Down” arrows simultaneously for 5 seconds. Check wiring connections and ensure 24 volts are present at the “R” terminal. If the thermostat controls both heating and cooling, verify the mode is set correctly. Battery issues can cause display problems; replace batteries if necessary. For persistent issues, consult the manual or contact a professional. Regular maintenance and calibration can prevent many problems, ensuring reliable performance and energy efficiency.

How to Reset Your Thermostat

Resetting your White Rodgers thermostat is a straightforward process. Locate the “Up” and “Down” arrows on the thermostat interface. Press and hold both buttons simultaneously for approximately 5 seconds. This action will restore the thermostat to its factory settings, clearing any programmed schedules or customizations. After resetting, the display will return to the default screen, indicating the process is complete. Note that resetting will erase all saved settings, so you’ll need to reprogram your preferences afterward. This method is effective for resolving many common issues, such as incorrect temperature readings or unresponsiveness. Always refer to your manual for model-specific instructions, as some models may have slightly different reset procedures. Regular resets can help maintain optimal performance and ensure accurate temperature control.

Advanced Features

White Rodgers thermostats offer smart home integration and energy-saving modes, enhancing comfort and efficiency. These features allow seamless connectivity and optimized temperature control, perfect for modern living.

Smart Home Integration

White Rodgers thermostats seamlessly integrate with smart home systems, enhancing convenience and control. By connecting to your home network, you can manage temperature settings remotely via smartphone apps or voice assistants like Siri. This feature allows you to adjust schedules, monitor energy usage, and receive alerts for optimal comfort. Geofencing technology can detect your location, automatically adjusting temperatures when you leave or arrive home. Compatibility with platforms like Apple HomeKit ensures a unified smart home experience. With smart home integration, you can maintain a consistent and energy-efficient environment, even when you’re not physically present. This advanced functionality transforms your thermostat into a central hub for modern home comfort and energy management.

Energy-Saving Modes

White Rodgers thermostats offer advanced energy-saving modes designed to reduce utility bills while maintaining comfort. These modes include programmable schedules, eco-friendly settings, and smart features that adapt to your lifestyle. By setting specific temperature ranges for different times of the day, you can optimize energy usage. For example, the thermostat can lower the temperature when you’re asleep or away from home, then return to your preferred setting before you wake up or arrive. Some models also feature learning algorithms that adjust based on your preferences and usage patterns. These energy-saving modes ensure your HVAC system operates efficiently, helping you save money and reduce environmental impact without sacrificing comfort.

Tips for Optimal Performance

Regularly clean the thermostat, ensure proper installation, and check battery levels to maintain accuracy. Schedule periodic maintenance to prevent malfunctions and ensure consistent heating and cooling performance.

Calibrating Your Thermostat

Calibrating your White Rodgers thermostat ensures accurate temperature readings. Start by comparing the displayed temperature with a reliable thermometer. If there’s a discrepancy, adjust the thermostat’s calibration settings. Press and hold the “Up” and “Down” arrows simultaneously for 5 seconds to access the calibration mode. Use a multimeter to check the voltage at the R terminal, ensuring it’s 24 volts. If issues persist, reset the thermostat by removing the batteries for 30 seconds. Regular calibration maintains optimal performance and energy efficiency, preventing overheating or overcooling. Always refer to your manual for specific calibration instructions tailored to your model.

Upgrading Your Thermostat

Upgrading your White Rodgers thermostat can enhance performance and unlock advanced features. Begin by researching compatible models that suit your HVAC system and home needs. Before installing, ensure the new thermostat supports your system type (e.g., heat pump, gas furnace) and wiring configuration. Turn off the power at the circuit breaker to safely remove the old thermostat. Carefully disconnect wires and label them for reference. Install the new thermostat, following the manufacturer’s instructions. Test all functions, including heating, cooling, and programming. Consider smart thermostats for Wi-Fi connectivity and energy-saving capabilities. Always consult the manual for specific upgrade guidance to ensure a smooth transition and maintain system efficiency.

4ever car seat manual

The Graco 4Ever car seat is a versatile, all-in-one solution designed for children from infancy to childhood, offering unmatched safety, durability, and ease of use. With its adjustable headrest, harness system, and customizable fit, it ensures comfort and protection across four stages of growth. Built to last, the 4Ever seat meets rigorous safety standards, providing peace of mind for parents. Its user-friendly design and long-term usability make it a top choice for families seeking a reliable car seat.

Overview of the 4Ever Car Seat

The Graco 4Ever car seat is an all-in-one solution designed to accommodate children from infancy through childhood, offering four stages of use: rear-facing, forward-facing, high-back booster, and backless booster. Its adjustable headrest and harness system ensure a proper fit as the child grows. Built for durability, the seat is constructed to last for years, meeting stringent federal safety standards. The ergonomic design provides comfort, while the slim-fit profile allows for easy installation in various vehicles. This versatility, combined with its safety features and ease of use, makes the 4Ever a practical and reliable choice for families seeking a long-term car seat solution.

Key Features and Benefits

The Graco 4Ever car seat offers a range of innovative features designed for safety, comfort, and convenience. Its 4-in-1 design adapts to four growth stages, from rear-facing to backless booster. The Simply Safe Adjust Harness System provides effortless adjustments without rethreading, ensuring a secure fit. The seat features a steel-reinforced frame for enhanced durability and crash protection. Additionally, the InRight LATCH system ensures quick and secure installation. The plush, washable fabric and integrated cup holders add comfort and practicality. With advanced safety features like side-impact protection and NHTSA certification, the 4Ever seat delivers peace of mind for parents while accommodating growing children.

Installation and Setup

The Graco 4Ever car seat offers easy installation using the InRight LATCH system, ensuring a secure and level fit in your vehicle, with detailed guidance in the manual.

Rear-Facing Installation Guidelines

For rear-facing installation, position the Graco 4Ever car seat in the back seat, ensuring it is level and securely fastened. Use the InRight LATCH system or a seat belt to anchor the seat tightly. The car seat should not move more than one inch side-to-side or front-to-back. Always check the leveling indicator to confirm proper alignment. Tighten the LATCH straps or seat belt until snug, then attach the tether if required. Consult the manual for specific instructions and weight limits for rear-facing use. Ensure the harness is correctly routed through the seat and properly tightened for your child’s safety.

Forward-Facing Installation Instructions

For forward-facing installation, place the Graco 4Ever car seat in the vehicle’s back seat, ensuring it is snug and level. Use the InRight LATCH system or a seat belt to secure the seat tightly. Attach the tether to the designated anchor point in your vehicle to prevent excessive movement. Route the harness straps correctly through the seat’s forward-facing belt path. Tighten the straps until the seat does not move more than one inch side-to-side or front-to-back. Always check the leveling indicator to confirm proper alignment. Follow the manual for specific weight and height limits for forward-facing use to ensure your child’s safety.

Adjusting the Car Seat for Proper Fit

Adjust the Graco 4Ever car seat by customizing the headrest height and seat depth to match your child’s growth. Tighten the harness snugly to ensure proper fit and safety.

Adjusting the Harness System

Adjust the Graco 4Ever harness system by first loosening the straps using the release mechanism. Position the straps to fit snugly across your child’s shoulders, ensuring proper alignment with their body. Tighten the harness until it feels secure but not overly restrictive. Regularly check the fit to accommodate growth and ensure safety. For younger children, use the infant insert for a better fit. Always refer to the manual for specific adjustment instructions tailored to your child’s size and age. Proper harness adjustment is crucial for maximizing protection and comfort during travel.

Customizing the Headrest and Seat Depth

Customize the Graco 4Ever car seat by adjusting the headrest and seat depth to fit your child perfectly. To adjust the headrest, pull it upward or downward until it aligns with your child’s shoulders and ears. For the seat depth, refer to the manual to ensure proper positioning based on your child’s height and weight. A snug fit ensures optimal safety and comfort. Regularly check and adjust these features as your child grows. Proper customization helps maintain correct posture and supports your child’s neck and back during travel, ensuring a secure and comfortable ride at every stage;

Safety Features and Certifications

The Graco 4Ever car seat is rigorously tested to meet federal safety standards, ensuring reliable protection in crashes. Its durable design and advanced features provide peace of mind for parents.

Understanding the Car Seat Expiration Date

The Graco 4Ever car seat, like all car seats, has an expiration date to ensure safety and compliance with current standards. This date, typically found on the label or in the manual, reflects material degradation and technological advancements. Using an expired seat can compromise safety and violate regulations. Always check the expiration date and replace the seat as recommended to maintain protection for your child and adhere to legal requirements. Proper disposal of expired seats is also crucial to prevent misuse. Stay informed to ensure your child’s safety on the road at all times.

Recall Information and Updates

Regularly checking for recalls is crucial for ensuring your Graco 4Ever car seat’s safety and compliance. The National Highway Traffic Safety Administration (NHTSA) issues recalls for car seats that may have safety defects. Visit the NHTSA website to search for recalls using your seat’s model number. If a recall is issued, follow the instructions provided by Graco, which may include replacing parts or adjusting the seat. Graco typically provides free repair kits or replacement parts to address recall issues. Always verify updates through official channels to ensure your child’s safety. Promptly addressing recalls is essential for maintaining protection and adhering to safety standards.

Meeting Federal Safety Standards

The Graco 4Ever car seat is rigorously tested to meet or exceed all federal safety standards, ensuring superior protection for children. It adheres to NHTSA guidelines and FMVSS requirements, providing confidence in its ability to withstand crash forces. The seat is designed to protect across various crash scenarios, including front, side, and rear impacts. Regular updates and certifications guarantee compliance with the latest safety regulations. By meeting these standards, the Graco 4Ever car seat offers reliable protection and peace of mind for parents, aligning with federal mandates for child passenger safety.

Maintenance and Cleaning

Regularly clean the Graco 4Ever car seat with mild soap and water, avoiding harsh chemicals. Inspect straps and buckles for wear and tear to ensure safety.

Cleaning the Car Seat Fabric

To maintain the Graco 4Ever car seat’s hygiene and appearance, clean the fabric regularly. For machine-washable seat pads, use a mild detergent and cold water. Gently scrub stains with a soft-bristled brush. Avoid harsh chemicals or bleach, as they may damage the material. For non-removable fabric, spot clean with a damp cloth and mild soap. Air dry thoroughly to prevent moisture buildup. Regular cleaning ensures a fresh, safe environment for your child while preserving the seat’s quality and functionality over time.

Inspecting and Replacing Parts

Regularly inspect the Graco 4Ever car seat for wear, damage, or expiration. Check the harness, buckles, and seat belts for signs of fraying or cracks. Replace any damaged parts immediately using only Graco-approved components to ensure safety and compliance with standards. The seat’s expiration date, found on the label, indicates when it should no longer be used. Refer to the manual for specific guidelines on replacement and maintenance. Always contact Graco customer support if unsure about any part’s condition or compatibility. Proper inspection and timely replacements are crucial for maintaining the seat’s safety and effectiveness over time.

Troubleshooting Common Issues

Identify common issues like loose straps or improper fit. Consult the manual for solutions or contact Graco support for assistance with persistent problems.

Resolving Harness Tightness Problems

If the harness feels too tight or loose, adjust it by loosening the straps and repositioning your child. Tighten the harness until snug, ensuring proper fit without restricting movement. Ensure the chest clip is at armpit level and the straps lie flat. If issues persist, refer to the manual or contact Graco support for guidance. Regular checks and adjustments are essential for your child’s safety and comfort. Always verify the harness system aligns with the seat’s design for optimal protection.

Fixing Creaks or Noises in the Seat

Creaks or noises in the Graco 4Ever car seat often result from dirt, moisture, or loose parts. Clean the seat with a damp cloth and mild detergent, paying attention to moving components. Inspect and tighten all bolts or screws according to the manual. Lubricate hinges lightly if needed. Ensure proper installation and alignment in the vehicle. Regular maintenance can prevent such issues. If noises persist, contact Graco customer support for assistance. Addressing these concerns ensures optimal performance and your child’s safety.

Legal and Regulatory Requirements

Graco 4Ever car seats must comply with federal safety standards set by the NHTSA. Ensure the seat meets all local car seat laws and regulations. Always verify expiration dates and check for recalls to maintain compliance and safety. Proper installation and use are legally required to protect children effectively. Adhering to these guidelines ensures both legal compliance and optimal child safety on the road.

Car Seat Laws by State

Car seat laws vary by state, requiring parents to ensure their child’s seat meets specific age, weight, and height regulations. Most states mandate rear-facing seats for infants up to 2 years or 30-35 pounds, while forward-facing seats are required until a child reaches 4-7 years or 40-65 pounds. Booster seats are often needed until a child is 4 feet 9 inches tall or between 8-12 years old. Check your state’s Department of Motor Vehicles (DMV) for exact requirements. Proper adherence ensures legal compliance and enhances child safety while traveling. Always verify expiration dates and follow manufacturer guidelines for optimal protection.

Ensuring Compliance with NHTSA Guidelines

To ensure compliance with NHTSA guidelines, always follow proper installation and use of the Graco 4Ever car seat. Verify that the seat meets federal safety standards and is free from recalls. Use the correct installation method, either LATCH or vehicle seatbelt, and ensure the car seat is securely tightened. Position your child correctly, with the harness snug and chest clip at armpit level. Regularly inspect the seat for damage or wear and stay updated on any safety notices. Adherence to these guidelines ensures your child’s safety and legal compliance while traveling.

The Graco 4Ever car seat offers exceptional safety, comfort, and durability, making it a reliable choice for families. Its 4-in-1 design ensures long-term use, adapting to your child’s growth. Always follow the manual for proper installation and maintenance to maximize safety and extend the product’s lifespan. This seat is a worthwhile investment for parents seeking a high-quality, versatile car seat solution.

Final Tips for Safe and Effective Use

Always check the car seat’s expiration date and ensure it hasn’t been recalled. Regularly inspect the harness for tightness and proper positioning. Keep your child’s posture upright, with the headrest at the correct height. Avoid using aftermarket accessories not approved by Graco. Clean the seat according to the manual to maintain its integrity. Never install the seat near airbags or in unsuitable vehicles. Ensure the seat is securely anchored and tightly fitted. Stay updated on safety guidelines and refer to the manual for any adjustments. Proper use enhances safety, so always prioritize your child’s well-being with careful attention to details.

Importance of Following the Manual

Adhering to the Graco 4Ever car seat manual ensures optimal safety, proper installation, and compliance with safety standards. The manual provides critical guidance for each stage of use, from rear-facing to forward-facing configurations. Incorrect installation or adjustments can compromise your child’s protection in a crash. Regularly reviewing the manual helps stay updated on safety features and maintenance requirements. Ignoring the guidelines may lead to improper use, increasing potential risks. Always refer to the manual for adjustments, inspections, and cleaning to guarantee your child’s safety and the seat’s longevity. Following the manual is essential for maximizing protection and ensuring peace of mind.

andersen 4000 series storm door installation manual

Introducing the Andersen 4000 Series Storm Door, designed for durability and energy efficiency․ This guide provides a comprehensive installation manual for a perfect, weather-tight fit․

Overview of the Andersen 4000 Series Storm Door

The Andersen 4000 Series Storm Door is a high-quality, durable solution designed to protect your entryway while enhancing your home’s curb appeal․ Manufactured by Andersen Corporation, a trusted name in doors and windows, this series offers excellent weather protection and energy efficiency․ Its fullview design features a retractable insect screen, allowing seamless transitions between glass and screen options․ Constructed from strong, lightweight aluminum, the door is built to last and requires minimal maintenance․ The series boasts advanced sealing technology to keep out rain, wind, and pests․ With various finish options and hardware styles, homeowners can customize the door to match their home’s exterior and interior decor․ Pre-assembled for easy installation, the Andersen 4000 Series Storm Door promises a secure fit and long-lasting performance․

Importance of Proper Installation

Proper installation of the Andersen 4000 Series Storm Door is crucial for ensuring long-lasting performance, energy efficiency, and weather-tight sealing․ A well-installed door prevents air leaks, water infiltration, and pest entry, while maintaining its structural integrity․ Improper installation can lead to sagging, uneven alignment, or compromised sealing, reducing the door’s effectiveness and durability․ Additionally, a poorly fitted door may void the manufacturer’s warranty․ Following the installation manual carefully ensures a secure fit, proper functionality, and optimal protection against the elements․ By adhering to the guidelines, homeowners can enjoy the full benefits of their Andersen storm door, including reduced energy costs and enhanced home security․ Proper installation is an investment in the door’s longevity and your home’s overall comfort․

Preparation for Installation

Preparation ensures a smooth installation process․ Measure door opening, gather tools and materials, and verify the mounting surface is level and secure․ Adhere to manual guidelines for proper fit and functionality․

Measuring the Door Opening

Accurate measurement of the door opening is crucial for proper storm door fit․ Measure the width at the top, middle, and bottom of the opening, noting the narrowest point․ Record the height from the threshold to the top of the opening․ Ensure measurements align with Andersen 4000 Series specifications to choose the correct size․ Use a level to confirm the opening is square and plumb․ Double-check all measurements to avoid errors during installation․ Refer to the manual for detailed diagrams and instructions to ensure accuracy and a successful installation․

Tools and Materials Needed

To ensure a smooth installation of your Andersen 4000 Series Storm Door, gather the necessary tools and materials in advance․ Essential tools include a drill, screwdriver (both Phillips and flathead), level, measuring tape, pencil, and utility knife․ Additionally, you may need shims, weatherstripping, and sealant to secure the door frame properly; The installation manual provides a detailed list of required materials, such as screws, hinges, and mounting hardware, which are typically included in the door kit․ Organizing these tools and materials beforehand will help you complete the installation efficiently and effectively, ensuring a proper fit and function of your new storm door․

Verifying the Mounting Surface

Before installing your Andersen 4000 Series Storm Door, ensure the mounting surface is level, plumb, and structurally sound․ Check for any rot, decay, or unevenness that could compromise the installation․ The door frame must align properly with the surrounding trim to ensure a weather-tight seal․ Use a level tool to verify that the surface is even, and if necessary, use shims to make adjustments․ A secure and even mounting surface is crucial for the proper functioning of the storm door, preventing sagging and ensuring smooth operation of the handle and hinges․ Refer to the installation manual for specific instructions on preparing and verifying the mounting surface to guarantee a successful installation․

Understanding the Installation Manual

The Andersen 4000 Series Storm Door installation manual provides clear, step-by-step instructions, ensuring a smooth and successful installation process․ It includes detailed diagrams and specifications․

Key Components of the Manual

The Andersen 4000 Series Storm Door manual includes essential components like a list of tools and materials, detailed step-by-step instructions, and diagrams․ It covers measuring the door opening, aligning the frame, and installing hardware․ The manual also provides troubleshooting tips and maintenance advice to ensure longevity; Clear illustrations and specific measurements guide users through each installation phase, making the process accessible for both professionals and DIY enthusiasts․ Additionally, it outlines warranty information and support contact details for any post-installation inquiries․ By following the manual, homeowners can achieve a secure, weather-tight installation that enhances their entryway’s functionality and appearance․

Navigating the PDF Document

The Andersen 4000 Series Storm Door installation manual is provided as a PDF, making it easy to navigate and reference․ The document is structured with clear sections, including a table of contents, detailed instructions, and visual diagrams․ Users can quickly locate specific topics using bookmarks or by searching keywords within the document․ The PDF is divided into numbered pages, with key steps highlighted for easy following․ Zoom tools allow users to enlarge text and images for better clarity․ Language options, such as English, Spanish, and French, are also accessible within the document․ By utilizing these features, homeowners and installers can efficiently navigate the manual and ensure a successful installation process․

Step-by-Step Installation Process

Follow the Andersen 4000 Series manual for a seamless installation․ Begin with preparing the rough opening, then proceed to seal, shim, and fasten the door frame securely․

Aligning and Securing the Door Frame

Proper alignment and securing of the Andersen 4000 Series storm door frame are critical for smooth operation and durability․ Begin by carefully placing the door frame into the prepared opening, ensuring it is centered and level․ Use a spirit level to verify alignment, and adjust as needed․ Measure the width at the top, middle, and bottom of the opening to ensure consistency․ Insert shims between the frame and the mounting surface to maintain proper positioning․ Once aligned, drill pilot holes and secure the frame using 8 x 1 screws provided in the hardware kit․ Tighten evenly to avoid warping the frame․ Finally, install the rain cap at the top, centered between the jambs, and fasten it securely․ This ensures a weather-tight seal and prevents sagging over time․

Installing the Handle Set

Installing the handle set on your Andersen 4000 Series Storm Door is a straightforward process․ Begin by unpacking the handle set and hardware from the box․ Refer to the instructions provided in the handle set box for specific details․ Determine the hinge side of the door to ensure proper alignment of the handle․ Attach the handle components to the door frame using the screws provided, ensuring they are securely fastened․ For left-hinged doors, position the latch bolt accordingly, and for right-hinged doors, adjust the alignment as needed․ Once installed, test the handle to ensure smooth operation and proper latching․ If desired, match the lock to your entry door hardware, such as Schlage or Kwikset, for a cohesive look․ Follow the manufacturer’s guide for precise fitting and functionality․

Adjusting the Door for Proper Fit

After securing the door frame, ensure the storm door is properly aligned and fits seamlessly within the opening․ Check that the door is level and plumb, using shims if necessary to achieve even alignment․ Verify the door’s clearance on all sides, ensuring it does not rub against the frame or drag on the threshold․ Adjust the hinges or mounting screws to fine-tune the door’s position․ Once aligned, tighten all screws firmly to secure the door in place․ Test the door by opening and closing it to ensure smooth operation and proper sealing․ If the door sags or does not close evenly, revisit the shimming process or adjust the hinges as needed for optimal performance․

Maintenance and Care

Regularly clean the storm door and hardware to maintain functionality․ Lubricate hinges and moving parts annually․ Inspect and replace worn-out components promptly for optimal performance․ Refer to the manual for detailed care instructions to ensure longevity and smooth operation․

Cleaning the Storm Door

Regular cleaning is essential to maintain the appearance and functionality of your Andersen 4000 Series Storm Door․ Start by using a mild soap and water solution to wipe down the door frame, glass panels, and screen․ Avoid using abrasive cleaners or scrubbers, as they may damage the finishes or scratch the glass․ For the insect screen, gently brush off dirt with a soft-bristled brush or rinse with a garden hose․ Inspect the door’s hinges and hardware for dust buildup and clean them with a damp cloth․ After cleaning, dry all surfaces thoroughly with a soft cloth to prevent water spots․ This routine maintenance will ensure your storm door remains in excellent condition and continues to provide reliable performance․ Always refer to the manual for specific care recommendations․ Keep your storm door looking new by incorporating cleaning into your seasonal maintenance routine․

Lubricating Moving Parts

Regular lubrication of moving parts ensures smooth operation and extends the life of your Andersen 4000 Series Storm Door․ Apply a silicone-based lubricant to hinges, handle sets, and any other moving hardware to maintain effortless functionality․ This step is particularly important if the door is frequently used or exposed to harsh weather conditions․ Lubricating periodically will prevent squeaking, stiff movement, and potential wear on components․ Always follow the product’s instructions for application and avoid using heavy oils that may attract dust or dirt․ By keeping the door’s moving parts well-lubricated, you can ensure a trouble-free experience and maintain the door’s performance over time․ This simple maintenance task contributes significantly to the longevity and efficiency of your storm door․ Regular checks and lubrication are key to keeping your door operating smoothly year-round․

Troubleshooting Common Issues

Common issues with the Andersen 4000 Series Storm Door may include improper alignment, squeaking, or difficulty closing․ If the door doesn’t shut properly, check for obstructions and ensure the frame is level․ Lubricate hinges and moving parts to eliminate squeaking․ For a loose door, tighten screws on the hinge and latch side․ If the insect screen doesn’t retract smoothly, inspect for debris or damage․ Consult the installation manual for specific adjustments․ Persistent issues may require replacing worn-out parts or re-aligning the door frame․ Always refer to the troubleshooting section of the manual for detailed solutions․ If problems persist, contact Andersen’s customer support for assistance․ Regular maintenance and inspections can prevent many of these issues, ensuring optimal performance and longevity of your storm door․

Installing the Andersen 4000 Series Storm Door is a manageable task when following the provided manual․ Proper preparation, precise measurements, and careful execution ensure a secure and weather-tight fit․ Regular maintenance, such as cleaning and lubricating moving parts, will extend the door’s lifespan․ Troubleshooting common issues like misalignment or squeaking can be addressed with simple adjustments or part replacements․ By adhering to the installation guide and maintaining the door, homeowners can enjoy enhanced energy efficiency, improved aesthetics, and long-term durability․ Successful installation not only protects your entryway but also adds value to your home․ Refer to the warranty and support information for any additional assistance or repairs․

Warranty and Support Information

The Andersen 4000 Series Storm Door is backed by a limited warranty from Andersen Corporation, ensuring coverage for defects in materials and workmanship․ For detailed warranty terms, visit the official Andersen website or refer to the product documentation․ Should you encounter any issues during or after installation, Andersen’s customer support team is available to assist․ Contact Andersen Windows and Doors Customer Support at 855-603-0692 or visit their Help Center for troubleshooting guides, FAQs, and repair requests․ Additionally, the Andersen Storm Door Division provides dedicated support for storm door installations, including downloadable resources like user manuals and installation guides․ This comprehensive support ensures your Andersen 4000 Series Storm Door performs optimally for years to come․

PDF

resnick halliday pdf

Resnick and Halliday’s Fundamentals of Physics is a renowned calculus-based textbook covering mechanics‚ electromagnetism‚ and modern physics. Its clear explanations and comprehensive coverage make it a cornerstone in physics education.

1.1 Overview of the Textbook

Fundamentals of Physics by Resnick and Halliday is a comprehensive‚ calculus-based textbook covering core physics topics. It spans mechanics‚ electromagnetism‚ and modern physics‚ with clear explanations and detailed problem sets. Widely adopted in universities‚ it is known for its structured approach and accessibility. The PDF version enhances convenience‚ making it a preferred choice for students and instructors worldwide. Its enduring popularity underscores its effectiveness in fostering a deep understanding of physics principles.

1.2 Importance of the Book in Physics Education

Fundamentals of Physics holds a pivotal role in physics education‚ offering a rigorous yet accessible introduction to the subject. Its structured approach and comprehensive problem sets make it indispensable for students and educators alike. The book’s ability to bridge theory with practical applications has made it a cornerstone in universities worldwide. Its influence extends across generations‚ shaping the foundational knowledge of countless physicists and engineers. This timeless resource continues to set standards in physics education globally.

1.3 Evolution of the Textbook Through Editions

Since its first publication‚ Fundamentals of Physics has undergone significant evolution‚ with each edition incorporating modern concepts and improved pedagogical tools. The 10th and 12th editions introduced enhanced problem sets‚ simulations‚ and digital resources‚ ensuring relevance in contemporary physics education. These updates reflect the authors’ commitment to adapting to advancements in physics and teaching methodologies‚ making the textbook a dynamic and essential resource for students and instructors worldwide.

Key Features of the Resnick Halliday Textbook

Resnick Halliday’s textbook excels with comprehensive physics coverage‚ robust problem-solving strategies‚ and modern concept integration. The PDF version enhances accessibility‚ offering convenience for students and educators alike.

2.1 Comprehensive Coverage of Physics Topics

Resnick Halliday’s Fundamentals of Physics offers an extensive exploration of core physics topics. From classical mechanics to electromagnetic theory‚ the PDF version ensures that students access detailed explanations‚ diagrams‚ and equations. The textbook’s structured approach covers thermodynamics‚ waves‚ optics‚ and modern physics‚ providing a solid foundation for undergraduate studies. Each chapter builds logically‚ reinforcing concepts with real-world applications‚ making it an indispensable resource for both students and instructors seeking a thorough understanding of physics principles.

2.2 Problem-Solving Approach and Examples

The Resnick Halliday PDF excels in its problem-solving approach‚ offering a wide range of questions that cater to different skill levels. Each chapter includes worked examples that demonstrate step-by-step solutions‚ helping students grasp complex concepts. The textbook emphasizes logical reasoning and mathematical rigor‚ with problems often requiring the application of multiple principles. This structured method enables learners to develop analytical skills and confidently tackle challenging scenarios‚ making it an invaluable resource for mastering physics problem-solving techniques.

2.3 Integration of Modern Physics Concepts

Fundamentals of Physics seamlessly integrates modern physics concepts‚ bridging classical and contemporary topics. The Resnick Halliday PDF includes chapters on relativity‚ quantum mechanics‚ and particle physics‚ providing a balanced curriculum. These sections are enriched with real-world applications and historical contexts‚ making advanced ideas accessible; The textbook’s modern approach ensures students are well-prepared for future studies and research‚ aligning with current scientific advancements and educational standards.

The Role of Resnick and Halliday in Physics Education

Resnick and Halliday revolutionized physics education with their textbook‚ making complex concepts accessible. Their work remains a cornerstone in universities worldwide‚ shaping modern physics curricula and inspiring students.

3.1 Biographies of the Authors

David Halliday was a prominent physicist and educator‚ known for his contributions to physics education. Robert Resnick‚ a distinguished professor‚ focused on making physics accessible to students. Both were instrumental in creating the widely acclaimed Fundamentals of Physics‚ which has become a standard in universities globally‚ influencing generations of physicists and engineers with its clear and comprehensive approach to the subject.

3.2 Their Contributions to Physics Teaching

Resnick and Halliday revolutionized physics education with their textbook‚ which emphasizes clarity and accessibility. Their approach integrated modern physics concepts early‚ enhancing student engagement. The book’s structured problem-solving method and detailed examples set a new standard‚ making complex topics understandable. Their work has left a lasting impact‚ shaping how physics is taught worldwide and inspiring future educators and physicists.

3.3 Impact on Introductory Physics Courses

Fundamentals of Physics has profoundly influenced introductory courses globally. Its clear explanations and structured approach have made it a primary resource for students and instructors. The textbook’s ability to balance theory with practical problems has raised educational standards‚ ensuring students grasp fundamental concepts. Its widespread adoption underscores its effectiveness in shaping the foundation of physics education for generations‚ making it indispensable in academic curricula worldwide.

The PDF Version of “Fundamentals of Physics”

The PDF version of Fundamentals of Physics offers a convenient digital format for students‚ enhancing accessibility and portability. It maintains the textbook’s comprehensive content while allowing easy navigation and reference. This digital edition has become popular among learners and educators for its flexibility and reliability in modern education settings.

4.1 Advantages of the Digital Format

The digital format of Fundamentals of Physics offers unparalleled convenience and accessibility. Students can access the material anytime‚ anywhere‚ without the need for physical storage. The PDF version enables easy navigation through chapters‚ sections‚ and problems via bookmarks and hyperlinks. Additionally‚ features like text search and note-taking tools enhance the learning experience. The digital format also reduces the environmental impact of printing‚ making it a sustainable option for modern education. Its portability and flexibility make it a preferred choice for students and instructors alike.

4.2 Accessibility and Convenience

The digital format of Fundamentals of Physics ensures seamless accessibility across devices‚ including laptops‚ tablets‚ and smartphones. Students can study anytime‚ anywhere‚ with the convenience of adjustable font sizes and night mode for optimal readability. The PDF version also allows quick navigation through bookmarks and hyperlinks‚ making it easier to locate specific topics or problems. This accessibility enhances the learning experience‚ enabling students to focus on understanding complex concepts without logistical barriers. Its portability and flexibility are particularly beneficial for modern learners.

4.3 Popularity Among Students and Instructors

Fundamentals of Physics remains a top choice among students and educators due to its clarity and comprehensive coverage. The PDF version is widely sought after for its ease of access‚ enabling users to study efficiently. Instructors appreciate its structured content‚ while students benefit from the wealth of solved problems and examples. Its popularity stems from its ability to bridge theory and application‚ making it indispensable for both teaching and learning in physics education.

Problem Solving in Resnick Halliday’s Textbook

Resnick Halliday’s textbook emphasizes a systematic problem-solving approach‚ offering diverse problems aligned with topics‚ from basic to advanced‚ to enhance understanding and critical thinking in physics.

5.1 Types of Problems and Their Difficulty Levels

Resnick Halliday’s textbook offers a wide variety of problems‚ ranging from basic to advanced‚ ensuring a gradual learning curve. Problems are categorized by difficulty‚ starting with straightforward numerical exercises and progressing to complex‚ thought-provoking questions. This structure caters to diverse learning needs‚ reinforcing foundational concepts while challenging advanced learners. The inclusion of multiple-choice questions and quantitative problems enhances problem-solving skills‚ preparing students for real-world applications and deeper understanding of physics principles.

5.2 Strategies for Tackling Complex Problems

Tackling complex problems in Resnick Halliday’s textbook requires a systematic approach. Start by understanding the problem statement thoroughly‚ identifying key concepts‚ and listing known quantities. Break down complex scenarios into simpler parts‚ using diagrams to visualize relationships. Apply fundamental principles and formulas‚ cross-verifying with worked examples for guidance. Practice consistently to build intuition and confidence. Utilize the textbook’s structured problem sets‚ which gradually increase in difficulty‚ to refine problem-solving skills and master advanced physics concepts effectively.

5.3 Role of Worked Examples in Learning

Worked examples in Resnick Halliday’s textbook play a crucial role in fostering deeper understanding. They provide step-by-step solutions to problems‚ illustrating how to apply concepts and formulas. These examples help students grasp problem-solving techniques‚ interpret physical situations‚ and translate them into mathematical models. By studying worked examples‚ learners gain confidence in tackling similar problems independently‚ making them indispensable for mastering complex physics topics and developing analytical skills effectively.

Digital Resources and Supplements

Resnick Halliday’s textbook offers digital resources like WileyPLUS‚ featuring online simulations‚ interactive tools‚ and additional study materials‚ enhancing student engagement and understanding of complex physics concepts effectively.

6.1 Online Simulations and Interactive Tools

The Resnick Halliday textbook is complemented by digital simulations and interactive tools‚ such as those found in WileyPLUS. These resources provide immersive learning experiences‚ enabling students to visualize complex physics concepts dynamically. Simulations cover topics like mechanics‚ electromagnetism‚ and thermodynamics‚ allowing for hands-on exploration. Interactive tools‚ including graphs and calculators‚ enhance problem-solving skills. These features make abstract ideas more tangible‚ fostering deeper understanding and engagement among students. They are accessible online‚ ensuring convenience for learners pursuing physics education.

6.2 WileyPLUS and Other Learning Platforms

WileyPLUS integrates seamlessly with Resnick and Halliday’s textbook‚ offering an interactive learning environment. This platform provides access to digital versions of the book‚ interactive simulations‚ and adaptive learning tools. It includes homework assignments‚ quizzes‚ and tracking features to monitor student progress. Other platforms like online learning hubs and educational apps complement the textbook‚ enhancing engagement and accessibility. These resources ensure a dynamic and personalized learning experience‚ making complex physics concepts more approachable for students at all levels of understanding.

6.3 Additional Study Materials for Students

Beyond the textbook‚ students can access supplementary materials like solution manuals‚ video tutorials‚ and interactive simulations. These resources provide detailed explanations for complex problems and offer alternative learning methods. Online forums and study groups also enable collaboration and peer-to-peer support. Additionally‚ summary guides and concept maps help reinforce key concepts‚ making study sessions more effective. These materials cater to diverse learning styles‚ ensuring students grasp physics fundamentals comprehensively.

The Legacy of Resnick and Halliday’s Work

Resnick and Halliday’s Fundamentals of Physics has left an enduring impact on physics education‚ with its widespread adoption in universities worldwide and continuous updates ensuring relevance.

7.1 Long-Term Success of the Textbook

Fundamentals of Physics has achieved remarkable longevity‚ staying relevant for over three decades. Its success stems from continuous updates‚ incorporating modern physics concepts and interactive tools. The textbook’s clear explanations and comprehensive problem sets have made it a favorite among students and instructors alike. Its popularity endures‚ solidifying its place as a leading resource in physics education globally‚ ensuring its continued use in academic institutions for future generations.

7.2 Adoption in Universities Worldwide

Fundamentals of Physics is widely adopted in universities globally‚ serving as a primary resource for calculus-based physics courses. Its comprehensive coverage and clarity make it a preferred choice for instructors. The textbook is extensively used in top-tier institutions‚ supporting students in competitive exams like the IIT-JEE. Its availability in multiple editions and digital formats ensures accessibility‚ making it a cornerstone in physics education worldwide for both undergraduate and graduate-level studies.

7.3 Continuous Updates and Relevance

Fundamentals of Physics remains relevant through continuous updates‚ incorporating modern physics concepts and advanced problem-solving techniques. Recent editions‚ such as the 12th‚ introduce new simulations and interactive tools to enhance understanding. The textbook evolves with the field‚ ensuring students engage with cutting-edge knowledge. Its adaptability and inclusion of historical developments maintain its status as a timeless resource for physics education‚ aligning with curriculum needs worldwide while inspiring future physicists.

How to Access the Resnick Halliday PDF

The Resnick Halliday PDF can be accessed through official sources like the publisher’s website or online retailers. Ensure legality by purchasing from authorized platforms.

8.1 Legal and Ethical Considerations

Accessing the Resnick Halliday PDF legally requires purchasing from authorized sources. Unauthorized downloads violate copyright laws and undermine authors’ efforts. Ethical access supports education and intellectual property rights.

8.2 Official Sources for the PDF

The official Resnick Halliday PDF is available through publishers like Wiley and authorized retailers. Platforms like Amazon and WileyPLUS offer legitimate digital copies. Students should verify the seller’s authenticity to ensure they receive the complete‚ updated version without pirated content. Purchasing from these sources guarantees access to supplementary materials and support.

8.3 Benefits of Using the Official Version

Using the official Resnick Halliday PDF ensures access to accurate‚ up-to-date content‚ free from errors and omissions found in unauthorized versions. It includes enhanced features like interactive simulations‚ practice problems‚ and study guides. Official versions often come with WileyPLUS access‚ offering additional learning tools. Supporting publishers by purchasing official copies promotes educational resources development and ensures compliance with copyright laws‚ fostering a fair academic environment for all students.

junior tennis racquet size guide

Junior tennis racquets range from 17 to 26 inches, with size determined by age and height. Proper fit ensures better technique, control, and reduces injury risk, making it essential for young players’ development.

Importance of Choosing the Right Racquet Size

Choosing the right racquet size is crucial for young players, as it directly impacts their performance and development. A racquet that is too large or too small can make it harder to control, leading to less accurate shots and increased fatigue. Additionally, using an improperly sized racquet can put unnecessary strain on a child’s arm and shoulder, potentially leading to injuries. On the other hand, a well-fitted racquet allows for better technique, more power, and precise shots, fostering confidence and enjoyment of the game. It also promotes proper stroke development, helping young players build a strong foundation for their tennis skills. Selecting the right size ensures a more comfortable and effective playing experience, making it essential for juniors to progress successfully in tennis.

How to Determine the Correct Racquet Size

Determine the correct racquet size by considering the player’s age and height. Use a size chart to match their measurements with the appropriate racquet length, ensuring optimal comfort and performance on the court.

Age as a Guideline

Age is a common starting point for selecting a junior tennis racquet. Children aged 2-4 years typically use a 17-19 inch racquet, while those aged 5-6 years prefer a 21-inch option. For ages 7-8, a 23-inch racquet is ideal, and for 9-10 years, a 25-inch racquet is recommended. These guidelines help match the racquet size to the child’s developmental stage, ensuring they can handle the racquet effectively. However, age alone isn’t always the perfect indicator, as growth rates vary. It’s essential to consider the child’s height and comfort level with the racquet. Using age as a guideline provides a foundation, but personal fit and comfort should also be taken into account to optimize performance and enjoyment of the game.

Height as a Guideline

Height is a key factor in determining the appropriate junior tennis racquet size. Children up to 100cm tall typically use a 17-19 inch racquet, while those between 100-115cm benefit from a 21-inch racquet. For taller players, 115-135cm, a 23-inch racquet is suitable, and for those 135-150cm or taller, a 25-inch racquet is recommended. This method ensures the racquet is proportionate to the child’s body size, allowing for better control and technique. Height guidelines are often more accurate than age because growth rates vary, and some children may be taller or shorter for their age group. By matching the racquet length to the child’s height, young players can maintain proper swing mechanics and generate more power. Always consider the child’s comfort and ability to maneuver the racquet when selecting based on height.

Grip Size for Junior Racquets

Grip size for junior racquets varies, with options typically ranging from 1 to 3. Proper fit is crucial for control and comfort, preventing injuries and enhancing performance. Ensure the grip matches the player’s hand size for optimal playability and technique development;

Grip Size Options

Grip size options for junior racquets are typically categorized as 1, 2, or 3. These sizes correspond to the circumference of the handle, ensuring a comfortable fit for smaller hands. Grip size 1 is the smallest, suitable for very young players or those with petite hands, while size 3 is the largest option for juniors, often used by older or larger children. Proper grip size is essential to prevent discomfort or injury and to allow for proper stroke mechanics. Coaches or parents can measure a child’s hand to determine the best fit, ensuring the racquet feels balanced and easy to maneuver. Many junior racquets come with adjustable grips or replaceable overgrips, allowing for customization as the player grows. Selecting the right grip size supports a young player’s technical development and overall enjoyment of the game.

How to Measure Grip Size

To measure grip size accurately, place the racquet handle in the player’s dominant hand. They should hold it with their index finger and thumb forming a “V” shape at the throat. The middle finger should rest against the handle. The gap between the palm and the handle should be about 1/8 inch for proper fit. If the gap is too large, the grip may be too small, and if it’s too tight, the grip may be too big. Another method is to measure the circumference of the handle using a ruler or grip size gauge. Junior players typically use grip sizes 1, 2, or 3, corresponding to smaller hands. Ensuring the correct grip size prevents discomfort, improves control, and reduces the risk of injury. Parents or coaches can assist younger players in measuring and selecting the appropriate size for optimal performance and comfort on the court.

Additional Factors to Consider

Besides size, consider weight, balance, and string pattern. Lighter racquets aid young players in handling, while balanced racquets enhance maneuverability. Proper string tension supports performance and prevents injury, ensuring a safe and enjoyable experience.

Weight and Balance

Weight and balance are crucial for junior racquets as they impact a child’s ability to maneuver and control the racquet. Lighter racquets, typically between 7 to 9 ounces, are recommended for younger players to prevent fatigue and improve swing mechanics. A well-balanced racquet distributes weight evenly, making it easier to handle. Head-heavy racquets can help generate power, while lighter heads enhance agility. It’s essential to choose a racquet that matches the child’s strength and skill level, ensuring they can maintain proper form and technique. Additionally, a racquet that is too heavy can lead to discomfort and injury, so prioritizing a manageable weight is vital for young players’ development and enjoyment of the game.

String Pattern and Tension

String pattern and tension significantly influence a junior player’s performance. A common string pattern for juniors is 16×19 or 18×20, offering a balance between power and control. Lower string density provides more power, while higher density enhances precision. For younger players, lower string tension (around 50-60 lbs) is recommended to generate additional power and reduce arm strain. As players develop strength and technique, higher tension can improve control. Synthetic strings are durable and easier on the arm, making them ideal for juniors. Natural gut offers better feel but requires more maintenance. Proper string pattern and tension ensure optimal performance and comfort, adapting to the player’s skill level and physical development. This balance supports their progression and enjoyment of the game.