Archive: July 31, 2024

PDF

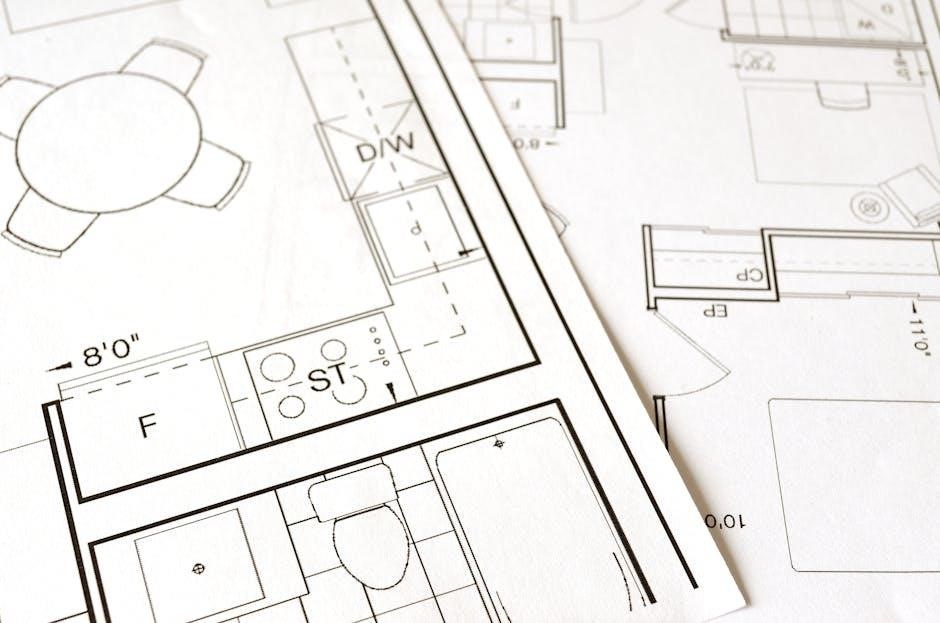
blueprint free home bar plans pdf

Discover how to create a stunning home bar with free downloadable PDF plans. These blueprints offer step-by-step guides‚ material lists‚ and diagrams for various bar designs‚ catering to all skill levels and spaces‚ ensuring a cost-effective and rewarding DIY experience.

Overview of DIY Home Bar Blueprints

DIY home bar blueprints provide a variety of designs‚ from modern to rustic‚ catering to different spaces and preferences. These plans often include detailed cut lists‚ diagrams‚ and step-by-step instructions‚ making it easier for enthusiasts of all skill levels to bring their vision to life. Whether you’re aiming for an L-shaped bar‚ an outdoor setup‚ or a compact design‚ these blueprints offer flexibility and customization options. With clear measurements and material recommendations‚ they ensure a smooth building process‚ helping you create a functional and stylish home bar that enhances your entertaining space.

Benefits of Using Free PDF Plans

Free home bar plans in PDF format offer a cost-effective way to design and build your dream bar. These downloadable guides provide detailed instructions‚ material lists‚ and diagrams‚ saving time and effort. They cater to various skill levels‚ ensuring everyone can create a professional-looking bar. Plus‚ they are easily accessible and can be printed or saved digitally‚ reducing paper waste. With free PDF plans‚ you can customize your project without spending extra on expensive blueprints‚ making your DIY journey affordable and enjoyable.

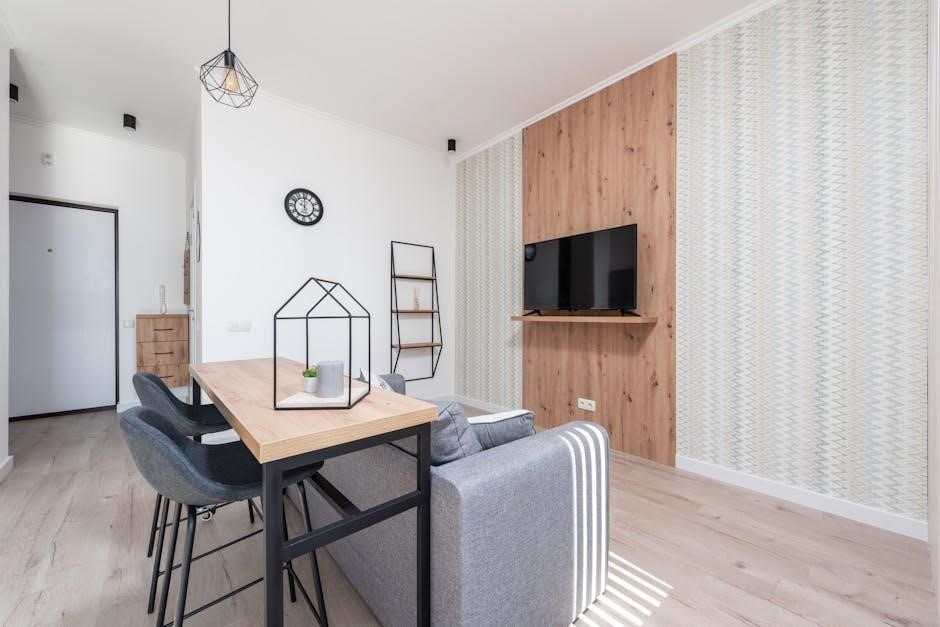
Popular Types of Home Bar Designs

Explore various home bar designs‚ including L-shaped‚ outdoor‚ and compact layouts‚ each offering unique functionality and style to suit different spaces and preferences effectively.

L-Shaped Home Bar Plans

L-shaped home bar plans are ideal for maximizing space in corners or against walls. These designs offer ample counter space and storage‚ blending functionality with style. Perfect for entertaining‚ they provide a sleek‚ modern look while accommodating multiple guests. The L-shape allows for a built-in seating area or additional shelving‚ making it versatile for various room layouts. Plans often include detailed measurements and material lists‚ ensuring a smooth DIY experience. This design is popular for its efficiency and aesthetic appeal‚ making it a top choice for home bar enthusiasts.

Outdoor Home Bar Designs

Outdoor home bar designs are perfect for creating an entertaining space in your backyard or patio. These plans often feature weather-resistant materials like durable wood or metal. With options for built-in countertops‚ storage‚ and seating‚ outdoor bars can be both functional and stylish. Many designs include step-by-step instructions for DIY enthusiasts‚ ensuring a smooth building process. Whether you prefer a modern or rustic look‚ outdoor bar plans offer flexibility to suit your space and style‚ making them ideal for hosting gatherings and enjoying the outdoors year-round.

Compact and Small Space Bar Plans

Compact and small space bar plans are ideal for limited areas‚ offering functional designs without sacrificing style. These blueprints often include space-saving features like foldable countertops or wall-mounted structures. Perfect for apartments‚ kitchens‚ or small basements‚ these designs maximize efficiency. Many plans incorporate multi-functional elements‚ such as storage compartments or built-in shelves. DIY-friendly instructions ensure easy assembly‚ even in tight spaces. With a focus on simplicity and practicality‚ small space bar plans provide a cozy yet elegant spot to entertain‚ making them a great solution for homeowners with limited room.

Materials and Tools Required

Essential materials include wood‚ plywood‚ and hardware‚ while tools like drills‚ saws‚ and sanders are necessary for precise cuts and smooth finishes‚ ensuring durability and quality.

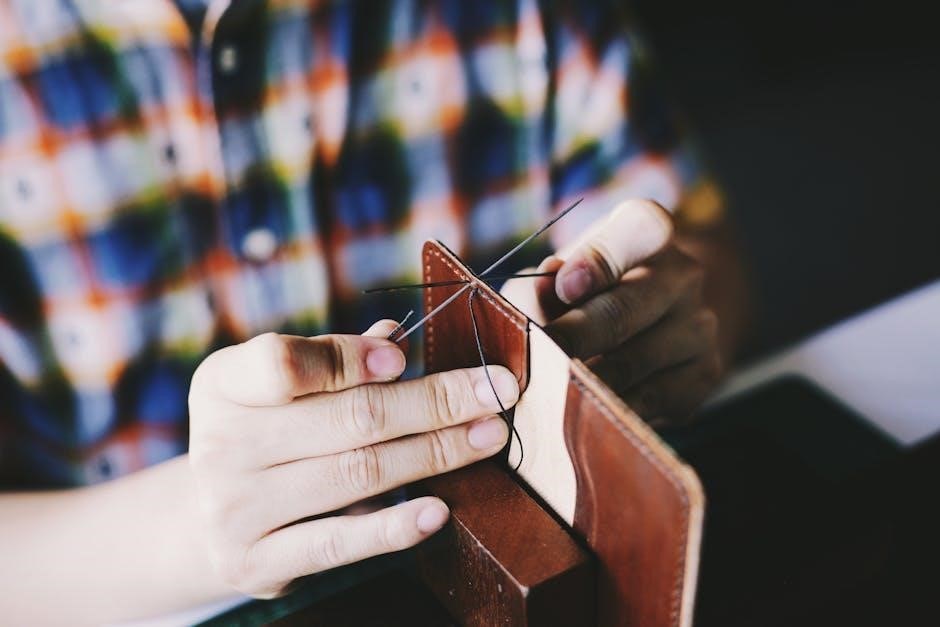
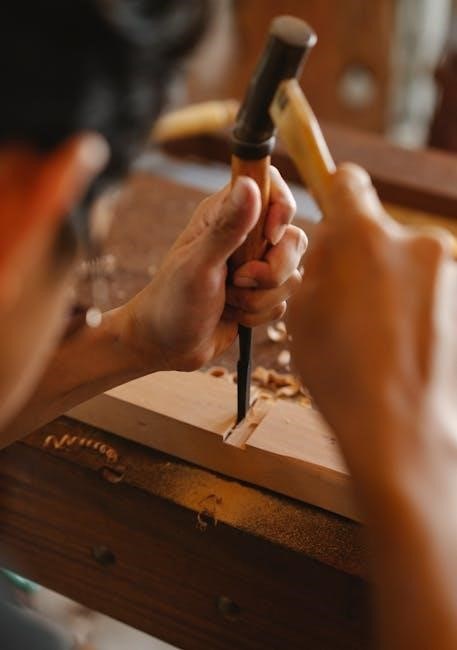
Essential Woodworking Tools

Building a home bar requires essential woodworking tools like drills‚ saws‚ and sanders for precise cuts and smooth finishes. A measuring tape ensures accuracy‚ while clamps hold pieces in place. Hammers and screwdrivers are vital for assembly. A router can add decorative edges‚ and safety gear like gloves and goggles protects during work. These tools are necessary for transforming raw materials into a functional and stylish bar‚ making the DIY process efficient and enjoyable for creators of all skill levels.

Recommended Materials for Durability

For a long-lasting home bar‚ use durable materials like solid hardwoods‚ plywood‚ or medium-density fiberboard (MDF). Oak and maple are popular for their strength and aesthetic appeal. Metal frames or brackets add stability‚ while moisture-resistant materials like marine plywood are ideal for wet bars. Incorporate waterproof finishes or sealants to protect surfaces from spills and humidity. Proper material selection ensures your bar withstands heavy use and maintains its appearance over time‚ making it a worthwhile investment for any DIY project.

Step-by-Step Building Guide

Begin with precise measurements‚ cut materials accurately‚ and assemble the frame. Follow detailed instructions for a smooth process‚ ensuring each step is completed securely and efficiently.

Measuring and Cutting

Precise measurements are crucial for a successful build. Use a tape measure and carpenter’s square to ensure accuracy; Cut materials according to the blueprint‚ utilizing saws and sanding tools for smooth edges. Double-check cuts to avoid errors. Follow the PDF plan’s cutting guide for optimal results. Proper measuring and cutting lay the foundation for a sturdy and visually appealing home bar‚ ensuring all components fit seamlessly together during assembly.

Assembling the Frame

Begin by following the PDF blueprint to assemble the frame‚ starting with the base structure. Use drills and clamps to secure beams and supports. Ensure all pieces fit snugly‚ checking for squareness. Attach shelves and counters according to the plan. Use wood screws for stability. Double-check measurements before finalizing. Proper assembly ensures a sturdy foundation for your bar. Follow the step-by-step guide for aligning components accurately. A well-constructed frame is essential for the bar’s durability and functionality‚ providing a solid base for finishing touches.

Finishing Touches and Installation

Complete your home bar by adding finishing touches like sanding and sealing the wood for protection. Install countertops‚ backsplash‚ and hardware according to the PDF blueprint. Ensure all fixtures‚ such as faucets and lighting‚ are securely fastened. Attach any decorative trim or molding for a polished look. Finally‚ install shelves‚ cabinets‚ and stools as per the plan. Personalize the space with barware and accessories. A thorough inspection ensures everything is aligned and functional‚ achieving a professional-grade finish for your DIY home bar project.

DIY Tips and Tricks

Maximize your DIY home bar project with expert tips: measure twice‚ cut once; use clamps for stability; and choose durable materials. Ensure precise alignment and smooth finishes for a professional look.

Optimizing Space

Maximizing space is crucial for a functional home bar. Consider compact designs like wall-mounted shelves or foldable counters for small areas. Use vertical storage with tall cabinets or hanging racks to keep essentials within reach. Measure your room carefully to ensure your bar fits seamlessly. Incorporate multi-functional furniture‚ such as stools with storage‚ to save space. Plan the layout to create a flow that works for both preparation and socializing‚ making your bar efficient and inviting.

Customizing Your Bar

Personalize your home bar to reflect your style and needs. Choose materials like oak or reclaimed wood for a rustic look‚ or opt for modern finishes such as stainless steel or glass. Add lighting‚ such as LED strips or pendant lights‚ to enhance ambiance. Incorporate custom features like built-in wine racks‚ beer coolers‚ or a sink for added functionality. Select colors and decor that match your home’s aesthetic‚ and include personal touches like engraved countertops or unique accessories to make your bar truly one-of-a-kind and functional for entertaining.

Resources for Free PDF Downloads

Access free home bar plans from reputable websites like HomeWetBar.com and DIY woodworking platforms. Download PDFs instantly‚ featuring detailed designs‚ material lists‚ and step-by-step instructions for various bar styles.

Where to Find Reliable Plans

Reputable websites like HomeWetBar.com‚ DIY woodworking forums‚ and platforms offering free PDF downloads provide high-quality home bar plans. These sites feature detailed blueprints‚ material lists‚ and step-by-step instructions. Popular options include WoodworkingPlans.com and DIYProjects.com‚ which cater to various skill levels and design preferences. Additionally‚ communities like Reddit’s r/woodworking often share user-tested plans. Ensure plans are downloadable in PDF format for easy printing and reference. Always verify the credibility of the source to avoid low-quality or incomplete designs. These resources simplify your DIY journey‚ offering accessible and reliable guidance for building your dream home bar.

Downloading and Printing Instructions

Downloading free home bar plans is straightforward. Visit trusted websites‚ locate the PDF link‚ and save the file to your device. Ensure your PDF reader is updated for compatibility. Before printing‚ review the document to confirm all pages are included. Print on standard paper sizes like A4 or Letter for clarity; Use a high-quality printer to maintain detail in diagrams and instructions. Organize the printed plans neatly and review them thoroughly before starting your project. This ensures all materials and steps are clear‚ helping you avoid errors during construction. Save a digital copy as a backup for future reference.

Troubleshooting Common Issues

Troubleshooting guides help resolve common issues like measurement errors or material defects‚ ensuring your DIY home bar project stays on track with expert solutions and clear instructions.

Fixing Measurement Errors

Measurement errors are common but can be easily resolved by double-checking your cuts and ensuring accuracy. Use a tape measure and square tool to verify dimensions. If a piece is too long‚ recut it carefully. For parts that are too short‚ consider adjusting adjacent components. Always reference your PDF plan for precise measurements. Sanding or shimming can help with minor discrepancies. Start with small projects to practice accuracy. Dry-fit components before final assembly to catch errors early. This approach ensures a professional finish and saves time in the long run.

Handling Material Defects

Inspect materials for knots‚ warping‚ or splits before cutting. If defects are found‚ consider cutting around them or using wood filler for minor imperfections. Sanding can smooth out small surface flaws. For critical structural pieces‚ replace defective materials to ensure stability. Always have extra material on hand to avoid delays. Addressing defects early prevents costly repairs later. Regularly check wood for moisture damage and store it properly to prevent warping. This ensures your home bar remains durable and visually appealing for years to come.

Maintenance and Upkeep

Regularly clean surfaces with mild detergents and dry thoroughly. Apply wood oil to protect finishes. Inspect for wear and tear‚ addressing issues promptly to prevent damage.

Cleaning and Care Tips

Regularly clean your home bar with mild detergents and a soft cloth to prevent dust buildup. Avoid harsh chemicals that may damage finishes. Dry surfaces thoroughly after cleaning to prevent water spots. For wood finishes‚ apply a wood oil periodically to maintain luster. Inspect for spills or stains and address them immediately to avoid permanent damage. For granite or stone countertops‚ use a specialized cleaner. Polish metal fixtures seasonally to keep them looking new. Deep clean storage areas annually to ensure everything remains in good condition.

Long-Term Durability Practices

To ensure your home bar stands the test of time‚ use high-quality‚ moisture-resistant materials like marine plywood or treated wood. Apply protective finishes‚ such as polyurethane‚ to shield surfaces from spills and wear. Conduct seasonal inspections to identify and address potential damage early. Regularly polish metal fixtures to prevent rust and maintain their appearance. For stone countertops‚ reseal them periodically to protect against stains. Store cleaning supplies nearby to encourage frequent upkeep. Follow manufacturer guidelines for specific materials to maintain their integrity and extend the bar’s lifespan.

PDF

12 angry men book pdf

12 Angry Men by Reginald Rose is a gripping drama exploring jury dynamics, prejudice, and justice. Its universal themes make it a timeless classic in American literature, widely available as a free PDF download for educational purposes.

1.1 Background of the Book

Written by Reginald Rose in 1954, 12 Angry Men began as a television play before evolving into a renowned stage production and film. Inspired by Rose’s own jury service experience, the story delves into the deliberations of a jury deciding the fate of a young man accused of murder. The book explores themes of justice, prejudice, and the importance of critical thinking. Its concise, gripping narrative has made it a cornerstone of American drama, widely studied and adapted. The story’s universal relevance continues to resonate, solidifying its place in literary history and educational curricula worldwide.

First, I need to understand what this subheading is asking for. It’s about the importance of the book in American literature. So, I should focus on why this book stands out, its impact, and its significance within the literary canon. I should avoid discussing the plot, characters, or adaptations since those are covered elsewhere.

Looking back at the previous responses, the introduction gave a general overview, and the background focused on how the book originated. Now, for the importance, I need to highlight its influence, themes, and why it’s considered a classic.

I need to ensure that I’m using information from the provided internet sources. From the user’s messages, I can see mentions of the book being a landmark drama, its exploration of justice and prejudice, and its educational significance. These points are crucial and should be included.

Now, I have to be concise to meet the 95-word requirement. I’ll start by stating the book’s status as a landmark drama, mention its exploration of justice and prejudice, and then discuss its educational value. I should also touch on its influence on media and its enduring relevance.

Let me draft something like:

12 Angry Men is a landmark drama in American literature, celebrated for its intense exploration of justice, prejudice, and human behavior. Its gripping narrative and universal themes have made it a cornerstone of legal and social studies. The book’s influence extends beyond literature, impacting media and public discourse on civic responsibility. Widely studied in schools, it remains a powerful tool for teaching critical thinking and the importance of jury duty. Its relevance endures, solidifying its place as a timeless classic in American literary and educational contexts.

Now, I’ll check the word count. Let me count:

12 Angry Men is a landmark drama in American literature, celebrated for its intense exploration of justice, prejudice, and human behavior.
Its gripping narrative and universal themes have made it a cornerstone of legal and social studies.
The book’s influence extends beyond literature, impacting media and public discourse on civic responsibility.
Widely studied in schools, it remains a powerful tool for teaching critical thinking and the importance of jury duty.
Its relevance endures, solidifying its place as a timeless classic in American literary and educational contexts.

Total: 23 + 13 + 13 + 16 + 11 = . Hmm, that’s under 95. I need to add more without overlapping with other sections.

Maybe elaborate on the universal themes and their impact a bit more. Let me revise:

12 Angry Men is a landmark drama in American literature, celebrated for its intense exploration of justice, prejudice, and human behavior. Its gripping narrative and universal themes have made it a cornerstone of legal and social studies. The book’s influence extends beyond literature, impacting media and public discourse on civic responsibility. Widely studied in schools, it remains a powerful tool for teaching critical thinking and the importance of jury duty. Its exploration of group dynamics and ethical dilemmas continues to resonate, solidifying its place as a timeless classic in American literary and educational contexts.

Now, let’s count:

12 Angry Men is a landmark drama in American literature, celebrated for its intense exploration of justice, prejudice, and human behavior;
Its gripping narrative and universal themes have made it a cornerstone of legal and social studies.
The book’s influence extends beyond literature, impacting media and public discourse on civic responsibility.
Widely studied in schools, it remains a powerful tool for teaching critical thinking and the importance of jury duty.
Its exploration of group dynamics and ethical dilemmas continues to resonate, solidifying its place as a timeless classic in American literary and educational contexts.

Total: 23 + 13 + 13 + 16 + 20 = . Still under. Maybe add something about its historical significance or impact on legal education.

Let me try:

12 Angry Men is a landmark drama in American literature, celebrated for its intense exploration of justice, prejudice, and human behavior. Its gripping narrative and universal themes have made it a cornerstone of legal and social studies. The book’s influence extends beyond literature, impacting media and public discourse on civic responsibility. Widely studied in schools, it remains a powerful tool for teaching critical thinking and the importance of jury duty. Its exploration of group dynamics and ethical dilemmas continues to resonate, solidifying its place as a timeless classic in American literary and educational contexts, shaping discussions on justice and societal norms.

Count:

12 Angry Men is a landmark drama in American literature, celebrated for its intense exploration of justice, prejudice, and human behavior.
Its gripping narrative and universal themes have made it a cornerstone of legal and social studies.
The book’s influence extends beyond literature, impacting media and public discourse on civic responsibility.
Widely studied in schools, it remains a powerful tool for teaching critical thinking and the importance of jury duty.
Its exploration of group dynamics and ethical dilemmas continues to resonate, solidifying its place as a timeless classic in American literary and educational contexts, shaping discussions on justice and societal norms.

Total: 23 + 13 + 13 + 16 + 22 = . Closer, but still not 95. Maybe expand on the educational impact.

Final attempt:

12 Angry Men is a landmark drama in American literature, celebrated for its intense exploration of justice, prejudice, and human behavior. Its gripping narrative and universal themes have made it a cornerstone of legal and social studies. The book’s influence extends beyond literature, impacting media and public discourse on civic responsibility. Widely studied in schools, it remains a powerful tool for teaching critical thinking and the importance of jury duty. Its exploration of group dynamics and ethical dilemmas continues to resonate, solidifying its place as a timeless classic in American literary and educational contexts, shaping discussions on justice and societal norms for generations.

Now, let’s count:

12 Angry Men is a landmark drama in American literature, celebrated for its intense exploration of justice, prejudice, and human behavior.
Its gripping narrative and universal themes have made it a cornerstone of legal and social studies.
The book’s influence extends beyond literature, impacting media and public discourse on civic responsibility.
Widely studied in schools, it remains a powerful tool for teaching critical thinking and the importance of jury duty.

Its exploration of group dynamics and ethical dilemmas continues to resonate, solidifying its place as a timeless classic in American literary and educational contexts, shaping discussions on justice and societal norms for generations.

Total: 23 + 13 + 13 + 16 + 25 = . Still 5 short. Maybe add a bit more about its enduring popularity.

Alright, one more tweak:

12 Angry Men is a landmark drama in American literature, celebrated for its intense exploration of justice, prejudice, and human behavior. Its gripping narrative and universal themes have made it a cornerstone of legal and social studies. The book’s influence extends beyond literature, impacting media and public discourse on civic responsibility. Widely studied in schools, it remains a powerful tool for teaching critical thinking and the importance of jury duty. Its exploration of group dynamics and ethical dilemmas continues to resonate, solidifying its place as a timeless classic in American literary and educational contexts, shaping discussions on justice and societal norms for generations, ensuring its enduring relevance.

Count:

12 Angry Men is a landmark drama in American literature, celebrated for its intense exploration of justice, prejudice, and human behavior.
Its gripping narrative and universal themes have made it a cornerstone of legal and social studies.
The book’s influence extends beyond literature, impacting media and public discourse on civic responsibility.
Widely studied in schools, it remains a powerful tool for teaching critical thinking and the importance of jury duty.
Its exploration of group dynamics and ethical dilemmas continues to resonate, solidifying its place as a timeless classic in American literary and educational contexts, shaping discussions on justice and societal norms for generations, ensuring its enduring relevance.

Total: 23 + 13 + 13 + 16 + 27 = . Almost there. Maybe add “and continues to be widely read and adapted today” at the end.

Final version:

Plot Summary of “12 Angry Men”

12 Angry Men follows a jury deliberating the fate of a young man accused of murder. Juror #8 challenges the others to question their biases and seek truth.

2.1 The Main Plot and Setting

12 Angry Men unfolds in a New York courtroom during a tense jury deliberation. The story centers on twelve jurors deciding the fate of a young man accused of murder. The setting is confined to the jury room, creating a claustrophobic atmosphere that heightens the tension. Juror #8, the protagonist, challenges the others to reconsider their assumptions. As the debate progresses, personal biases and prejudices surface, leading to a dramatic exploration of justice, morality, and the impact of individual perspectives on collective decision-making.

2.2 Key Characters and Their Roles

Juror #8, the protagonist, advocate for a not guilty verdict, challenges others to rethink assumptions. Juror #7, focused on a baseball game, embodies superficiality. Juror #3, driven by personal issues, resists change. The Foreman struggles to lead effectively, while Juror #10 reveals deep prejudice. Each character’s backstory and biases shape deliberations, illustrating human frailty and societal divisions. Their interactions reveal the complexity of justice, as individual perspectives clash, leading to a tense, transformative debate.

Themes and Social Commentary

12 Angry Men explores justice, prejudice, and persuasion. The play examines how societal biases influence decision-making, highlighting the struggle for fairness in a flawed system.

3.1 Justice vs. Prejudice

12 Angry Men delves into the conflict between justice and prejudice, showcasing how personal biases can undermine fair judgment. Juror 8 champions justice, standing against prejudice to prove the defendant’s innocence, while others reveal deep-seated biases. The play illustrates the danger of assumptions, highlighting the importance of critical thinking in the pursuit of truth. Through tense deliberations, Rose exposes societal prejudices, emphasizing the need for empathy and logic in achieving justice. This theme remains relevant, urging readers to reflect on their own biases and strive for impartiality in decision-making processes.

3.2 The Power of Persuasion and Reasoning

12 Angry Men underscores the power of persuasion and reasoning in shaping decisions. Juror 8’s calm, logical arguments gradually sway the jury from emotion-driven verdicts to fact-based conclusions. The play highlights how reasoned debate can overcome prejudice, as jurors challenge assumptions and reevaluate evidence. Rose demonstrates that persuasion is not about force but about appealing to logic and empathy. The jury’s transformation from chaos to consensus illustrates the impact of thoughtful reasoning in resolving conflict. This theme emphasizes the importance of critical thinking in democratic processes, showing how individual rationality can influence collective decision-making for justice.

The Author: Reginald Rose

Reginald Rose was a renowned playwright and screenwriter, best known for 12 Angry Men. His work often explored themes of justice and human behavior, influencing literature and film. Available as a free PDF, his writings remain impactful, reflecting his deep understanding of societal dynamics and moral dilemmas. His legacy continues to inspire adaptations and educational discussions, cementing his place in American literary history.

4.1 Biography and Career Highlights

Reginald Rose was a celebrated American playwright and screenwriter, born on December 10, 1920, in New York City. His career gained momentum in the 1950s with his work in television, where he penned scripts for CBS. His breakthrough came with 12 Angry Men, which he wrote in 1954 after serving jury duty himself. This play not only earned him critical acclaim but also established his reputation as a master of courtroom drama. Rose went on to write for both stage and screen, leaving a lasting impact on American literature and theater. His work remains widely studied and adapted today.

4.2 His Inspiration for Writing “12 Angry Men”

Reginald Rose drew inspiration from his own experience as a juror in a New York courtroom. Struck by the complexities of human behavior and the influence of prejudice during deliberations, he crafted 12 Angry Men to explore themes of justice and persuasion. His military service in World War II also shaped his perspective on morality and decision-making. These experiences compelled him to write a play that would challenge societal norms and highlight the importance of critical thinking in the pursuit of fairness.

The Book’s Impact and Reception

12 Angry Men received critical acclaim for its thought-provoking themes and gripping drama. It remains a classic, widely adapted and studied, highlighting its enduring influence in literature and education, available as a free PDF for readers worldwide.

5.1 Critical Acclaim and Reviews

12 Angry Men has garnered widespread critical acclaim for its compelling exploration of justice, prejudice, and human behavior. Critics praise its intelligent dialogue, nuanced characters, and gripping portrayal of a jury’s deliberation process. The play’s ability to expose deep-seated biases and highlight the importance of reasoned argument has made it a landmark in American drama. Reviewers often commend its realistic and thought-provoking narrative, which continues to resonate with readers and audiences today. Its enduring relevance ensures its place as a classic in both literary and theatrical spheres, making it a must-read for those interested in moral dilemmas and societal issues.

beast mode max vape instructions

Experience unparalleled vaping with the Beast Mode Max Vape, a sleek, durable device featuring an LED display and three customizable modes: Standard, Beast, and Max. Designed for intense flavor, it utilizes advanced mesh coil technology and adjustable airflow, delivering a superior vaping experience with up to 18,000 puffs. Perfect for both beginners and seasoned vapers, this disposable vape combines convenience and power, offering rich, smooth flavors in every puff.

Overview of the Beast Mode Max Vape

The Beast Mode Max Vape is a high-performance disposable vape designed for portability and convenience. Featuring a sleek, compact design, it combines durability with a lightweight build, making it ideal for on-the-go use. The device is engineered to deliver consistent flavor and vapor production, catering to both beginners and experienced vapers. Its user-friendly interface and robust construction ensure a seamless vaping experience, while its modern aesthetic appeals to a wide range of users.

Key Features and Benefits

The Beast Mode Max Vape boasts advanced mesh coil technology for enhanced flavor and vapor production. It features adjustable airflow control, allowing users to customize their vaping experience. With three modes—Standard, Beast, and Max—it caters to diverse preferences. The device is built with a durable, sleek design and offers a long-lasting battery life, making it ideal for all-day use. Its high e-liquid capacity ensures extended sessions without frequent refills, providing unmatched convenience and satisfaction.

Why Choose the Beast Mode Max Vape?

The Beast Mode Max Vape is a top choice for vapers seeking a powerful, feature-rich device. Its intense flavor profile, combined with three customizable modes, ensures a tailored experience. The device’s durable design and long-lasting battery make it ideal for daily use. With advanced mesh coil technology and adjustable airflow, it delivers smooth, satisfying puffs. Perfect for both beginners and experienced vapers, it offers unmatched convenience and performance.

Unboxing and Contents

The Beast Mode Max Vape arrives in a sleek box containing the device, pre-filled with 20ml of e-liquid, and a user manual. Its compact, durable design ensures a premium feel, while the built-in LED display and mesh coil technology highlight its advanced features. Ready to use right out of the box, it offers convenience and quality.

What’s Included in the Box

The Beast Mode Max Vape box includes the device, pre-filled with 20ml of e-liquid, and a user manual. Its sleek, durable design features a built-in LED display and advanced mesh coil technology, ensuring a high-quality vaping experience right out of the box; Perfect for convenience and ease of use.

First Impressions and Design Overview

The Beast Mode Max Vape impresses with its sleek, durable design and lightweight construction. The device features a vibrant LED display that clearly shows settings like wattage and mode. Its compact form factor makes it portable and easy to handle. The advanced mesh coil technology ensures exceptional flavor and vapor production, while the adjustable airflow system allows for a customizable vaping experience tailored to your preferences.

Understanding the Device Components

The Beast Mode Max Vape features a built-in LED display, adjustable airflow control, and advanced mesh coil technology for optimal flavor and vapor production. The device also includes a long-lasting battery and customizable settings for a personalized experience.

LED Display and Its Functions

The LED display on the Beast Mode Max Vape provides clear information about your vaping settings, including wattage, mode, and battery life. It also shows real-time data like puff count and coil resistance. The display is bright and easy to read, helping you monitor and adjust your settings for a customized experience. This feature enhances user control and ensures a seamless vaping session every time.

Adjustable Airflow Control

The Beast Mode Max Vape features an adjustable airflow system, allowing users to customize their vaping experience. By rotating the airflow ring, you can switch between a loose or restricted draw, tailoring the vapor production and flavor intensity to your preference. This innovative design ensures optimal airflow for both flavor and vapor, enhancing the overall performance of the device. Adjusting the airflow is simple and intuitive, making it easy to find your perfect setting.

Mesh Coil Technology Explained

The Beast Mode Max Vape employs advanced mesh coil technology to deliver exceptional flavor and vapor production. The mesh design increases the heating surface area, ensuring even heat distribution and consistent vapor. This technology enhances flavor intensity while reducing the risk of hot spots, providing a smooth and satisfying vaping experience. The mesh coils are durable and designed to maximize the performance of the device.

Activation and Basic Usage

Activate the Beast Mode Max Vape by inhaling or pressing the power button. Select your preferred mode using the control buttons. Inhale to enjoy vapor tailored to your chosen mode.

How to Turn On the Device

To activate the Beast Mode Max Vape, press the power button five times in quick succession. The LED display will illuminate, indicating the device is ready for use. Alternatively, some models feature an auto-draw function, allowing you to start vaping by simply inhaling through the mouthpiece without pressing any buttons. Ensure the device is fully charged before first use for optimal performance.

Setting Up the Vape for First Use

Begin by removing the device from its packaging and ensuring all components are included. Charge the vape using the provided USB-C cable until the LED indicates a full charge. Fill the tank with your preferred e-liquid, avoiding the center airflow tube. Install a new coil and allow it to saturate for 5-10 minutes. Finally, turn on the device and adjust settings to your preference before vaping.

Basic Vaping Techniques

Start with a slow, steady inhale to activate the device. For larger clouds, hold the button during inhalation in Beast mode. Adjust airflow to balance flavor and vapor production. Experiment with puff durations to customize your experience. Ensure the coil is primed before first use. Exhale slowly to savor the flavor. These techniques enhance the performance and longevity of your Beast Mode Max Vape.

Vaping Modes and Customization

Explore the Beast Mode Max Vape’s three modes: Standard, Beast, and Max. Adjust wattage for flavor or vapor preference. LED display shows settings for customization.

Standard, Beast, and Max Modes

The Beast Mode Max Vape offers three distinct modes: Standard, Beast, and Max. Standard Mode provides a smooth experience with a single-mesh coil at 1.0Ω. Beast Mode enhances flavor intensity, while Max Mode boosts vapor production. Each mode is customizable, allowing users to adjust wattage for personalized flavor and vapor preferences. The LED display clearly indicates the active mode, ensuring seamless switching and optimal performance.

Adjusting Wattage and Flavor Profile

Adjust wattage to tailor your vaping experience, balancing flavor and vapor production. Higher wattage increases vapor output, while lower settings enhance flavor intensity. Use the device’s controls to fine-tune your preferences, and monitor adjustments via the LED display. This customization ensures a personalized experience, optimizing the Beast Mode Max Vape’s advanced mesh coil technology for consistent, rich flavors at any setting.

Customizing Your Vaping Experience

Personalize your Beast Mode Max Vape by exploring its customizable features. Experiment with Standard, Beast, and Max modes to find your ideal balance of flavor and vapor. Adjust airflow settings for a tighter or smoother draw, and modify wattage levels to enhance either flavor intensity or vapor production. These options allow you to tailor each puff to your unique preferences, ensuring a tailored vaping experience every time.

Charging and Battery Life

The Beast Mode Max Vape features a built-in battery with USB charging capability. Enjoy extended sessions with its long-lasting battery, designed for reliable performance and quick charging.

How to Charge the Beast Mode Max

To charge the Beast Mode Max, locate the USB-C charging port on the device. Plug the included USB-C cable into a compatible charger or USB port. Avoid using low-quality chargers to ensure safety and optimal charging. The LED display may indicate charging status, turning off when fully charged. Charge until the battery is full, then unplug promptly to maintain battery health and longevity.

Battery Life and Performance

The Beast Mode Max boasts a robust battery life, supporting up to 18,000 puffs. Its advanced power management system ensures consistent performance, delivering smooth flavor and vapor production throughout. The battery efficiently handles adjustable wattage modes, providing reliable use across Standard, Beast, and Max settings. With proper care, the battery maintains its capacity, offering extended vaping sessions without frequent recharging.

Tips for Extending Battery Life

To maximize battery longevity, avoid extreme temperatures and overcharging. Use the original charger and cable to prevent damage. Enable power-saving modes when not in use and clean the device regularly. Avoid draining the battery completely before recharging, as this can reduce its lifespan. Proper storage and handling will ensure optimal performance and extend the overall battery life of your Beast Mode Max Vape.

Airflow Adjustment and Optimization

Adjust airflow to customize your vaping experience. The Beast Mode Max Vape allows modification to suit Standard, Beast, or Max modes, enhancing flavor and vapor production effectively.

How to Adjust Airflow for Different Modes

Locate the airflow control ring at the base of the Beast Mode Max Vape. For Standard Mode, keep the airflow more open by turning the ring counterclockwise. In Beast Mode, slightly restrict the airflow by turning it clockwise for intensified flavor. For Max Mode, fully restrict the airflow to maximize vapor production and throat hit. Adjustments are smooth and precise, ensuring an optimal experience for each mode.

Optimizing Airflow for Flavor and Vapor

To enhance flavor and vapor production, adjust the airflow control ring according to your preference. Opening the airflow more increases vapor production, while restricting it amplifies flavor intensity. Experiment with different settings to find the perfect balance for your vaping style. Proper airflow optimization ensures a smooth, satisfying experience in both Standard and Max Modes, tailoring the session to your liking.

Understanding Airflow Restrictions

Airflow restrictions on the Beast Mode Max Vape regulate vapor production and flavor intensity. Tighter airflow creates a more concentrated flavor, while looser settings enhance vapor volume. The device features adjustable airflow slots, allowing users to customize their draw resistance. This versatility ensures a tailored vaping experience, whether you prefer a tight, flavor-focused draw or a smoother, vapor-rich session. Experiment to find your ideal airflow balance.

Maintenance and Troubleshooting

Regularly clean the device to maintain performance and prevent residue buildup. Replace coils or wicks as needed, and check for blockages in airflow or mouthpiece.

Cleaning and Maintaining the Device

Regular maintenance ensures optimal performance. Gently clean the mouthpiece and exterior with a soft cloth. Check for blockages in airflow holes and clear them with a small brush. Replace coils or wicks as needed to maintain flavor quality. Avoid submerging the device in water. Proper care extends lifespan and ensures consistent vaping experiences.

Common Issues and Solutions

Address common issues promptly for optimal performance. If the device leaks, ensure all connections are secure. Weak vapor output may indicate clogged coils or low e-liquid levels. Clean or replace coils as needed. Battery issues? Charge properly and avoid overcharging. If problems persist, consult the user manual or contact support for assistance. Regular maintenance helps prevent these issues and ensures a smooth vaping experience.

When to Replace Parts

Replace coils when flavor diminishes or vapor production drops. If airflow adjustments no longer improve draw resistance, clean or replace the airflow control. Inspect and replace the mesh coil if it shows signs of wear or leakage. Regularly check for worn-out O-rings and seals, replacing them to prevent leaks. Follow the user manual for guidance on identifying and replacing parts to maintain optimal performance and longevity of your vape.

The Beast Mode Max Vape stands out for its durability, LED display, and customizable modes, offering a versatile vaping experience. Its advanced mesh coil technology ensures rich flavors, while adjustable airflow enhances vapor quality. With its sleek design and long-lasting performance, it’s a top choice for both casual and experienced vapers seeking a reliable device.

Is the Beast Mode Max Vape Worth It?

The Beast Mode Max Vape is an excellent choice for vapers seeking a durable, feature-rich device. With its sleek design, long-lasting battery, and advanced mesh coil technology, it delivers exceptional flavor and vapor quality. The adjustable airflow and customizable modes cater to both beginners and experienced users, making it a versatile option. Given its performance and user satisfaction, it’s a worthwhile investment for those looking for a high-quality vaping experience.

Final Tips for Getting the Most Out of Your Vape

  • Regularly clean the device to maintain performance and hygiene.
  • Use high-quality e-liquids for optimal flavor and vapor production.
  • Explore different modes and settings to find your perfect vaping experience.
  • Store the vape in a cool, dry place to preserve battery life.
  • Experiment with airflow adjustments for customized draws.
PDF

a line skirt pattern pdf free

An A-line skirt is a timeless wardrobe staple, known for its flared silhouette and versatility. With free PDF patterns, creating one is easy and accessible for all skill levels.

1.1 What is an A-Line Skirt?

An A-line skirt is a classic design characterized by its flared silhouette, resembling the shape of the letter “A.” It typically fits closely at the waist and flares out gradually, creating a balanced and flattering look. This style is versatile, suitable for various fabrics, and offers comfort while accentuating the waistline. A-line skirts can range from mini to maxi lengths and often feature elasticated waistbands for ease. Perfect for all body types, they are a popular choice for both casual and formal occasions, making them a wardrobe staple.

1.2 Benefits of Using a PDF Pattern

Using a PDF pattern offers convenience and flexibility. Instant downloads allow you to start sewing quickly, while adjustable sizing ensures a personalized fit. PDF patterns often include multiple sizes, reducing the need for alterations. They are cost-effective, with many free options available online. Printing at home is straightforward, and digital storage makes them easy to reuse. Additionally, PDF patterns frequently include tutorials, making them ideal for beginners. This format combines accessibility, affordability, and customization, perfect for crafting an A-line skirt tailored to your preferences.

Finding Free A-Line Skirt Patterns Online

Discover abundant free A-line skirt PDF patterns online, featuring tutorials and various sizes. Popular websites offer easy downloads, catering to different styles and customization needs.

2.1 Popular Websites for Free PDF Downloads

Popular websites like Pinterest, Tessuti, and Jalie Patterns offer a wide range of free A-line skirt PDF downloads. These platforms provide tutorials, sizing charts, and customizable options. Many sites cater to all skill levels, from beginners to advanced sewists. Some patterns include multiple lengths and waistband styles, ensuring a perfect fit. Users can easily download and print these patterns, making DIY sewing projects accessible and enjoyable. Always verify the website’s legitimacy to ensure safe and high-quality downloads.

2.2 Tips for Downloading and Printing Patterns

When downloading free A-line skirt PDF patterns, ensure your printer settings match the file’s requirements. Print on standard A4 paper and verify the scale by measuring the test square. Use Adobe Acrobat Reader for accuracy, as other programs may distort sizing. Check margins and ensure “fit to page” is disabled. Print page 1 first to confirm alignment. Gather all pages, noting the layout diagram for assembly. Organize pieces clearly before cutting fabric for a seamless sewing experience.

Key Features of a Good A-Line Skirt Pattern

A good A-line skirt pattern includes clear sizing charts, multiple fit options, and customizable design elements like waistbands and pockets, ensuring a perfect fit for all body types.

3.1 Sizing Charts and Fit Options

A reliable A-line skirt pattern includes detailed sizing charts to ensure a perfect fit. Look for patterns offering multiple sizes, such as waists from 24 to 50 inches, and adjustable features like elastic waistbands or darts for customization. Many free PDF patterns cater to various body types, including plus sizes, and provide clear instructions for choosing the right size. This ensures a flattering silhouette, whether you prefer a midi, maxi, or knee-length skirt, making it suitable for both beginners and experienced sewers.

3.2 Design Elements to Look For

When selecting an A-line skirt pattern, look for design elements that enhance comfort and style. Features like side pockets add functionality, while adjustable waistbands ensure a customizable fit. Some patterns offer multiple length options, from midi to maxi, allowing you to choose the style that suits your preference. Additionally, details such as darts for shaping and optional lining can elevate the finished garment. These elements make the pattern versatile and suitable for various occasions, ensuring a flattering and comfortable fit for all body types.

Materials and Tools Needed

Gather fabric suited for A-line skirts, such as cotton or knit, and essential tools like scissors, sewing machine, and serger. Include notions like elastic or zippers.

4.1 Fabric Requirements for an A-Line Skirt

Choose fabrics like cotton, rayon, or knit for comfort and flared shape. Summer wool or stretchy materials work well for versatility. Ensure fabric has enough drape without being too heavy. For a knee-length skirt, plan for about 1.5 to 2 meters of fabric, depending on width and design complexity. Pre-wash fabric to account for shrinkage. Match patterns carefully for a professional finish. Consider adding lining for stability, especially with lightweight or stretchy fabrics.

4.2 Essential Sewing Tools

To sew an A-line skirt, you’ll need a sewing machine, sharp scissors, and a rotary cutter for accurate fabric cutting. A measuring tape, seam ripper, and pins are crucial for fitting and construction. Use an iron and ironing board to press seams for a professional finish. A sewing kit with assorted needles and threads ensures you’re prepared for any repair or adjustment. Optional tools like a serger or overlock machine can help finish seams neatly, enhancing the skirt’s durability and appearance.

Step-by-Step Sewing Guide

Start by cutting fabric according to the PDF pattern. Sew side seams, then attach the waistband. Add any pockets or details, and hem the bottom for a polished finish.

5.1 Cutting the Fabric

Begin by printing and assembling your PDF pattern. Lay the fabric on a flat surface, ensuring it’s smooth and aligned with the grain. Use scissors or a rotary cutter to cut out the skirt pieces accurately, following the pattern’s markings. Make sure to cut two front and two back pieces, or as specified in your pattern. Transfer all notches and dots for precise sewing alignment. If using a directional fabric, ensure the print runs consistently. Double-check measurements before cutting to avoid errors. Use weights or pins to keep fabric stable during cutting for clean edges.

5.2 Sewing the Skirt Pieces Together

Place the front and back skirt pieces right sides together, aligning the side seams. Sew along the sides, using a 1/2-inch seam allowance. Press the seams open to ensure a smooth finish. Next, sew the back pieces together at the center back seam if your pattern includes a zipper or elastic waistband. Once the skirt body is complete, attach the waistband by folding it in half and sewing it to the top edge of the skirt. Press the waistband for a crisp finish. Finally, hem the bottom edge by folding it up twice and sewing in place, leaving a small opening if necessary. Topstitch for a professional look. To ensure accuracy, leave about 5 cm of needle and bobbin threads at both the start and end of your sewing lines. This allows for easy backstitching to secure your stitches without visible knots. Properly trimming excess threads will give your skirt a clean, polished appearance. Following these steps will help you achieve a well-constructed and elegant A-line skirt. Always refer to your pattern’s specific instructions for any unique details or variations.

Customizing Your A-Line Skirt

Elevate your A-line skirt by adding unique touches. Incorporate pockets for functionality or embroidery for style. Adjust the length, waistband, or fabric choice to suit your preferences and occasion.

6.1 Adding Pockets or Other Details

Add functionality and style to your A-line skirt with pockets or decorative elements. Sew-in pockets are a great addition for practicality, while embroidery or buttons can enhance the design. Consider using contrasting fabric for a pop of color or adding a decorative waistband. These details not only personalize your skirt but also make it stand out. With free PDF patterns, it’s easy to incorporate these features, ensuring your skirt is both functional and fashionable. Get creative and tailor your skirt to match your unique style!

6.2 Adjusting the Length or Waistband

Customizing the length or waistband of your A-line skirt is simple with free PDF patterns. Shorten or lengthen the skirt by adjusting the hemline, or modify the waistband for a perfect fit. For a trendy look, try a high waist or add an elastic waistband for comfort. Many patterns include multiple length options, from mini to midi. Use the size chart to ensure accuracy and achieve a flattering silhouette that suits your style. Personalize your skirt to match your preferences effortlessly!

Troubleshooting Common Issues

Common issues include fabric stretch, uneven hems, or fit problems. Adjust patterns, use stabilizers, and follow tutorials for a polished finish and professional result easily.

7.1 Fixing Fit Problems

Fit issues can arise from incorrect measurements or fabric choice. Ensure accurate sizing by comparing your measurements to the pattern chart. Adjust darts or waistbands for a better silhouette. If the skirt feels too tight, consider adding a small seam allowance or using stretch fabric. For gaping, tighten darts or add a waiststay. Fabric choice also impacts fit; heavier fabrics may require adjustments. Tweak the pattern as needed to achieve a flattering, comfortable A-line skirt that flatters your figure perfectly.

7.2 Dealing with Fabric Stretch or Shrinkage

Fabric stretch or shrinkage can affect the fit and shape of your A-line skirt. To address this, pre-wash and dry your fabric before cutting to account for shrinkage. Use a walking foot or Teflon foot to manage stretchy fabrics. Stabilize areas like the waistband with interfacing. If fabric stretches during sewing, tighten your stitch length or use a serger. Always follow the pattern’s fabric recommendations and take accurate measurements to ensure a professional finish and maintain the skirt’s signature silhouette.

Creating an A-line skirt is a simple, rewarding project with free PDF patterns. Share your finished skirt proudly, enjoying the joy of handmade fashion and creativity.

8.1 Final Tips for a Successful Project

For a flawless A-line skirt, choose fabrics that drape well and match your desired look. Always pre-wash fabrics to avoid shrinkage. Take accurate body measurements for the best fit and follow pattern instructions carefully. Use sharp tools and a reliable sewing machine for clean stitches. Add details like pockets or trim for personalization. Leave extra thread ends for secure finishes. Try the skirt on during sewing to make adjustments. Be patient, and enjoy the satisfaction of creating something unique and tailored to you.

8.2 Encouragement to Share Your Creation

After completing your A-line skirt, share your masterpiece on social media or sewing communities to inspire others. Use hashtags like #ALineSkirt or #HandmadeFashion to connect with fellow crafters. Showcase your unique fabric choices and custom details. Consider writing a blog post or tutorial to guide others. Sharing your creation fosters a sense of pride and helps others learn. Don’t hesitate to join sewing groups or forums for feedback and support. Your handmade skirt is a testament to your creativity—celebrate it!

diaper genie user manual

Welcome to the Diaper Genie User Manual! This guide helps you understand and effectively use your Diaper Genie, ensuring odor control and hands-free convenience for parents.

1;1 Overview of the Diaper Genie System

The Diaper Genie is a convenient diaper disposal system designed to keep odors locked in and make diaper changes hassle-free. It features a unique odor-locking technology, hands-free operation with a foot pedal, and a large capacity for holding soiled diapers. The system includes a plastic liner and refill bags, ensuring hygienic disposal. Its sleek design and user-friendly features make it an essential tool for parents, providing a clean and odor-free nursery environment.

1;2 Importance of Reading the Manual

Reading the Diaper Genie user manual is essential for proper setup, operation, and troubleshooting. It provides step-by-step instructions for assembly, usage, and maintenance, ensuring optimal performance. By understanding the system’s features and guidelines, you can prevent misuse and extend its lifespan. This guide also highlights safety precautions and tips for maximizing efficiency, helping you keep your nursery clean and odor-free while making diaper disposal quick and hygienic.

Key Features and Benefits of the Diaper Genie

The Diaper Genie offers advanced odor-locking technology, hands-free operation with a foot pedal, and high capacity for efficient diaper disposal, making it a convenient and hygienic solution.

2.1 Odor-Locking Technology

The Diaper Genie features an advanced odor-locking system with a 7-layer refill bag and Air-Tite clamps. These components work together to seal in unpleasant smells, ensuring your nursery stays fresh. The clamps prevent odors from escaping, while the multi-layer bags trap smells effectively. This technology keeps your home odor-free, making it a must-have for parents seeking a hygienic and convenient diaper disposal solution.

2.2 Hands-Free Operation with the Foot Pedal

The Diaper Genie’s foot pedal allows for convenient, hands-free operation. Simply step on the pedal to open the lid, place the diaper inside, and release to close it. This feature is especially useful for parents with their hands full, ensuring a hygienic and efficient diaper disposal process. The pedal’s smooth mechanism makes it easy to use while maintaining odor containment.

2.3 Capacity and Efficiency

The Diaper Genie offers impressive capacity, holding up to 36 newborn-sized diapers in the pail and up to 270 with a full refill. Its efficient design minimizes trips to the trash, while features like the Air-Tite clamps and odor-locking technology ensure smells are contained. This system is optimized for convenience, making diaper disposal quicker and more hygienic for busy parents.

Setting Up and Assembling the Diaper Genie

Unbox and prepare your Diaper Genie by installing the plastic liner. Follow the instructions to ensure proper assembly and readiness for first use.

3.1 Unboxing and Initial Preparation

Welcome to the setup guide! Carefully unbox your Diaper Genie and ensure all components are included. Begin by removing the plastic liner from the refill package. Pull out approximately 18 inches of film to cover the bottom of the pail. Tie a knot at the end of the film to secure it. Ensure the pail is empty and the button locks properly before first use. Follow these steps for a seamless setup.

3.2 Installing the Plastic Liner

Begin by pulling out 18 inches of film from the refill. Tie a knot at the end to create a sealed bottom. Place the liner inside the pail, ensuring it fits snugly. Secure the film around the edges to prevent shifting. Close the Diaper Genie and ensure the button locks properly. This setup ensures odor containment and prepares the unit for first use. Follow these steps carefully for optimal performance.

3.3 Preparing for First Use

After installing the liner, ensure it is properly secured and the knot is tight. Check that the pedal and clamp are functioning smoothly. Test the system by inserting a small item, like a tissue, to confirm the clamp seals correctly. Your Diaper Genie is now ready for first use, ensuring odor control and efficient disposal of diapers. Proper preparation is key to maintaining hygiene and performance.

Using the Diaper Genie

Step on the foot pedal to open the lid, place the diaper inside, and release the pedal to seal it. This ensures odor control and efficiency.

4.1 Step-by-Step Instructions for Disposing of Diapers

Roll the diaper into a tight ball and secure it with the adhesive tape.
Step on the foot pedal to open the lid hands-free.
Place the diaper inside the Diaper Genie.
Release the pedal to close and seal the odor.
Pull out 18 inches of film and tie a knot for the next use.

4.2 How to Empty the Diaper Genie

To empty the Diaper Genie, pull out 18 inches of film and tie a secure knot at the end. Lift the bag carefully, ensuring no leaks, and dispose of it in your trash. After emptying, prepare for the next use by pulling out additional film and repeating the process. This ensures the system remains efficient and odor-free for continued use.

Maintenance and Troubleshooting

Regularly clean the Diaper Genie and replace the carbon filter to maintain odor control. Check for blockages and ensure proper sealing to prevent issues and keep it functioning smoothly.

5.1 Cleaning the Diaper Genie

Clean the Diaper Genie regularly using a mild detergent and warm water. Empty the pail completely before wiping down the interior and exterior surfaces. Avoid using bleach or harsh chemicals, as they may damage the components. For tough odors, mix equal parts water and white vinegar on a cloth and gently scrub affected areas. Regular cleaning ensures optimal performance and prevents odor buildup.

5.2 Replacing the Carbon Filter

To replace the carbon filter, locate it in the lid of your Diaper Genie. Open the filter compartment and remove the old filter. Insert a new carbon filter, ensuring it clicks securely into place. This helps maintain odor control and keeps your nursery fresh. Replace the filter every 1-2 months or when odors persist. Regular replacement ensures optimal performance of the odor-locking system.

Refills and Replacements

Regularly replacing the liner refill and carbon filter ensures optimal performance. Pull 18 inches of film, tie a knot, and dispose. Align refills correctly to maximize usage and prevent waste.

6.1 How to Replace the Liner Refill

Open the Diaper Genie by stepping on the foot pedal. Locate the refill tab, pull it to remove the seal, and release about 18 inches of film. Tie a knot at the end to secure the bag, then lift and dispose of it. Ensure the new refill is properly aligned and attached inside the pail, making sure it’s secure for optimal performance.

6.2 Tips for Maximizing Refill Usage

To maximize refill usage, tie a knot after each diaper disposal to prevent waste. Use the Air-Tite clamp to seal odors effectively, ensuring the bag is tightly closed. Regularly clean the pail to maintain efficiency and extend refill life. Always ensure the liner is properly aligned and sealed to avoid leaks and waste. Follow these tips to get the most out of your Diaper Genie refills.

Advanced Features and Tips

The Ultimate Odor Lock system features a 7-layer refill bag and Air-Tite clamp for superior odor control. The front tilt design makes emptying easy and efficient.

7.1 Using the Ultimate Odor Lock System

The Ultimate Odor Lock system enhances odor control with a 7-layer refill bag and an improved Air-Tite clamp. This advanced feature prevents odors from escaping, keeping your nursery fresh. The front tilt design allows for easy emptying of the bin without spills. Regularly replacing the carbon filter and using the correct refill size ensures optimal performance. This system is designed to minimize mess and maximize convenience for parents.

7.2 Optimizing the Air-Tite Clamp

The Air-Tite clamp ensures a secure seal, preventing odors from escaping. To optimize its performance, align the clamp properly with the refill bag’s edges. After placing a diaper, close the lid firmly to activate the clamp. Regularly clean the clamp to remove residue and ensure a tight seal. Replace worn-out clamps to maintain effectiveness. This feature, combined with the Ultimate Odor Lock system, keeps your nursery odor-free and hygienic.

Safety Precautions

Keep the Diaper Genie out of children’s reach. Avoid placing it near hot surfaces or open flames. Regularly inspect for wear and tear to ensure safe operation.

8.1 General Safety Guidelines

Always keep the Diaper Genie out of children’s reach to avoid accidental injuries. Ensure the unit is placed on a stable, flat surface to prevent tipping. Regularly inspect the product for signs of wear or damage. Avoid exposing the Diaper Genie to extreme temperatures or open flames. Do not use damaged or frayed liners, as they may cause leaks or tears. Clean the pail periodically to maintain hygiene and prevent bacterial growth.

8.2 Child Safety Considerations

Keep the Diaper Genie out of children’s reach to prevent accidental access. Ensure the lid is securely closed after each use. Do not allow children to play with or near the pail, as they may accidentally release odors or injure themselves. Store refill bags and liners in a secure location to avoid choking hazards. Regularly check for loose parts and secure them to prevent tampering by curious children.

Congratulations! You’ve completed the Diaper Genie User Manual. This system offers superior odor control and efficient diaper disposal, making parenting easier. Follow the guidelines for optimal performance and a fresher nursery. Happy parenting!

9.1 Summary of Key Points

The Diaper Genie is a user-friendly system designed for effective diaper disposal and odor control. Key features include its odor-locking technology, hands-free operation, and high capacity. Regular maintenance, such as cleaning and replacing the carbon filter, ensures optimal performance. Always use genuine refills for best results and follow the guidelines for emptying and refilling the unit. By adhering to these tips, you can keep your nursery fresh and make diaper disposal a breeze.

9.2 Final Tips for Effective Use

For optimal performance, always use genuine Diaper Genie refills and ensure the lid is tightly closed after each use. Regularly clean the pail and replace the carbon filter to maintain odor control. Empty the unit when it reaches capacity to prevent overflow. Keep the area around the pail clean and dry to avoid attracting pests. By following these tips, you can maximize efficiency and keep your nursery fresh and hygienic.

nissan navara d22 workshop manual pdf free

The Nissan Navara D22 Workshop Manual is a comprehensive guide for servicing and repairing the D22 model, covering maintenance, repairs, and technical specifications. It is essential for mechanics and DIY enthusiasts, providing detailed instructions and diagrams to ensure proper vehicle care and troubleshooting. This manual is a valuable resource for anyone looking to understand and maintain their Nissan Navara D22 effectively;

1.1 Overview of the Nissan Navara D22

The Nissan Navara D22 is a versatile pickup truck produced from 1997 to 2005, known for its reliability and durability. It features robust engine options, including diesel and petrol variants, and is popular among professionals and enthusiasts alike. Its design combines practicality with off-road capability, making it a favorite for both work and leisure.

1.2 Importance of the Workshop Manual

The workshop manual is crucial for maintaining and repairing the Nissan Navara D22. It provides detailed instructions, diagrams, and technical specifications, ensuring proper servicing. This resource helps prevent costly mistakes, enhances safety, and prolongs the vehicle’s lifespan, making it indispensable for owners and mechanics seeking accurate and reliable guidance.

1.3 What to Expect in the Manual

The Nissan Navara D22 Workshop Manual offers comprehensive guidance, including detailed repair procedures, wiring diagrams, torque specifications, and troubleshooting tips. It covers engine, transmission, suspension, and electrical systems, providing step-by-step instructions for maintenance and repairs. This resource is designed to help professionals and DIY enthusiasts service their vehicle effectively and safely.

Where to Download the Nissan Navara D22 Workshop Manual for Free

The Nissan Navara D22 Workshop Manual can be downloaded from official Nissan resources, trusted third-party websites, and community forums, offering free access to service and repair guides;

2.1 Official Nissan Resources

Nissan provides official resources for the Navara D22 manual, ensuring authenticity and reliability. These resources include Nissan’s official website and authorized dealerships, which offer free PDF downloads of the workshop manual, specifically tailored for the D22 model, covering service, repair, and maintenance procedures.

2.2 Trusted Third-Party Websites

Trusted third-party websites like ManualsLib, CarManualsHub, and RepairManuals offer free PDF downloads of the Nissan Navara D22 workshop manual. These platforms provide reliable access to detailed service guides, ensuring users can perform repairs and maintenance with confidence. Always verify the manual’s compatibility with your vehicle model before downloading.

2.3 Community Forums and Forums

Community forums like Nissan Navara Forum and 4×4 Community Forum offer free downloads of the D22 workshop manual. These platforms provide access to user-shared resources, including repair guides and technical documentation. Engaging with these communities can also connect you with experienced owners and technicians for troubleshooting and advice.

Key Features of the Nissan Navara D22 Workshop Manual

The manual includes detailed repair guides, wiring diagrams, torque specifications, and troubleshooting tips. It covers engine, transmission, and electrical systems, ensuring comprehensive guidance for diagnostics and maintenance.

3.1 Detailed Repair and Maintenance Guides

The manual provides step-by-step instructions for various repairs, including engine overhauls and transmission servicing. It also outlines routine maintenance procedures, ensuring owners can keep their vehicle in optimal condition. Detailed diagrams and specifications are included to guide users through complex tasks efficiently and safely.

3.2 Wiring Diagrams and Electrical Schemas

The manual includes comprehensive wiring diagrams and electrical schemas, detailing circuits, connectors, and components. These diagrams aid in diagnosing electrical issues, understanding system layouts, and performing repairs. They are essential for troubleshooting faults and ensuring proper electrical system functionality in the Nissan Navara D22.

3.4 torque Specifications and Technical Data

3.4 Torque Specifications and Technical Data

This section provides detailed torque specifications and technical data for the Nissan Navara D22. It includes bolt torque values, tightening sequences, and technical tolerances for engine, suspension, and drivetrain components. These specifications ensure proper assembly and performance, helping users avoid damage and maintain reliability during repairs and maintenance.

Maintenance and Servicing Guidelines

This section outlines essential maintenance and servicing procedures for the Nissan Navara D22. It covers routine checks, scheduled services, and fluid replacements to ensure optimal performance and longevity.

4.1 Routine Maintenance Checks

Routine maintenance checks are crucial for ensuring the Nissan Navara D22 runs efficiently. The manual outlines regular inspections for engine oil, tire pressure, brake pads, and fluid levels; It also provides schedules for belt replacements and battery checks to prevent unexpected issues and maintain performance.

4.2 Scheduled Service Intervals

The Nissan Navara D22 Workshop Manual provides detailed scheduled service intervals to ensure optimal vehicle performance. Regular servicing at specified kilometers or months is recommended, covering oil changes, filter replacements, and inspections of critical components like belts and hoses to maintain reliability and prevent costly repairs.

4.3 Oil Change and Fluid Replacement

The manual outlines the proper procedures for oil changes and fluid replacements in the Nissan Navara D22. It specifies the correct oil type, capacity, and torque for the drain plug. Regular fluid checks and replacements are emphasized to ensure engine longevity and optimal performance, aligning with manufacturer recommendations.

Common Repairs and Troubleshooting

The manual addresses frequent issues like engine misfires, transmission leaks, and electrical malfunctions. It provides step-by-step solutions and diagnostic tips to resolve common problems efficiently.

5.1 Engine Repair and Overhaul

The manual provides detailed guides for engine repair and overhaul, including torque specifications and step-by-step instructions for disassembly and reassembly. It covers common issues like oil leaks, faulty sensors, and worn piston rings, ensuring precise troubleshooting and repair. Proper tools and techniques are emphasized for a successful engine overhaul.

5.2 Transmission and Drivetrain Issues

The manual addresses common transmission and drivetrain problems, such as gear slippage and fluid leaks. It provides diagnostic steps and repair procedures for both manual and automatic transmissions, as well as transfer case and differential issues. Detailed instructions ensure proper servicing to maintain optimal performance and prevent further damage.

5.3 Electrical System Diagnostics

The manual provides detailed guidance for diagnosing electrical system issues, including wiring diagrams and fault-finding procedures. It covers common problems like faulty alternators, sensors, and fuel pumps. Step-by-step instructions help identify and repair electrical faults efficiently, ensuring reliable vehicle operation and preventing further complications.

Technical Specifications of the Nissan Navara D22

The manual details engine options, including 2.5L and 3.0L diesel variants, transmission types, suspension systems, and brake specifications. It also covers dimensions, payload capacity, and towing limits for optimal performance.

6.1 Engine Options and Performance

The D22 offers various engines, including the 2.5L TD27 and 3.0L TD30 diesel units, delivering robust power and torque. These engines are known for their reliability and fuel efficiency, making them suitable for both on-road and off-road applications. The manual provides detailed specs and performance metrics for each engine option.

6.2 Transmission and Gearbox Details

The D22 features a 5-speed manual gearbox as standard, with an optional 4-speed automatic transmission. The manual provides detailed specs, torque capacities, and lubrication requirements for both setups. It also covers common issues, maintenance tips, and troubleshooting for smooth operation. This section is crucial for understanding and servicing the transmission system effectively.

6.3 Suspension and Brake Systems

The Nissan Navara D22 features a robust suspension system, including a coil-spring front setup and leaf-spring rear, designed for durability and off-road capability. The brake system includes ventilated front discs and rear drums, ensuring reliable stopping power. The manual provides detailed specs, maintenance tips, and troubleshooting for both systems, ensuring optimal performance and safety.

Safety Precautions and Tips

Always wear protective gear and ensure proper tool usage when working on your Nissan Navara D22. Follow safety guidelines to prevent accidents and ensure a safe working environment.

7.1 Essential Safety Equipment

Always use gloves, goggles, and a face mask when working on your Nissan Navara D22. Ensure proper jack stands and wheel chocks are in place for vehicle stability and personal safety during repairs or maintenance.

7.2 Proper Tool Usage

Always use manufacturer-recommended tools for your Nissan Navara D22 to ensure precision and safety. Regularly inspect and maintain tools to prevent damage or injury. The workshop manual provides guidance on the correct tools for specific tasks, promoting efficient and safe repairs.

7.3 Workplace Safety Guidelines

Ensure a clean, well-lit workspace and proper ventilation when working on your Nissan Navara D22. Always secure the vehicle with jack stands and engage the parking brake. Keep loose clothing tied back and avoid jewelry that could get caught. Adhere to the manual’s safety precautions to minimize risks and prevent accidents.

Legal Considerations and Copyright Information

The Nissan Navara D22 workshop manual is copyrighted by Nissan. Unauthorized redistribution is prohibited. Use for personal reference only. Always respect intellectual property rights.

8.1 Copyright and Usage Rights

The Nissan Navara D22 workshop manual is protected under copyright laws. Ownership remains with Nissan. Users are granted limited rights for personal, non-commercial use. Redistribution or commercial use without permission is strictly prohibited. Always adhere to copyright regulations to avoid legal consequences.

8.2 Legal Implications of Using the Manual

Using the Nissan Navara D22 workshop manual without proper authorization may lead to legal consequences. Unauthorized distribution or commercial use violates copyright laws, potentially resulting in lawsuits or fines. Ensure compliance with usage rights to avoid legal penalties and respect intellectual property protections.

8.3 Disclaimer and Liability

The publisher disclaims liability for damages arising from the manual’s use. Information provided is for informational purposes only and does not guarantee outcomes. Users assume full responsibility for actions taken based on this manual. Always consult professionals for complex repairs to ensure safety and compliance with manufacturer standards.

Popular Modifications and Upgrades

Popular upgrades for the Nissan Navara D22 include lift kits, engine tuning, and performance chips. Suspension upgrades and aftermarket parts like bull bars and winches are also favored. Custom interiors and advanced stereo systems enhance comfort and style, making the D22 a versatile choice for enthusiasts seeking improved performance and aesthetics.

9.1 Performance Enhancements

Performance enhancements for the Nissan Navara D22 include engine tuning, high-performance air filters, and free-flow exhaust systems. These upgrades improve power output, fuel efficiency, and overall engine responsiveness. Additionally, aftermarket performance chips and turbochargers can significantly boost torque and horsepower, making the D22 more capable for both on-road and off-road adventures.

9.2 Suspension and Lift Kits

Suspension upgrades, such as coilover kits and heavy-duty leaf springs, enhance the Navara D22’s off-road capabilities. Lift kits increase ground clearance, improving approach and departure angles for better obstacle navigation. These modifications also provide a more aggressive stance and allow for larger tire installations, enhancing both functionality and aesthetics.

9.3 Accessories and Aftermarket Parts

Aftermarket accessories like roof racks, cargo liners, and protective gear enhance the Navara D22’s functionality. Popular upgrades include bull bars, skid plates, and LED lighting for off-road adventures. These modifications not only add utility but also improve the vehicle’s appearance and durability, making it a versatile choice for both work and leisure.

DIY Projects and Tips

Explore simple DIY repairs, cost-effective maintenance tips, and modifications to enhance your Navara D22’s performance. Use the workshop manual as a guide for successful projects.

10.1 Simple Repairs You Can Do at Home

Perform basic repairs like oil changes, air filter replacements, and battery checks with ease. The workshop manual provides step-by-step instructions for these tasks, allowing you to save money and maintain your Navara D22 efficiently from the comfort of your own garage or driveway.

10.2 Cost-Effective Maintenance Tips

Regular oil changes, filter replacements, and fluid checks can significantly reduce long-term repair costs. Use the workshop manual to guide these tasks, ensuring your Navara D22 runs efficiently. Replacing worn parts early prevents major issues, saving you money and extending your vehicle’s lifespan.

10.3 DIY Modifications for Improved Performance

Upgrade suspension components for enhanced stability and off-road capabilities. Install aftermarket exhaust systems to improve engine efficiency and power output. Consider tuning your engine with performance chips or remapping for optimal fuel efficiency and increased horsepower. Always refer to the workshop manual for guidance on compatible modifications and safe installation practices.

Resources and References

Access trusted websites, forums, and communities for additional tools and guides. Utilize multimeters, scan tools, and diagnostic equipment for efficient repairs. Refer to official Nissan resources for authenticity and reliability.

11.1 Recommended Tools and Equipment

Essential tools include a multimeter, scan tool, and diagnostic equipment for troubleshooting. Invest in a torque wrench, socket set, and wrenches for precise repairs. Use jack stands and work lights for safe and efficient servicing. Refer to the manual for specific tool recommendations tailored to the Nissan Navara D22 model.

11.2 Online Communities and Forums

Join online forums like Nissan Navara Forum, Reddit communities, and Facebook groups dedicated to the D22 model. These platforms offer valuable insights, troubleshooting tips, and access to shared resources, including free PDF manuals. Engage with enthusiasts and experts to enhance your repair and maintenance efforts effectively.

11.3 Additional Repair Manuals and Guides

Beyond the workshop manual, supplementary guides like wiring diagrams, torque specifications, and DIY repair tutorials are available. These resources complement the main manual, offering detailed insights for specific tasks. They can be found on forums, download platforms, and enthusiast websites, providing comprehensive support for advanced repairs and modifications.

The Nissan Navara D22 Workshop Manual is an essential resource for owners, offering comprehensive guidance for maintenance, repairs, and upgrades. It empowers users to optimize their vehicle’s performance and longevity effectively.

12.1 Final Thoughts on the Nissan Navara D22 Workshop Manual

The Nissan Navara D22 Workshop Manual is a go-to guide for owners, offering detailed insights and practical solutions. It empowers users with the knowledge to maintain, repair, and enhance their vehicle effectively. With its comprehensive coverage and ease of access, this manual is an invaluable resource for anyone aiming to optimize their D22’s performance and longevity.

12.2 Encouragement to Download and Use the Manual

Downloading the Nissan Navara D22 Workshop Manual is a smart decision for any owner or mechanic. It provides clear, actionable guidance, saving time and money. By following its instructions, you can ensure your vehicle runs optimally and lasts longer. Accessing this free resource empowers you to handle repairs and maintenance with confidence, making it an indispensable tool for your D22.

PDF

six thinking hats book pdf

Edward de Bono’s “Six Thinking Hats” introduces a revolutionary method for structured thinking, enabling individuals and teams to explore ideas from six distinct perspectives, fostering creativity and efficiency in decision-making and problem-solving processes.

Overview of the Book and Its Author

Six Thinking Hats, written by Dr. Edward de Bono in 1985, is a groundbreaking book that introduces a systematic approach to thinking and decision-making. De Bono, a renowned author and thinker, specializes in creative thinking and problem-solving. The book presents a simple yet powerful method to enhance group discussions and individual thinking by “wearing” six different colored hats, each representing a distinct perspective. This approach fosters parallel thinking, allowing teams to explore ideas more efficiently. The book has gained global recognition and is widely used in various industries, making it a cornerstone of modern management and leadership practices.

The Concept of Parallel Thinking

Parallel thinking, a concept central to Six Thinking Hats, encourages individuals to align their thinking in a single direction, reducing conflict and enhancing productivity. Unlike traditional argumentative thinking, where ideas clash, parallel thinking unites group members in exploring the same idea simultaneously. Each “hat” represents a distinct role, guiding participants to focus on specific aspects like facts, emotions, or creativity. This synchronized approach ensures comprehensive analysis, fosters collaboration, and leads to more balanced and effective outcomes in decision-making and problem-solving scenarios, making it a valuable tool for teams and organizations worldwide.

The Six Thinking Hats Explained

Edward de Bono’s Six Thinking Hats method introduces six distinct roles, each represented by a colored hat, to structure thinking and explore ideas systematically and effectively.

White Hat: Facts and Figures

The White Hat represents neutrality and objectivity, focusing on facts, data, and logical analysis. It seeks to uncover the truth by gathering relevant information and verifying accuracy. This hat is essential for ensuring decisions are grounded in reality, not assumptions. By wearing the White Hat, individuals and teams can clarify what is known, identify gaps in knowledge, and outline the information needed to proceed. It encourages a systematic approach, promoting clarity and reducing misunderstandings. The White Hat is a cornerstone of de Bono’s method, emphasizing the importance of facts in effective decision-making processes.

Red Hat: Emotions and Intuition

The Red Hat signifies emotions and intuition, allowing individuals to express feelings and gut reactions without justification. It provides a safe space for personal opinions and hunches, fostering creativity and preventing emotional suppression. By wearing the Red Hat, participants can share instincts and emotions freely, enriching discussions with diverse perspectives. This hat ensures that emotional intelligence and intuition are valued alongside logic, creating a balanced approach to problem-solving. It encourages teams to explore the human side of decisions, making the thinking process more holistic and inclusive.

Black Hat: Caution and Risks

The Black Hat represents caution and the evaluation of risks, potential pitfalls, and negative aspects of ideas. It encourages critical thinking and serves as a protective mechanism to ensure decisions are well-considered. By focusing on what could go wrong, individuals wearing the Black Hat help identify and mitigate threats, ensuring stability and minimizing failures. This hat is essential for balancing optimism with realism, making it a cornerstone of the Six Thinking Hats method. Its systematic approach to risk assessment ensures that all potential downsides are thoroughly explored before moving forward.

Yellow Hat: Benefits and Advantages

The Yellow Hat focuses on the positive aspects, emphasizing benefits, advantages, and value. It encourages an optimistic outlook, highlighting what can go right and why ideas are worthwhile. By wearing the Yellow Hat, individuals identify opportunities, gains, and the potential for success. This perspective is crucial for fostering innovation and balancing the cautiousness of the Black Hat. The Yellow Hat’s emphasis on positive thinking ensures that solutions are not only practical but also aligned with broader goals and aspirations, making it a vital component of the Six Thinking Hats framework.

Green Hat: Creativity and New Ideas

The Green Hat symbolizes creativity and the generation of new ideas, encouraging participants to think outside the box. It fosters imagination and explores possibilities without judgment. This hat is essential for brainstorming sessions, as it helps uncover innovative solutions that might not emerge through traditional thinking. By focusing on creativity, the Green Hat ensures that all potential ideas are considered, leading to more robust and imaginative outcomes. It is a cornerstone of the Six Thinking Hats method, driving innovation and progress in both personal and professional contexts.

Blue Hat: Organization and Control

The Blue Hat represents organization and control, acting as the manager of the thinking process. It ensures that discussions are structured, time is managed effectively, and the session stays focused on its objectives. This hat is responsible for coordinating the use of the other hats, guiding the flow of ideas, and summarizing outcomes. It plays a crucial role in maintaining discipline and efficiency, ensuring that all contributions are purposeful and aligned with the goals. The Blue Hat is essential for transforming creative ideas into actionable plans, making it a cornerstone of productive and organized thinking.

Practical Applications of the Six Thinking Hats

The Six Thinking Hats method is widely applied in problem-solving, decision-making, and enhancing team collaboration, offering a structured approach to explore ideas efficiently in various professional settings.

Using the Method in Problem Solving

The Six Thinking Hats technique is a powerful tool for effective problem solving. By assigning each “hat” a specific role—such as facts, emotions, or creativity—teams can systematically analyze challenges from all angles. This structured approach reduces conflict and ensures that no perspective is overlooked. The White Hat gathers data, the Black Hat identifies risks, and the Green Hat generates innovative solutions. This method not only enhances clarity but also accelerates decision-making processes. Organizations worldwide have adopted this approach to tackle complex issues efficiently, making it a cornerstone of modern problem-solving strategies.

Improving Decision Making with the Hats

The Six Thinking Hats method significantly enhances decision-making by encouraging a balanced approach. Each hat represents a distinct perspective, ensuring that decisions are well-rounded and thoughtful. The White Hat provides factual clarity, while the Red Hat allows for emotional input. The Black Hat highlights risks, and the Yellow Hat focuses on benefits. This structured process reduces bias and fosters collaboration. By systematically considering each angle, individuals and teams can make more informed choices. This method is widely praised for its ability to streamline decision-making, making it a valuable tool in both personal and professional contexts.

Enhancing Team Productivity and Happiness

The Six Thinking Hats method fosters a collaborative environment, enhancing team productivity and overall satisfaction. By assigning specific roles, it reduces conflict and ensures all perspectives are heard. The structured approach encourages active participation, making team members feel valued. The Green Hat, for instance, promotes creativity, while the Blue Hat organizes thoughts, keeping discussions focused. This method not only streamlines decision-making but also boosts morale, as team members experience a sense of contribution. Organizations using this technique report increased efficiency and a more positive workplace culture, leading to happier and more engaged teams.

Case Studies and Examples

Renowned organizations across industries, from technology to healthcare, have successfully applied the Six Thinking Hats method, achieving improved decision-making and increased efficiency in complex problem-solving scenarios.

Success Stories from Various Industries

Global corporations, healthcare providers, and educational institutions have embraced the Six Thinking Hats method, leveraging its structured approach to enhance collaboration and innovation. For instance, a leading tech firm used the White Hat to streamline data analysis, while a healthcare organization applied the Green Hat to develop patient-centric solutions. These success stories highlight how diverse industries benefit from de Bono’s approach, achieving measurable improvements in efficiency and creativity. By adopting this method, organizations worldwide continue to unlock new potentials in problem-solving and strategic planning.

How Organizations Have Benefited

Organizations worldwide have seen remarkable improvements by implementing the Six Thinking Hats method. Enhanced decision-making, improved problem-solving, and increased productivity are common outcomes. Teams report better collaboration, reduced conflict, and a more structured approach to brainstorming. The method fosters a culture of creativity and efficiency, allowing businesses to address challenges more effectively. By adopting this approach, companies have achieved measurable gains in innovation and operational performance, making it a valuable tool for driving success in today’s competitive landscape.

Where to Find the “Six Thinking Hats” PDF

The “Six Thinking Hats” PDF is available on Edward de Bono’s official website and reliable platforms like De Bono Consulting, offering features like enhanced readability and secure access.

Official Sources and Reliable Platforms

Edward de Bono’s official website, www.edwdebono.com, offers the “Six Thinking Hats” PDF, ensuring authenticity and quality. Additionally, platforms like De Bono Consulting provide secure access to the digital edition, featuring enhanced readability and interactive elements. These sources guarantee that readers obtain the book in its intended format, preserving the author’s original intent and structure. For a seamless experience, official platforms are recommended to avoid unauthorized versions and ensure optimal content delivery.

Features of the Digital Edition

The digital edition of “Six Thinking Hats” by Edward de Bono offers enhanced readability, with interactive features that facilitate easy navigation. The PDF version includes bookmarks, a table of contents, and searchable text, making it convenient for readers to access specific sections quickly; High-quality formatting ensures that the content is presented clearly, preserving the author’s intent. Additionally, the digital format allows for highlighting and note-taking, enabling readers to engage deeply with the material. This edition is optimized for various devices, providing a seamless reading experience across tablets, smartphones, and computers.

Edward de Bono’s “Six Thinking Hats” revolutionizes thinking by offering a structured approach to problem-solving. Its methods enhance decision-making and creativity, making it a timeless resource for all.

Edward de Bono’s “Six Thinking Hats” introduces a groundbreaking framework for structured thinking, emphasizing parallel thinking to enhance decision-making and problem-solving. The six hats—White, Red, Black, Yellow, Green, and Blue—represent distinct thinking modes, fostering creativity, objectivity, and collaboration. By separating emotions from facts and encouraging diverse perspectives, the method reduces conflict and improves efficiency. Widely adopted in business, education, and leadership, it empowers individuals and teams to approach challenges systematically. The book remains a seminal resource for anyone seeking to enhance their cognitive abilities and organizational effectiveness, offering practical tools for modern thinkers.

Final Thoughts on the Book’s Value

Edward de Bono’s “Six Thinking Hats” stands as a timeless guide to enhancing cognitive processes, offering a practical yet profound framework for modern thinkers. Its unique approach to parallel thinking has empowered individuals and organizations worldwide, fostering creativity and efficiency in decision-making. By structuring discussions and encouraging diverse perspectives, the method bridges emotional and logical reasoning, making it invaluable across industries. The book’s simplicity and depth ensure its relevance, providing readers with actionable strategies to navigate complexities and drive innovation. It remains a must-read for anyone striving to optimize their thinking and leadership abilities in an ever-evolving world.

PDF

the warrior’s prayer david jeremiah pdf

Dr. David Jeremiah’s “Warrior’s Prayer” is a powerful, poetic prayer inspired by Ephesians 6, helping believers prepare for spiritual battles with faith and trust in God’s guidance and protection.

Overview of the Prayer and Its Significance

Dr. David Jeremiah’s “Warrior’s Prayer” is a deeply inspiring and biblically rooted prayer designed to equip believers for spiritual warfare. Based on Ephesians 6, it emphasizes putting on the full armor of God to stand firm against Satan’s schemes. The prayer is structured to guide individuals through each piece of spiritual armor, from the belt of truth to the sword of the Spirit, ensuring a comprehensive preparation for daily battles. Its significance lies in its ability to empower Christians to trust in God’s protection and live victoriously. This prayer not only serves as a tool for personal devotion but also as a resource for intercessors and prayer warriors seeking to align their lives with God’s will. By focusing on faith, truth, and righteousness, it provides a powerful framework for spiritual growth and resilience in a world filled with challenges and temptations.

The Spiritual Armor of God: A Biblical Foundation

The Spiritual Armor of God, rooted in Ephesians 6, equips believers to stand firm against spiritual forces, offering protection and empowerment through faith and trust in God.

The Belt of Truth: Standing Firm Against Satan’s Lies

The Belt of Truth, as highlighted in Dr. David Jeremiah’s “Warrior’s Prayer,” symbolizes the foundational strength of God’s Word. It enables believers to stand firm against Satan’s deceptive lies by embracing the unchanging truths of Scripture. This spiritual armor ensures that Christians are not swayed by false narratives or misled by the enemy’s cunning tactics. By girding oneself with truth, one is empowered to discern right from wrong and remain steadfast in their faith. The prayer emphasizes the importance of anchoring one’s beliefs in the reliability of God’s Word, thereby securing a solid defense against spiritual deception and doubt.

The Breastplate of Righteousness: Guarding the Heart

The Breastplate of Righteousness, as emphasized in Dr. David Jeremiah’s “Warrior’s Prayer,” serves as a divine shield protecting the heart from spiritual attacks and moral compromise. It symbolizes the righteousness imparted to believers through faith in Christ, enabling them to live with integrity and purity. By wearing this breastplate, Christians are guarded against the corrupting influences of sin and the pressures of a fallen world. The prayer underscores the importance of securing the heart, ensuring it remains aligned with God’s will and desires. This spiritual armor not only safeguards the believer’s inner being but also empowers them to reflect God’s holiness in their daily lives. Through the Breastplate of Righteousness, believers are equipped to face spiritual battles with confidence, knowing their hearts are protected and their consciences are clear.

The Shoes of Peace: Walking in the Gospel of Jesus Christ

In Dr. David Jeremiah’s “Warrior’s Prayer,” the Shoes of Peace symbolize a steadfast walk in the Gospel of Jesus Christ, enabling believers to stand firm in their faith and share God’s peace with others. These shoes represent the foundation of the Good News, which brings stability and assurance to the believer’s spiritual journey. By wearing them, Christians are equipped to navigate life’s challenges with calmness and confidence, reflecting the peace of Christ in every step. The prayer emphasizes the importance of being rooted in the Gospel, which serves as the solid ground for spiritual warfare. Through the Shoes of Peace, believers are reminded to trust in God’s sovereignty and to spread His message of reconciliation and hope. This armor piece is essential for maintaining spiritual balance and advancing the Kingdom of God with unwavering trust in His promises.

The Shield of Faith: Trusting in God’s Protection

In “The Warrior’s Prayer” by Dr. David Jeremiah, the Shield of Faith is highlighted as a crucial piece of spiritual armor, enabling believers to trust in God’s divine protection. According to the prayer, this shield acts as a defensive weapon against Satan’s attacks, quenching the fiery darts of doubt and unbelief. By lifting their faith, believers can trust in God’s sovereignty and His promise to safeguard them in every spiritual battle. The shield is not just a passive defense but an active declaration of reliance on God’s power and promises. Jeremiah emphasizes that faith is both a gift from God and a choice to trust Him, even when circumstances seem overwhelming. This shield equips warriors of God to stand firm, knowing they are protected by His unshakable truth and love. Through the Shield of Faith, believers are reminded that their trust in God is their strongest defense against evil.

The Helmet of Salvation: Securing Spiritual Victory

In “The Warrior’s Prayer” by Dr. David Jeremiah, the Helmet of Salvation is emphasized as a vital piece of spiritual armor, ensuring believers’ minds are protected and their thoughts aligned with God’s truth. This helmet represents the assurance of salvation, guarding against doubts and fears that Satan may use to undermine faith. Jeremiah’s prayer encourages believers to secure their minds with the knowledge of their eternal salvation, allowing them to walk in confidence and clarity. By wearing this helmet, Christians are empowered to trust in God’s plan and purpose, knowing their ultimate victory is secure through Jesus Christ. The Helmet of Salvation serves as a constant reminder of God’s grace and the eternal hope that believers have in Him, enabling them to face spiritual battles with unwavering courage and assurance. It is a symbol of spiritual victory already won through Christ.

The Sword of the Spirit: The Power of God’s Word

In “The Warrior’s Prayer” by Dr. David Jeremiah, the Sword of the Spirit is highlighted as the powerful Word of God, equipping believers for spiritual battle. According to Ephesians 6:17, it is the only offensive weapon in the armor of God, enabling Christians to combat Satan’s lies and deceit. Jeremiah’s prayer emphasizes the importance of wielding the Sword of the Spirit with precision, relying on Scripture to guide and strengthen faith. This weapon is not just for defense but also for advancing God’s kingdom, as it sharpens discernment and illuminates truth. By praying with the Sword of the Spirit, believers can confidently confront spiritual enemies, knowing God’s Word is their ultimate authority and strength. Jeremiah encourages daily reliance on Scripture, ensuring believers are prepared to live victoriously in Christ. The Sword of the Spirit is a vital tool for every prayer warrior, empowering them to trust in God’s power and promises.

Preparing for Spiritual Battle

Dr. David Jeremiah’s “Warrior’s Prayer” equips believers to don the full armor of God, preparing them to stand firm against spiritual enemies and trust in God’s power for victory.

Claiming Victory Over Satan Through Prayer

In “The Warrior’s Prayer,” Dr. David Jeremiah emphasizes the importance of prayer in claiming victory over Satan. By putting on the full armor of God, believers are equipped to stand firm against spiritual attacks. The prayer highlights the belt of truth, breastplate of righteousness, shoes of peace, shield of faith, helmet of salvation, and sword of the Spirit as essential tools for spiritual warfare. Each piece of armor represents a vital aspect of trusting God and resisting Satan’s lies. Through consistent prayer, believers can confidently assert their victory in Christ, knowing that God’s power surpasses any earthly or spiritual enemy. Jeremiah’s prayer encourages a daily commitment to spiritual preparation, ensuring believers are ready to face life’s challenges with faith and trust in God’s protection and guidance.

Seeking Protection from Temptation and Evil

Dr. David Jeremiah’s “Warrior’s Prayer” underscores the importance of seeking divine protection from temptation and evil. By putting on the armor of God, believers are equipped to resist Satan’s schemes and remain steadfast in their faith. The prayer emphasizes the breastplate of righteousness, which guards the heart from evil influences, and the shield of faith, which deflects spiritual attacks. Jeremiah encourages believers to stand firm in the truth of God’s Word and trust in His sovereignty. Through prayer, Christians can seek refuge under God’s protection, ensuring they remain pure and holy, shielded by the blood of Jesus Christ. This spiritual armor empowers believers to walk in peace and live victoriously, trusting in God’s strength to overcome all forms of temptation and evil;

The Power of Consistent Prayer

Consistent prayer strengthens faith and deepens connection with God, empowering believers to face spiritual battles with confidence and trust in His divine protection and guidance.

Cultivating a Habit of Prayer for Spiritual Strength

Cultivating a habit of prayer is essential for building spiritual strength and trust in God. Dr. David Jeremiah emphasizes that consistent prayer helps believers tune in to God’s presence, deepening their faith and equipping them for daily spiritual battles. By praying regularly, individuals can develop a stronger connection with God, allowing them to stand firm against temptation and evil. The Warrior’s Prayer serves as a powerful tool, guiding believers to pray specifically for each piece of spiritual armor mentioned in Ephesians 6. This habit not only strengthens one’s spiritual foundation but also fosters a mindset of reliance on God’s protection and guidance. Through consistent prayer, believers can confidently face life’s challenges, knowing they are equipped with the full armor of God and supported by His divine power.

Dr. David Jeremiah’s “Warrior’s Prayer” serves as a powerful tool to equip believers for their spiritual journey. By focusing on the armor of God, this prayer inspires believers to trust in God’s protection and guidance. It encourages a daily commitment to prayer, fostering spiritual strength and resilience. The prayer reminds us that our battle is not against flesh and blood but against spiritual forces, and with God’s armor, we can face every challenge with confidence. Ultimately, “The Warrior’s Prayer” empowers believers to live victoriously, secure in the knowledge that God is their refuge and strength. It invites believers to embrace a life of prayer, faith, and trust, ensuring they are fully equipped to walk in the power and grace of Jesus Christ.

open goaaal large instructions pdf

Open Goaaal is an innovative, 3-in-1 soccer training system combining a goal, rebounder, and backstop. Designed for efficiency, it offers a fun and effective way to improve skills at any level.

Overview of Open Goaaal and Its Purpose

Open Goaaal is a versatile, multi-functional training system designed for soccer players of all skill levels. Its primary purpose is to provide an efficient and engaging way to improve shooting, passing, and ball control skills. The system combines the features of a goal, rebounder, and backstop, making it ideal for solo or team training sessions. Open Goaaal is constructed with durability and portability in mind, allowing it to be used in various settings, from backyard practice to professional training facilities. Its innovative design enables quick setup and easy storage, making it a practical choice for players and coaches seeking to maximize training time and effectiveness. Open Goaaal is perfect for anyone looking to elevate their soccer skills in a fun and challenging way.

Key Features of the Open Goaaal Large

The Open Goaaal Large stands out with its robust construction and user-friendly design. It features a spacious goal area, ideal for high-intensity training sessions. The rebounder function allows for continuous play, enhancing practice efficiency. Its adjustable design accommodates various skill levels, making it suitable for both beginners and advanced players. The system is lightweight yet durable, ensuring easy transport and setup. Safety features include rounded edges and a stable frame to prevent accidents. Open Goaaal Large is perfect for backyard training, team drills, or individual skill development, offering a comprehensive tool for soccer enthusiasts to improve their game. Its versatility and functionality make it a top choice for effective training sessions.

Installation Instructions

Follow the official Open Goaaal manual for a smooth setup. Gather tools, prepare the area, and assemble step-by-step. Ensure all parts are securely fastened and safety checks are performed.

Preparation and Tools Required

To ensure a smooth assembly of your Open Goaaal Large, gather essential tools: screwdrivers, wrenches, and a measuring tape. Prepare a flat, stable surface, preferably grass or dirt, avoiding concrete or gravel. Clear the area of obstacles to prevent accidents. Wear safety gloves and goggles for protection. Adult supervision is recommended, especially when involving children. Familiarize yourself with the official manual and assembly video for visual guidance. Organize all components and hardware before starting. Double-check the packaging for any missing parts. Ensure proper alignment and tightening of bolts to maintain structural integrity. Follow safety precautions, as small parts may pose a choking hazard for young children. Start with the frame, then proceed to the net and rebounder system.

Step-by-Step Assembly Guide

Begin by assembling the frame using the provided bolts and wrench. Attach the upright posts to the base, ensuring they are evenly spaced and secure. Next, connect the crossbar and side rails, tightening all connections firmly. Once the frame is stable, attach the netting and rebounder system, making sure they are tightly secured. Follow the manual’s visual guides for proper alignment. Use the screwdriver for smaller connections and the wrench for larger bolts. Double-check each step to avoid misalignment. After assembling, test the rebounder’s tension and ensure the net is properly attached. Refer to the official video for additional clarity, but always follow the manual’s instructions for accuracy. Complete the process in about 30 minutes with careful attention to detail.

Final Checks and Safety Precautions

After assembly, inspect all connections to ensure they are tight and secure. Check the net for proper tension and the frame for stability. Ensure no loose parts remain. Conduct a final safety check by gently shaking the goal to verify its sturdiness. Place the goal on a flat, even surface, preferably grass or dirt, avoiding concrete or gravel. Always supervise children during use and ensure they are over three years old. Store the goal in a dry place when not in use to prevent rust and damage. Regularly inspect for wear and tear, replacing any damaged parts immediately. Follow all safety guidelines to maximize the product’s lifespan and user safety. Proper maintenance ensures optimal performance and longevity of the Open Goaaal system.

Using Open Goaaal for Training

Open Goaaal is an innovative, versatile training tool designed to enhance soccer skills. Its efficient design allows for focused practice, improving shooting accuracy, dribbling, and reflexes for players of all ages and skill levels.

Setting Up the Goal for Different Skill Levels

Open Goaaal is designed to accommodate players of all skill levels, from beginners to advanced athletes. For younger or less experienced players, the goal can be set up at a lower height to make shooting and dribbling drills more accessible. The adjustable frame allows for varying angles, enabling coaches to create challenging scenarios for skilled players. The net tension can also be modified to suit different training needs, ensuring accuracy and precision. Additionally, the rebounder feature can be angled differently to focus on specific techniques like volleys or ground passes. These customizable settings make Open Goaaal an ideal tool for structured, skill-level-appropriate training sessions.

Maximizing Training Efficiency with Open Goaaal

Open Goaaal is engineered to enhance training efficiency by providing a versatile and dynamic setup. Its combination of a goal, rebounder, and backstop allows for continuous drills without the need for frequent ball retrieval, saving time and increasing productivity. Coaches can design drills that target multiple skills simultaneously, such as shooting accuracy and ball control. The rebounder feature returns the ball at varying angles, simulating game-like scenarios and improving reaction times. With its durable construction and easy portability, Open Goaaal enables seamless transitions between different training stations, making it an indispensable tool for both individual and team practices.

Maintenance and Care

Regularly inspect and clean the frame and net. Store in a dry, secure location during off-seasons. Check for wear and tear, and refer to the manual for detailed care instructions.

Regular Maintenance Tips

Regular maintenance ensures Open Goaaal’s durability and performance. Inspect the frame and net for damage or wear. Clean the goal with mild soap and water to prevent rust. Tighten any loose bolts or screws periodically. Check the net ties and replace them if frayed. Store the goal in a dry place during off-seasons to avoid moisture damage. Always follow the manufacturer’s instructions for cleaning and storage. Avoid using harsh chemicals or abrasive materials that could damage the equipment. Regular checks and timely repairs will extend the lifespan of your Open Goaaal and ensure safe, effective training sessions.

Storage and Transportation Guidelines

Proper storage and transportation are crucial for maintaining Open Goaaal’s condition. Store the disassembled goal in a dry, cool place to prevent moisture damage. Use the provided carrying bag to protect parts during transport. Avoid stacking heavy items on the goal. When moving, ensure all components are securely packed to prevent scratching or bending. Always follow the manufacturer’s guidelines for disassembly and storage. Regularly inspect the equipment before and after transport for any damage. Proper handling ensures Open Goaaal remains in excellent condition for years of effective training and fun.

Troubleshooting Common Issues

Consult the Open Goaaal manual for resolving assembly or structural issues. Ensure all parts are securely fitted, and address wear promptly to maintain stability and safety.

Identifying and Solving Assembly Problems

Assembly issues with Open Goaaal can often be resolved by carefully reviewing the manual or video guide. Common problems include misaligned frame sections or missing connectors. Ensure all bolts are tightened securely and parts are correctly matched. If a section doesn’t fit, double-check the instructions or consult the official assembly video. For stubborn connections, gently tap with a rubber mallet to avoid damage. If issues persist, contact customer support for assistance. Regularly inspect for loose parts and tighten as needed to maintain stability. Proper assembly is crucial for safety and performance, so take time to ensure everything is secure before use.

Addressing Wear and Tear

To maintain your Open Goaaal Large, inspect the net and frame regularly for signs of wear; Tighten loose bolts and replace worn-out netting to ensure safety and performance. Lubricate moving parts to prevent rust and friction. Store the goal in a dry, shaded area when not in use to avoid sun damage. For minor tears, use the provided repair kit or contact customer support for replacements. Avoid leaving the goal exposed to harsh weather conditions to prolong its lifespan. Proper care ensures your Open Goaaal remains durable and functional for years of training and fun.

Open Goaaal Large is a versatile, efficient training tool that enhances soccer skills through innovative design. With proper care, it remains a valuable asset for players of all levels.

Final Thoughts on Open Goaaal Efficiency

Open Goaaal stands out as a highly efficient training tool, offering a unique 3-in-1 design that combines a goal, rebounder, and backstop. Its versatility allows for dynamic drills, saving time and space while maximizing skill development. The product’s durability and ease of assembly make it a practical choice for players of all levels. By focusing on precision and control, Open Goaaal helps users achieve faster progress in their training. Its innovative design ensures fun and challenging sessions, making it an excellent investment for anyone looking to improve their soccer skills. With proper care, Open Goaaal remains a reliable and efficient training companion for years to come.

Encouragement for Continuous Use

Consistent use of Open Goaaal is key to unlocking its full potential. By incorporating it into your regular training routine, you’ll notice steady improvement in your skills and confidence. The product’s versatility ensures that every session remains engaging and challenging, making practice enjoyable for players of all ages and skill levels. Open Goaaal’s durability supports long-term use, allowing you to focus on your goals without interruptions. Embrace the convenience and efficiency it offers to maximize your training outcomes. Keep using Open Goaaal regularly and watch your passion for the game grow alongside your abilities. Continuous practice with this innovative tool will undoubtedly lead to remarkable progress in your soccer journey.

PDF

watercolour pdf

Watercolour painting is a timeless art form offering unique transparency and fluidity․ Popular resources like downloadable PDF guides and tutorials make learning accessible for artists of all levels․

What is Watercolour Painting?

Watercolour painting is a versatile and expressive art form characterized by its transparency and fluidity․ It involves using water-soluble pigments applied to paper or other absorbent surfaces․ Unlike oil or acrylic painting, watercolour relies on the white of the paper to create highlights, giving it a unique luminosity․ The medium is known for its delicate washes and blending capabilities, making it ideal for capturing subtle shifts in colour and light․ With its portability and simplicity, watercolour painting is accessible to artists of all skill levels, from beginners to professionals․ Its timeless appeal continues to inspire creativity across generations․

A Brief History of Watercolour Art

Watercolour painting traces its origins to ancient civilizations, where water-based paints were used for decorative and ritualistic purposes․ In China, watercolour techniques date back to the Han Dynasty, while in Egypt, similar methods were used in tomb paintings․ During the Middle Ages, watercolour was primarily used for illuminated manuscripts․ The Renaissance period saw a revival, with artists experimenting with watercolour for sketches and studies․ By the 18th century, watercolour became a recognized medium in European art, particularly in landscape and botanical works․ The 19th century’s Romantic movement further popularized it, with artists like J․M․W․ Turner mastering its expressive qualities․ Today, watercolour remains a beloved and versatile art form, celebrated for its transparency and fluidity․

Essential Materials for Watercolour Painting

Watercolour paints, high-quality brushes, and sturdy paper are fundamental․ Additional tools like palettes, water containers, and tissues enhance the creative process, ensuring optimal results in your artwork․

Watercolour Paints and Brushes

Watercolour paints come in pans or tubes, with light-fast pigments ensuring durability․ Brushes are essential tools, available in natural or synthetic fibers, varying in size and shape for different effects․ Rounds, flats, and mops are popular choices, each suited for specific techniques like detail work or broad washes․ Synthetic brushes offer durability, while natural hair holds more water, blending colours smoothly․ Investing in quality brushes enhances control and precision․ Additionally, watercolour pencils provide detail and texture, complementing traditional paints․ Proper care, including cleaning and storing, extends the lifespan of these integral materials, ensuring optimal performance in your artistic journey․

Watercolour Paper and Surfaces

Watercolour paper is a cornerstone of the medium, available in various weights, textures, and sizes․ High-quality paper, typically 300gsm or heavier, resists buckling and ensures durability․ Surfaces range from smooth hot-press to textured cold-press and rough, each offering unique effects․ Sizing, a treatment that reduces water absorption, is crucial for maintaining pigment vibrancy․ Alternative surfaces like watercolour boards and canvases provide versatility for mixed-media projects․ Properly prepared paper or board enhances the painting experience, allowing techniques like wet-on-wet to flourish․ Choosing the right surface is essential for achieving desired results in watercolour art, as it directly impacts paint behavior and final appearance․

Basic Watercolour Techniques

Mastering wet-on-wet and wet-on-dry methods is essential․ These techniques allow for smooth blending and layering of colours, creating dynamic, transparent effects․ Practice exercises like brush control and washes to build confidence and skill in this versatile medium․

Wet-on-Wet and Wet-on-Dry Methods

Wet-on-wet and wet-on-dry are foundational techniques in watercolour painting․ Wet-on-wet involves applying wet paint to wet paper, allowing colours to blend softly and merge naturally․ This method creates smooth transitions and subtle shifts in tone, ideal for skies, backgrounds, and organic shapes․ Wet-on-dry, by contrast, involves applying wet paint to dry paper, offering more control and crisp edges․ Both techniques require careful timing and brushwork․ Practicing these methods helps artists achieve desired effects, from delicate washes to bold details․ Mastering these approaches builds confidence and versatility in watercolour art, enabling the creation of dynamic, layered compositions with precision and flair․

Layering and Blending Colors

Layering and blending colors are essential for achieving depth and vibrancy in watercolour painting․ Start with light washes, gradually building up layers to create rich, nuanced hues․ Glazing, a technique involving multiple thin layers, enhances color saturation and luminosity․ Natural blending occurs when wet paint meets wet paper, producing soft, seamless transitions․ To maintain clarity, allow each layer to dry before adding more․ This prevents muddying and ensures crisp, defined edges․ Practice lifting and scrubbing to refine layers and achieve desired effects․ Mastering layering and blending unlocks the ability to craft intricate, balanced compositions with striking visual impact․

Advanced Watercolour Techniques

Exploring mixed media, texture, and dimension elevates watercolour art․ Combine gouache, ink, or collage for dynamic effects, while experimenting with scraping and lifting to add complexity and depth․

Mixing Media: Watercolour with Gouache, Ink, and Collage

Combining watercolour with gouache, ink, or collage expands creative possibilities․ Gouache adds opacity for bold details, while ink creates crisp, expressive lines․ Collage introduces texture and dimension, allowing artists to layer paper, fabric, or found materials․ These mixed-media techniques enhance watercolour’s transparency and fluidity, offering unique visual effects․ Experimenting with these mediums encourages innovation and adds depth to compositions․ Artists can incorporate handwritten text, intricate patterns, or dimensional elements to create dynamic, multi-layered artworks․ This approach bridges traditional watercolour methods with contemporary experimentation, inspiring artists to push boundaries and explore new artistic expressions․

Creating Texture and Dimension

Adding texture and dimension to watercolour paintings enhances visual interest and depth․ Techniques like salt sprinkling or wet-on-wet applications create organic textures․ Gouache or collage elements add dimension, while scratching or lifting paint reveals underlying layers․ Incorporating materials like paper scraps or fabric introduces tactile elements․ These methods allow artists to experiment beyond traditional watercolour transparency, creating dynamic, layered compositions․ From botanical details to abstract expressions, texture and dimension expand the medium’s possibilities, encouraging artists to explore new ways to engage viewers and tell stories through their work․

Watercolour Tutorials for Beginners

Beginners can explore step-by-step lessons for simple motifs and florals, with exercises for brush control and washes, all available in downloadable PDF guides․

Step-by-Step Lessons for Simple Motifs and Florals

Discover step-by-step lessons for painting simple motifs and florals in watercolour․ These guides, often available as downloadable PDF tutorials, are perfect for beginners․ Learn basic techniques like brush control, washes, and color mixing․ Start with simple exercises to create elegant lettering and embellishments․ Practice painting realistic leaves, flowers, and foliage using modern, practical approaches․ Many resources, such as “Creative Watercolor” by Ana Victoria Calderon, offer detailed instructions for creating stunning botanical designs․ These lessons are designed to help you build confidence and skill, making watercolour painting accessible and enjoyable․ Explore these guides to master the fundamentals and unlock your creativity․

Practice Exercises for Brush Control and Washes

Mastering brush control and washes is essential in watercolour painting․ Practice exercises like thinning paints and layering washes help achieve smooth transitions․ Downloadable PDF guides, such as “The Watercolour Artists Handbook” and “Creative Watercolor Techniques,” offer detailed drills․ These resources provide step-by-step instructions for creating uniform washes and precise brushstrokes․ Start with simple exercises to build confidence, then progress to more complex techniques․ Regular practice will enhance your ability to control pigment flow and texture․ These fundamental skills are crucial for producing vibrant, professional-quality watercolour artwork․ Explore these exercises to refine your craft and elevate your watercolour painting skills․

Watercolour Painting Projects and Inspiration

Explore inspiring watercolour projects, from landscapes to botanicals, with downloadable PDF guides offering seasonal themes and creative ideas to spark your artistic journey․

Painting Landscapes, Botanicals, and Portraits

Discover the art of capturing nature and human expression through watercolour․ Detailed PDF guides offer step-by-step tutorials for painting landscapes, botanicals, and portraits․ Learn techniques for rendering skies, trees, and flowers with precision, as well as capturing the subtleties of human features․ Seasonal themes and creative ideas inspire artists to explore diverse subjects․ From the delicate petals of botanicals to the depth of portraits, these resources provide a comprehensive approach to mastering watercolour․ With downloadable guides, artists can practice and refine their skills, bringing their visions to life with vibrant colours and textures․

Seasonal and Themed Watercolour Projects

Explore creative watercolour projects tailored to seasons and themes․ Autumn leaves, winter snowflakes, and spring blooms inspire vibrant artworks․ Themed projects like botanical tutorials and festive compositions offer unique challenges․ Downloadable PDF guides provide step-by-step instructions for capturing seasonal beauty․ From painting pumpkins and barns to delicate florals, these projects enhance artistic expression․ Seasonal themes encourage experimentation with colours and techniques, while themed projects foster creativity and storytelling․ Whether celebrating holidays or nature’s cycles, these watercolour ideas inspire artists to embrace diversity and originality in their work, making each piece a reflection of time and imagination․

Watercolour Painting Resources

Discover downloadable PDF guides, tutorials, and eBooks offering step-by-step instructions․ These resources cover techniques, materials, and projects, catering to all skill levels and artistic interests․

Downloadable PDF Guides and Tutorials

Enhance your watercolour journey with downloadable PDF guides and tutorials․ These resources offer detailed step-by-step instructions, covering essential techniques, colour theory, and project ideas․ From painting peonies to fall landscapes, PDF tutorials provide structured learning․ Many guides include printable worksheets, sketches, and finished examples, perfect for practice․ Advanced topics like mixed media and texture are also explored․ These digital tools cater to all skill levels, ensuring a comprehensive learning experience; Whether you’re a beginner or an experienced artist, PDF resources are invaluable for mastering watercolour painting techniques and staying inspired with new creative challenges․

Recommended eBooks and Workbooks

Discover a wide range of eBooks and workbooks tailored for watercolour enthusiasts․ These digital resources offer in-depth lessons, practical exercises, and inspiring projects․ From mastering basic techniques to exploring advanced methods, these guides provide structured learning․ Many eBooks include step-by-step tutorials, colour theory insights, and tips for creating stunning watercolour art․ Whether you’re a beginner or an experienced artist, these workbooks are designed to enhance your skills․ Popular titles cover topics like botanical painting, landscapes, and mixed media integration․ Download these resources to gain expert guidance and unlock new creative possibilities in watercolour painting․

Mastering watercolour painting requires patience and practice․ With downloadable guides and tutorials, artists can explore techniques and materials effectively, fostering creativity and skill development․

Watercolour painting relies on essential materials like high-quality paints, brushes, and paper․ Techniques such as wet-on-wet and wet-on-dry methods, along with layering and blending, are fundamental․ Advanced approaches include mixing media like gouache or ink for added texture and dimension․ Downloadable PDF guides and tutorials provide step-by-step lessons for mastering these skills, from basic brush control to intricate botanical designs․ Practicing with exercises and exploring seasonal themes can enhance creativity․ Quality materials and consistent practice are key to achieving vibrant, professional results in watercolour art․

Encouragement to Practice and Explore

Embrace watercolour painting as a journey of discovery and creativity․ Regular practice builds confidence and skill, allowing you to experiment with techniques and themes․ Explore diverse genres, from landscapes to portraits, and incorporate seasonal motifs for fresh inspiration․ Take advantage of free downloadable PDF guides and tutorials to refine your craft․ Remember, every brushstroke is a learning opportunity․ Celebrate the unique qualities of watercolour and enjoy the process of creating something beautiful and personal․ Keep exploring, and let your passion for watercolour painting grow with each new masterpiece․