Archive: March 31, 2026

t855ish manual

Pro1 T855iSH Thermostat: A Comprehensive Manual Overview (as of 03/31/2026)

This overview details the Pro1 T855iSH thermostat, encompassing installation, operation, and Wi-Fi integration.
Available documentation includes user guides, installation manuals, quick start guides, and submittal sheets.
Access resources at pro1iaq.com/wifi for comprehensive support and troubleshooting assistance.

Welcome to the Pro1 T855iSH Programmable Thermostat! This advanced thermostat is designed for optimal comfort and energy efficiency in your home. It’s compatible with a wide range of heating and cooling systems, including gas, electric, or oil furnaces, as well as heat pumps with or without auxiliary heat.

The T855iSH boasts a clear, digital LCD display with a height of 2.5 inches, providing easy-to-read temperature and system information. Its programmable features allow for customized scheduling to suit your lifestyle, potentially reducing energy consumption and lowering utility bills.

This thermostat also offers convenient Wi-Fi connectivity, enabling remote control and monitoring via a dedicated mobile app. The current app version information is readily available within the app itself, and customer support may request this information for assistance. Professional installation is recommended to ensure proper setup and functionality. Explore pro1iaq.com/wifi for additional self-help resources and support.

Thermostat Overview & Key Features

The Pro1 T855iSH is a multi-stage programmable Wi-Fi thermostat offering a comprehensive suite of features for enhanced home climate control. Key features include compatibility with up to 5H/3C systems, allowing for precise temperature management across various heating and cooling stages. The intuitive digital interface, featuring a 2.5-inch display, provides clear visibility of settings and system status.

Beyond basic temperature control, the T855iSH supports remote sensor operation for whole-house comfort balancing. Programmable scheduling allows for customized temperature settings throughout the day, optimizing energy usage. Temporary and permanent hold features provide flexibility for overriding schedules as needed.

Wi-Fi connectivity enables remote access and control via the Pro1 app, with regular updates to ensure optimal performance. The thermostat also supports humidity level settings, contributing to overall indoor air quality. Detailed documentation, including user guides and installation manuals, are available at pro1iaq.com/wifi.

Available Manuals & Documentation

A comprehensive collection of resources is readily available to support the installation, operation, and troubleshooting of the Pro1 T855iSH thermostat. Users can access the T855iSH Installation Manual for detailed guidance on wiring and setup procedures, ensuring a correct and efficient installation process. The T855iSH Operation Manual provides a thorough explanation of all thermostat functions and settings.

For quick reference, the T855iSH Quick Start Guide offers a streamlined overview of essential features and basic operation. Additionally, the T855iSH Submittal Sheet provides a concise summary of the thermostat’s specifications and capabilities. All these documents, along with other helpful resources, are conveniently located on the Pro1 website at pro1iaq.com/wifi.

These materials are designed to empower both professional installers and end-users with the knowledge needed to maximize the benefits of the Pro1 T855iSH thermostat.

Installation Guide

Proper installation is crucial for optimal performance. This guide details wiring diagrams, technician setup procedures, and essential installation tips for the Pro1 T855iSH thermostat.

Installation Tips & Best Practices

Before beginning, ensure power is completely disconnected at the breaker to prevent electrical shock. Carefully review all wiring diagrams and configurations specific to your heating and cooling system – gas, electric, oil, or heat pump compatibility is key.

Properly identify all existing wiring before disconnecting the old thermostat, labeling each wire clearly. Double-check compatibility with the Pro1 T855iSH, referencing the installation manual for specific terminal assignments.

Mount the thermostat securely to the wall, ensuring it’s level for accurate temperature readings. Avoid locations exposed to direct sunlight, drafts, or excessive moisture.

When connecting wires, ensure they are firmly seated in the terminals. A loose connection can cause intermittent operation or system failure. After wiring, restore power and verify the thermostat powers on correctly.

For optimal performance, consider professional installation if you are uncomfortable with electrical work. Always consult a qualified HVAC technician for complex system configurations.

Wiring Diagrams & Configurations

The Pro1 T855iSH thermostat accommodates various system configurations, including gas, electric, oil furnaces, and heat pumps with or without auxiliary heat. Accurate wiring is crucial for proper operation. Refer to the detailed wiring diagrams in the installation manual for your specific system type.

Typical wiring includes connections for Rh, Rc, W, Y, G, and C terminals. The ‘C’ wire (common wire) is often required for consistent power. Heat pump systems may require additional wiring for reversing valve control (O/B terminal).

Technician setup procedures involve verifying voltage levels and ensuring correct wire assignments. Incorrect wiring can damage the thermostat or the HVAC system. Always double-check connections before restoring power.

Pay close attention to multi-stage compatibility. Proper configuration allows the thermostat to control multiple heating and cooling stages for enhanced comfort and efficiency. Consult the manual for specific wiring configurations for each stage.

If unsure about any wiring aspect, consult a qualified HVAC technician. Improper wiring can void the warranty and potentially create a safety hazard.

Technician Setup Procedures

Prior to powering on the Pro1 T855iSH, technicians must meticulously verify all wiring connections against the appropriate wiring diagram for the installed HVAC system. Confirm Rh and Rc jumper settings are correct based on the system configuration.

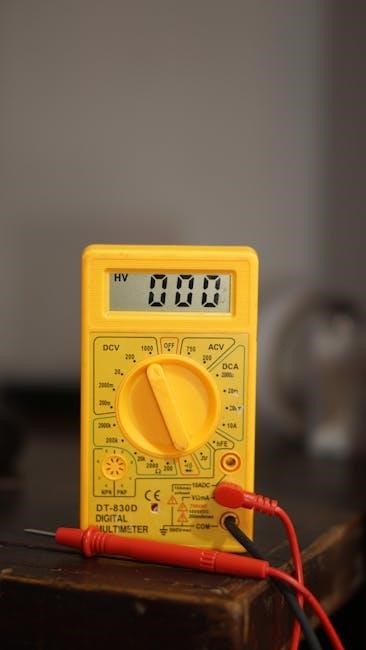
Voltage verification is critical; ensure the system voltage matches the thermostat’s specifications. Check for proper grounding and a stable common (C) wire connection. Incorrect voltage can lead to malfunction or damage.

During initial startup, observe the thermostat’s display for any error codes. These codes provide valuable diagnostic information. Refer to the troubleshooting section of the installation manual for code definitions and resolution steps.

Configure system parameters such as heating and cooling modes, fan control, and temperature limits. Utilize the thermostat’s menu options to customize settings for optimal performance.

Thoroughly test all thermostat functions – heating, cooling, fan operation, and any auxiliary features – to confirm proper operation before leaving the installation site. Document all settings for future reference.

Understanding Wiring Tips

Proper wiring is paramount for the reliable operation of the Pro1 T855iSH thermostat. Always de-energize the HVAC system at the breaker before commencing any wiring work. Carefully label all existing wires before disconnecting them from the old thermostat.

Refer to the specific wiring diagram included in the installation manual that corresponds to your HVAC system type (gas, electric, oil, or heat pump). Incorrect wiring can cause system malfunction or damage to the thermostat and HVAC equipment.

Ensure wires are securely connected to the terminal blocks, avoiding loose connections. Use appropriately sized wire connectors and ensure sufficient wire insulation. A common (C) wire is often required for consistent power;

Pay close attention to Rh and Rc wiring; a jumper may be necessary depending on your system configuration. Verify the jumper setting before powering on the thermostat. Double-check all connections before restoring power.

If unsure about any wiring aspect, consult a qualified HVAC technician. Incorrect wiring can be dangerous and void the thermostat’s warranty.

Getting to Know Your Thermostat Components

The Pro1 T855iSH thermostat features a digital LCD display with a height of 2.5 inches, providing clear visibility of settings and temperature. The interface includes intuitive buttons for adjusting temperature, mode selection (heat, cool, auto, off), and fan control (auto, on).

Key components include the temperature sensor, responsible for accurate room temperature readings, and the terminal block, where HVAC system wiring connects. The thermostat also incorporates a Wi-Fi module for remote access and control via the Pro1 app.

The unit supports multi-stage operation, accommodating gas, electric, oil furnaces, and heat pumps with or without auxiliary heat. Familiarize yourself with the location of the battery compartment for backup power during outages.

The thermostat’s housing is designed for wall mounting and includes mounting screws and anchors. Understanding these components will aid in proper installation, operation, and troubleshooting.

Refer to the detailed diagrams in the installation manual for a visual representation of each component and its function.

Operational Manual

This section details the Pro1 T855iSH’s core functions, including basic controls, humidity settings, and programming options. Explore temporary and permanent hold features for customized comfort management.

Thermostat Operation: Basic Controls

The Pro1 T855iSH thermostat offers intuitive control over your home’s climate. The primary display showcases the current room temperature, alongside setpoint temperature and operational mode indicators. Utilize the up and down arrow buttons to adjust the desired temperature, ensuring comfortable living conditions.

The ‘Mode’ button cycles through available settings: Heat, Cool, Auto, and Off. In ‘Heat’ mode, the thermostat activates the heating system when the room temperature falls below the setpoint. Conversely, ‘Cool’ mode engages the cooling system when temperatures exceed the setpoint. ‘Auto’ mode intelligently switches between heating and cooling to maintain the desired temperature. Selecting ‘Off’ disables both systems.

A dedicated ‘Fan’ button controls the fan operation. Options include ‘Auto’, where the fan runs only during heating or cooling cycles, and ‘On’, for continuous air circulation. Familiarize yourself with these basic controls to effectively manage your home’s temperature and enhance your overall comfort. Refer to the full operational manual for advanced features and troubleshooting tips.

Setting the Humidity Levels

The Pro1 T855iSH thermostat allows for humidity control, enhancing indoor comfort and air quality. While specific details regarding humidity setting aren’t explicitly detailed in readily available documentation, the thermostat’s operational capabilities suggest integration with humidification or dehumidification systems.

Typically, thermostats with humidity control display the current humidity level alongside the temperature. Adjustments are made using the thermostat’s interface, often through menu navigation. The desired humidity level is then set as a target percentage.

When the actual humidity deviates from the setpoint, the thermostat signals the connected humidification or dehumidification system to activate, maintaining the desired level. Proper humidity control prevents dryness, reduces static electricity, and contributes to a healthier indoor environment. Consult the complete operational manual or Pro1’s customer support for detailed instructions specific to humidity control on the T855iSH model.

Programming the Thermostat

The Pro1 T855iSH thermostat offers programmable scheduling for optimized comfort and energy savings. The available documentation indicates the ability to “Set Program Schedule (Two Time Periods).” This suggests a simplified programming structure, allowing users to define two distinct temperature settings per day – likely one for daytime and another for nighttime.

Programming typically involves accessing the thermostat’s menu, selecting the “Schedule” option, and then setting the desired temperature and time for each period. The thermostat will automatically adjust the temperature based on the programmed schedule. This feature eliminates the need for manual adjustments, ensuring consistent comfort while minimizing energy consumption.

For detailed step-by-step instructions on programming the T855iSH, refer to the official operational manual or visit pro1iaq.com/wifi. Understanding the scheduling options is key to maximizing the thermostat’s efficiency and tailoring it to your lifestyle;

Set Program Schedule (Two Time Periods)

To establish a program schedule with two time periods on your Pro1 T855iSH thermostat, begin by entering the programming mode via the main menu. You’ll then define a “Wake” or “Day” period, specifying the start time and desired temperature for when you are typically active. For example, set 6:00 AM to 72°F.

Next, configure the “Sleep” or “Night” period. Input the start time for when you prefer a cooler temperature, such as 10:00 PM, and set the corresponding temperature – perhaps 68°F. The thermostat will automatically transition between these two settings, providing comfort during waking hours and energy savings while you sleep.

Remember to save your settings after each adjustment. Consult the full operational manual at pro1iaq.com/wifi for visual aids and detailed instructions specific to your T855iSH model. This two-period schedule offers a basic yet effective approach to temperature management.

Temporary & Permanent Hold Feature

The Pro1 T855iSH thermostat offers both Temporary and Permanent Hold features for overriding your programmed schedule. A Temporary Hold allows you to set a desired temperature for a specified duration, after which the thermostat automatically reverts to the programmed schedule. This is ideal for short-term adjustments due to unexpected events or preferences.

Conversely, a Permanent Hold maintains your selected temperature indefinitely, completely disabling the programmed schedule until manually cancelled. This is useful when a consistent temperature is desired for an extended period, such as during a vacation or seasonal change.

To activate either hold, simply adjust the temperature to your preference and select the corresponding hold option within the thermostat’s menu. Refer to the operational manual available at pro1iaq.com/wifi for detailed step-by-step instructions and clarification on canceling a Permanent Hold.

Wi-Fi & App Integration

The Pro1 T855iSH seamlessly integrates with your home Wi-Fi network via the Pro1 app.
Check the app version for compatibility and updates, as customer support may request this information for assistance.

App Version Information & Updates

Maintaining the latest version of the Pro1 app is crucial for optimal performance and access to the newest features of your T855iSH thermostat. The app version number can be found within the app’s settings menu, typically under an “About” or “Version Information” section.

Regular updates address bug fixes, enhance security protocols, and introduce improvements to the user interface. Pro1 Technologies frequently releases updates to ensure a smooth and reliable experience. You will generally receive notifications within the app when a new version is available for download.

It’s recommended to enable automatic updates within your device’s app store settings to ensure you’re always running the most current version. Customer support representatives may request your app version number when troubleshooting issues, so having this information readily available can expedite the support process. Visit pro1iaq.com/wifi for further assistance and update details.

Connecting to Wi-Fi

Establishing a Wi-Fi connection unlocks the full potential of your Pro1 T855iSH thermostat, enabling remote control and advanced features through the Pro1 app. Begin by ensuring your home Wi-Fi network is active and you have the network name (SSID) and password readily available.

Within the Pro1 app, navigate to the device settings for your T855iSH thermostat and select the “Connect to Wi-Fi” option. The app will guide you through the process of selecting your network and entering the password. Ensure the thermostat is within range of your Wi-Fi router for a stable connection.

A successful connection is indicated by a Wi-Fi icon appearing on the thermostat’s display and within the app. If you encounter issues, verify the password, restart the thermostat and router, or consult the troubleshooting section at pro1iaq.com/wifi for detailed instructions and support resources.

Advanced Features & Specifications

The Pro1 T855iSH boasts multi-stage compatibility for various heating/cooling systems, alongside remote sensor operation for enhanced comfort and precise temperature control throughout your home.

Remote Sensor Operation

The Pro1 T855iSH thermostat offers the capability to utilize a remote sensor, significantly enhancing temperature management within your home. This feature allows for temperature readings in locations distant from the thermostat itself, addressing common issues like uneven heating or cooling. For example, a room far from the main HVAC unit, or one frequently affected by sunlight, can be accurately monitored.

To effectively employ the remote sensor, ensure it’s strategically positioned, avoiding direct sunlight, drafts, or proximity to heat-generating appliances. The thermostat then averages readings from both the internal sensor and the remote sensor, providing a more representative temperature for optimal comfort. This averaging process ensures a balanced and consistent climate throughout the designated area. Proper sensor placement is crucial for accurate readings and maximizing the benefits of this advanced feature.

Consult the full installation manual at pro1iaq.com/wifi for detailed instructions on pairing and configuring the remote sensor with your T855iSH thermostat.

Multi-Stage Compatibility (Gas, Electric, Oil, Heat Pumps)

The Pro1 T855iSH thermostat demonstrates exceptional versatility through its compatibility with a wide range of heating and cooling systems. This includes gas, electric, and oil furnaces, as well as various heat pump configurations – both with and without auxiliary heat. This broad compatibility simplifies upgrades and replacements, ensuring a seamless transition regardless of your existing HVAC setup.

Multi-stage operation allows the thermostat to modulate heating or cooling output based on demand, enhancing energy efficiency and comfort. Instead of simply turning on or off, the system can operate at different levels, providing more precise temperature control and reducing energy waste. This is particularly beneficial with heat pumps, where staging optimizes performance in varying weather conditions.

Proper wiring is essential to leverage the multi-stage capabilities. Refer to the detailed wiring diagrams in the installation manual, available at pro1iaq.com/wifi, to ensure correct connections for your specific system type. Incorrect wiring can lead to suboptimal performance or system malfunction.

Display Specifications (Height: 2.5 in)

The Pro1 T855iSH thermostat features a clear and easily readable digital LCD display, designed for optimal visibility in various lighting conditions. A key specification of this display is its height, measuring precisely 2.5 inches. This size provides ample space for presenting essential information, including the current temperature, setpoint, operating mode, and time.

The LCD technology ensures sharp contrast and wide viewing angles, allowing you to easily monitor your home’s climate from across the room. The display’s layout is intuitive and user-friendly, facilitating quick access to thermostat settings and programming options. Brightness levels are automatically adjusted for comfortable viewing, or can be manually configured.

This display is integral to the thermostat’s functionality, providing a central hub for controlling and monitoring your HVAC system. For detailed information regarding display features and troubleshooting, consult the comprehensive user manual available at pro1iaq.com/wifi.

Support & Warranty

For warranty details and assistance, visit pro1iaq.com/wifi or contact our US-based customer service team. Comprehensive online documents and resources are readily available for support.

Warranty Information Details

Pro1 Technologies extends a limited warranty on the T855iSH thermostat, safeguarding against manufacturing defects in materials and workmanship. This warranty commences from the date of original purchase, with proof of purchase essential for claim validation. The duration of the warranty coverage varies based on the specific component and nature of the defect.

Generally, the thermostat itself is covered for a period of one year. However, certain components, like the display or sensors, may have a shorter coverage period. The warranty specifically excludes damage resulting from improper installation, misuse, neglect, accidents, unauthorized modifications, or acts of nature.

To initiate a warranty claim, customers should contact Pro1 Technologies’ customer support team, providing detailed information about the issue and proof of purchase. Pro1 Technologies reserves the right to inspect the defective product and, at its discretion, repair or replace it. This warranty provides a remedy distinct from any other implied or expressed warranties.

Customer Support Resources

Pro1 Technologies provides multiple avenues for customer support regarding the T855iSH thermostat. A dedicated US-based customer service team is readily available to assist with any questions or concerns. Customers can reach support via phone during standard business hours, ensuring prompt assistance with troubleshooting, installation guidance, or warranty inquiries.

Furthermore, Pro1 maintains a comprehensive online resource center at pro1iaq.com/wifi. This digital hub hosts a wealth of self-help materials, including frequently asked questions (FAQs), detailed user guides, installation manuals, and troubleshooting tips. The website also features downloadable documents and resources, empowering users to resolve common issues independently.

For app-related support, referencing the current app version (available within the app settings) when contacting customer service is highly recommended. This ensures the support team can provide tailored assistance based on the specific app functionality. Pro1 is committed to delivering exceptional customer experiences.

Accessing Online Documents & Resources (pro1iaq.com/wifi)

Pro1’s website, pro1iaq.com/wifi, serves as a central repository for all T855iSH thermostat documentation and support materials. Users can readily download essential resources, including the complete T855iSH-Wifi Programmable Thermostat User Guide in PDF format. This guide provides detailed instructions on operation, programming, and troubleshooting.

Additionally, the website offers the T855iSH Installation Manual, crucial for professional installers or those undertaking DIY installation. A quick start guide is also available for a simplified setup process, and the T855iSH Submittal Sheet provides technical specifications for compatibility assessments.

The online resources are continuously updated to reflect the latest features and improvements. Regularly visiting pro1iaq.com/wifi ensures access to the most current information. This digital platform empowers users with self-service options, reducing reliance on direct customer support and streamlining the ownership experience.

xsy-at1 vfd manual pdf

XSY-AT1 VFD Manual PDF: A Comprehensive Guide

Embark on mastering your Xsy-At1 Inverter! This detailed PDF guide unlocks precise control, ensuring optimal performance before initial operation and beyond․

Welcome to the world of the XSY-AT1 Variable Frequency Drive (VFD)! This powerful device offers precise motor control, enhancing efficiency and performance across diverse applications․ This introduction serves as your starting point for understanding the capabilities of the XSY-AT1 and navigating its comprehensive manual․

Whether you’re a seasoned engineer or new to VFD technology, this guide will equip you with the knowledge to successfully install, configure, and operate your XSY-AT1․ The accompanying PDF manual is designed to unravel the secrets of this inverter, allowing for precise control of its functions․ Remember to carefully review all instructions before utilizing the XSY-AT1, ensuring safe and optimal operation․

What is a VFD and Why Use One?

A Variable Frequency Drive (VFD) is a system that controls the speed of an AC electric motor by varying the frequency and voltage supplied to the motor․ Unlike traditional methods, VFDs offer unparalleled precision and efficiency․ Utilizing a VFD, like the XSY-AT1, allows for optimized process control, reduced energy consumption, and extended motor lifespan․

This control is achieved through mastering the functions of the inverter, as detailed in the XSY-AT1 manual․ VFDs eliminate mechanical wear associated with speed changes, minimizing downtime and maintenance costs․ They also provide soft starting capabilities, reducing stress on the motor and connected equipment․ Understanding these benefits is key to unlocking the full potential of your XSY-AT1 system․

XSY-AT1 VFD: Key Features and Specifications

The XSY-AT1 VFD boasts a robust design focused on reliable motor control․ Key features include a wide voltage range, supporting diverse industrial applications․ It offers advanced protection functions, safeguarding against overvoltage, undervoltage, and overload conditions – details thoroughly explained in the manual․

Specifications typically encompass a power range suitable for various motor sizes, alongside precise frequency control capabilities․ The XSY-AT1 also supports multiple communication protocols for seamless integration into existing automation systems․ Refer to the XSY-AT1 inverter manual for exact specifications, including current ratings, input/output configurations, and environmental operating parameters․ Mastering these details ensures optimal performance․

Understanding the XSY-AT1 VFD Manual PDF

The XSY-AT1 VFD manual PDF is your essential companion for successful operation․ It’s structured to guide users from initial setup through advanced troubleshooting․ This document unveils the secrets of your new inverter, enabling precise control of its functions․ Before utilizing the XSY-AT1, carefully review the safety guidelines and operational procedures detailed within․

The manual’s clarity is paramount, offering step-by-step instructions and illustrative diagrams․ It’s designed for both novice and experienced technicians․ Pay close attention to the notes and warnings, as they highlight critical information for preventing damage and ensuring safe operation․ Proper understanding is key to maximizing the VFD’s potential․

Locating and Downloading the Official Manual

Accessing the official XSY-AT1 VFD manual PDF is straightforward․ Begin by visiting the manufacturer’s official website – a reliable source for the most up-to-date documentation․ Navigate to the ‘Support’ or ‘Downloads’ section, typically found in the website’s footer or main navigation menu․ Search for “XSY-AT1” or utilize the provided model number search function;

Alternatively, authorized distributors often host direct links to the manual on their product pages․ Ensure the downloaded file originates from a trusted source to avoid potentially corrupted or outdated versions․ Once located, the PDF can be downloaded and saved for offline access, providing a readily available resource whenever needed․

Manual Contents Overview: Sections and Chapters

The XSY-AT1 VFD manual PDF is meticulously structured for ease of use․ Expect comprehensive sections covering installation, wiring, parameter settings, operation, and troubleshooting․ Initial chapters detail safety precautions and unpack the VFD’s core functionalities․ Subsequent sections delve into detailed wiring diagrams, terminal connections, and step-by-step installation procedures․

A significant portion focuses on parameter configuration – both basic and advanced – tailored for specific applications․ Dedicated chapters address control methods (keypad, external signals, communication) and interpreting the VFD’s display information․ Finally, a robust troubleshooting guide, complete with error code explanations, ensures swift resolution of common issues․

Installation and Wiring of the XSY-AT1 VFD

Proper installation is crucial for reliable XSY-AT1 VFD operation․ The manual dedicates significant detail to this process, beginning with unpacking and inspection․ It emphasizes adherence to safety precautions throughout․ Detailed wiring diagrams illustrate terminal connections for power, control signals, and motor leads․ Clear instructions guide users through mounting the VFD, ensuring adequate ventilation and protection from environmental factors․

The manual stresses the importance of correct grounding and wire sizing․ It provides specific guidance on connecting external devices, such as keypads or PLCs․ Following these instructions meticulously minimizes the risk of damage and ensures optimal performance․

Safety Precautions During Installation

Prioritizing safety is paramount when installing the XSY-AT1 VFD․ The manual prominently features warnings regarding high voltages and potential electrical hazards․ Always disconnect power before making any connections․ Qualified personnel should perform the installation, adhering to local and national electrical codes․ The manual cautions against touching live components and emphasizes the need for proper grounding to prevent electric shock․

It also highlights the importance of using appropriate personal protective equipment (PPE), including safety glasses and insulated tools․ Never operate the VFD with damaged wiring or enclosures․ Careful attention to these precautions ensures a safe and successful installation process․

Wiring Diagrams and Terminal Connections

The XSY-AT1 VFD manual PDF provides comprehensive wiring diagrams illustrating various connection configurations․ Detailed schematics clearly depict terminal assignments for power input, motor output, control signals, and grounding․ Precise terminal numbering is crucial for correct installation, and the manual offers multiple diagrams catering to different motor types and control schemes․

It emphasizes verifying voltage compatibility and proper wire gauge selection․ The manual also details the function of each terminal, including descriptions of commonly used signals like start/stop, speed reference, and fault reset․ Following these diagrams meticulously prevents incorrect wiring and potential damage to the VFD or connected equipment․

Parameter Setting and Programming

The XSY-AT1 VFD manual PDF dedicates significant sections to parameter configuration․ It guides users through both basic and advanced settings, crucial for tailoring the VFD’s performance to specific applications․ The manual explains each parameter’s function, acceptable range, and impact on motor operation․ Understanding these parameters is key to optimizing efficiency and protecting the motor․

It details how to navigate the VFD’s programming interface, whether via the keypad or communication protocols․ Step-by-step instructions are provided for common tasks like setting motor voltage, frequency, and acceleration/deceleration times․ The manual stresses the importance of careful parameter adjustments to avoid instability or damage․

Basic Parameter Configuration

The XSY-AT1 VFD manual PDF begins with essential, foundational parameter settings․ These initial configurations establish core operational characteristics․ Users will learn to set fundamental motor parameters – voltage, frequency, current, and rated speed – ensuring compatibility and safe operation․ The manual emphasizes correctly inputting these values to prevent motor damage or unexpected behavior․

It guides users through setting acceleration and deceleration times, influencing the smoothness of motor starts and stops․ Basic protection parameters, like overcurrent and overload settings, are also covered, safeguarding the motor and VFD․ The manual provides clear, step-by-step instructions, making initial setup accessible even for beginners․

Advanced Parameter Settings for Specific Applications

The XSY-AT1 VFD manual PDF delves into sophisticated parameter adjustments for tailored performance․ Beyond basic configuration, users can optimize the drive for specific loads and applications․ This includes settings for vector control, slip compensation, and auto-tuning, enhancing motor efficiency and responsiveness․ The manual details how to configure PID control loops for precise process control, ideal for applications like pump and fan control․

Advanced users can modify carrier frequency, switching patterns, and braking parameters to minimize noise and optimize energy consumption․ The PDF provides detailed explanations of each parameter’s impact, enabling fine-tuning for specialized needs․ It stresses the importance of understanding the application before altering these settings․

Operation and Control of the XSY-AT1 VFD

The XSY-AT1 VFD manual PDF comprehensively explains various control methods․ Users can operate the drive via the integrated keypad, offering local control and parameter adjustments․ Furthermore, the manual details external signal control options, including analog and digital inputs, allowing integration with PLCs and other automation systems․ Communication protocols, such as Modbus, are also covered, enabling remote monitoring and control․

The PDF clarifies how to initiate start/stop commands, adjust speed references, and monitor critical parameters․ It emphasizes the importance of understanding the control circuit configuration for safe and reliable operation․ Detailed diagrams illustrate wiring connections for different control schemes․

Control Methods: Keypad, External Signals, Communication

The XSY-AT1 VFD manual PDF meticulously details three primary control methods․ The intuitive keypad provides a user-friendly interface for local operation, parameter adjustments, and fault diagnostics․ Additionally, external signal control allows seamless integration with external devices like potentiometers, switches, and PLCs via digital and analog inputs․ This enables automated process control․

Crucially, the manual extensively covers communication protocols, notably Modbus, facilitating remote monitoring and control capabilities․ Detailed wiring diagrams and parameter settings are provided for each method, ensuring proper configuration․ Understanding these options unlocks the full potential of the XSY-AT1 VFD within diverse applications․

Monitoring and Display Information

The XSY-AT1 VFD manual PDF emphasizes comprehensive monitoring capabilities․ The integrated display panel presents real-time data, including frequency, current, voltage, speed, and motor status․ Furthermore, the manual details how to access and interpret diagnostic information, crucial for identifying potential issues before they escalate․

Importantly, users can monitor key performance indicators (KPIs) to optimize efficiency and prevent downtime․ The manual explains how to configure the display to show specific parameters relevant to the application․ Detailed explanations of error codes and their corresponding troubleshooting steps are also provided, empowering users to quickly resolve problems․

Troubleshooting Common Issues

The XSY-AT1 VFD manual PDF dedicates a significant section to resolving typical operational challenges․ It systematically outlines common problems, ranging from motor overload to communication errors, and provides step-by-step solutions․ Crucially, the manual details interpreting error codes – a vital skill for efficient diagnostics․

Users will find guidance on addressing issues like tripped circuit breakers, incorrect parameter settings, and unexpected motor behavior․ The manual stresses the importance of verifying wiring connections and power supply before assuming internal faults․ Moreover, it offers practical advice on isolating the root cause of problems, minimizing downtime and maximizing productivity․

Error Codes and Their Meanings

A cornerstone of the XSY-AT1 VFD manual PDF is its comprehensive error code directory․ This section meticulously lists each error code, providing a clear and concise explanation of the fault it indicates․ Beyond simple definitions, the manual details potential causes for each error, empowering users to pinpoint the source of the problem efficiently․

Importantly, the manual doesn’t just identify the issue; it also suggests corrective actions․ These range from simple parameter adjustments to more complex hardware checks․ Understanding these codes is paramount for effective troubleshooting, reducing reliance on external support and minimizing downtime․ The manual’s structured approach ensures quick diagnosis and resolution․

Common Problems and Solutions

The XSY-AT1 VFD manual PDF dedicates a crucial section to addressing frequently encountered issues․ This isn’t merely a list of problems; it’s a practical guide offering step-by-step solutions․ Common scenarios, such as motor overheating, unexpected trips, or communication failures, are thoroughly covered․ Each problem description is followed by a detailed troubleshooting process․

The manual emphasizes a logical approach, starting with simple checks – wiring connections, parameter settings – before progressing to more advanced diagnostics․ Clear instructions and diagrams aid users in implementing the suggested fixes․ This section aims to empower operators to resolve issues independently, minimizing downtime and maintenance costs, ultimately maximizing productivity․

Maintenance and Care

The XSY-AT1 VFD manual PDF highlights proactive maintenance as key to longevity and reliable operation․ It details a schedule for regular inspection, focusing on dust accumulation – a primary cause of overheating – and verifying proper fan function․ Cleaning procedures are outlined, emphasizing the use of compressed air and avoiding liquids near electrical components․

The manual also addresses component lifespan, suggesting periodic checks of capacitors and cooling fans․ It provides guidance on identifying signs of wear and tear, and outlines the process for safe component replacement․ Following these guidelines ensures optimal performance, prevents unexpected failures, and extends the VFD’s operational life, reducing long-term costs․

Regular Inspection and Cleaning

The XSY-AT1 VFD manual PDF stresses routine checks to maintain peak performance․ Inspections should prioritize identifying dust buildup, a significant contributor to overheating and potential failures․ Regularly examine the cooling fan for obstructions and ensure free rotation․ Visually inspect wiring for loose connections or damaged insulation, addressing any issues immediately․

Cleaning procedures, as detailed in the manual, recommend using compressed air to remove dust from heatsinks and internal components․ Avoid using liquids directly on the VFD, as this can cause short circuits․ A clean VFD operates more efficiently and reliably, extending its lifespan and minimizing downtime․ Consistent upkeep is crucial․

Component Replacement and Lifespan

The XSY-AT1 VFD manual PDF outlines expected component lifespans and replacement procedures․ Capacitors, being electrolytic, typically exhibit the shortest lifespan, requiring periodic monitoring for bulging or leakage․ Cooling fans are also prone to failure due to bearing wear and dust accumulation, necessitating replacement every few years depending on the operating environment․

The manual emphasizes using only manufacturer-approved replacement parts to ensure compatibility and maintain warranty validity․ Proper disposal of old components is also addressed, highlighting environmental considerations․ While the VFD itself can last over a decade with proper care, individual components will require attention throughout its service life, extending overall operational longevity․

Technical Support and Resources

The XSY-AT1 VFD manual PDF directs users to comprehensive support channels․ Direct contact with the manufacturer is facilitated through provided email addresses and phone numbers for specialized assistance․ Beyond official channels, the manual acknowledges the value of online forums and communities dedicated to VFD technology, offering peer-to-peer support and troubleshooting advice․

These online resources often contain practical solutions to common issues and insights from experienced users․ The manual also suggests checking the manufacturer’s website for frequently asked questions (FAQs), updated software, and application notes․ Utilizing these resources ensures users can efficiently resolve problems and maximize the VFD’s performance․

Contacting the Manufacturer

For direct assistance with your XSY-AT1 VFD, the official manual PDF emphasizes reaching out to the manufacturer’s dedicated support team․ This ensures access to expert knowledge and tailored solutions for specific challenges․ The manual typically lists a dedicated support email address and a phone number for immediate assistance during business hours․

When contacting support, be prepared to provide your VFD’s model number, serial number, and a detailed description of the issue you are experiencing․ Referencing specific error codes (detailed within the manual) can significantly expedite the troubleshooting process․ The manufacturer’s website may also offer a contact form for submitting inquiries․

Online Forums and Communities

Beyond the official XSY-AT1 VFD manual PDF, a wealth of knowledge exists within online forums and dedicated communities․ These platforms connect users globally, fostering collaborative troubleshooting and knowledge sharing․ Experienced operators often share practical tips, workarounds, and insights not always found in formal documentation․

Searching online for “XSY-AT1 VFD forum” or related keywords will reveal active communities․ Remember to exercise caution and verify information obtained from unofficial sources․ Cross-referencing with the official manual is always recommended․ These forums can be invaluable for resolving unique application challenges and learning from others’ experiences with the VFD․

PDF

stained glass slope-graphing linear equations answer key pdf

Article Plan: Stained Glass Slope-Graphing Linear Equations Answer Key PDF

This comprehensive guide details a stained glass activity for graphing linear equations, offering a detailed answer key for educators. It covers slope-intercept form,
various slopes, and provides resources for practice, all within a downloadable PDF format.

Stained glass graphing is an engaging and visually appealing method for students to practice and solidify their understanding of linear equations. This technique transforms the often-daunting task of graphing into a creative art project, boosting student motivation and retention. The core concept involves graphing multiple linear equations on a single coordinate plane, then coloring the resulting sections to resemble a stained glass window.

This particular activity focuses on equations presented in slope-intercept form (y = mx + b), requiring students to accurately identify both the slope (m) and y-intercept (b) before plotting the lines. The beauty of this approach lies in its inclusivity – it incorporates all four types of slopes: positive, negative, zero, and undefined, providing a well-rounded practice experience.

The final product isn’t just a collection of lines; it’s a colorful, personalized piece of art. Students can express their creativity through their color choices, making the learning process more enjoyable and memorable. The availability of a detailed answer key PDF ensures accurate assessment and provides a valuable resource for teachers.

What are Slope-Intercept Form Equations?

Slope-intercept form is a fundamental concept in algebra, representing linear equations in a clear and accessible manner. An equation in this form is written as y = mx + b, where ‘m’ represents the slope of the line and ‘b’ represents the y-intercept. Understanding this form is crucial for accurately graphing linear equations, as it directly provides the key information needed to plot the line on a coordinate plane.

The slope (m) indicates the steepness and direction of the line. A positive slope signifies an upward trend, a negative slope indicates a downward trend, a zero slope results in a horizontal line, and an undefined slope creates a vertical line. The y-intercept (b) is the point where the line crosses the y-axis; it’s the value of ‘y’ when ‘x’ is equal to zero.

In the context of the stained glass activity, students are presented with equations already in slope-intercept form. Their initial task is to correctly identify ‘m’ and ‘b’ from each equation. This foundational step is essential for successful graphing and ultimately, for creating the visually appealing stained glass effect. The answer key PDF will verify the correct identification of these values.

Identifying Slope (m) in Linear Equations

Accurately identifying the slope (m) within a linear equation in slope-intercept form (y = mx + b) is paramount for successful graphing. The slope dictates the line’s steepness and direction. Students must be able to isolate the coefficient of the ‘x’ term to determine the slope’s value. This coefficient can be a fraction, a whole number, positive, or negative – all impacting the line’s visual representation.

The stained glass activity incorporates all four types of slopes: positive, negative, zero, and undefined. Positive slopes rise from left to right, negative slopes fall, zero slopes create horizontal lines, and undefined slopes result in vertical lines. Recognizing these characteristics is key to interpreting the graph.

The answer key PDF will provide the correct slope for each of the 18 equations included in the activity. It will detail not only the numerical value of ‘m’ but also its sign (positive or negative), ensuring students understand the direction of each line. Careful attention to detail is crucial, as even a minor error in identifying the slope will lead to an inaccurate graph and a flawed stained glass design.

Determining the Y-Intercept (b)

The y-intercept (b) represents the point where a line crosses the y-axis on a coordinate plane. In the slope-intercept form (y = mx + b), it’s the constant term. Accurately identifying ‘b’ is crucial for precise graphing, as it establishes a key point on the line. Students need to understand that the y-intercept is the value of ‘y’ when ‘x’ equals zero.

Within the stained glass activity, students will encounter equations with varying y-intercepts – positive, negative, and zero. A zero y-intercept means the line passes directly through the origin (0,0). The answer key PDF will meticulously list the correct y-intercept for each of the 18 equations, providing a reliable reference for students and educators.

Correctly pinpointing the y-intercept allows students to plot a second point alongside the y-intercept itself, enabling them to draw an accurate line. The stained glass effect relies on the precision of these lines, so a solid understanding of the y-intercept is essential for a visually appealing and mathematically correct result.

Graphing Linear Equations: A Step-by-Step Guide

To successfully complete the stained glass activity, students must follow a systematic approach to graphing each linear equation. First, isolate the slope (m) and y-intercept (b) from the slope-intercept form (y = mx + b). Next, plot the y-intercept on the coordinate plane – this is the starting point.

From the y-intercept, utilize the slope to find a second point. Remember, slope represents rise over run (vertical change over horizontal change). For example, a slope of 2/3 means moving 2 units up and 3 units to the right. Connect these two points with a straight line, extending it across the entire graph.

The answer key PDF will demonstrate each step visually for all 18 equations. It will showcase correctly graphed lines, ensuring students can compare their work and identify any errors. This step-by-step guidance, coupled with the detailed key, fosters a deeper understanding of linear equations and their graphical representation within the artistic context of the stained glass project.

Positive Slope and its Graphical Representation

A positive slope in a linear equation (y = mx + b) signifies that the line ascends from left to right. This indicates that as the value of ‘x’ increases, the value of ‘y’ also increases. Graphically, a positive slope is represented by a line that angles upwards when viewed on a coordinate plane.

Within the stained glass activity, students will encounter several equations with positive slopes. The answer key PDF will clearly illustrate these lines, demonstrating their upward trajectory. Students should observe that the ‘rise’ (vertical change) is positive relative to the ‘run’ (horizontal change).

Correctly identifying and graphing positive slopes is crucial for creating the desired stained glass effect. The lines will intersect, forming various shapes and sections that students will then color. The answer key provides a visual benchmark, ensuring students accurately represent these increasing linear relationships and contribute to the overall aesthetic of the artwork.

Negative Slope and its Graphical Representation

A negative slope in a linear equation (y = mx + b) indicates that the line descends from left to right. This means as the value of ‘x’ increases, the value of ‘y’ decreases. Graphically, this is shown as a line angling downwards on the coordinate plane. Understanding this inverse relationship is key to accurate graphing.

The stained glass activity incorporates equations with negative slopes, providing students practice in visualizing and representing decreasing linear functions. The answer key PDF will showcase these lines, clearly demonstrating their downward trend. Students must accurately calculate the ‘rise’ (negative) over the ‘run’ to achieve correct results.

Accurate depiction of negative slopes is vital for the stained glass design. These downward-sloping lines will intersect with others, creating distinct sections for coloring. The answer key serves as a reliable reference, ensuring students correctly graph these lines and contribute to the overall visual harmony of the finished artwork.

Zero Slope: Horizontal Lines

A zero slope signifies a horizontal line on the coordinate plane, represented by an equation of the form y = b, where ‘b’ is the y-intercept. This indicates that the value of ‘y’ remains constant regardless of the value of ‘x’. Visually, the line extends infinitely left and right without any vertical change.

The stained glass activity intentionally includes equations with a zero slope to challenge students to recognize and graph these unique lines. The answer key PDF will clearly illustrate these horizontal lines, serving as a benchmark for student accuracy. Correctly identifying a zero slope is crucial for creating the desired stained glass effect.

Horizontal lines create distinct boundaries within the stained glass design, defining specific areas for coloring. Students must accurately graph these lines to ensure the sections are properly delineated. The answer key provides a detailed visual guide, confirming the correct placement and appearance of these essential horizontal components.

Undefined Slope: Vertical Lines

Vertical lines are characterized by an undefined slope, represented by an equation of the form x = a, where ‘a’ is the x-intercept. This signifies that the line extends infinitely up and down without any horizontal change; the change in ‘x’ is zero, leading to an undefined result when calculating slope.

The stained glass activity incorporates equations with undefined slopes to provide a complete practice of all slope types. The answer key PDF will meticulously showcase these vertical lines, offering a clear standard for evaluating student work. Recognizing and accurately graphing these lines is vital for a complete stained glass design.

Vertical lines often act as strong structural elements within the stained glass pattern, dividing the design into distinct sections. Students must precisely graph these lines to ensure the sections are correctly formed and ready for coloring. The answer key serves as a definitive visual reference, confirming the correct position and appearance of these critical vertical components.

The Stained Glass Activity: Overview

The Stained Glass Slope-Graphing activity is designed to engage students in a visually appealing and practical application of linear equations. Students receive a set of 18 equations, all presented in slope-intercept form (y = mx + b), encompassing positive, negative, zero, and undefined slopes. The core task involves identifying the slope and y-intercept of each equation before accurately graphing it on a coordinate plane.

The unique element of this activity is the creation of a “stained glass” effect. Once all lines are graphed, students darken them and then color the resulting sections, transforming a mathematical exercise into a vibrant piece of art. This fosters creativity while reinforcing graphing skills. The answer key PDF provides a completed example for reference.

This activity is suitable for various learning environments, including classroom work, homework, or even as a collaborative project. The downloadable worksheet and accompanying answer key streamline implementation for educators. It’s a fun and effective way to assess student understanding of linear equations and their graphical representation.

Materials Needed for the Activity

To successfully complete the Stained Glass Slope-Graphing activity, a few essential materials are required. First and foremost, each student will need a printed copy of the worksheet, readily available as a PDF download. This worksheet contains the 18 linear equations in slope-intercept form, along with a coordinate plane for graphing.

Standard graphing supplies are also crucial: a pencil for initial sketching, a ruler to ensure straight and accurate lines, and colored pencils, crayons, or markers for creating the stained glass effect. A good eraser is helpful for correcting any mistakes during the graphing process.

For educators, access to the answer key PDF is vital for efficient grading and providing feedback. Optionally, graph paper can be provided for students who prefer a more structured graphing surface. Finally, a quiet workspace and sufficient time are needed to allow students to focus on accurately identifying slopes, y-intercepts, and creating their artistic designs.

Creating the Stained Glass Effect: Coloring Techniques

Once the linear equations are accurately graphed, the fun begins – transforming the coordinate plane into a vibrant stained glass window! Students can employ various coloring techniques to achieve this effect. A simple method involves coloring each section created by the intersecting lines with different colors, mimicking the panes of glass.

For a more intricate design, consider layering colors or using shading to create depth and dimension. Students can experiment with blending colors to achieve unique hues. Bold, contrasting colors can make the graph visually striking, while softer palettes can create a more subtle and elegant look.

Encourage creativity! There are no strict rules for coloring. Students can add patterns, textures, or even small details within each section. The goal is to personalize the artwork while reinforcing their understanding of linear equations. Darkening the graphed lines before coloring enhances the stained glass appearance, making the lines stand out against the colored sections.

Common Errors Students Make When Graphing

When students graph linear equations, several common errors frequently emerge. A prevalent mistake is incorrectly identifying the slope and y-intercept from the slope-intercept form (y = mx + b). Students may reverse these values, leading to an inaccurate graph.

Another frequent error involves plotting the y-intercept incorrectly or miscounting the rise and run when determining the slope. This results in a line that doesn’t accurately represent the equation. Difficulty with negative slopes is also common; students may struggle to correctly interpret and plot the negative rise or run.

Furthermore, students sometimes struggle with graphing horizontal (zero slope) and vertical (undefined slope) lines. They may incorrectly assume a slope exists for vertical lines or fail to recognize the constant y-value for horizontal lines. Careful observation of student work during the stained glass activity can pinpoint these misunderstandings, allowing for targeted intervention and clarification.

Answer Key Considerations: Accuracy and Detail

A robust answer key for the stained glass graphing activity demands meticulous accuracy and comprehensive detail. Each graphed line must precisely reflect the given equation’s slope and y-intercept. The key should not only show the correct lines but also clearly indicate the plotted points used to construct them, especially for verification.

Beyond the lines themselves, the answer key should demonstrate correct identification of slope and y-intercept for each equation. This reinforces the connection between the algebraic representation and the graphical form; Variations in acceptable graphs are possible due to differing plotting precision; the key should account for minor discrepancies.

Furthermore, the key should explicitly address the graphing of zero and undefined slopes, ensuring horizontal and vertical lines are accurately represented. Detailed explanations accompanying each solution can aid in identifying student errors and providing constructive feedback. A well-crafted key transforms the activity from a simple check into a valuable learning tool.

Resources for Additional Practice & PDF Downloads

To supplement the stained glass activity, numerous online resources offer further practice with graphing linear equations. Websites like Digital Lesson.com provide worksheets and interactive exercises focusing on slope-intercept form. Khan Academy offers comprehensive video tutorials and practice problems covering all aspects of linear equations, including slope and intercepts.

Pinterest serves as a valuable source for visual inspiration and alternative stained glass project ideas, allowing educators to adapt the activity to suit diverse learning styles. Searching “Graphing Lines Project” or “Linear Equations Art Project” yields a wealth of creative examples.

For convenient access, a downloadable PDF version of the answer key and the student worksheet is highly recommended. This ensures easy distribution and accessibility for both in-class and remote learning environments. Consider creating a dedicated online folder or learning management system location to house all related materials, fostering organized learning.

PDF

catch 22 novel pdf

Catch-22 Novel PDF: A Comprehensive Guide

Finding a Catch-22 novel PDF requires navigating legitimate sources and understanding potential risks associated with unofficial downloads, as highlighted by online resources.

Accessing the text digitally, like the one found on booksdrive.org, offers convenience, but verifying source authenticity is crucial for a safe experience.

Understanding the Novel’s Significance

Joseph Heller’s Catch-22 transcends a simple war narrative; it’s a profound exploration of bureaucratic absurdity, the horrors of conflict, and the individual’s struggle against overwhelming systems. The novel’s enduring power lies in its satirical dismantling of logic and reason within the context of World War II, resonating far beyond its historical setting.

The availability of a Catch-22 novel PDF allows wider access to this significant work, enabling readers to engage with its complex themes and unconventional structure. Its impact on anti-war movements and popular culture is undeniable, prompting critical analysis of power structures and the human condition. Understanding its significance requires recognizing its innovative narrative techniques and enduring relevance to contemporary issues.

The novel’s exploration of the “catch-22” itself—a paradoxical situation—has entered the lexicon, representing any illogical and self-contradictory rule or regulation.

Historical Context of Catch-22

Published in 1961, Catch-22 reflects the anxieties and disillusionment following World War II and the burgeoning Cold War era. Joseph Heller drew upon his own experiences as a bombardier during the war, witnessing firsthand the bureaucratic inefficiencies and the psychological toll of aerial combat. The novel isn’t a literal recounting of events, but rather a satirical exaggeration of the absurdities inherent in military life.

Accessing a Catch-22 novel PDF today allows readers to connect with this historical context, understanding the novel as a product of its time. The post-war period was marked by questioning authority and challenging established norms, themes powerfully embodied in Heller’s work. The availability of digital copies facilitates study and analysis of the novel’s relationship to its historical roots, enriching comprehension.

The novel’s critique of military logic resonated with a generation grappling with the threat of nuclear annihilation.

Joseph Heller and His Literary Style

Joseph Heller, a master of satirical black humor, employed a distinctly non-linear narrative structure in Catch-22. This fragmented approach mirrors the chaotic and illogical nature of war, deliberately disorienting the reader. PDF versions of the novel allow for easy navigation and revisiting of key passages, aiding in deciphering this complex style.

Heller’s use of repetition, paradox, and grotesque imagery serves to underscore the absurdity of the situations depicted. He frequently shifts perspectives and timelines, creating a sense of unease and highlighting the subjective experience of trauma. Digital access to the text facilitates close reading and annotation, crucial for appreciating Heller’s stylistic innovations.

His style is characterized by a cynical wit and a relentless critique of power structures.

Finding a Catch-22 Novel PDF Online

Locating a Catch-22 novel PDF online presents both opportunities and challenges. Numerous websites offer digital copies, but discerning legitimate sources from potentially harmful ones is paramount. Resources like booksdrive.org are cited as potential access points, though users should exercise caution. A quick search reveals various platforms claiming to host the PDF, demanding careful evaluation.

However, downloading from unofficial sources carries risks, including malware and copyright infringement. Prioritizing reputable online libraries or purchasing a digital edition from authorized retailers ensures a safe and legal reading experience. Utilizing search filters and verifying website security certificates are recommended practices.

Always double-check the source before downloading any file.

Legitimate Sources for PDF Downloads

Securing a Catch-22 novel PDF from trustworthy sources is crucial for a safe and legal reading experience. While direct, free PDF availability is limited, several avenues offer legitimate access. Authorized online bookstores, such as Amazon Kindle or Google Play Books, provide digital editions for purchase, guaranteeing authenticity and quality.

Additionally, academic databases and online libraries, often accessible through university affiliations, may contain legally obtained PDF versions. Project Gutenberg, though not currently hosting Catch-22 directly, represents a reliable source for classic literature in digital format.

Exploring these platforms minimizes the risk of encountering malware or copyright violations, ensuring a secure and enjoyable reading journey.

Potential Risks of Unofficial PDF Sources

Downloading a Catch-22 novel PDF from unofficial sources presents significant risks. These websites often harbor malware, viruses, and other malicious software that can compromise your device and personal data. Copyright infringement is another serious concern, as downloading from unauthorized platforms supports illegal activities.

Furthermore, the quality of these PDFs is often substandard, featuring formatting errors, missing pages, or incomplete text. Such files can hinder your reading experience and potentially damage your device’s functionality.

Prioritizing legitimate sources, even if they require a purchase, safeguards your digital security and respects the author’s intellectual property rights, ensuring a safe and enjoyable reading experience.

Synopsis of Catch-22: A Brief Overview

Joseph Heller’s Catch-22, a satirical war novel, follows Captain John Yossarian, a U.S. Army Air Forces bombardier desperately trying to maintain his sanity amidst the absurdity of World War II; Stationed on the fictional island of Pianosa, Yossarian seeks to escape combat duty, but is trapped by the paradoxical “Catch-22.”

This Catch-22 stipulates that a pilot is considered insane if he willingly continues to fly dangerous missions, but requesting to be grounded demonstrates sanity, thus disqualifying him from being relieved.

The novel’s non-linear narrative and dark humor expose the bureaucratic madness and illogical nature of war, questioning authority and the value of human life.

Key Characters in Catch-22

Captain John Yossarian, the protagonist, embodies the novel’s anti-war sentiment, relentlessly attempting to avoid further bombing missions through feigned illness or bureaucratic loopholes. Lieutenant Colonel Cathcart, obsessed with promotion, continually raises the required mission quota, driving the pilots to desperation.

Major Major Major Major, a character promoted solely due to a clerical error, represents the absurdity of military bureaucracy. Milo Minderbinder, a mess officer, embodies capitalist opportunism, trading with both sides of the conflict for personal profit.

Doc Daneeka, the squadron’s flight surgeon, is complicit in the Catch-22, upholding the illogical rule. These characters, within the Catch-22 PDF, highlight the novel’s satirical critique of power and the dehumanizing effects of war.

Major Themes Explored in the Novel

The absurdity of war is central, depicted through illogical rules and bureaucratic nightmares, readily apparent when exploring a Catch-22 PDF. The corrupting influence of power manifests in characters like Cathcart, prioritizing promotion over the lives of his men.

The individual versus the system is a recurring motif, as Yossarian struggles against the overwhelming, irrational forces of the military. Loss of innocence and the psychological toll of combat are subtly woven throughout the narrative.

Capitalism and greed, embodied by Milo Minderbinder, are presented as equally destructive forces. Accessing the novel’s PDF allows readers to dissect these themes, revealing Heller’s profound commentary on human nature and societal structures.

The Meaning of “Catch-22” Itself

“Catch-22” represents a paradoxical situation where one is trapped by contradictory rules. Yossarian’s desire to avoid dangerous missions requires a declaration of insanity, but requesting it proves sanity, thus perpetuating the cycle. A Catch-22 novel PDF illuminates this core concept.

The term embodies logical fallacies and the frustrating nature of bureaucratic systems. It signifies a no-win scenario, where any attempt to escape only reinforces the initial predicament. The PDF format allows for close textual analysis, revealing the nuance of Heller’s creation.

Beyond the novel, “Catch-22” has entered common parlance, describing any impossible dilemma. Studying the PDF provides a deeper understanding of its origins and enduring relevance.

The Logical Paradox Explained

Catch-22 functions as a circular argument: a pilot can be grounded if deemed insane, but requesting to be grounded demonstrates sanity, disqualifying him. This creates an inescapable loop, a core paradox explored within the Catch-22 novel PDF.

The logic is inherently flawed, relying on a self-contradictory premise. It’s a system designed to maintain control, trapping individuals within its absurd rules. Accessing the novel’s PDF allows readers to trace the development of this paradox through Yossarian’s experiences.

Heller masterfully illustrates how bureaucratic structures can prioritize self-preservation over individual well-being, using this paradox as a central critique. The PDF format facilitates detailed examination of this complex logical trap.

Real-World Applications of the Catch-22 Concept

The “Catch-22” concept extends far beyond the novel’s wartime setting, resonating in various real-world scenarios. It describes situations where conflicting rules prevent a desired outcome, mirroring bureaucratic hurdles and systemic inequalities. Studying the Catch-22 novel PDF reveals how this paradox functions as a critique of power structures.

Examples include needing experience to get a job, but needing a job to gain experience, or requiring credit to secure a loan, yet needing a loan to build credit. Accessing the PDF allows for a deeper understanding of the pattern.

These situations, like those faced by Yossarian, highlight the frustrating circularity of illogical systems, prompting critical analysis of societal norms.

Critical Reception and Analysis of Catch-22

Catch-22 initially received mixed reviews, but quickly gained recognition as a significant anti-war novel; Critics lauded Heller’s innovative narrative structure and satirical portrayal of military bureaucracy. Analyzing the Catch-22 novel PDF reveals the depth of its commentary on the absurdity of war and the dehumanizing effects of institutional power.

Literary scholars have explored the novel’s themes of alienation, paranoia, and the individual’s struggle against overwhelming forces. The non-linear storytelling, a key element, challenges traditional narrative conventions.

The PDF format facilitates close reading and scholarly examination, allowing for detailed analysis of Heller’s stylistic choices and thematic concerns, solidifying its place in literary history.

Literary Criticism and Interpretations

Catch-22 has been subject to extensive literary criticism, with interpretations ranging from existentialist readings to analyses of its political satire. Accessing a Catch-22 novel PDF allows scholars to easily dissect Heller’s complex narrative and identify recurring motifs. Critics often focus on the novel’s fragmented structure, mirroring the chaotic experience of war.

Interpretations explore the psychological toll of conflict, the loss of individual agency, and the corrupting influence of power. The PDF format aids in comparative analysis, enabling researchers to trace thematic connections and stylistic patterns.

Furthermore, the novel’s enduring relevance continues to inspire new critical perspectives, cementing its status as a cornerstone of 20th-century literature.

Impact on Popular Culture

Catch-22’s influence extends far beyond literature, permeating popular culture and becoming a widely recognized idiom. The phrase “Catch-22” itself signifies a paradoxical situation where one is trapped by contradictory rules, a concept readily accessible through digital PDFs of the novel.

The novel’s themes have resonated in film adaptations, television shows, and even music, demonstrating its enduring appeal. Having a Catch-22 novel PDF facilitates studying these adaptations and tracing the novel’s influence on other artistic works.

Its satirical critique of bureaucracy and war continues to inspire commentary on contemporary issues, solidifying its place as a cultural touchstone.

Catch-22 and the Anti-War Movement

Catch-22 emerged during a period of growing dissent against the Vietnam War, quickly becoming a symbol for the anti-war movement. The novel’s depiction of the absurdity and futility of war resonated deeply with those questioning military intervention, and access to a Catch-22 novel PDF amplified its message.

Its satirical portrayal of military bureaucracy and the dehumanizing effects of conflict provided a powerful critique of the rationale behind war. The readily available PDF format allowed for wider dissemination of Heller’s anti-war sentiments.

Catch-22 offered a voice to the disillusionment felt by many, solidifying its status as a key text within the anti-war discourse.

The Novel’s Portrayal of War’s Absurdity

Catch-22 masterfully portrays the illogical and chaotic nature of war, presenting a world where reason is overturned by bureaucratic madness. The availability of a Catch-22 novel PDF has allowed generations to experience this unsettling depiction firsthand.

Heller utilizes satire and black humor to expose the senselessness of military regulations and the detachment of those in power from the realities faced by soldiers. This absurdity is central to the novel’s impact.

Through Yossarian’s desperate attempts to escape combat, the novel highlights the inherent contradictions and irrationality at the heart of warfare, making it a timeless anti-war statement.

Its Relevance to Contemporary Conflicts

Catch-22, readily accessible as a novel PDF, continues to resonate deeply with modern audiences due to its enduring commentary on the futility and absurdity of conflict. The themes explored within its pages transcend the historical context of World War II.

The novel’s depiction of bureaucratic incompetence, the dehumanizing effects of war, and the struggle against illogical systems remain strikingly relevant in today’s geopolitical landscape.

From modern military operations to political maneuvering, the “Catch-22” situation – a paradoxical dilemma – persists, prompting reflection on the cyclical nature of conflict and the challenges of achieving peace.

Analyzing Specific Chapters and Scenes

Catch-22, easily found as a novel PDF, benefits from detailed chapter-by-chapter analysis to fully grasp Heller’s complex narrative structure and satirical intent. Examining the opening chapters, particularly the introduction to Yossarian, establishes the novel’s tone and introduces key thematic elements.

Specific bombing missions and their aftermaths serve as focal points for exploring the psychological toll of war and the characters’ desperate attempts to maintain sanity amidst chaos.

Close readings reveal how Heller employs non-linear storytelling and recurring motifs to critique the absurdity of military bureaucracy and the dehumanizing aspects of armed conflict, enriching the reading experience.

Chapter 1 of Catch-22, readily accessible in a novel PDF format, immediately plunges readers into Yossarian’s unsettling world, establishing the novel’s darkly comedic and fragmented narrative style. We meet Yossarian in a state of anxious rebellion, feigning illness to avoid dangerous bombing missions.

This initial portrayal highlights his desperate attempts to preserve his own life within a system that prioritizes duty over individual well-being. The chapter introduces the claustrophobic atmosphere of Pianosa and the pervasive sense of dread among the airmen.

Heller skillfully uses Yossarian’s perspective to foreshadow the novel’s central themes of absurdity, bureaucratic madness, and the futility of war.

The Bombing Mission and Its Aftermath

Within a Catch-22 novel PDF, the harrowing bombing missions and their subsequent fallout are central to illustrating the novel’s anti-war sentiment. These sequences, often depicted with brutal honesty, showcase the psychological toll exacted upon the airmen.

The missions aren’t glorified; instead, they’re presented as chaotic, terrifying experiences where survival feels arbitrary. The aftermath reveals the bureaucratic indifference to the men’s suffering, with superiors focused on increasing mission quotas rather than addressing the trauma experienced.

Heller’s depiction emphasizes the senselessness of the conflict and the dehumanizing effects of war, solidifying the novel’s powerful message.

Exploring the Satirical Elements of Catch-22

A Catch-22 novel PDF reveals a masterful use of satire, relentlessly mocking the absurdity of war and bureaucratic systems. Heller employs exaggeration and irony to expose the illogical nature of military authority and the dehumanizing effects of conflict;

Characters and situations are deliberately outlandish, highlighting the disconnect between the stated ideals of war and the grim reality experienced by the airmen. This satirical approach isn’t merely comedic; it serves as a potent form of social commentary.

The novel’s humor is often dark and unsettling, forcing readers to confront the uncomfortable truths about power, control, and the futility of war.

Heller’s Use of Black Humor

Examining a Catch-22 novel PDF demonstrates Joseph Heller’s distinctive employment of black humor, a stylistic choice integral to the novel’s impact. This isn’t lighthearted comedy; instead, it’s a jarring juxtaposition of horrific events with sardonic wit and cynical observations.

Heller uses humor to distance the reader, creating a sense of detachment that mirrors the characters’ own alienation and powerlessness. The absurdity of the situations, coupled with the nonchalant tone, underscores the senselessness of war.

This dark comedic lens allows Heller to critique the military and societal structures without resorting to overt moralizing, making the satire all the more effective and unsettling.

Satire as a Tool for Social Commentary

Analyzing a Catch-22 novel PDF reveals how Joseph Heller masterfully employs satire as a potent vehicle for social commentary. The novel isn’t merely a war story; it’s a scathing indictment of bureaucratic inefficiency, the abuse of power, and the dehumanizing effects of institutional logic.

Heller exaggerates and distorts reality to expose the underlying flaws within the military and, by extension, broader societal structures. The “Catch-22” itself embodies this satirical intent, highlighting the paradoxical nature of rules and regulations.

Through humor and irony, Heller compels readers to question authority and confront uncomfortable truths about the absurdity of war and the human condition, fostering critical thought.

Catch-22: A Guide to Understanding the Complex Narrative

Engaging with a Catch-22 novel PDF demands patience, as its narrative structure is intentionally fragmented and non-linear. Heller deliberately disrupts chronological order, presenting events out of sequence to mirror the chaotic and disorienting experience of war.

This technique forces readers to actively piece together the story, challenging conventional storytelling expectations. Recurring motifs and symbols, like Milo Minderbinder’s syndicate, weave throughout the narrative, adding layers of meaning.

Understanding these elements is crucial for deciphering the novel’s complex themes. A digital PDF allows for easy referencing and annotation, aiding in navigating this intricate and rewarding literary experience.

Non-Linear Storytelling Techniques

Exploring a Catch-22 novel PDF reveals Heller’s masterful use of non-linear storytelling. The narrative jumps between time periods and perspectives, deliberately avoiding a straightforward chronological progression. This technique mirrors the psychological disorientation experienced by Yossarian and other characters during wartime.

Flashbacks and foreshadowing are employed extensively, creating a sense of unease and ambiguity. Events are often revisited from different angles, offering new insights and challenging initial perceptions.

A digital PDF format facilitates easy navigation between these fragmented sections, allowing readers to trace the connections and unravel the novel’s complex structure. This deliberate disruption enhances the thematic impact.

Recurring Motifs and Symbols

Analyzing a Catch-22 novel PDF reveals a rich tapestry of recurring motifs and symbols that amplify the novel’s anti-war message. The constant presence of death, particularly the frequent mentions of deceased characters, underscores the senselessness of conflict.

Symbols like Milo Minderbinder’s syndicate represent the corrupting influence of capitalism and the absurdity of bureaucratic logic. The titular “Catch-22” itself functions as a pervasive symbol of inescapable paradox and institutional control.

A digital PDF allows for easy searching and cross-referencing, aiding in the identification of these patterns. These motifs collectively contribute to the novel’s satirical and deeply unsettling portrayal of war.

ted baker size guide

Ted Baker Size Guide: A Comprehensive Overview (Updated May 03, 2026)

Navigating Ted Baker’s sizing requires careful attention. This guide details measurements for men, women, and children, including shirts, trousers, dresses, and shoes.
Refer to the provided PDF size charts, specifically the women’s wear non-elastic options, for accurate fitting.

Ted Baker is renowned for its distinctive British style and quality craftsmanship, but understanding their sizing can sometimes present a challenge for shoppers. Unlike some brands that adhere to standardized measurements, Ted Baker often exhibits unique sizing nuances across different product categories. This stems from their design philosophy, which prioritizes a tailored and fashionable silhouette, sometimes resulting in fits that differ from conventional sizing expectations.

Therefore, relying solely on your usual size isn’t always advisable. A thorough understanding of Ted Baker’s specific size charts is crucial to ensure a perfect fit and avoid the inconvenience of returns. This guide aims to demystify the process, providing detailed information on how Ted Baker sizes their clothing, shoes, and accessories for both men, women, and children; We will explore specific considerations for various items, like dresses, shirts, jeans, and footwear, referencing available resources like the official Ted Baker website and supplementary charts.

Remember to always consult the most up-to-date size guides, as sizing can occasionally be adjusted seasonally or for new collections. Accurate measurements are your best ally in achieving a confident and stylish look with Ted Baker.

Why Ted Baker Sizing Can Be Tricky

Several factors contribute to the inconsistencies often experienced with Ted Baker sizing. Firstly, the brand frequently utilizes a more ‘fitted’ silhouette in their designs, meaning garments may run smaller than expected, particularly in areas like the waist and hips. This is a deliberate stylistic choice, aiming for a flattering, tailored appearance, but requires careful consideration when selecting a size.

Secondly, sizing can vary significantly between different product lines. A size 10 dress might fit differently than a size 10 pair of trousers, necessitating a review of the specific size chart for each item. Furthermore, the use of different fabric compositions – such as those with or without stretch – impacts the fit. The provided PDF size charts, especially those detailing non-elastic fabrics, highlight these variations.

International sizing conversions can also add to the confusion. Ted Baker primarily uses UK sizing, which differs from US and European standards. Finally, inconsistencies in manufacturing tolerances, though minimal, can occasionally occur. Therefore, prioritizing accurate self-measurement and referencing the official size guides is paramount.

Understanding Ted Baker Women’s Sizes

Ted Baker’s women’s collection offers a diverse range of sizes and styles. Accurate measurements are crucial for dresses, tops, jeans, and accessories. Refer to detailed charts for optimal fit.

Women’s Clothing Size Chart ─ General Overview

Ted Baker’s women’s sizing generally aligns with standard UK sizing, but variations can occur due to design and fabric. It’s essential to consult the official size chart before making a purchase, as discrepancies can impact the fit significantly. The brand typically offers sizes ranging from UK 6 to UK 16, though this can extend depending on the specific item and collection.

When reviewing the size chart, pay close attention to the corresponding bust, waist, and hip measurements. These are the primary indicators for determining your correct size. Ted Baker often provides measurements in both inches and centimeters for convenience. Remember that size charts are guidelines, and individual body shapes can vary.

For non-elastic fabrics, as noted in available resources, a precise fit is even more critical. These materials offer less give, so selecting the size that closely matches your measurements is paramount. Don’t assume you can size down or up; stick to the recommended measurements for the best results. Always consider the garment’s style – a fitted dress will require a more accurate measurement than a looser-fitting top.

Furthermore, be aware that sizing can differ between different product categories. A size 12 dress might fit differently than a size 12 pair of trousers. Therefore, always check the specific size chart for the item you are interested in purchasing.

Women’s Dresses: Specific Sizing Considerations

Ted Baker dresses often feature unique silhouettes and varying fabric compositions, necessitating a closer look at sizing. Unlike standardized garments, dress styles – from bodycon to A-line – demand individual measurement checks. Pay particular attention to the dress’s description, noting whether it’s designed to be fitted, relaxed, or oversized.

When selecting a Ted Baker dress, prioritize bust and waist measurements. Many dresses are designed to accentuate the waist, so an accurate measurement is crucial for a flattering fit. If you fall between sizes, consider the fabric’s stretch. Dresses with some elasticity may allow for a more forgiving fit.

Consider the dress length, especially for maxi or midi styles. Ted Baker provides length measurements, which are essential for ensuring the dress falls at the desired point on your leg. For non-elastic fabrics, adhere strictly to the size chart; alterations can be costly and may compromise the dress’s design.

Review customer reviews for insights into specific dress fits. Other shoppers often share valuable information about whether a dress runs true to size, small, or large. This collective feedback can aid in making an informed decision.

Women’s Tops & Shirts: Finding Your Fit

Ted Baker’s women’s tops and shirts showcase diverse styles, from classic button-downs to delicate blouses, requiring careful attention to sizing details. Unlike universally sized garments, Ted Baker’s cuts often lean towards a tailored aesthetic, so understanding your measurements is paramount.

Focus on bust and shoulder measurements when selecting tops and shirts. A well-fitting top should comfortably accommodate your bust without pulling or gaping. Shoulder measurements ensure the yoke sits correctly, preventing slippage or restriction of movement.

Consider the sleeve length and overall style. Ted Baker offers various sleeve lengths – from sleeveless to long-sleeved – and styles, including fitted, relaxed, and oversized. Choose a style that complements your body shape and personal preference.

Pay attention to fabric composition. Some fabrics, like silk or linen, may have less stretch than others. For non-elastic materials, prioritize accurate measurements and consult the size chart diligently. Customer reviews can also provide valuable insights into the fit of specific styles.

Women’s Jeans & Trousers: Waist & Length Guide

Ted Baker’s women’s jeans and trousers offer a range of fits, from slim-leg to wide-leg, and varying waist heights. Accurate waist and length measurements are crucial for achieving a flattering and comfortable fit.

Measure your natural waistline – typically the narrowest part of your torso – and hip circumference at the fullest point. Compare these measurements to Ted Baker’s size chart, noting the corresponding waist size. Remember that Ted Baker’s waist sizes are generally true to size, but can vary slightly depending on the style.

For length, measure your inseam – from your crotch to your ankle bone – while wearing shoes similar to those you’ll pair with the trousers. Ted Baker often provides length options, allowing you to choose the perfect fit.

Consider the rise of the trousers. High-waisted styles will sit higher on your waist, while low-rise styles will sit lower. Pay attention to fabric composition; styles with stretch may offer more flexibility in fit.

Women’s Shoes: UK, EU, and US Conversions

Finding the correct shoe size in Ted Baker requires understanding the differences between UK, EU, and US sizing systems. Ted Baker primarily uses UK sizing, so converting your usual size is essential for an accurate fit.

Here’s a general conversion guide:

  • US Size 5 | UK Size 3 | EU Size 35
  • US Size 6 | UK Size 4 | EU Size 36
  • US Size 7 | UK Size 5 | EU Size 37
  • US Size 8 | UK Size 6 | EU Size 38
  • US Size 9 | UK Size 7 | EU Size 39
  • US Size 10 | UK Size 8 | EU Size 40

However, it’s crucial to remember that sizing can vary slightly between styles and manufacturers. Always consult Ted Baker’s official size chart on their website for the most accurate conversions. Consider reading customer reviews for specific shoe styles, as they often provide insights into whether the shoe runs true to size, large, or small.

If you are between sizes, it’s generally recommended to size up, especially for sandals or styles with pointed toes.

Women’s Accessories: Belt & Scarf Sizing

Ted Baker’s accessories, like belts and scarves, require specific sizing considerations to ensure a perfect complement to your outfit. Belts are typically measured in inches or centimeters, corresponding to your waist or hip size, depending on where you intend to wear the belt.

Belt Sizing: Measure your waist or hips (where the belt will sit) to determine your ideal size. Ted Baker belts often run true to size, but it’s always best to check the product description for specific guidance. If you’re unsure, it’s generally advisable to order one size up for a comfortable fit.

Scarf Sizing: Ted Baker scarves come in various sizes and shapes, including square, rectangular, and oblong. Dimensions are usually provided in the product details. Consider how you plan to style the scarf – a larger scarf offers more versatility for different looks, while a smaller scarf is ideal for a delicate accent. There isn’t a ‘one-size-fits-all’ approach with scarves; it’s more about personal preference and desired styling.

Understanding Ted Baker Men’s Sizes

Ted Baker menswear sizing demands attention to detail. Accurate chest, waist, and leg measurements are crucial for shirts, trousers, suits, and outerwear. Consult detailed size charts for optimal fit.

Men’s Clothing Size Chart ─ General Overview

Ted Baker’s men’s clothing sizes generally follow standard UK sizing, but variations can occur. It’s essential to consult the specific size chart for each garment type, as fits are designed differently. For shirts, collar size is paramount, ranging typically from 14.5 inches to 18.5 inches, while sleeve length is measured in inches, often from 32 to 36 inches.

Trousers and chinos utilize waist size in inches (e.g., 30, 32, 34) and leg length, also in inches (e.g., 30, 32, 34). Suit and blazer sizing centers around chest measurement, often correlating with UK jacket sizes (38R, 40R, etc.).

Remember that Ted Baker’s ‘slim fit’ options will run smaller than ‘regular fit’ styles. Always prioritize measuring yourself accurately before ordering. The official Ted Baker website provides comprehensive size guides, and comparing your measurements to these charts is highly recommended. Don’t assume your usual size will automatically fit; individual styles may differ. Consider reading customer reviews for insights into specific garment fits.

Pay close attention to any notes regarding the garment’s construction, such as whether it’s designed for a more tailored or relaxed silhouette.

Men’s Shirts: Collar & Sleeve Length Guide

Finding the perfect fit in a Ted Baker shirt hinges on accurate collar and sleeve measurements. Collar size is determined by measuring around the base of your neck, allowing room for comfort – typically adding 2-3 inches to your actual neck measurement. Ted Baker’s collar sizes generally range from 14.5” to 18.5”, often in half-inch increments.

Sleeve length is measured from the center back of your neck, over the shoulder, and down to your wrist bone. Common sleeve lengths are 32”, 33”, 34”, 35”, and 36”. For a classic fit, ensure the shirt cuffs extend approximately half an inch beyond your wrist bone.

Consider the shirt’s style – slim fit shirts will generally have a more tailored sleeve and a closer collar fit. If you’re between sizes, it’s often advisable to size up, especially for a more comfortable wear. Refer to the Ted Baker size chart, as variations can occur between different shirt styles.

Don’t forget to account for shrinkage after washing; a slightly larger size may be preferable if you anticipate significant shrinkage.

Men’s Trousers & Chinos: Waist & Leg Length Guide

Achieving the right fit in Ted Baker trousers and chinos requires precise waist and leg length measurements. Waist size is measured around your natural waistline, typically just above your hip bones. Ted Baker’s waist sizes generally range from 30” to 40”, often in even numbers.

Leg length, or inseam, is measured from the crotch seam down to the bottom of the trouser leg. Common leg lengths are 30”, 32”, 34”, and 36”. To determine your ideal inseam, measure a pair of well-fitting trousers.

Ted Baker offers various fits, including slim, regular, and relaxed. Slim-fit trousers will have a narrower leg opening, while relaxed-fit trousers offer more room. Consider your body type and preferred style when selecting a fit.

If you’re between sizes, it’s generally better to size up in the waist, as trousers can be easily tailored. Pay attention to the rise of the trousers – a higher rise will sit at your natural waist, while a lower rise will sit below.

Men’s Suits & Blazers: Chest & Waist Measurements

Finding the perfect fit in a Ted Baker suit or blazer hinges on accurate chest and waist measurements. Begin by measuring your chest at the fullest part, keeping the tape measure level and under your armpits. Ted Baker’s jacket sizes typically correspond to chest measurements, ranging from 38” to 48” or beyond.

Next, measure your waist at your natural waistline – usually just above your belly button. This measurement is crucial for determining the correct jacket waist suppression and trouser size. Waist sizes generally range from 30” to 40”.

Consider your shoulder width when selecting a jacket size. A well-fitting jacket should lie flat across your shoulders without pulling or bunching. Ted Baker offers different suit styles, including slim-fit, regular-fit, and tailored-fit.

Remember that suit jackets often require tailoring for a truly bespoke fit. Don’t hesitate to consult a professional tailor to adjust the sleeves, waist, and overall length. Accurate measurements are the first step towards a sharp and sophisticated look.

Men’s Shoes: UK, EU, and US Conversions

Ted Baker men’s shoes are often listed in UK sizing, but understanding conversions to EU and US sizes is essential for a comfortable fit. Here’s a general guide, though slight variations can occur between styles:

  • UK 6 = EU 39 = US 7.5
  • UK 7 = EU 40 = US 8.5
  • UK 8 = EU 41 = US 9.5
  • UK 9 = EU 42 = US 10.5
  • UK 10 = EU 43 = US 11.5
  • UK 11 = EU 44 = US 12.5
  • UK 12 = EU 45 = US 13.5

It’s always recommended to consult Ted Baker’s official size chart on their website for the most accurate conversions, as some styles may run slightly larger or smaller.

Consider the type of shoe when selecting your size. Loafers and dress shoes typically fit more snugly than trainers or boots. If you’re between sizes, it’s generally best to size up, especially if you plan to wear thicker socks. Always prioritize comfort and allow for some toe room.

Men’s Accessories: Belt & Tie Sizing

Ted Baker belts are typically sized in inches, corresponding to your waist measurement. To determine your correct belt size, measure your waist at the point where you normally wear your trousers. Add 2-4 inches to this measurement to ensure a comfortable fit. For example, a 34-inch waist usually requires a 36-38 inch belt.

Ted Baker ties generally come in a standard length of 58 inches (147cm), suitable for most heights and neck sizes. However, for taller individuals or those preferring a longer tie, extended length options may be available.

Consider the knot you intend to tie when choosing a tie. Larger knots, like the Windsor, require more tie length than smaller knots, such as the Four-in-Hand. Ensure the tip of the tie reaches your belt buckle for a classic and polished look. Always check product descriptions for specific sizing details.

Ted Baker Kids’ Sizes

Ted Baker’s childrenswear offers stylish designs for growing kids. Sizing charts for both boys and girls are essential for a perfect fit, especially for rapidly changing feet!

Kids’ Clothing Size Chart ‒ Boys & Girls

Understanding Ted Baker’s kids’ clothing sizes is crucial for comfortable and stylish outfits. While specific charts vary by garment type, a general overview helps determine the best fit for your little ones. Ted Baker typically uses age ranges as a primary sizing indicator, but measurements are key, as children of the same age can differ significantly in height and build;

For boys and girls aged 2-16, Ted Baker offers sizes ranging from 2 years to 16 years. However, relying solely on age isn’t recommended. Always check the specific garment’s size chart, often found on the product page of the official Ted Baker website. These charts will provide detailed measurements for chest, waist, and inseam (for trousers).

Pay close attention to the ‘actual garment measurements’ listed, rather than simply comparing to a generic age-based size. Measure your child’s chest circumference, waist circumference, and inseam accurately. When in doubt, it’s generally advisable to size up, allowing room for growth and layering. Remember that Ted Baker’s designs often have a tailored fit, so avoiding a too-tight garment is important for comfort and freedom of movement.

Consider the style of the clothing. A looser-fitting t-shirt might allow for more flexibility in sizing, while a more structured jacket may require a more precise fit. Regularly checking the official Ted Baker website for the most up-to-date size charts is always recommended.

Kids’ Shoes: Sizing for Growing Feet

Accurate shoe sizing is paramount for growing feet, and Ted Baker offers a range of stylish options for children. Unlike clothing, shoe sizes aren’t always consistent across brands, so understanding Ted Baker’s specific measurements is vital. Ted Baker kids’ shoes utilize UK sizing as the primary standard, but conversions to EU and US sizes are readily available on their website and through third-party resources.

To determine the correct size, measure your child’s foot length accurately while they are standing. Place a piece of paper under their foot and trace around it, then measure the distance from the heel to the longest toe. Compare this measurement to Ted Baker’s size chart, which provides corresponding UK sizes.

Always allow for growth! It’s generally recommended to add approximately 1-1.5cm (0.4-0.6 inches) to your child’s foot length when selecting a shoe size. This provides room for their feet to grow without being overly large and uncomfortable. Consider the type of shoe; boots may require slightly more room for thicker socks.

Regularly check your child’s feet, as they can grow quickly. Don’t rely on previous shoe sizes, as a new measurement is essential each time you purchase shoes. Ted Baker’s website provides detailed size guides to assist with accurate fitting.

Tips for Accurate Measurement

Precise body measurements are key to finding your perfect Ted Baker fit. Utilize a flexible measuring tape and, ideally, have a friend assist for accuracy.
Focus on bust, waist, hips, inseam, and sleeve length for optimal results.

How to Measure Bust, Waist & Hips

Accurate bust measurement is crucial, especially for Ted Baker’s fitted dresses and tops. Stand naturally and measure around the fullest part of your bust, keeping the tape measure level across your back. Ensure it’s snug but not tight, allowing for comfortable breathing.

To determine your waist size, locate your natural waistline – typically the narrowest part of your torso. This is usually an inch or two above your belly button. Measure around this point, keeping the tape measure relaxed and parallel to the floor. Avoid sucking in your stomach.

For hip measurement, stand with your feet together and measure around the fullest part of your hips and buttocks. Again, ensure the tape measure is level and not too tight. This measurement is particularly important for skirts, trousers, and dresses with a defined hip shape.

Record all measurements in inches or centimeters and compare them to Ted Baker’s size charts for the most accurate fit. Remember that sizes can vary slightly between styles, so always double-check before purchasing.

How to Measure Inseam & Sleeve Length

Determining your inseam is vital for perfectly fitting trousers and jeans. Measure from the crotch seam down the inside of your leg to where you want the hem to fall, typically at the top of your shoe. Wear shoes similar to those you’ll pair with the garment for accuracy. It’s best to have a friend assist for a precise measurement.

For sleeve length, bend your arm slightly and measure from the shoulder point (where the sleeve meets the shoulder) down to your wrist bone. Keep your arm relaxed and measure along the outside of your arm. Consider the style of the sleeve – a longer sleeve for layering or a shorter sleeve for a more contemporary look.

When measuring, use a flexible measuring tape and ensure it’s not twisted or pulled too tightly. Round up to the nearest half-inch if your measurement falls between sizes.

Compare your inseam and sleeve length measurements to Ted Baker’s size guides to find the best fit. Remember to account for any desired alterations or styling preferences.

Ted Baker Size Guides ─ Where to Find Them

Locate official Ted Baker size charts directly on their website for the most accurate information. Additionally, explore reliable third-party resources offering comprehensive size conversions and guides.

Official Ted Baker Website Size Charts

Ted Baker’s official website is the primary and most dependable source for their sizing information. They provide dedicated size guides categorized by gender – women, men, and children – ensuring a focused approach to finding your perfect fit.

Within each gender section, you’ll discover detailed charts broken down by specific product types. Expect to find separate guides for dresses, tops, jeans, trousers, shirts, suits, and outerwear. These charts typically include measurements in inches and centimeters, covering bust, waist, hips, inseam, sleeve length, and chest size, depending on the garment.

Crucially, Ted Baker also offers shoe size conversions, translating UK sizes to both EU and US standards. This is particularly helpful for international customers. The website’s size guides are regularly updated to reflect any changes in their sizing standards, ensuring accuracy.

To access these resources, navigate to the product page of the item you’re interested in. Look for a “Size Guide” link, usually located near the size selection dropdown menu. Clicking this link will open a detailed chart specific to that product category. Remember to carefully review the instructions on how to take your measurements before consulting the chart for the best results.

Third-Party Size Chart Resources

While Ted Baker’s official website remains the most reliable source, several third-party resources can supplement your sizing research. These platforms often compile size charts from various brands, including Ted Baker, offering a consolidated view. However, exercise caution when using these resources, as information may not always be up-to-date or entirely accurate;

Popular fashion and retail websites frequently host size charts contributed by users or gathered from brand specifications. These can provide additional perspectives and real-world feedback on Ted Baker’s sizing. Comparison websites dedicated to clothing sizes can also be helpful, allowing you to compare Ted Baker’s measurements to other brands you’re familiar with.

It’s essential to cross-reference information from multiple sources and prioritize the official Ted Baker guide whenever possible. User-submitted measurements should be viewed as approximations, as individual body shapes and preferences vary. Always double-check the specific garment’s description for any unique sizing considerations.

Remember that these external resources are supplementary and should not replace the official Ted Baker sizing information. Use them to gain a broader understanding, but always rely on the brand’s own charts for the most precise fit.